As an Amazon Associate, I earn from qualifying purchases. Additionally, I earn a commission through each purchase made on Amazon, Clickbank, zZounds, Plugin Boutique, Plugin Fox, Thomann, Jam Play, and Punkademic from one of my links.
I’ve tested some of the more popular plugins and plugin bundles so I have a good knowledge of what I like, and that’s what this list will feature. The plugins and VSTs that I like and not necessarily the ones that a producer is supposed to like. In my view, the best free (and premium) plugins for Garageband are:
1) BlueCat Audio’s Axe Pack
2) Komplete 13
3) FabFilter’s Mastering Suite
4) Initial Audio’s 808 Studio II Synth
5) Melodyne 5 from Celemony
6) Antares Auto-Tune Pro
7) EZ Drummer 3
8) Melda Production’s MFreeFXBundle
Plugin Bundles
Blue Cat Audio’s Axe Pack (Free Trials Available)
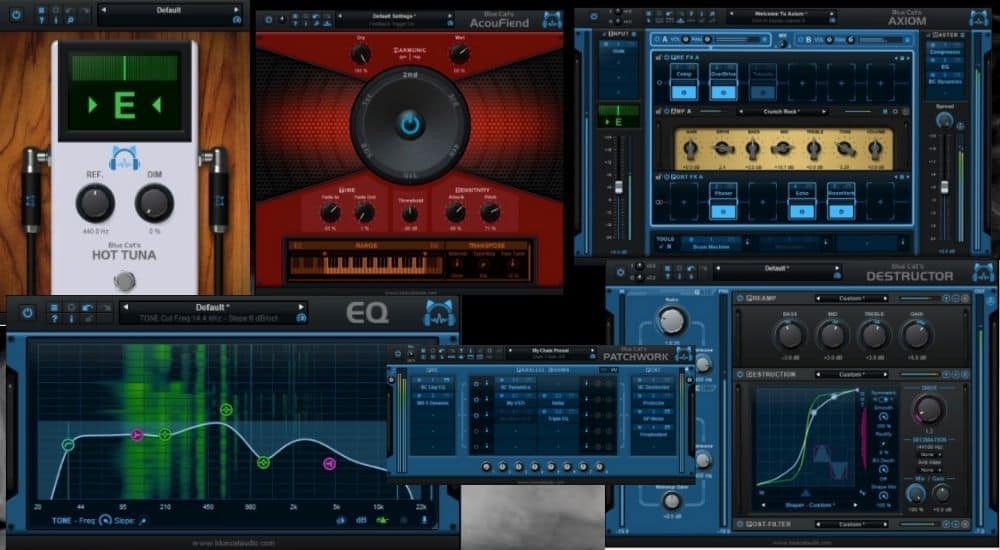
These days, Blue Cat Audio’s Axe Pack from Plugin Boutique is my favorite thing to play with. It’s the thing I’m using the most when I load up Garageband on my computer. There’s certainly nothing wrong with using the Amp Designer (my tutorial on it here), however, I find there is a point where you just want to move on to premium software for more features, functionality, and superior sound quality.
Blue Cat Audio’s Axe Pack comes with 6 different things:
- Axiom – An Amp Modeler with Effects
- Destructor – A Distortion Plugin and Amp Modeler
- Hot Tuna – A Chromatic Guitar Tuner
- Acoufiend – A Plugin to Create and Shape Guitar Amp Feedback
- Late Replies – Multi-Effects Plugin with Delay and Reverb
- Patchwork – A Patchbay that allows you to host many plugins and effects in one interface
I have to be totally honest with you though, I only use the Axiom, the Destructor, and the Hot Tuna. The Axiom is my favorite aspect of the plugin bundle because it has a ton of cool and great-sounding presets to run through one by one; you can load other plugins and VSTs in Axiom; you can patch in other effects and processors, and it looks awesome (blue is my favorite color).
The Destructor is a distortion plugin that’s equally as hailed by metal and rock fans, although, I don’t use it that much, not because I don’t like it, but simply because this plugin bundle has so much good stuff that I haven’t gotten around to exploring every parameter of it.
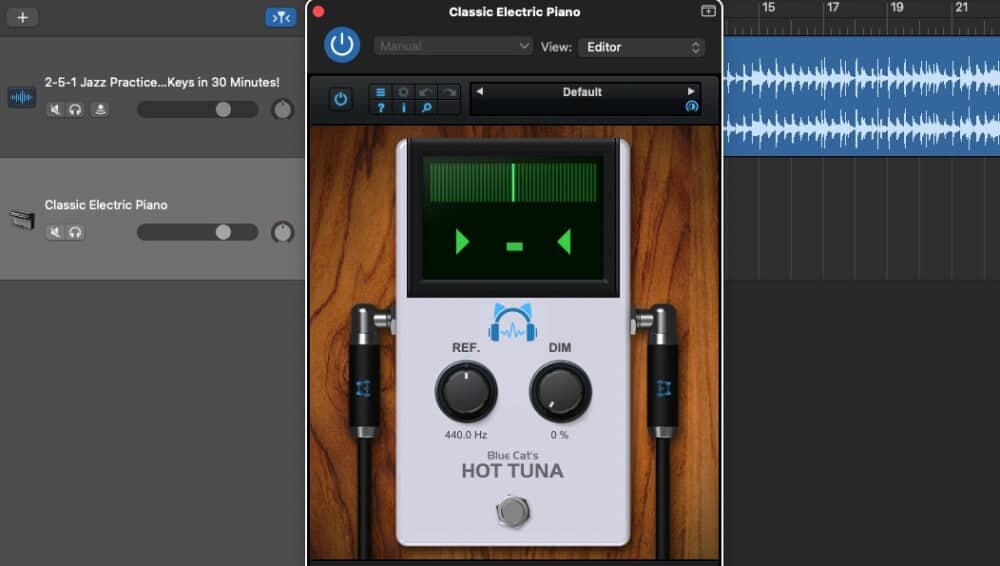
The Hot Tuna is just a regular chromatic tuner that I use all of the time, however, what’s special about it is that it’s accurate and it saves me a considerable amount of time. I’ve said it before in my tuning article and I’ll say it again: I frequently forget to tune my guitar after I’ve set everything up and sat down to play, so having this tuner in my DAW ready to go when I need it is a great way of saving me a lot of moving around.
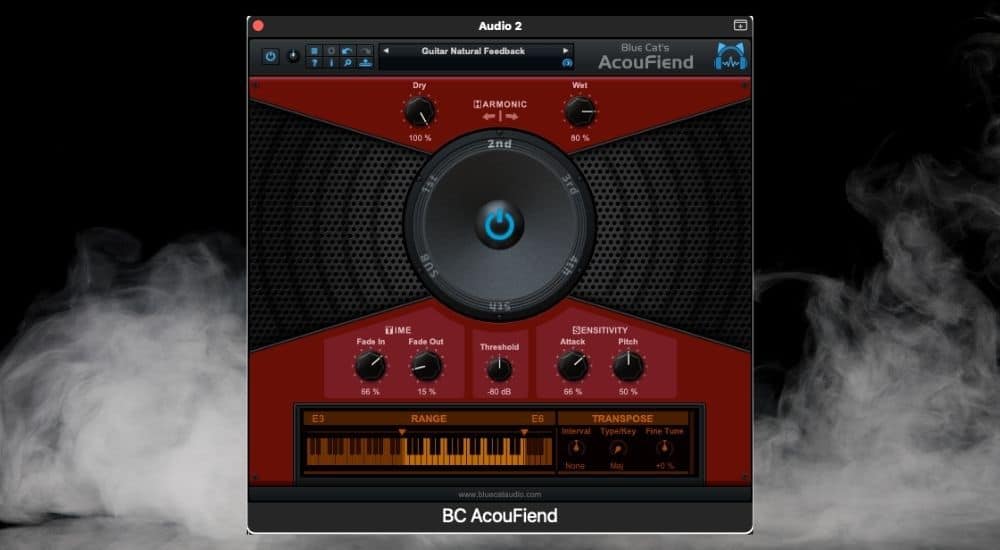
Then you have AcouFiend, a tool that allows you to create, control, and shape the way a guitar rig’s feedback sounds. Rather than having guitar amplifier feedback be an uncontrollable nuisance where the only way of dealing with it is by moving away from it, this plugin allows you to control and shape the sound.
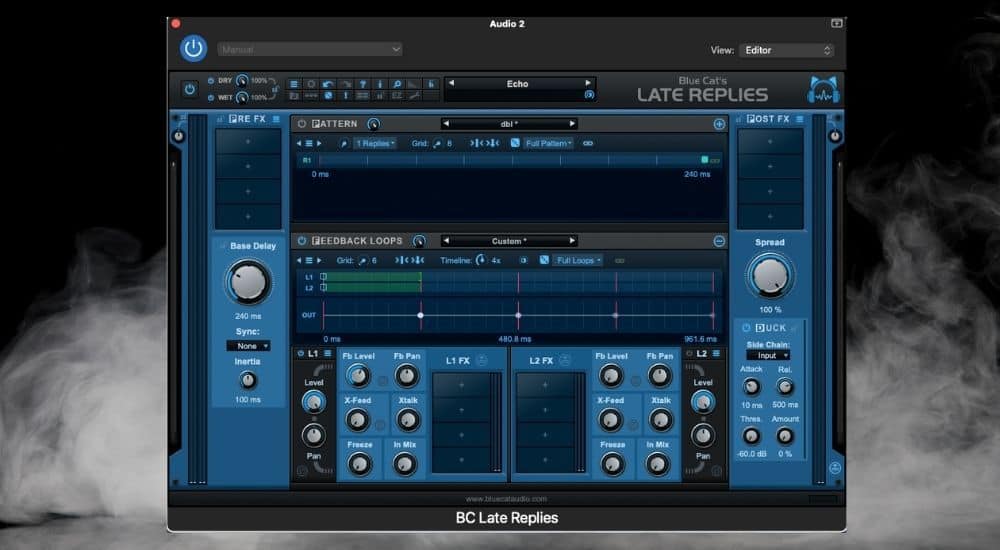
Late Replies, a multi-effects unit, is just that. It’s a reverb, delay, compressor, comb filter, chorus, flanger, and phaser plugin. Similar to nearly all of Blue Cat Audio’s plugins, there is a cornucopia of presets that you can try out in case you find the whole interface overwhelming at first.
…and then Patchwork, which functions as a patch-bay for all kinds of different plugins, effects, and tools, all in one instrument or audio track. Explained another way, this allows you to configure chains of unrelated plugins and effects in one plugin and preset. It’s also immediately recallable which is what makes it so useful and easy to use.
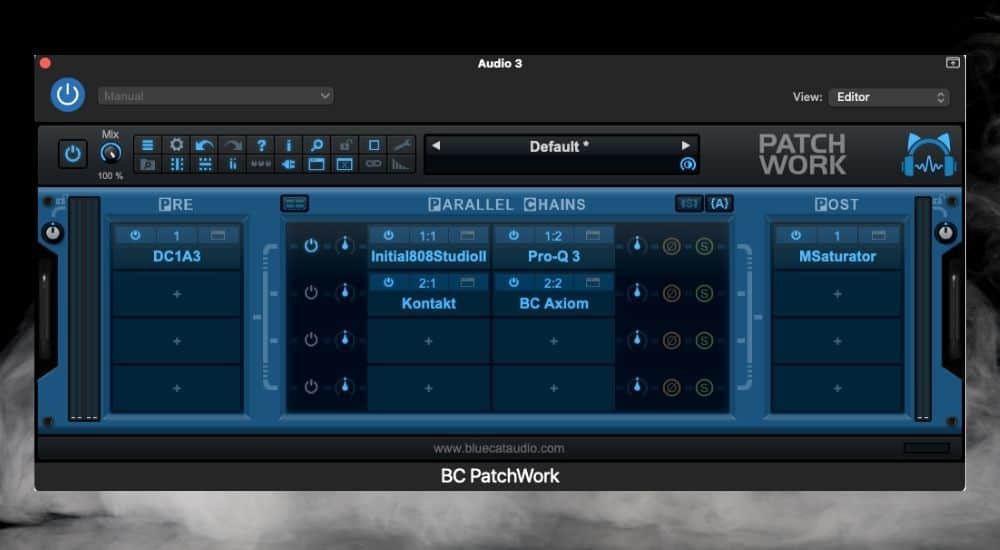
Additionally, you can try out these effects for free by going here to Blue Cat Audio’s website. Frankly, I don’t see why it would be necessary to get any other amp simulator considering Blue Cat Audio’s Axe Pack does pretty much everything that you would ever need and it does it well.
With that said, we will talk about some other modelers and guitar effects later in the honorable mentions section.
Komplete Start from Native Instruments (Free)
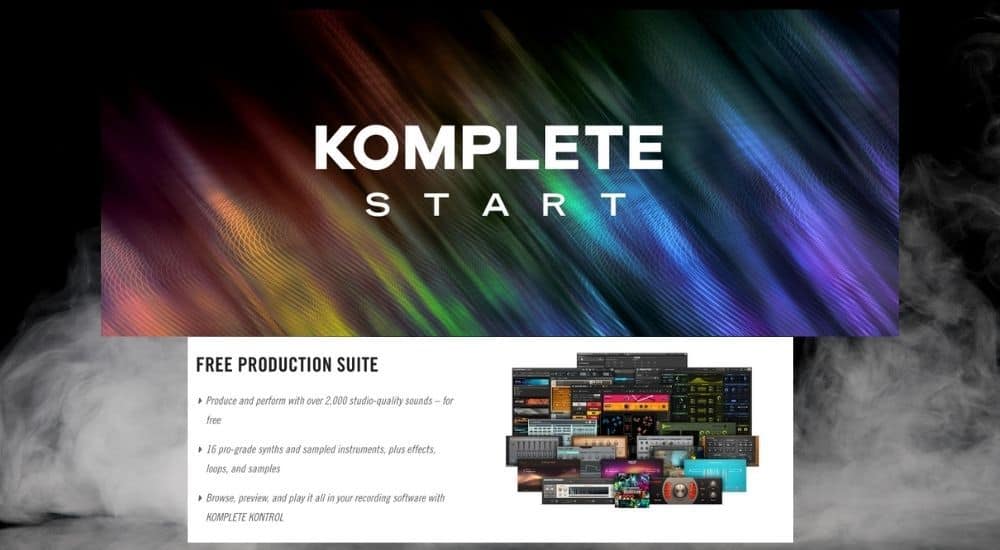
I’ve already written about Komplete Start before in my other plugins guide, but it’s always worth talking about because it’s such a great software suite of useful tools, instruments, and effects. Komplete Start – which you can try out here from their website – is kind of like the free version of Komplete 13.
The full version includes all of the instruments you’d ever want or need, the unlimited Kontakt 6, and many other things as well. What makes Komplete Start special though (other than that it’s free) is that the instruments are very high quality.
The instruments, samples, VSTs, and everything that it comes with are so top-of-the-line that they’re inspirational. If you’re into music production, you know what I’m talking about. Sometimes all it takes is the right sound to get the ball rolling.
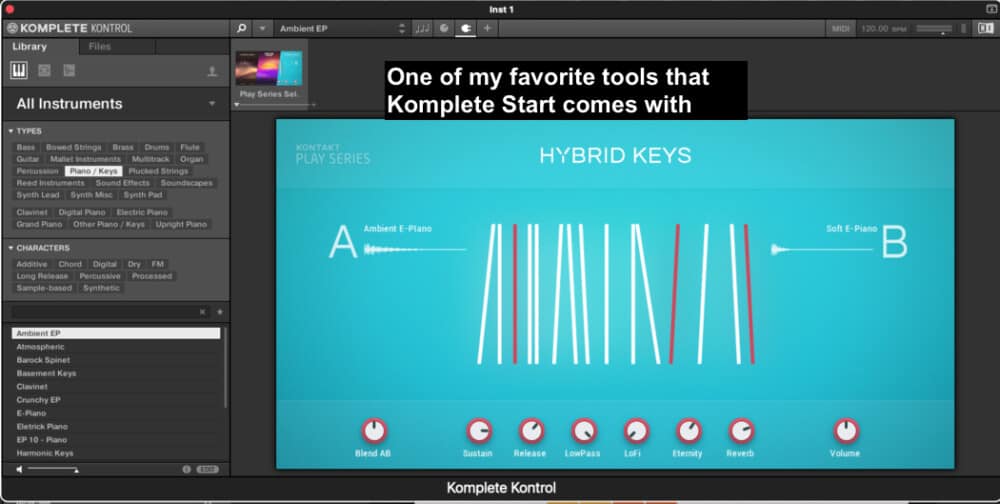
My favorite thing to use in Komplete’s bundle thus far is the Hybrid Keys, Ethereal Earth, Kinetic Treats, and the Persian Ney Flute, which I’ve used in a number of songs at this point. The VSTs and sounds are totally modifiable as well, so it’s not like you’re only getting one specific sound.
Komplete Start Includes:
- 7 Synthesizers: A batch of bass, analog, and soundscape synths with their own unique presets and styles.
- 9 Sampled Instruments: High quality, specialized VSTs with their own unique sounds, ie, Glass Harmonica, Piano Instruments, Soundscapes, Synths, Flutes, and other cool instruments.
- Guitar Rig 6 Player (Demo Version): A free guitar amp modeler like Blue Cat Audio’s Axiom, except Native Instruments take on the same idea.
- SUPERCHARGER Compressor: A cool-looking compressor with about one-and-a-half-dozen presets.
- Komplete Kontrol: An interface where you can access every sound and instrument from Native Instruments. Use this tool to navigate through the massive library of sounds.
- Kontakt 6 (Demo Version): Kontakt 6 is like a DAW within a DAW. It’s a player which allows you to not only play all of Native Instruments’ sounds but also the plugins, effects, and instruments from other companies as well. It’s capable of sampling and combining sounds together among many other features as well, although, the demo version is limited.
- Reaktor 6 (Demo Version): Reaktor 6 is a platform where you can create your own sounds, synths, effects, soundscapes, and other sound designs.

Tip: Scroll through the massive library of sounds, instruments, and effects with Komplete Kontrol. This allows you to hear what everything in the library sounds like by default, and you’ll get a good demonstration of everything including the Reaktor 6 synths, the TRK-01 bass, the Play Series Collection like the Kinetic Treats and Hybrid Keys, and a lot of other sounds and effects.
Komplete 13 from Native Instruments

Komplete 13 (which goes for the best price on zZounds) is essentially the full, maxed-out, version of Komplete Start. You get twice as many instruments, samples, libraries, synthesizers, and effects, while also getting the full versions of Kontakt 6, Komplete Kontrol, and Reaktor 6. Komplete 13 is the mecca of plugin bundles and the best thing I’ve ever bought.
Komplete Start does come with the three main platforms that I just mentioned, but they’re not the full versions which mean they either don’t work at their maximum capacity (a demo-timer) or they’re unable to use with many plugins from third parties.
Komplete 13 comes with:
- Kontakt 6 (Full Version)
- Komplete Kontrol (Full Version)
- Reaktor 6 (Full Version)
- 14 Synthesizers
- 30 Sampled Instruments
- 5 Percussion Tools
- 16 Effects
- 24 Expansion Packs
Perks of Kontakt Full
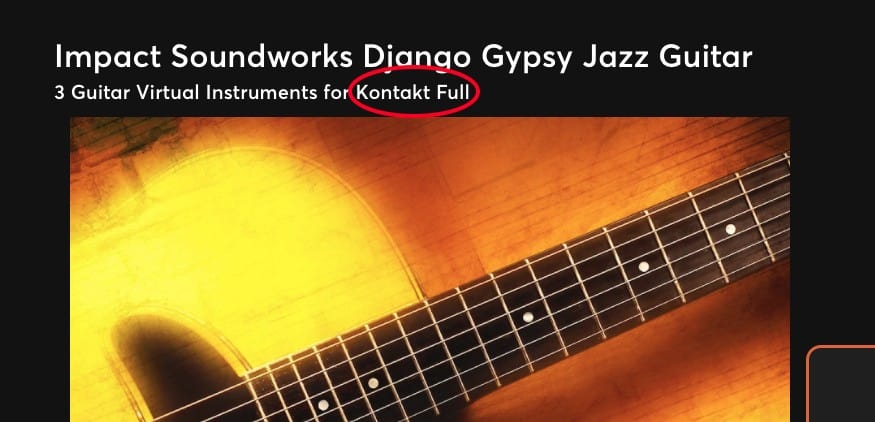
As you saw earlier, Komplete Start also comes with Kontakt 6, however, the main difference between the two is that with the paid version of Kontakt 6, you can access third-party plugins and tools that aren’t licensed through the Native Instruments ‘Native Access’ system in addition to considerably increased editing functions.
Put simply, there are many companies who haven’t paid a fee for the right for their plugin to be featured in the Native Access sound library, which is where users buy all of their sound libraries. Kontakt 6 (the full version) allows you to use these unlicensed creators whereas the free version does not.
You’ll see this effect in action when you go to download a plugin but it’s only for the full version of Kontakt 6. This Django Reinhardt instrument and sample library, for example, can only be bought and then used for Kontakt 6, and not the demo version of it that’s included in Komplete Start.
Kontakt 6 Comes With the Best World Instruments
There’s no question you’ll find the thing you like most about Komplete 13, however, one thing I find really cool about it is not only the ability to download all kinds of fantastic sample libraries like I just mentioned but also the included instruments like the Cuba, Middle East, West Africa, and India collections.
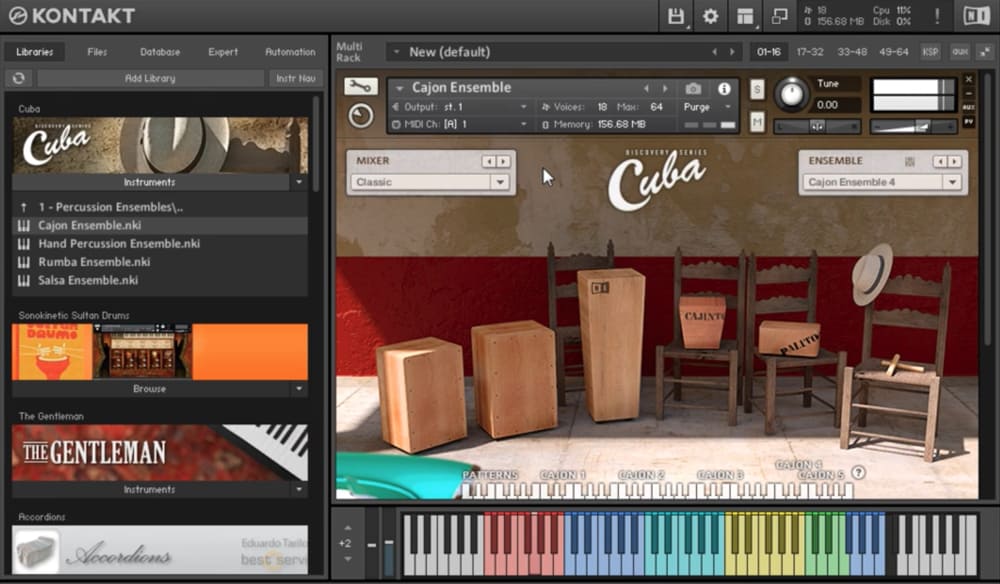
Within these instrument and sound libraries are modifiable and playable samples, but also the ability to play them as stand-alone instruments. For example, you could easily load up one of the drums in the Cuba library and then play around with it on your drum pad as if you owned the instrument itself.
These are just a couple of the things I like about it, and one of many reasons why Komplete is so popular with music producers. The only thing that’s almost as popular as Native Instruments plugins and software is FabFilter’s dynamic processors.
FabFilter’s Mastering Suite
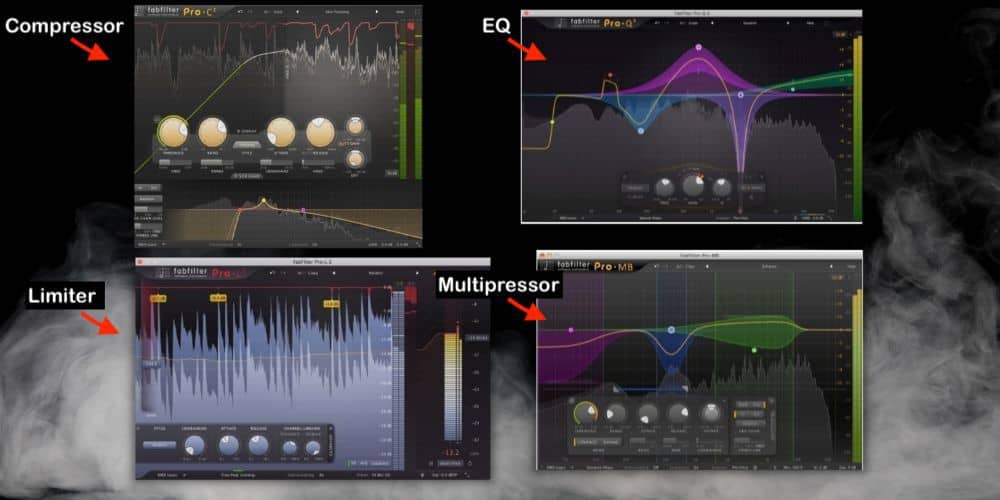
Get FabFilter’s mastering suite from Plugin Boutique for the best price because like Native Instruments Komplete Collection, these plugins are extraordinarily high quality. Dynamics processors all do the same thing essentially, however, each plugin in this bundle has a particular feature about it that makes it special.
These are the best tools for mastering. The mastering suite includes all four plugins pictured above and down below (EQ, Compressor, Limiter, and Multiband Compressor), but you can get each one separately on its own as well, so no worries there.
FabFilter Pro-Q 3 EQ (Free Trial Available)
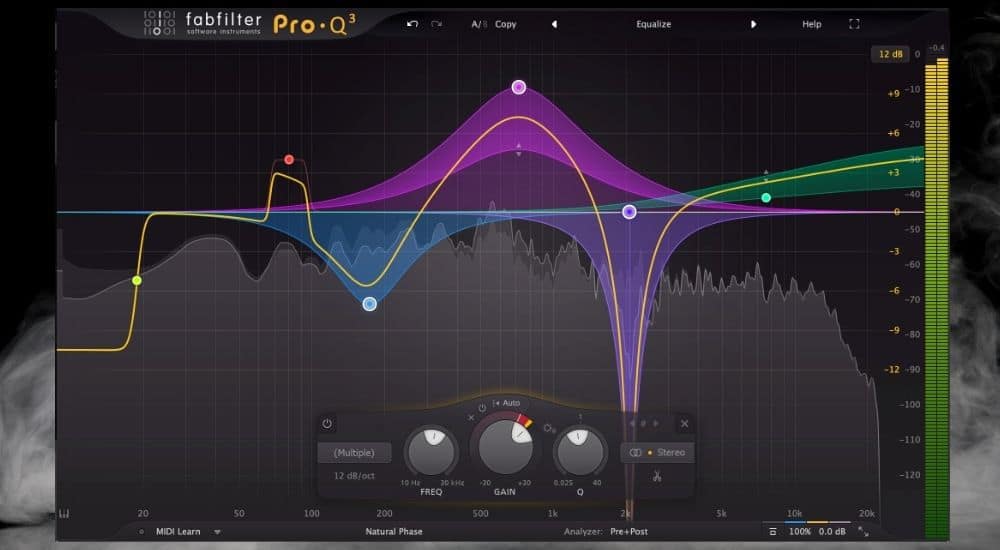
FabFilter’s Pro-Q 3 EQ, which you can grab on its own on Plugin Boutique, is easily the most popular EQ plugin, and once you start using it, it’s easy to understand why. It’s one of those tools where the moment you load it up, everything looks perfect, the dials, knobs, and buttons work on it 100%, and there are no issues at all.
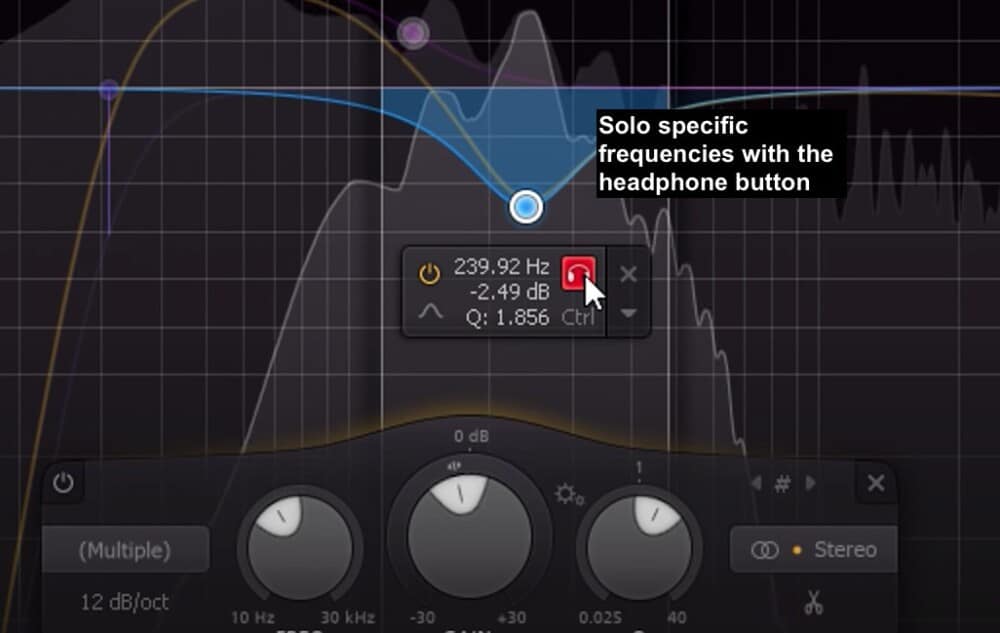
What’s the most impressive about this particular EQ plugin is that you can actually solo particular frequency bands. As a result, you can hear what the frequency sounds like on its own, that way your EQ sweeps aren’t nearly as blind anymore. You can actually figure out, with 100% accuracy, which part of your tone is the culprit. Download the demo from their site to give it a shot.
FabFilter’s Pro-C 2 Compressor (Free Trial Available)
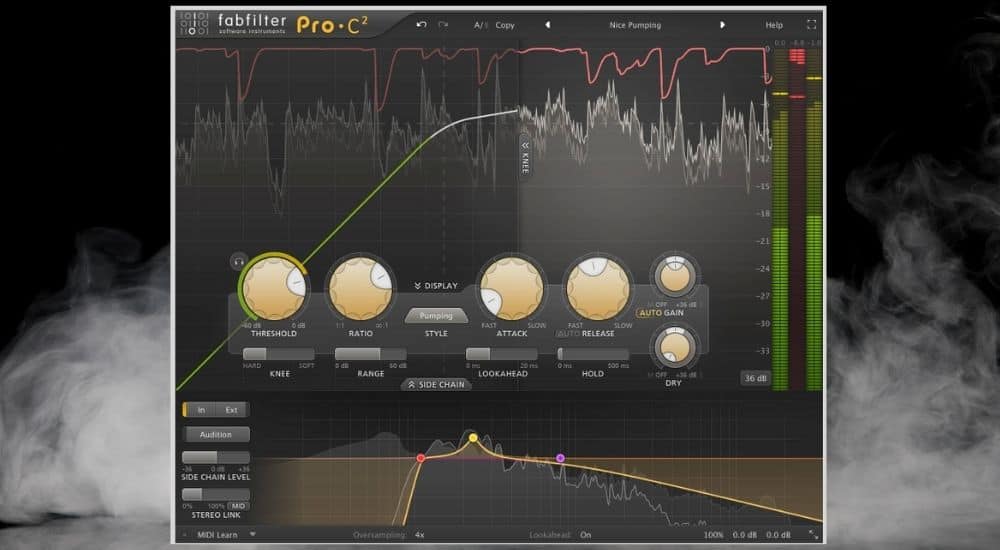
Similar to the Pro-Q EQ, a lot can be done with the Pro-C 2 compressor (also from Plugin Boutique). One of the stand-out features of it is the Compression style option from which you can select “Mastering,” “Vocal,” “Pumping,” “Punch,” and so on, in addition to new functions like the Range, Lookahead, Hold controls and the side-chain EQ.
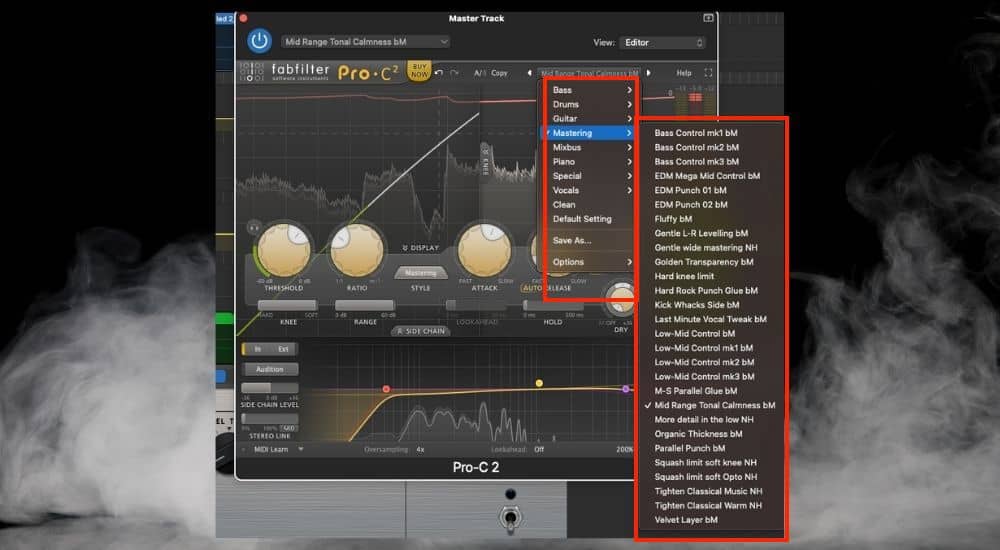
Use one of the many presets, adjust the size of the plugin, or apply some of Garageband’s presets to this compressor to see how they sound. The image shown down below includes just a handful of the many presets that you can use.
Another thing that’s cool about the Pro-C 2 Compressor is the Auto-Gain function which makes it so you don’t have to adjust the gain every time you’ve changed the threshold or ratio on your compressed signal, which is an issue on pretty much every other compression plugin. Try out the demo here.
FabFilter’s Pro-L 2 Limiter (Free Trial Available)
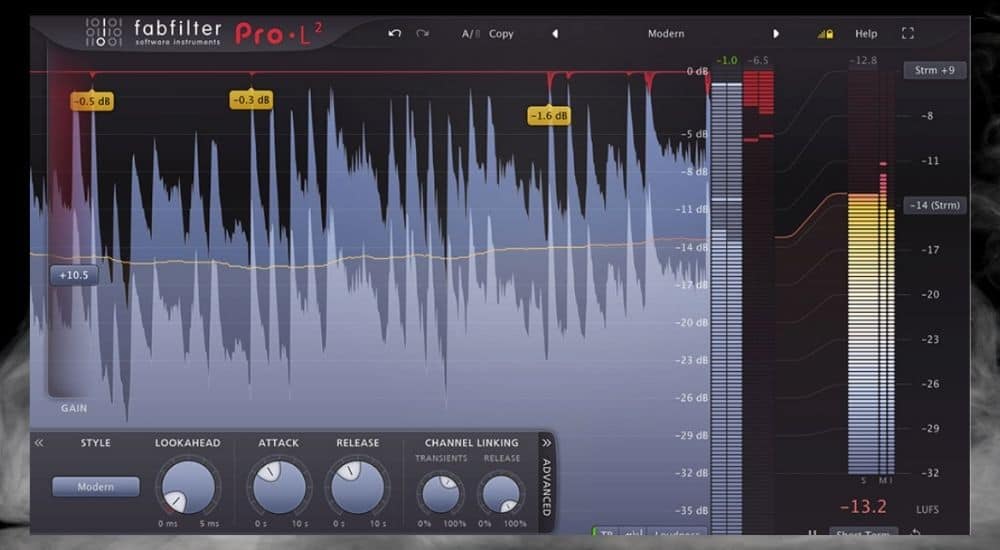
Even though it’s not talked about as much, the FabFilter Pro-L 2 Limiter (also from Plugin Boutique) is of similar quality as the compressor and EQ. You can measure the loudness of your song right in the plugin that way there’s no guessing game when trying to get your music to a similar level as your competition.
For people who are just getting into the potential of limiting, I’ll typically recommend using Garageband’s AUPeakLimiter because it’s the most advanced and capable limiter that comes with the software, but if you want to take the next step, the L-2 is your best bet because it’s like the swiss army knife of limiting.
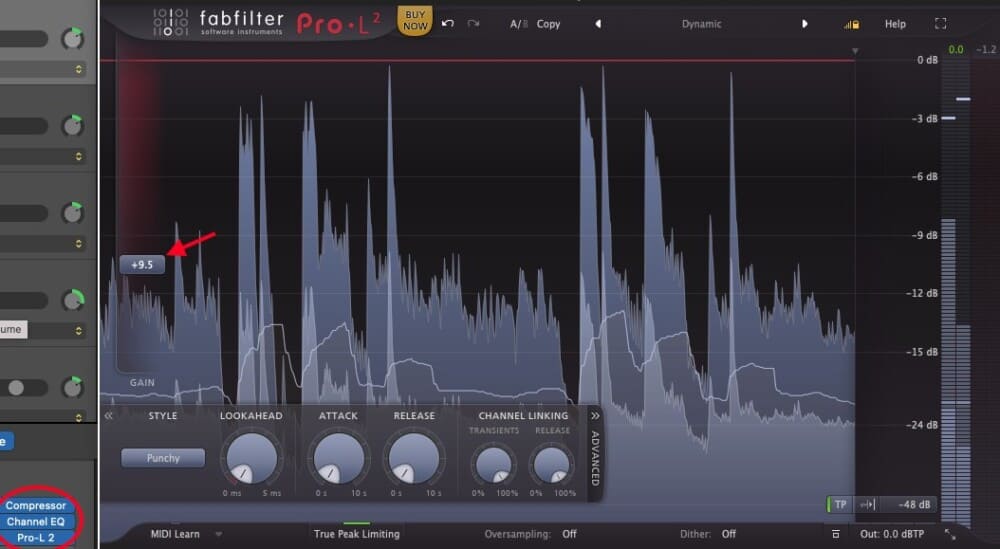
Choose from limiting styles like “Punchy,” “Transparent,” and “Aggressive,” and then set your gain to +9.5dB on the left-hand side of the plugin. I put this on the Master Track in the same way that I would with the AUPeakLimiter (more on that in my guide) and it sounds great. Get the demo here.
FabFilter’s Pro-MB Multiband Compression (Free Trial Available)
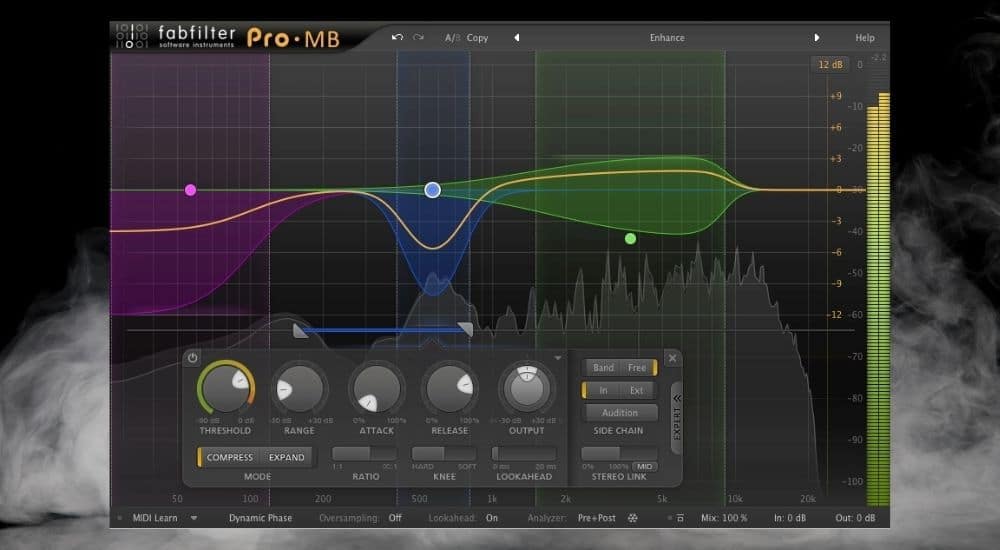
Easily the most underrated of the bunch, the Pro-MB (also on Plugin Boutique) is an incredible little tool that allows you to compress some frequencies over others with a really sleek and easy-to-use design. In other words, rather than compression on the entire signal as you would with a regular compressor, a plugin like this one allows you to compress six different areas of the frequency range as you can see in the image here.
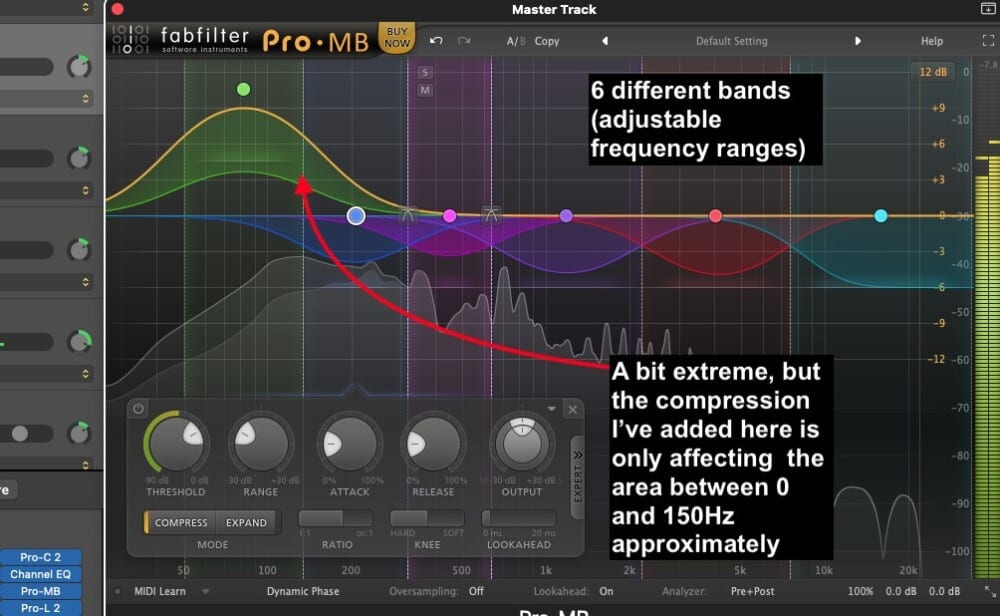
Enjoy the same access to cool-sounding presets, in addition to the ability to use “Free” mode, a tool whereby you can trigger a high-pass or low-pass filter with an entirely separate frequency range. This feature is definitely the most popular aspect of the Pro-MB.
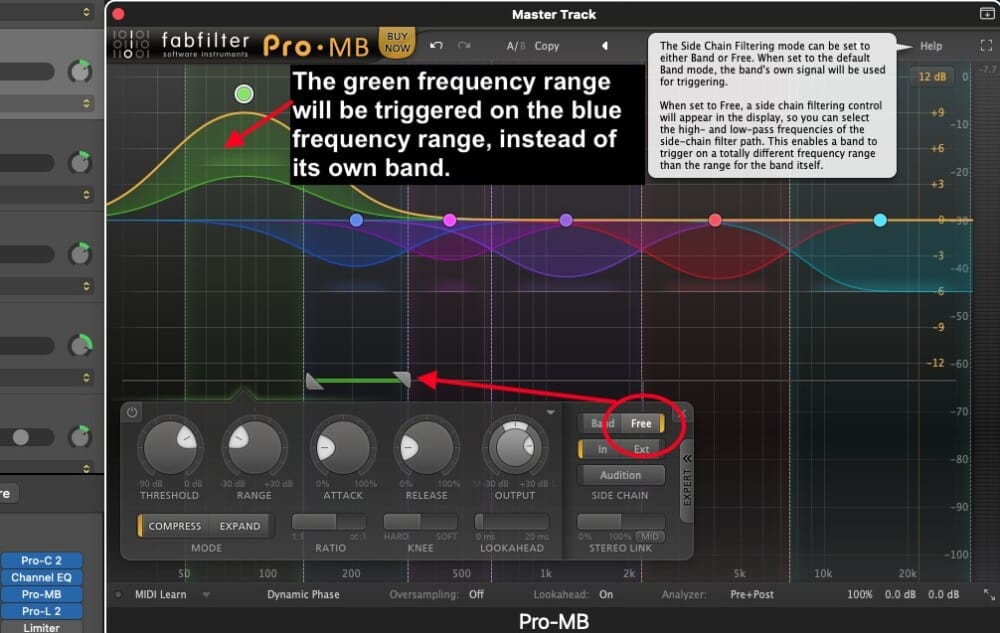
Explained in another way, the Pro-MB can act as a ducker on certain frequency ranges, but rather than the ducking being triggered by the frequency band on which it’s set, it can be triggered by another sound. A great example of this would be the sound of a guitar pick hitting the strings.
The “Free” band can be set up so that whenever the notes of the guitar string ring out, the sound of the guitar pick hitting the strings decreases, or, you could set it up in the opposite way, although, I imagine most won’t do that. Either way, this is a fantastic multiband compressor – probably even the best one (try the demo here).
Melda Production’s Complete Suite (Free Trial Available)
Melda Production’s Complete Suite of plugins and effects (from Plugin Boutique) includes 114 effects, processors, and instruments, all of which can easily be found on their website. Frankly, if you’ve purchased Melda’s complete suite, I can’t imagine that you would ever need to buy a plugin bundle again, other than Komplete 13, the Fab Filter Mastering Bundle, and Blue Cat Audio’s Axe Pack.
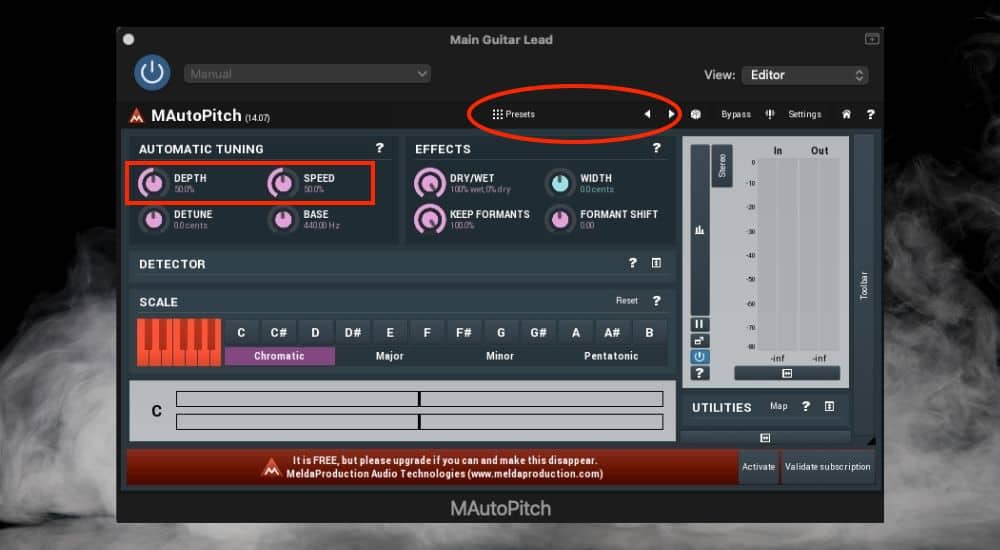
The MAutoPitch, which I’ve talked about before in my other guide, is just one example of the type of cool plugin that you would get with the MCompleteBundle, although, this one also comes with the MFreeFXBundle as well. Like most Melda plugins, they’re easy to use, intuitive, and they look nice.
It would take forever to talk about every single plugin that comes in this list, so what I will say is that everything you would ever need is in here, moreover, you could always try it on an annual or monthly subscription basis if you wanted to, or by accessing the demo version on their site.
Melda Production’s MFreeFXBundle (Free)
Melda Production’s MFreeFXBundle is to their Complete Suite what Komplete Start is to Komplete 13. It’s designed to be an introduction to their entire repository of tools and effects. If you’re interested in getting the Complete Suite but you don’t want to pay any money, then at least try out their MFreeFXBundle from their site, which is basically like a stripped-down version of it.
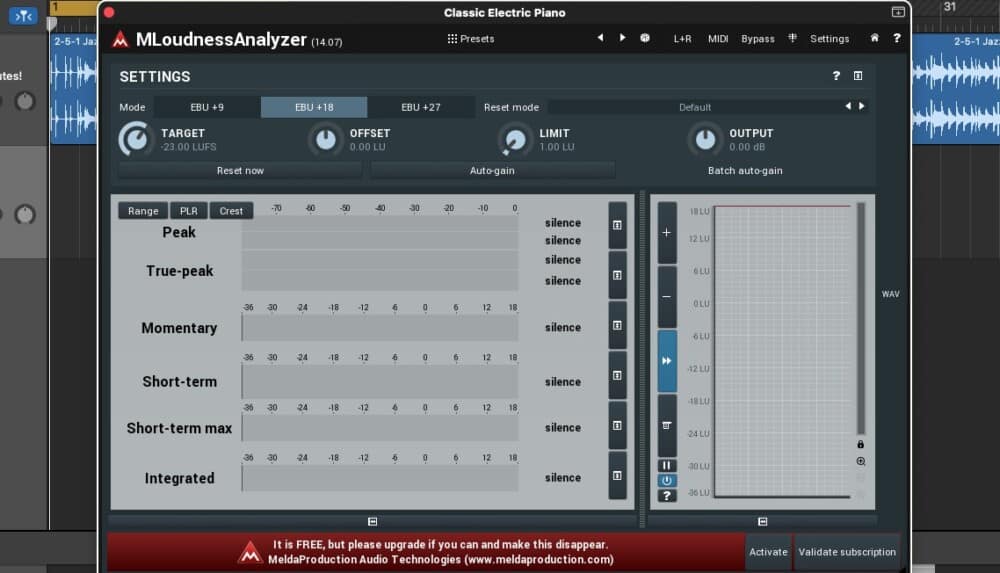
I’d like to point out that MP’s MFreeFXBundle is actually the first plugin bundle that I’ve ever downloaded. I was pretty happy to see all of the cool tools that came with it, particularly the MLoudnessAnalyzer which I still use sometimes. You can see it down below.
Another really cool plugin that came with the MFreeFXBundle is the MSaturator which is a great way of adding some juiciness or pepper to your sounds.
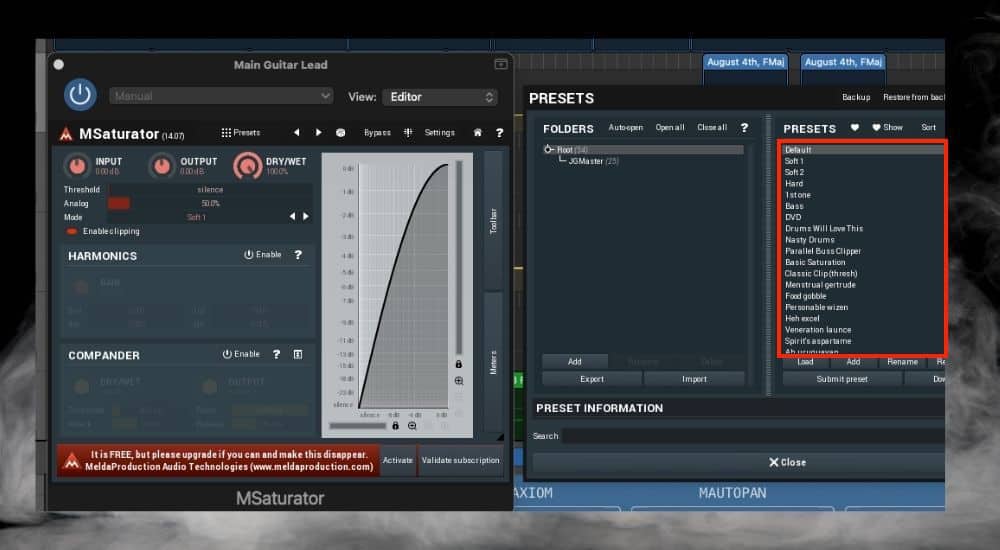
I’ll use this on an instrument every once in a while when I feel like it needs something but I just don’t know what that something is.
Xpand! 2 (Free Trial Available)
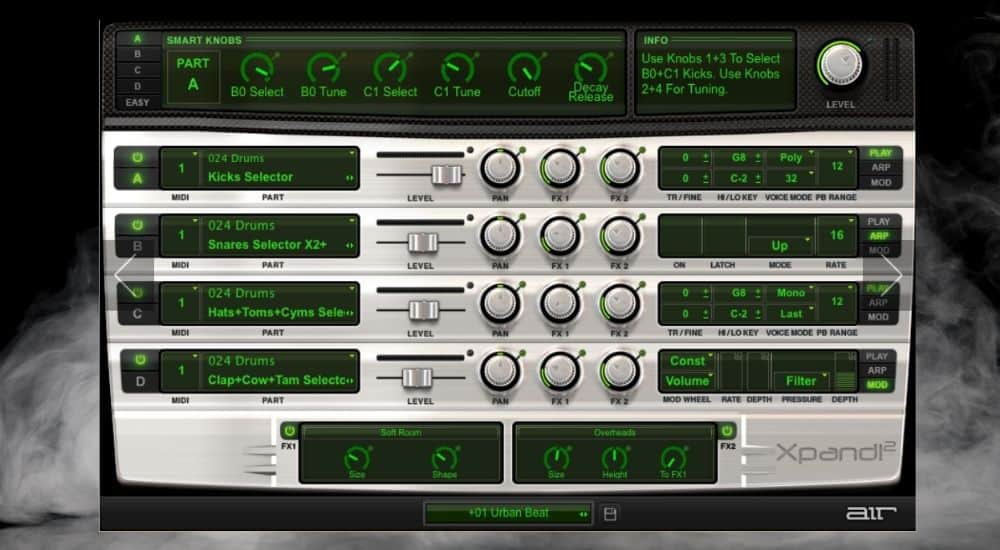
Xpand! 2, made by AIR Music (who recently announced their plugin is now compatible with Big Sur), is an inexpensive batch of VSTs and sounds that are great quality for the price on Plugin Fox. If you want a library of instruments and sounds but you don’t want to spend a lot of money, then this is the right choice for you.
The nice thing about XPand! 2 is that it’s super cheap, in fact, from what I understand, there was a time when it was even cheaper but word got out that it was awesome so Air Music Tech raised the price. I’ve talked about XPand! 2 too before including in my one YouTube video where I talk about where to get the accordion (I have an article on this too), which is generally a difficult instrument to find.
As the image below points out, you can mix different sounds together by selecting up to 4 at a time and then hitting the little power button on the left-hand side to actually activate the sound.
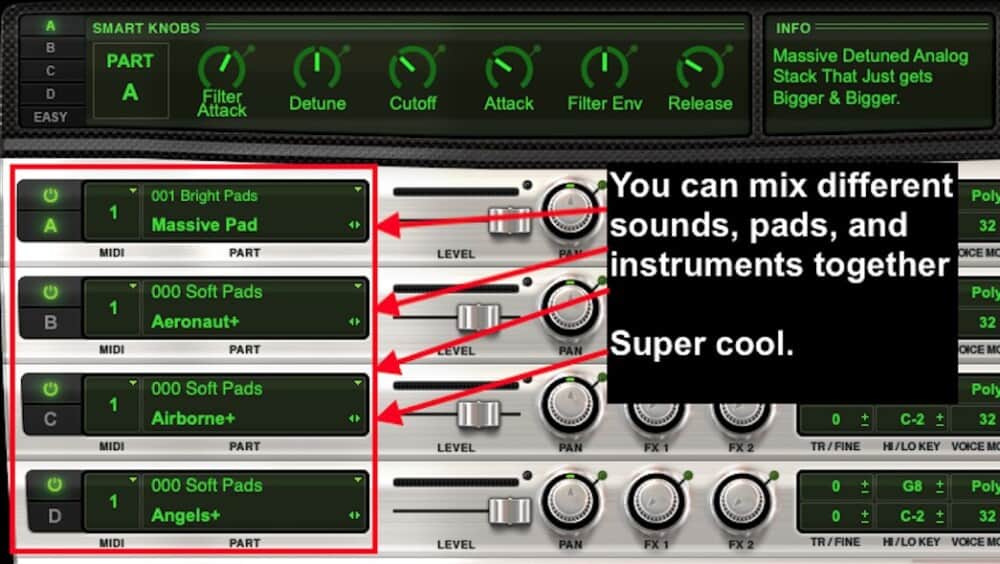
Even though personally I find XPand! 2’s interface unsightly, I recommend it highly because it’s still super easy to use, it’s inexpensive, and the most important thing is that most of the instruments sound great, although, some of the presets aren’t great. Try it out for yourself with their free trial.
Blue Cat’s Freeware Plug-ins Pack II (Free)
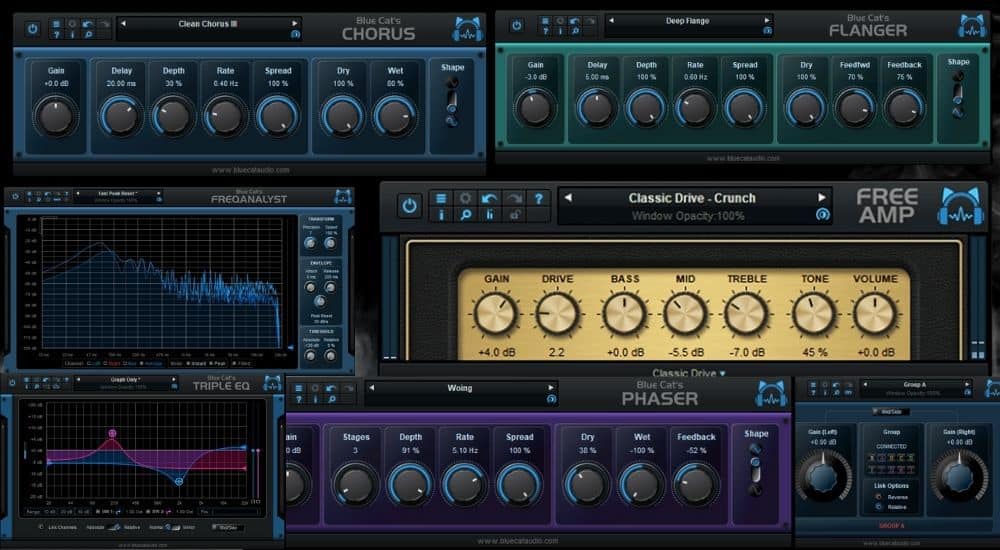
Blue Cat Audio’s Freeware Plug-in Pack features seven different tools including:
- Blue Cat Chorus
- Flanger
- Free Amp
- Frequency Analyst
- Gain Suite
- Phaser
- Triple EQ
One thing I appreciate about this company is their willingness to give people the chance to try out their premium products for free and without needing to give them their email or anything (try it out here).
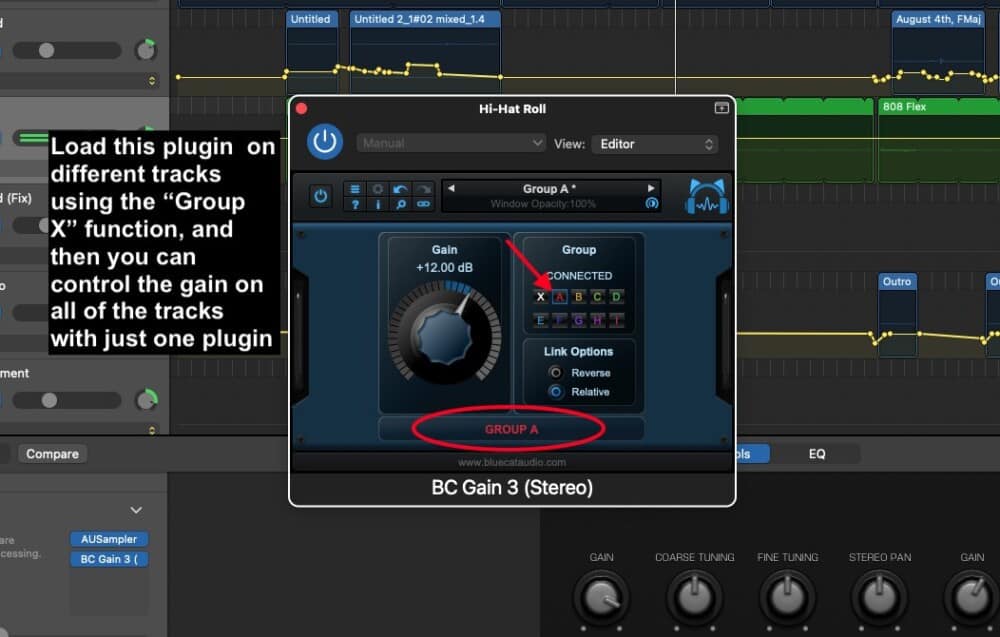
Most of the effects and processors that come with the Freeware pack are fairly straightforward or self-explanatory, however, I just wanted to point out the one cool thing about the Gain Suite plugin which is that you can control the gain of many different tracks at once.
Truthfully, if you’ve already downloaded MFreeFXBundle from Melda Productions, you probably don’t need to get this free pack as well. I would say the Freeware pack is for people who don’t want to download all of the MFreeFXBundle plugins, or if you’re just a fan of Blue Cat Audio and you want to use some of them with the Axiom, Destructor, or Patchwork.
Guitar Amp and Bass Amp Simulators
Blue Cat Audio’s Axiom (Free Trial Available)
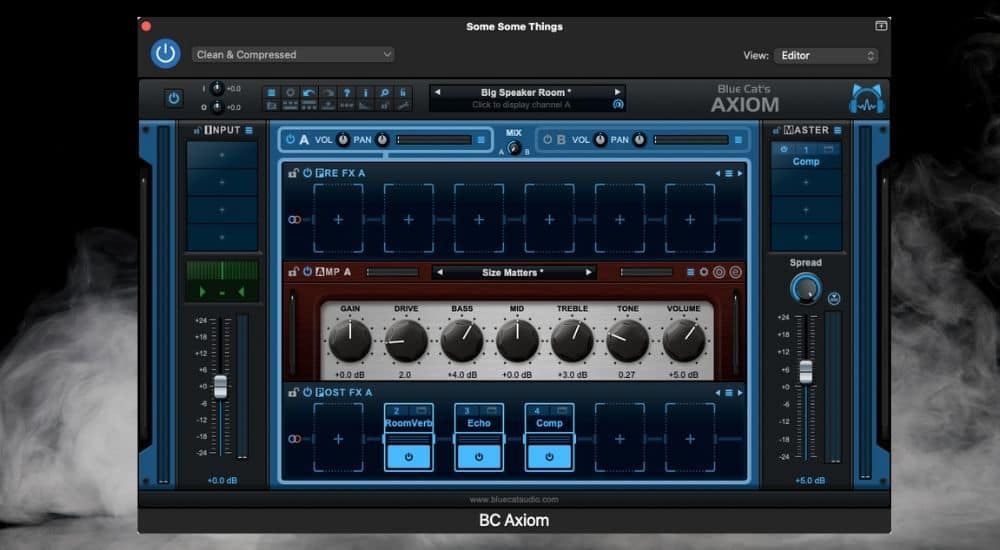
Like I said earlier, Blue Cat Audio’s Axiom is one of my favorite tools to use right now. It’s worthy to mention all by itself down here, like the Destructor, because you can try it out for free from their website, or you can get it on its own from Plugin Boutique in case you don’t want the other plugins that come with the Axe Pack.
Here’s what the Axiom includes:
- Guitar and Bass Amp Modeling Software
- 2 Amp Simulation Channels
- 70 Premium Effects
- Re-Guitar, Destructor, Late Replies, and Hot Tuna
- Able to Load 3rd Party Plugins
- Oodles of Presets
- Impulse Response Loaders
- Global Stereo Spread Control
- Master Volume
- Zero Latency
- Ability to Lock Presets so you don’t lose changes.
One Cool Preset I Like in BlueCat’s Axiom:
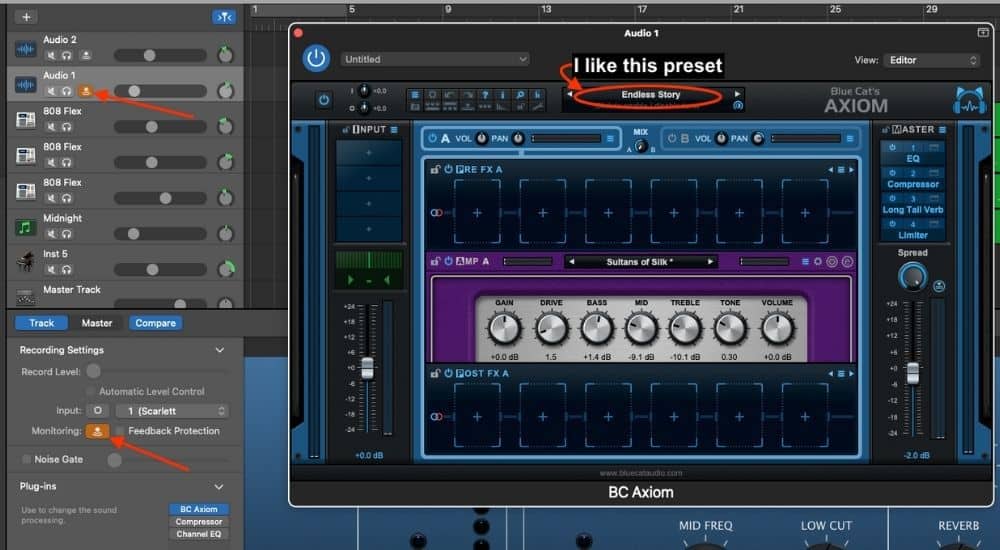
The “Endless Story” preset pictured above is one of my favorite presets to use because as the title suggests, it adds a reverb with a long delay time on it, that way the sound seemingly rings out forever. This is the same kind of effect that guitar player Jakub Zyecki uses whose work I’m a fan of.
Blue Cat Audio’s Destructor (Free Trial Available)
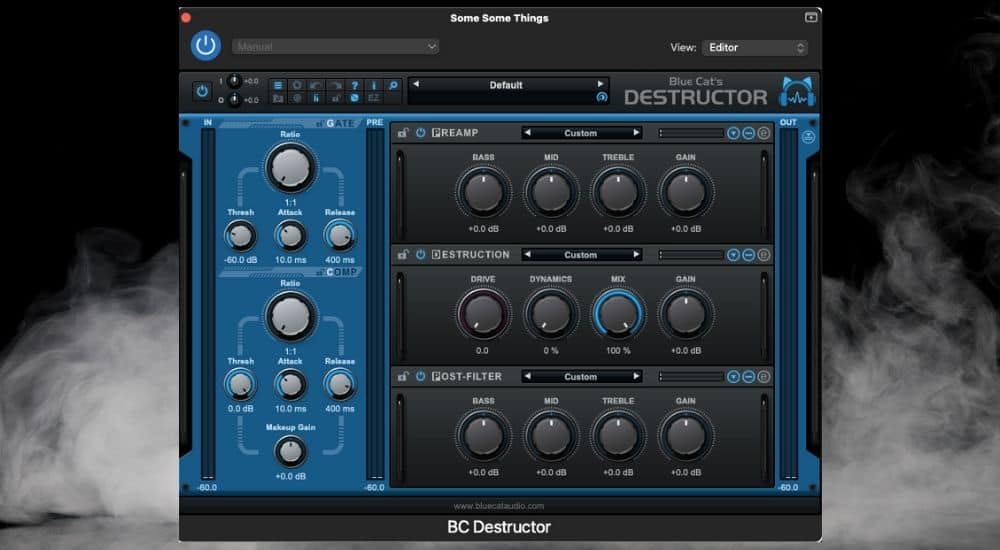
Blue Cat Audio’s Destructor is different from the Axiom in the sense that it’s primarily created as a distortion plugin and amp modeling tool. It doesn’t have as many effects as the Axiom, however, Destructor shines because it’s capable of imitating pretty much any kind of distortion that you would ever want.
Here’s what the Destructor includes:
- Distortion and Amp Modeler
- Ability to Simulate Any Distortion Type or Clean Tones
- Many Editable Presets
- Has a Compressor and Input Noise Gate
- Pre and Post Filters
- Dynamics Processors
- IR Loaders
- Limiter
- Zero Latency
One Cool Preset I Like in BlueCat’s Destructor:
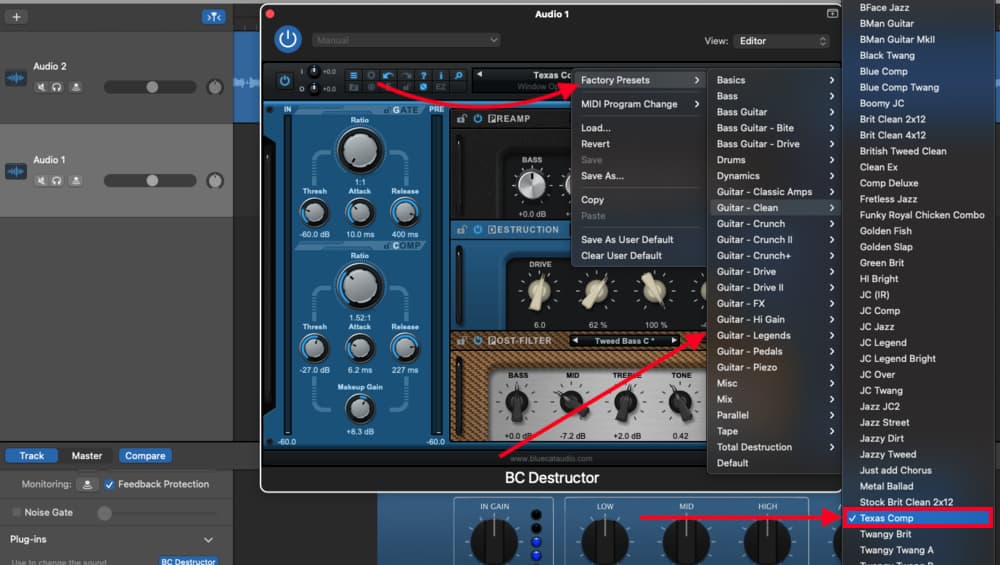
Admittedly, I’m not that into distortion these days so I find myself using Axiom more than Destructor, however, there are still some great sounds in Destructor as well, particularly in the “Clean” section. I’m a fan of the “Texas Comp” preset, for example, on the other hand, there’s a distorted preset called “Djentlemen” that I like.
If I were to use distortion, I would probably use that one, because I like the way it makes full chords sound like DMaj7. It’s worth mentioning that there are probably more than 700 presets on this thing and they all sound awesome.

VSTs
Initial Audio’s 808 Studio II Synth (Free Trial)
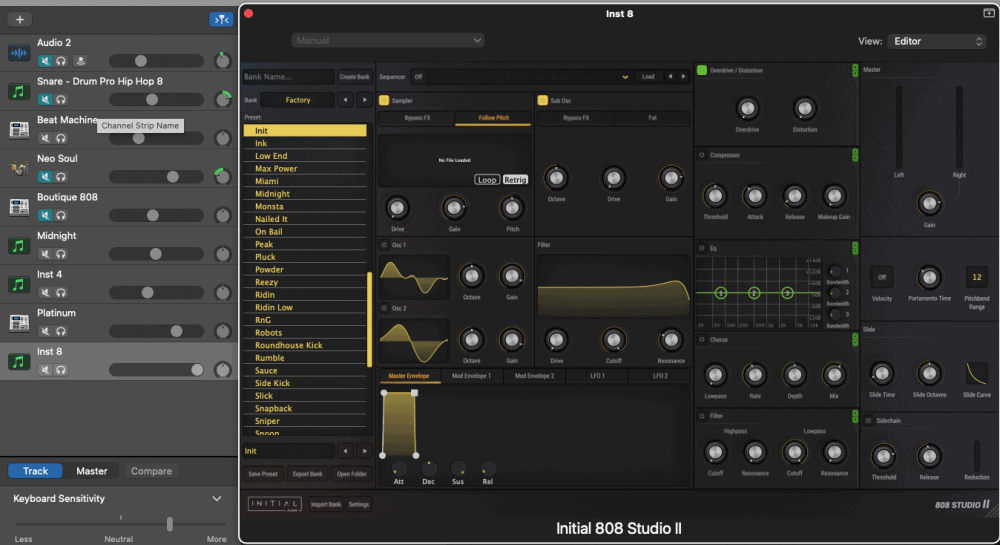
What can I say about this awesome 808 Studio II synth plugin that I haven’t said many times before? I got this plugin from Plugin Boutique not that long ago (it goes for a great price on their site) and I haven’t looked back since.
Not only does it have awesome presets, the ability to load your own 808 samples, and in-built dynamics processing, but it also has the portamento timing (ability to glide) which I’ve talked about before. I love this 808 plugin and coupled with the 808 Elektronik Sound Lab 808 machine, I really don’t think there is much else I could ask for.
One Cool Preset I Like in Initial Audio’s 808 Studio II Synth:
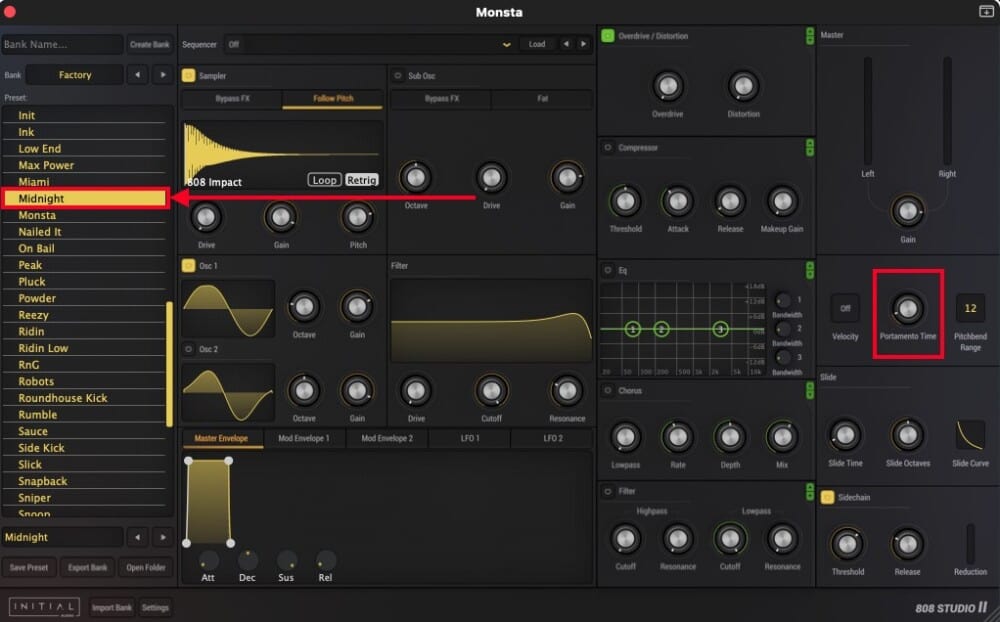
I like using the “Midnight” preset a lot and a lot can be done with the way it sounds with the plugin’s many controls. For instance, I’ll often play around with the Master Envelope on the bottom left-hand side, and you can see the Portamento Time on the right-hand side which allows you to glide/slide your 808s.
In case you don’t know, the Master Envelope adjusts the shape of the way the 808 rings out. For instance, you can set it up so that the 808 sound rings out for a long time, gradually decreases in volume, or abruptly stops. It’s up to you. Get the demo on their site.
808 Bass Module 4 Lite from Elektronik Sound Labs (Free)
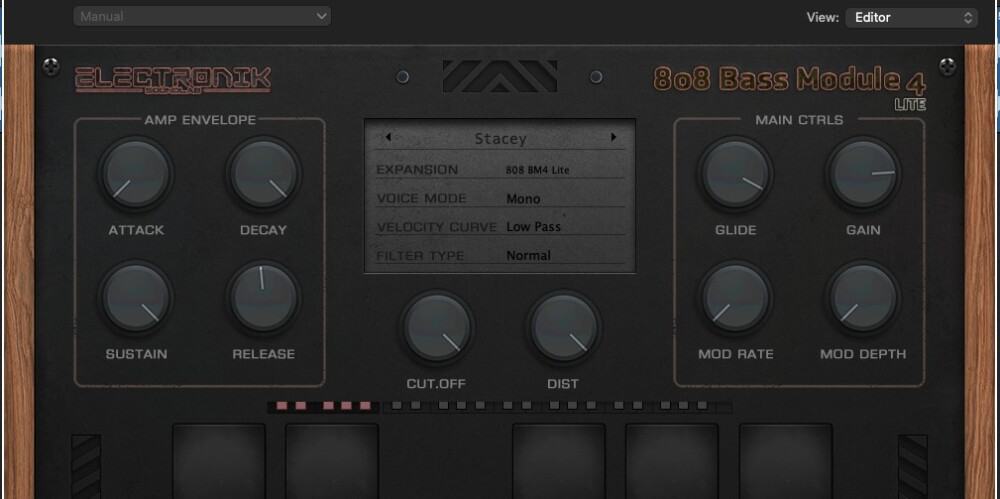
I’ve actually recommended this 808 bass plugin before in my article on 6 awesome plugins for Garageband, however, this company, BeatMaker, I believe has undergone a name change and a few other business changes. They now go by the name, Elektronik Sound Labs and it’s abbreviated as ESL in your plugin menu.
Regardless of their name, this is a plugin that I’ve liked ever since I first got my hands on it. You can grab it from their website here. I use this plugin every once in a while if, for whatever reason, I want to switch it up from the Initial Audio 808 synth. Variety is the spice of life.
My favorite part of the 808 Bass Module 4 Lite:
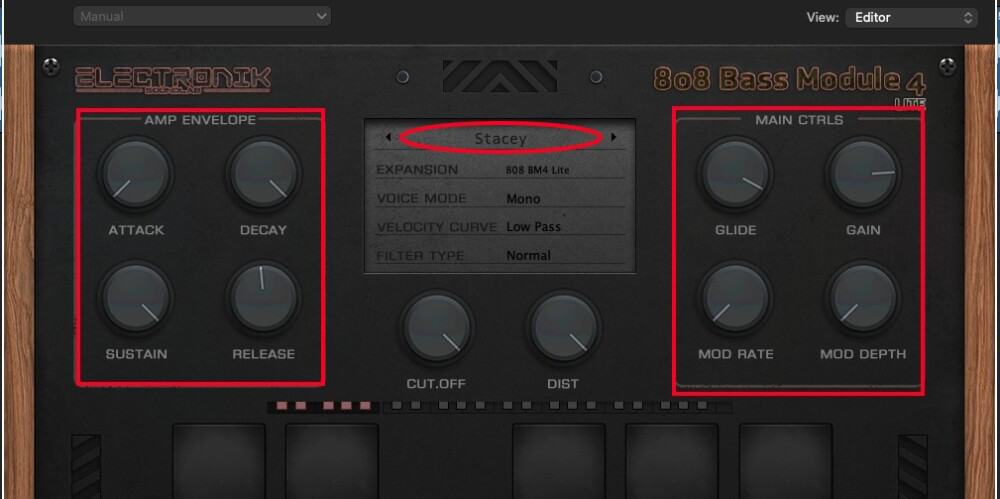
The “Stacey” preset alongside the “Glide” option, which makes it very easy to set up really nice, sliding 808s. As a matter of fact, I find this 808 plugin – in general – very simple to use and it always seems to sound great no matter what. This software isn’t quite as good as IA’s 808 Studio II, but it’s free, so you can’t complain.
P Ample Bass Lite ii
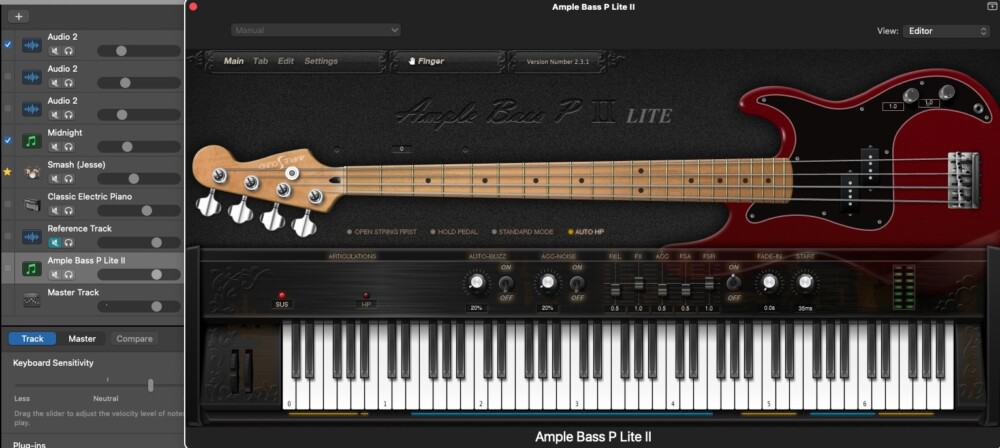
There’s simply no question that the P Ample Bass Lite ii from Ample Sound is the best free bass that you can get your hands on, in fact, I recommended it already in my article on how to make a metal song in Garageband. I haven’t used a bass guitar like this before, however, there was a time when I couldn’t get it to work with Garageband.
I figured this out and explained it here on my YouTube channel. Yeah, this thing sounds great for a free VST bass guitar, although, Spitfire Audio has a solid one as well. Probably one of my favorite things about this bass guitar VST is 1) it actually sounds good, and 2) it has the ability to mimic slides, slapping, and the pop sound.
No other free bass VST can do that, as far as I know. One thing that’s worth mentioning is that a 49-key MIDI keyboard isn’t wide enough to run this thing, so you’ll have to shift between octaves. This means you need a larger keyboard like the Arturia KeyLab 88 from zZounds (this is the one I have on my Christmas List).
Cool Tip for the P Ample Sound Bass ii Lite:
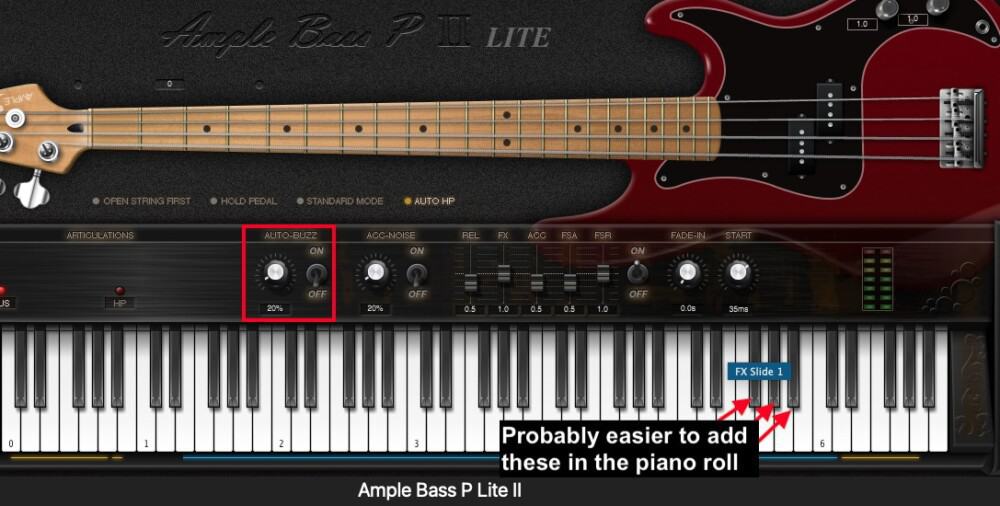
Try out the Auto-Buzz parameter which increases the fret-buzz by a percentage. Also, the aforementioned slap and pop option is really cool, however, I would much rather add those with the piano roll (my guide), rather than while I’m playing the bass manually with my keyboard.
Ample Acoustic Guitar M Lite II
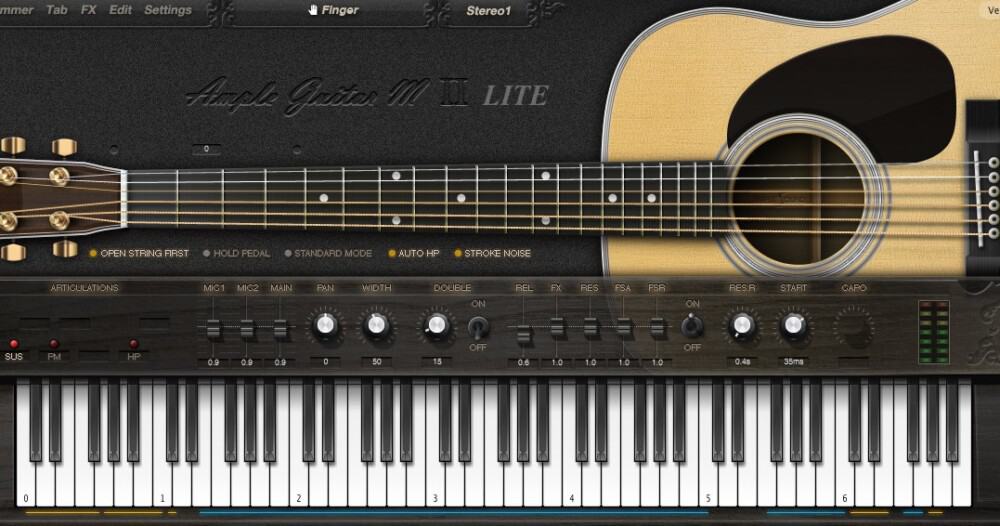
As you can see, the Ample Acoustic Guitar M Lite II from Ample Sound (on Plugins4Free) is fairly similar to the P Bass in terms of how it looks and how the instrument has been designed. You also have to do the same thing in order to get this plugin to work in Garageband. One user explains how to do it here on KVRAudio’s forums using Sudo commands.
One thing that’s worth stating about the Ample Sound VSTs is that the paid versions are much better, but that’s to be expected. One problem is that some of the samples are missing on the higher chords, but all in all, this is still a great instrument to use.
My favorite part of the plugin, other than that it sounds good:
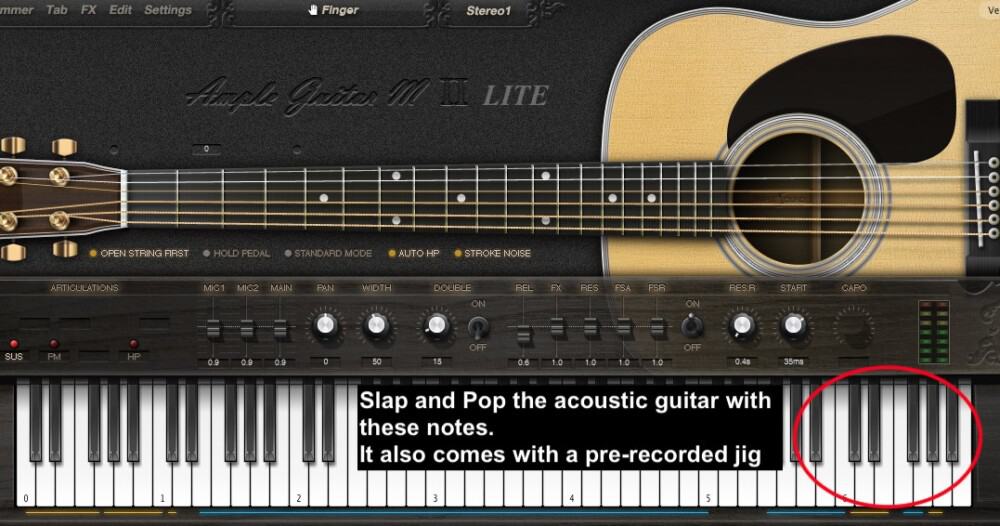
The Ample Acoustic Guitar M Lite II has the ability to slap on the guitar, including on the body and also on the strings and the rim of the body. Similar to the P Bass, you can actually program this guitar to make slapping and popping guitar riffs, which is pretty cool.
Again, I think it would be better to do this in the piano roll. If you’re at the point where you’re so good at using a MIDI keyboard that you can play the acoustic guitar with slaps and pops, your skills would be better used on a real guitar.
Spitfire Audio Labs
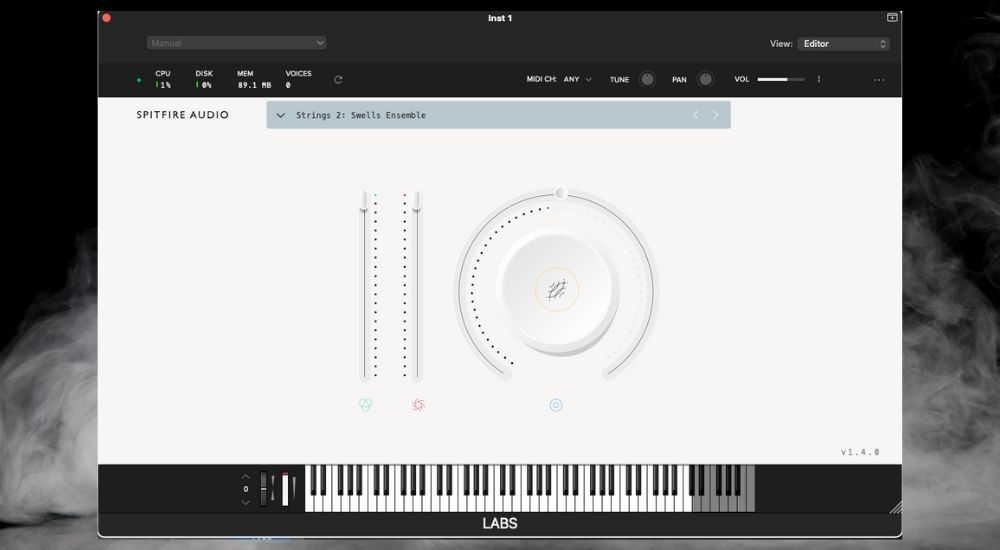
If you haven’t already downloaded Spitfire Audio’s application (from their site) and installed it on your computer, then I don’t know what you’re waiting for. This is one of the best free plugins that you can get. Similar to Native Instruments, Spitfire Audio understands the value of offering really high-quality products for free.
With the value you get from the free instruments, it makes you wonder what kind of quality you get if you pay for it? There are a lot of instruments that are included as part of the plugin you can download in Garageband, and the handy thing is they make it so easy to continue to download new VST instruments.
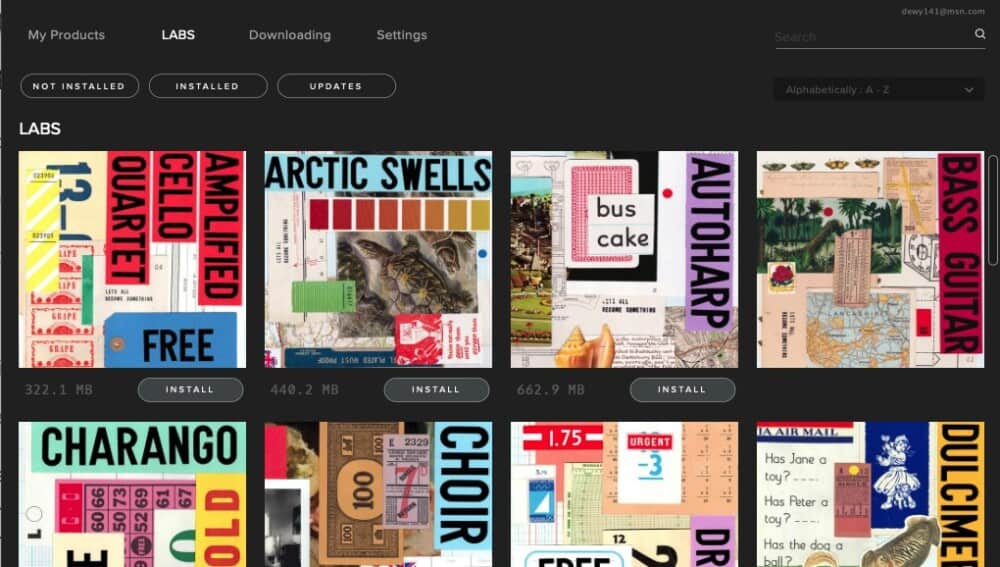
Sign up for their newsletter and you’ll be notified whenever they come out with something cool. This instrument is a bit different because Spitfire Audio doesn’t seem to care so much about making the actual interface resemble an instrument of some kind. Frankly, I’m here for it, because I’d rather have the plugin sound really amazing than look like the instrument that’s in its title.
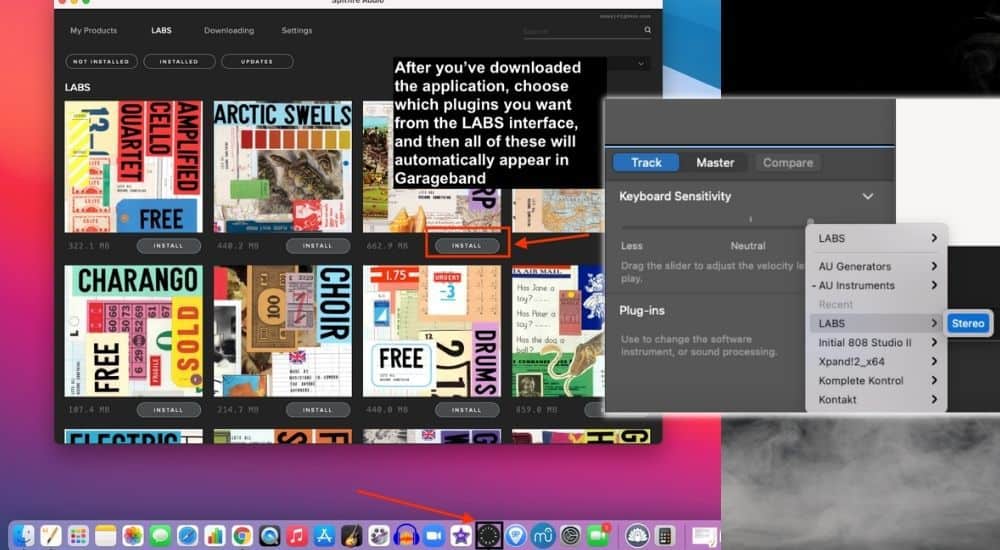
Before we get into each instrument that comes with the Spitfire Audio LABS app, first understand that LABS, as it’s called, is an application that you download for your computer, but it functions as a plugin in your DAW. Without further ado, let’s talk about each one of my favorites.
Peel Guitar from Spitfire Audio Labs
The peel guitar is modeled after a Fender Telecaster that’s purportedly played through a 15w amp alongside a bit of tremolo, reverb, and some other effects to give you a really gentle, clean, guitar sound. The Peel Guitar is easily the best free guitar VST I’ve ever heard.
But the one downside is that there is only one sound – you can’t make modifications to it (other than with external plugins). Additionally, I would say that this guitar is certainly not a “raw” Telecaster sound. There are some effects on it that make it sound less like a guitar and more like a piano or a synth, but it still sounds great either way.
The best part of the Peel Guitar:
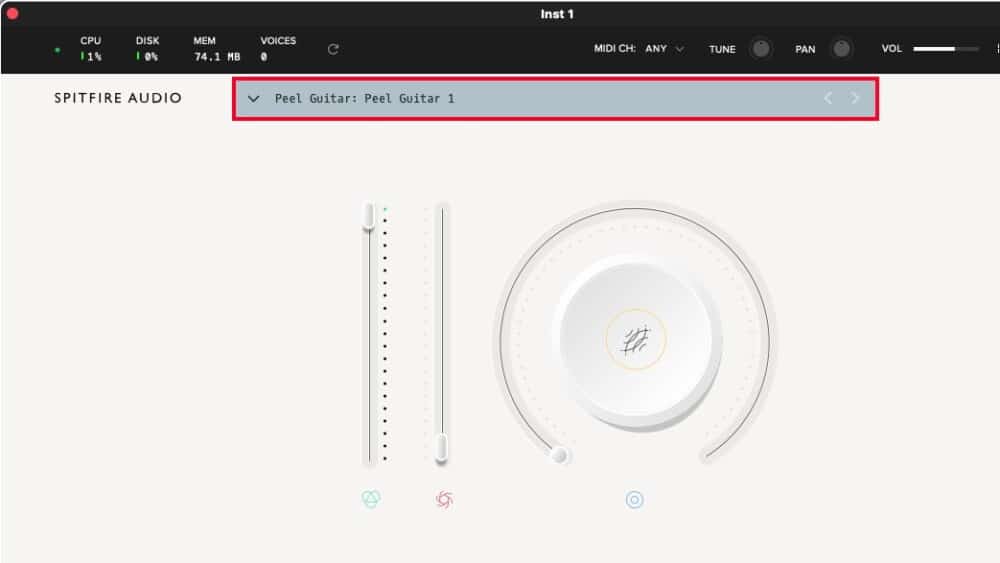
The “Peel Guitar 1” sound is the one I use the most because I find the “Peel Guitar Ensemble” setting is more like a synth or a soundscape instrument. While the Peel Guitar is great, I would say that the Guitar Harmonics is probably the superior of the two.
Strings 1 and Strings 2 from Spitfire Audio Labs
Another Spitfire Audio classic, the strings just might be one of the most realistic-sounding instruments they’ve created, although, that doesn’t mean it’s my favorite. I like these strings a lot and I think they’re exceptional, far beyond anything that Garageband has by default.
The best part of the Strings:
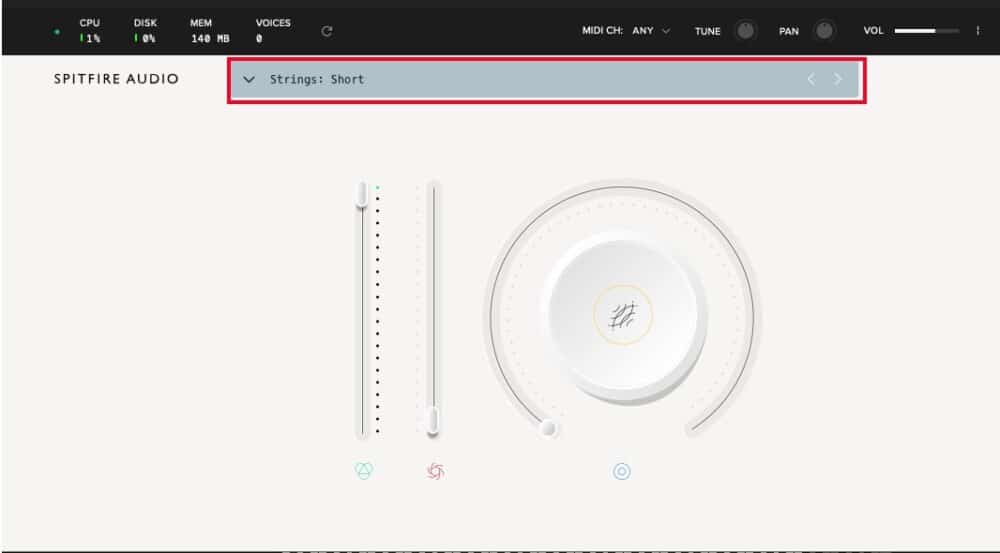
My personal favorite is the “Short” strings because it’s just short staccato notes of violins playing, probably at least 2 or 3 of them. It kind of reminds me of the opening riff to “Still DRE” from Dr. Dre, but I’m not entirely sure why.
Either way, you can get really creative with this and there are more sounds in there too. Make sure you’ve downloaded both Strings 1 and Strings 2, because they are two different instruments. I consider one just as an extension of the other.
Guitar Harmonics from Spitfire Audio Labs
Guitar Harmonics is just what it sounds like: guitar harmonics. Spitfire, again, has done a great job of making some really accurate and realistic-sounding harmonics, and it appears as if this plugin has been modeled after an acoustic and nylon string guitar. In addition to the preset I’ll talk about in a second, this plugin comes with other harmonics but with effects on top too like “Reverse Pluck,” just to name one.
The best part of the Guitar Harmonics:
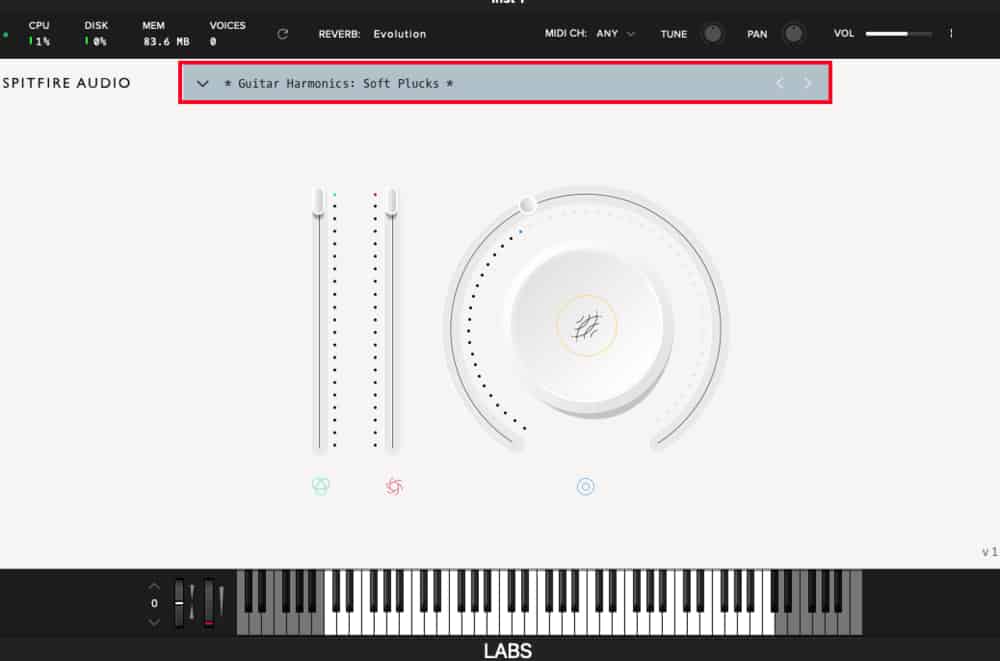
The “Soft Plucks” preset is probably my favorite thing to play around with. Like most of Spitfire’s sounds, the quality is so good that it inspires creativity in you. While I was making the image for this post I almost got distracted with a new song idea from a riff I made with the “Soft Plucks.”
Moon Guitar from Spitfire Audio Labs
Probably one of my favorite VSTs of all time, Spitfire Audio Lab’s Moon Guitar appears to be modeled after the Chinese traditional instrument, the Yueqin. I love the way the Moon Guitar sounds, for real. It sounds incredibly cool, unique, and high quality.
The Coolest Part About the Moon Guitar:
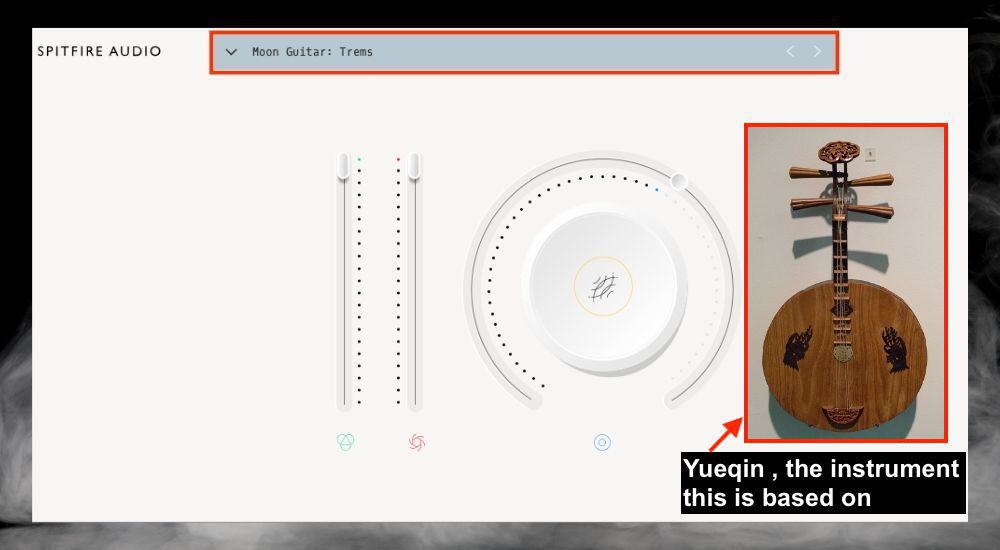
All presets and settings on the Moon Guitar sound good to my ears, but pay special attention to the “Trems” effect which is just a single note being played by the Yueqinist (no idea if that’s the right way of saying it) with varying levels of strength.
Soft Piano from Spitfire Audio Labs
The Soft Piano is the piano that I recommended to my readers in my guide to free piano sounds, and I still stand by the inclusion of this piano today. It sounds really awesome. Even though Garageband released a batch of new and great-sounding pianos with their last update, I still consider the Soft Piano as one of the best that you can get for free.
The Best Soft Piano Sound:
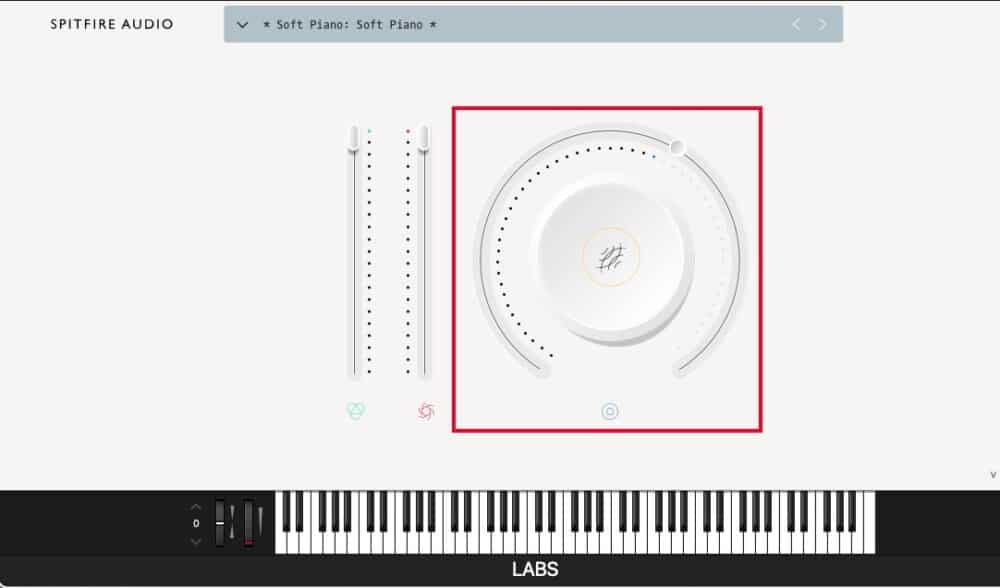
An interesting aspect of the Spitfire Soft Piano is the bare bones of it, in the sense that there is only one setting, “Soft Piano,” and then you have the Reverb dial that I’ve outlined in red in the image above. The reverb sounds great on this piano, and it’s definitely worth trying out, however, my favorite part of the Soft Piano is actually not the reverb, but the way the piano key attack sounds. It sounds mad cool.
Autoharp from Spitfire Audio Labs
In case you didn’t know, the Autoharp is similar to a harp, however, it’s designed in such a way that’s suited to mute all strings except for the chord that you’re trying to play. Personally, I think I would’ve preferred just a standard harp instrument from this company, but the Spitfire Audio Lab Autoharp still sounds great and it’s great to play around with.
The Cool Feature of the Autoharp:
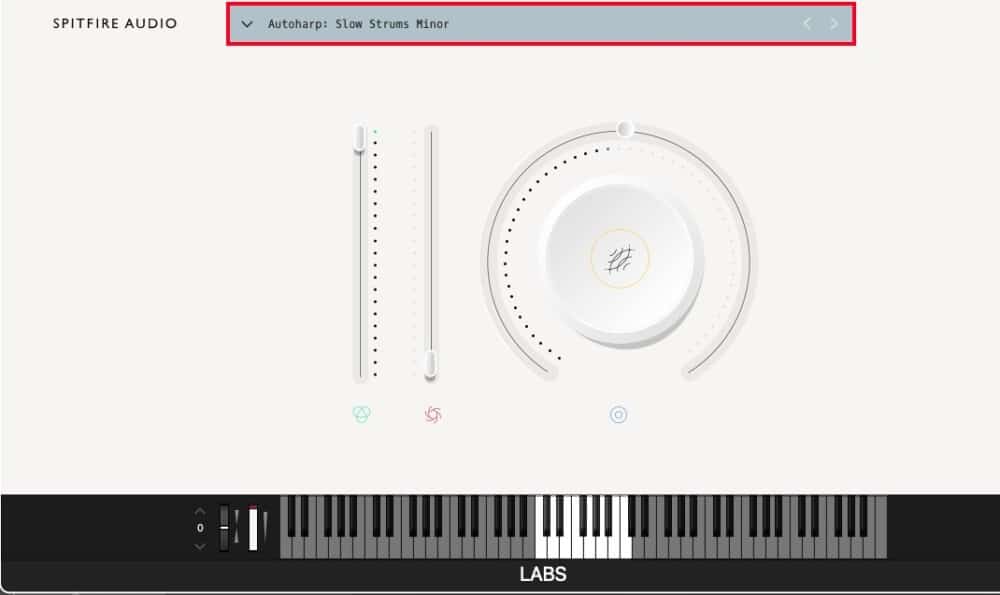
What I like about the Autoharp is the Slow Strums Minor and Major preset, which essentially is an automatic arpeggiator of Minor and Major chords. There is an option for 7th chords as well, but I prefer the regular triads.
Lap Steel from Spitfire Audio Labs

Another really cool stringed instrument from Spitfire Audio Labs, as the title suggests, this instrument is based on the Lap Steel Guitar played through a bunch of delays and reverbs. It sounds really good, especially with the special settings that you get which I’ll tell you about now.
The Coolest Part of the Lap Steel:
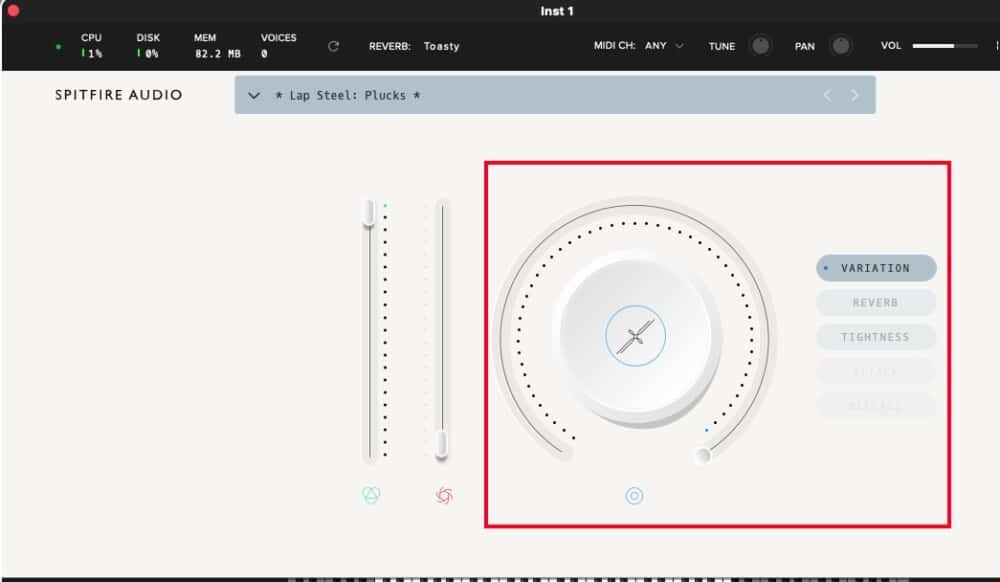
When you crank the variation knob on the Lap Steel and play a Minor 6th chord, I find you can get some really interesting Tesseract vibes. With Spitfire Audio Labs, there is no shortage to stringed instruments because we’ve got another one up next.
Mandolin from Spitfire Audio Labs
Considering I’m a guitar player, it probably makes sense that I’m a fan of nearly every stringed instrument that Spitfire Audio Labs produces. This mandolin has a number of great sounding presets, one of which I’ll explore in a second, but it’s the same old story with Spitfire Audio Labs. They make GREAT VSTs.
The Coolest Feature of the Mandolin:
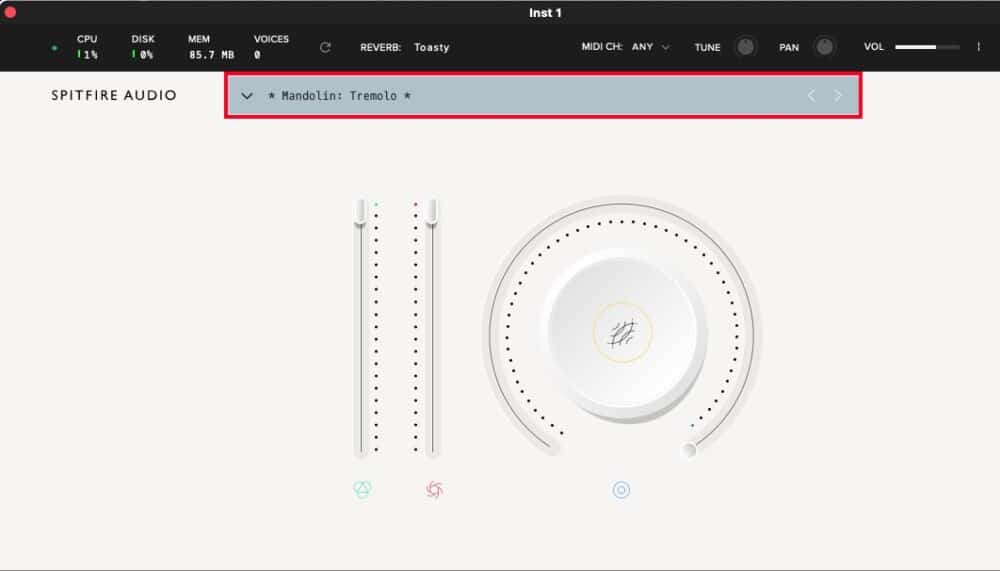
There’s no doubt that the “Tremolo” option of the Mandolin is the coolest feature on it. As I was writing this article, I nearly got lost in an idea where I was shifting between a C Major, Amin, and CMaj7 chord. Give it a shot and I imagine you’ll also be amazed by how this thing sounds.
EZDrummer 2 from Toontrack (Free Trial Available)
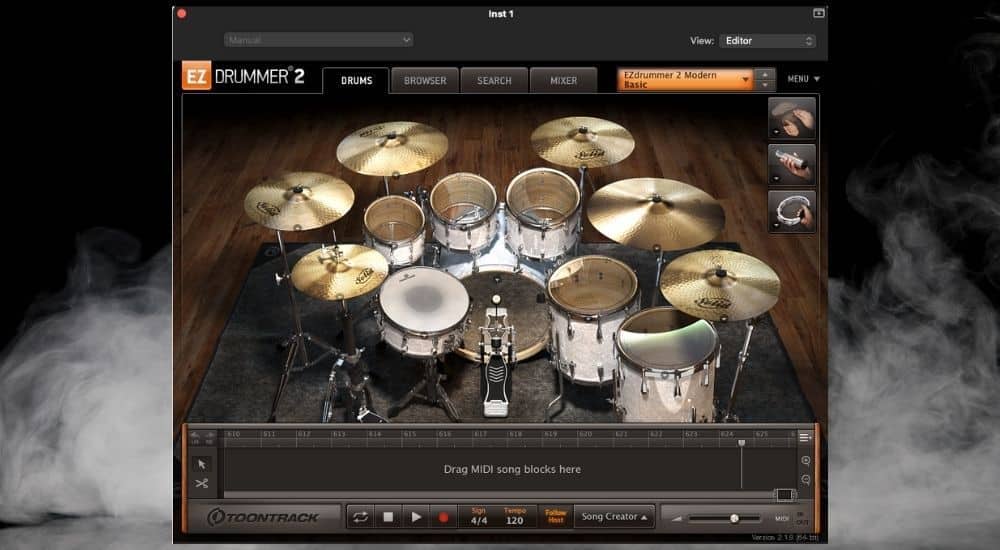
There was a time when I would recommend Steven Slate Drums 5 to users, however, for whatever reason, I struggle to get their plugin to work in Garageband now. I made the switch to EZDrummer and this is a nice little upgrade from Garageband’s drummer track which I’ve made tutorials on before. Other than getting it from Plugin Fox for a good price, you can also try out the demo on Toontrack’s website as well.
An interesting EZDrummer Feature:
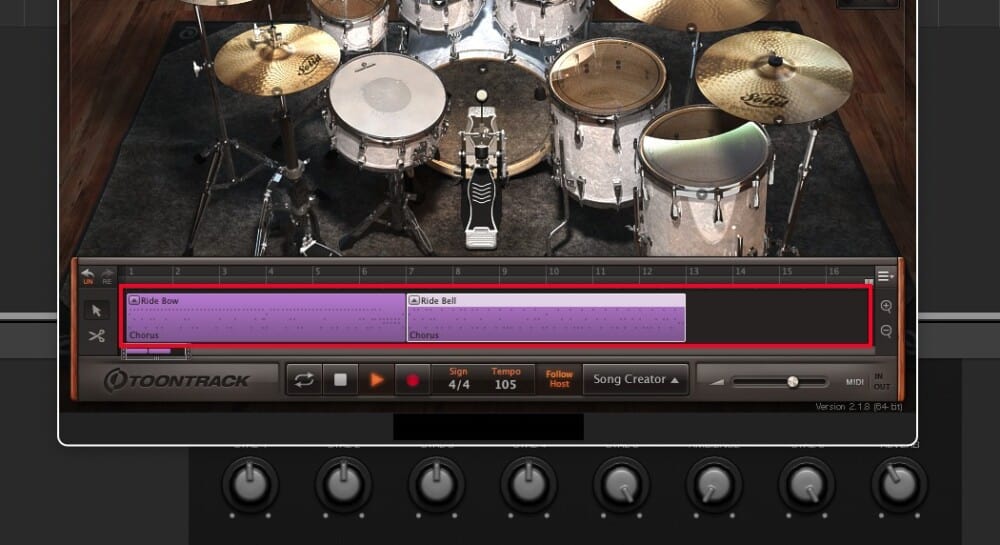
What’s cool about the EZDrummer is the Song Creator, which gives you a number of song ideas to choose from after having loaded a MIDI file into the “Drag MIDI Song Blocks Here” box. Additionally, every key on my MIDI keyboard responds to a drum piece, which is definitely not the case with the regular Drummer Track.
It’s also important to mention that the drum samples, kits, and loops, simply sound a lot more realistic than what Garageband has to offer, which makes sense considering everything you get in Garageband is totally free.
Superior Drummer 3 from Toontrack
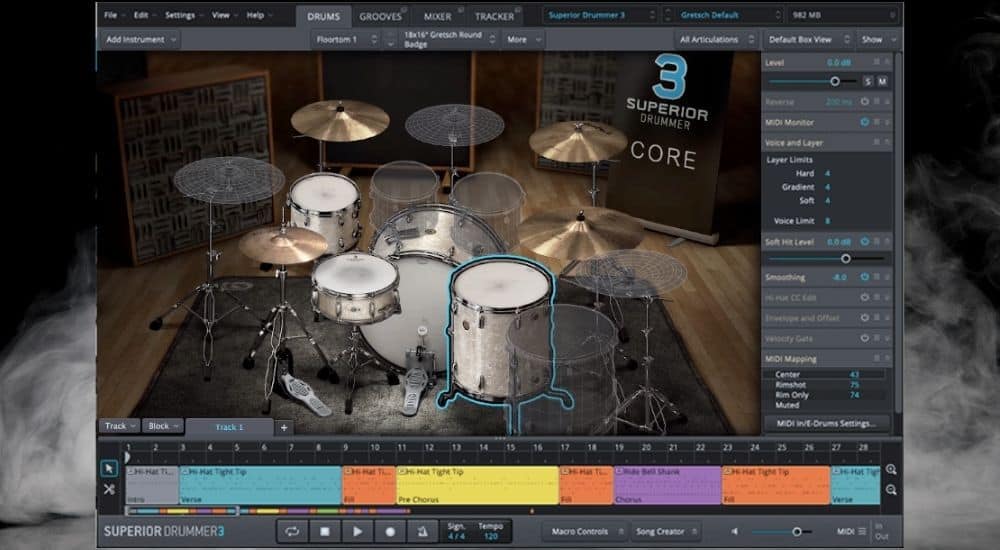
Superior Drummer 3 (which is most reasonable on Plugin Fox) is kind of like the mecca of drum programming. If you’ve downloaded the entire package, it’s something like 340+ GB of samples, drum pieces, sounds, and loops.
In other words, you won’t have to worry about having a drum part in one of your songs ever again if you’ve bought Superior Drummer. Admittedly, I’ve never purchased Superior Drummer 3 because I’m still getting used to EZDrummer, but when I’m ready to make the switch to a more serious program, I’m definitely going to use this.
The Best Feature of Superior Drummer 3:
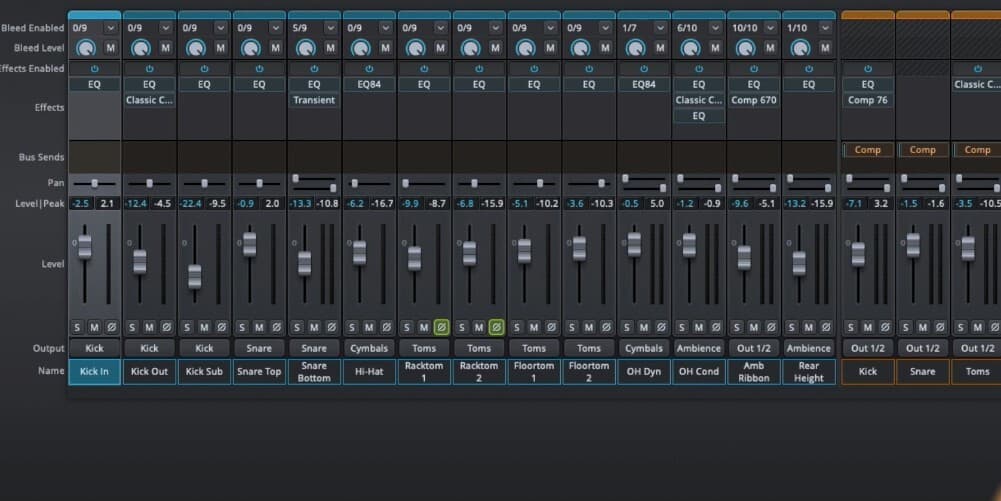
From what I’ve heard, the pre-recorded drum loops in this thing are amazing, but another thing that’s worth pointing out is the mixer of Superior Drummer. Everything can be done right in the plugin, and there is no need to separate parts of the kit as you would with the Garageband Drummer Track.
Drum Pro from Studio Linked (Free)
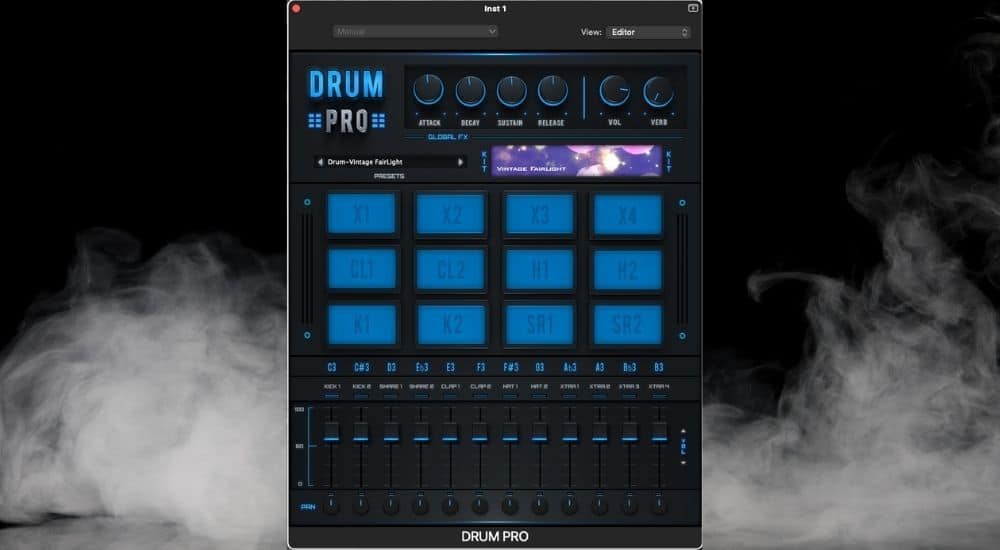
I’m not kidding when I say that I’ve used Drum Pro (from Plugins 4 Free) ever since I first started playing around with Garageband a few years ago now. This drum plugin has served me really well over the years, and I still use it to this day. It has a solid number of kits in it, and all of the drum pieces legitimately sound great considering they’re free.
My Favorite Part of the Drum Pro Plugin:
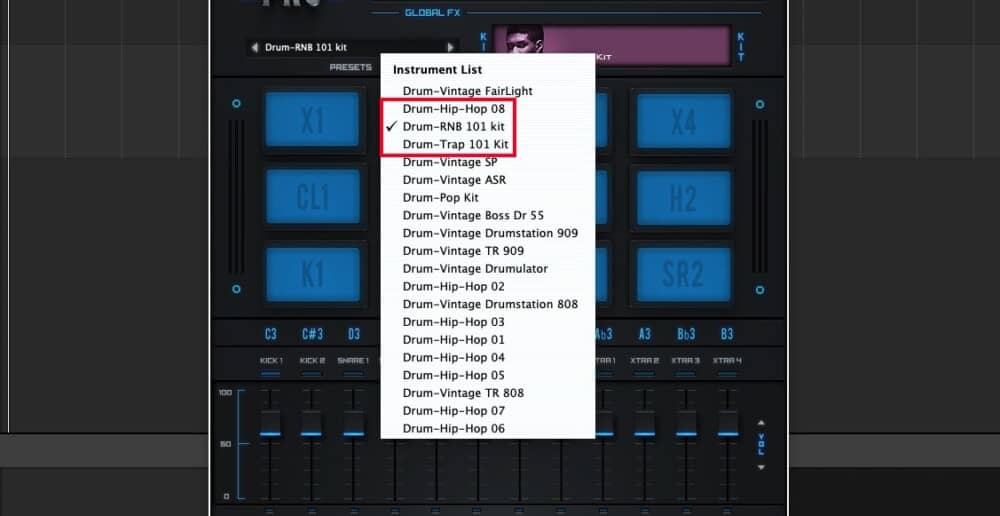
The Trap Kit, the R&B Kit, and the Hip-Hop 8 kit are the best drum kits in this thing, and I’ve been using them for an eternity, in fact, I just got finished using the Snare from the R&B kit the other day. This plugin has other features on it as well, but I support StudioLinked’s Drum Pro strictly for the way it sounds.
Dynamics Processors
Klanghelm DC1A Compressor (Free)
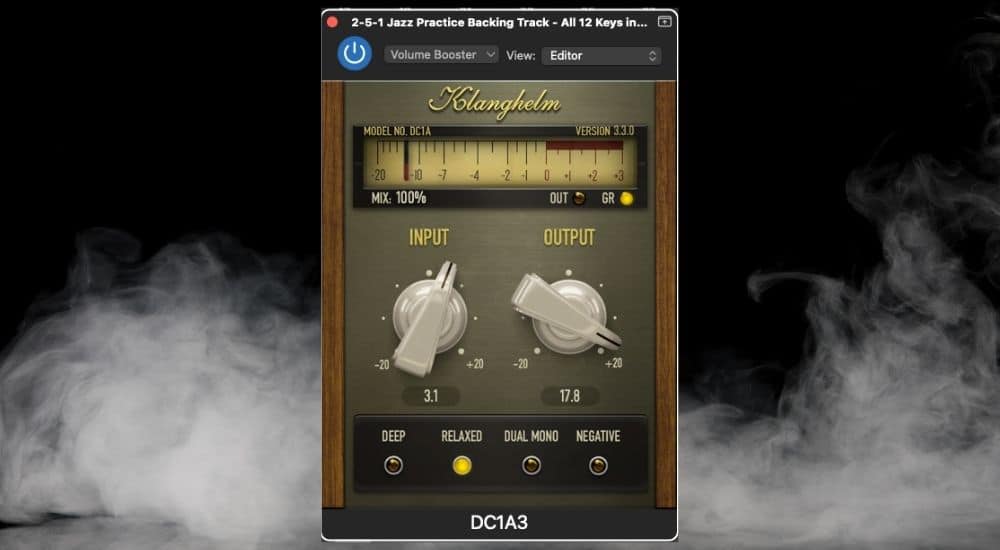
If you’ve already gotten the Pro-C 2 compressor from FabFilter, you won’t need to get this one, however, for free software, the Klanghelm DC1A3 is a great sounding compressor (get it here on their site). The four compressor configurations on the bottom mimic popular forms of compression, and the Input and Output knobs make it simple to use.
The Best Part of the DC1A3 Plugin:
In addition to its simplicity, I find that the DC1A3 has a warmth to it that other compressors don’t have. Moreover, the lack of controls on it ensures you won’t mess anything up with it. I typically use this on vocals, although, sometimes I use the “Volume Booster” preset which you can see in the image above. I think I might’ve made that preset from scratch, although, I’m not sure anymore.
Bob Perry’s Noise Gate (Free)
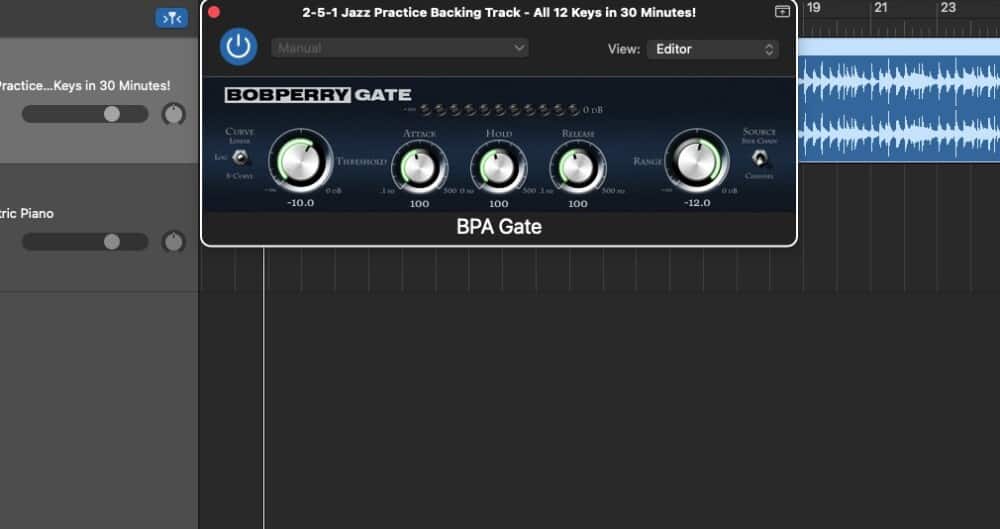
I’ve written about the Bob Perry Noise Gate before in my vocal plugins article, but regardless of that, I’d say this is easily the best free noise gate you can get your hands on from Plugins 4 Free. It’s far more advanced and feature-rich than the standard noise gate that comes with Garageband, including an Attack, Hold, Release, Range, and Threshold option.
The Best Part of the Bob Perry Noise Gate:
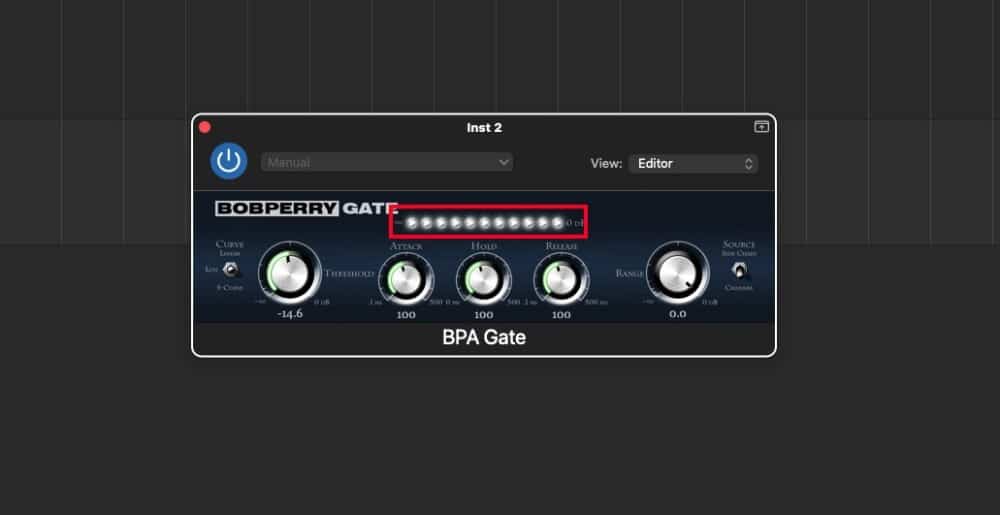
Because you actually have access to the Threshold, Attack, Hold, Release, and Range knobs, you have way more control over how and why your gate sounds in your projects. Additionally, there is a gain meter on top of the three dials in the center which allows you to see how much you’re affecting the signal (a useful tool indeed).
Audio Damage’s Rough Rider 3 Compressor (Free)
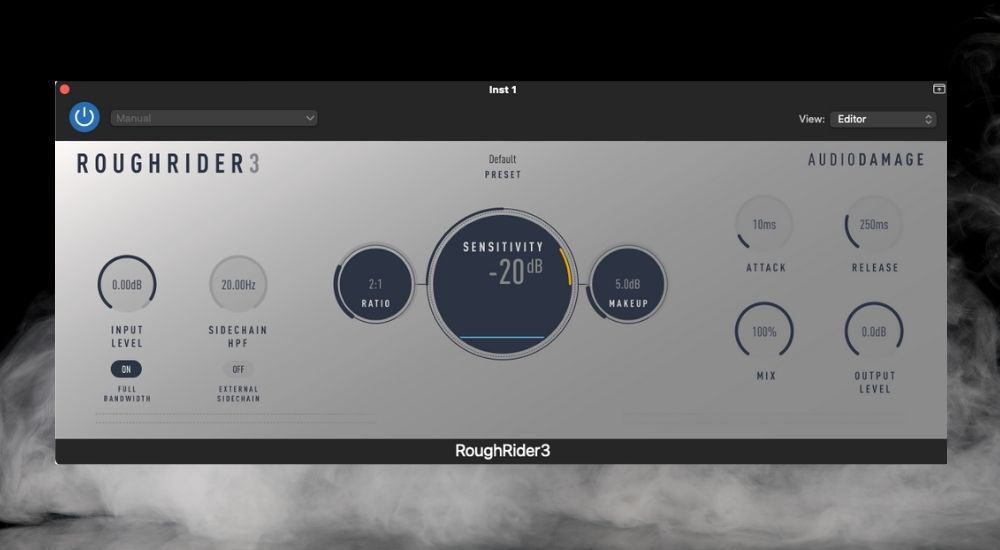
The first time I mentioned this compressor was in my article on parallel compression, I believe, but to be completely honest with you, ever since I got the FabFilter compressor I don’t use this thing too much anymore.
I first got it on Plugins 4 Free and it served its time well because the additional controls on this make it a great tool. I appreciate the metering in the center of the plugin as well as the external sidechain option.
What I Like Most About the Rough Rider 3:
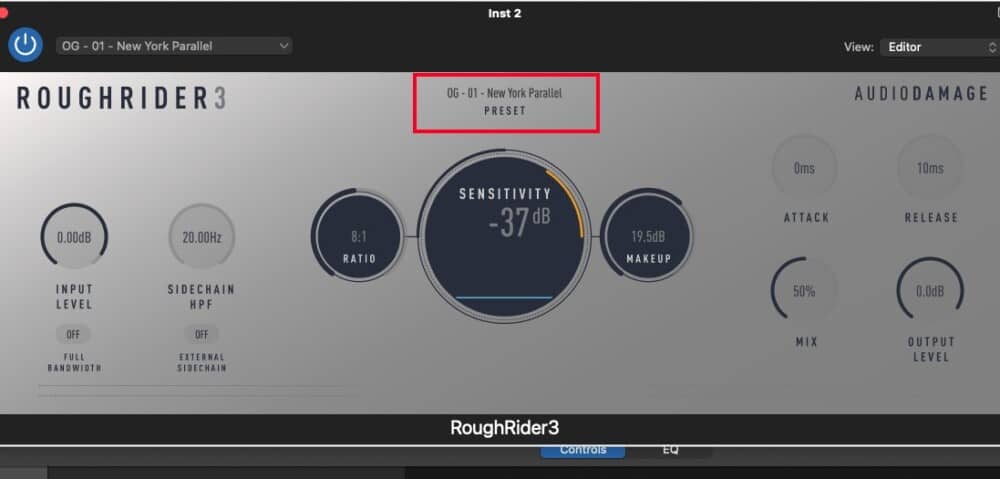
Yeah, the additional controls on this thing are great, but it’s the presets that really shine, particularly the New York-style compression that you can see in the image above. This is also the same preset that I mentioned in my parallel compression article.
Effects
Acon Digital Multiply Chorus
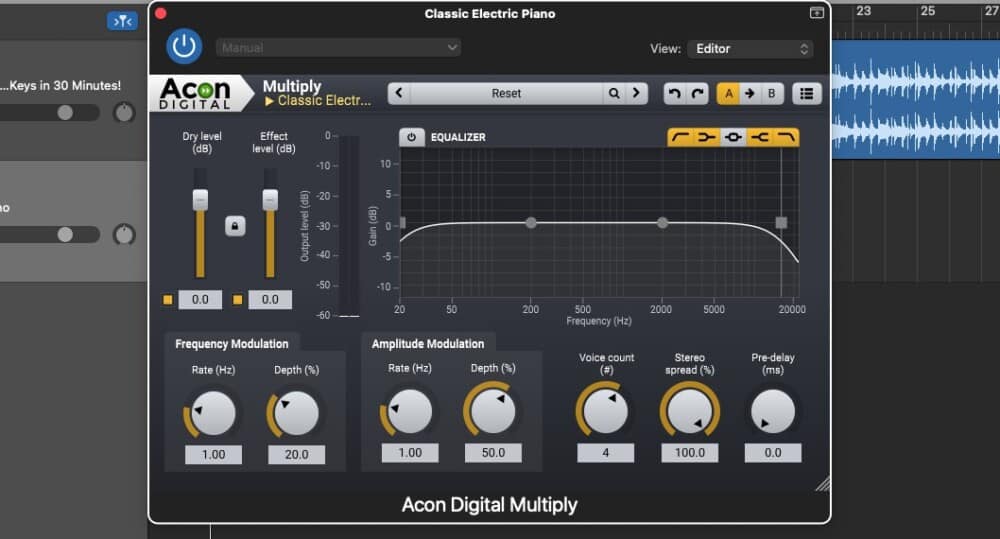
This is another one of those high-value, free, and high-quality plugins that companies give away for free (on Plugin Boutique) sometimes as a way of attracting you to their brand and their products (which is brilliant by the way). Acon Digital’s Multiply Chorus is a full-featured chorus plugin that features a nice EQ and a few other handy features.
One Thing I Like About the Multiply Chorus:
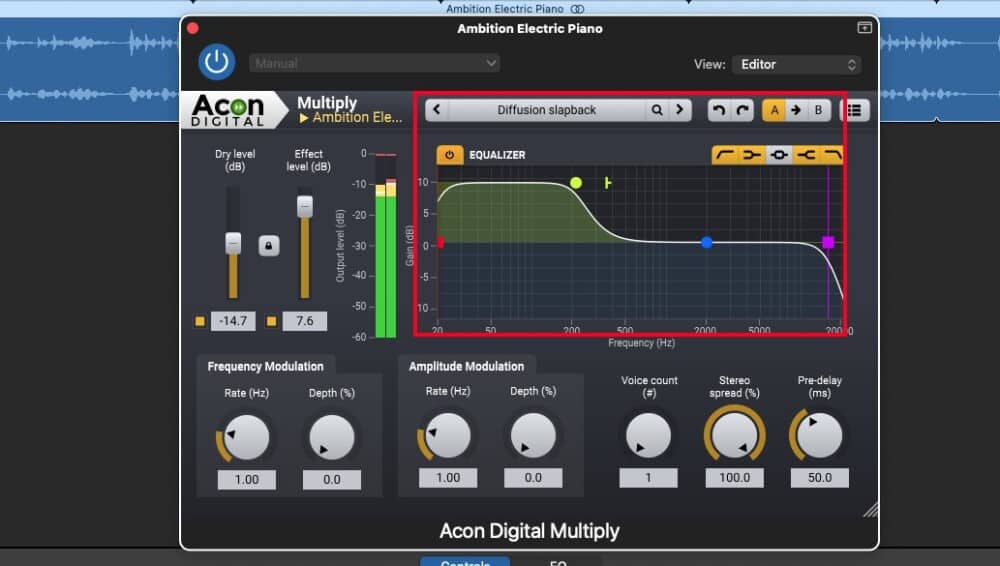
The “Diffusion Slapback” preset with the “Effect Level” turned up and the “Dry Level” turned down sounds great. Push up the lower frequencies on the in-built equalizer and you have a nice little effect. Scroll through all of the useful presets to see how this thing sounds on sounds that need a bit of flavor.
Eventide’s SP2016 Reverb
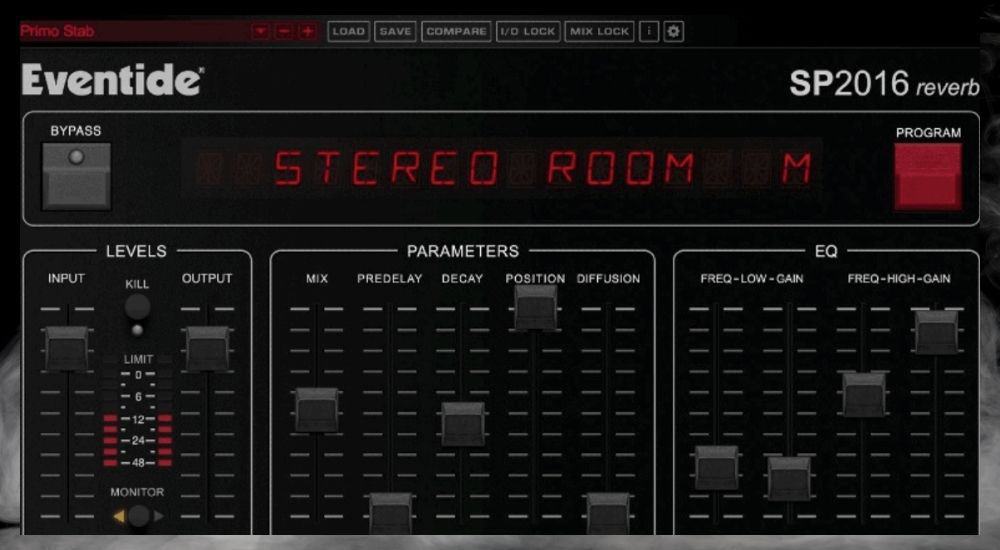
Eventide’s SP2016 Reverb plugin (on Plugin Boutique) is probably one of the more hailed reverbs on the market. It’s critically acclaimed for sounding nearly as good as the hardware on which it’s based, including the many, many parameters that you can adjust. You can obviously see some of them in the image above.
The Best Feature of Eventide’s SP2016 Reverb:
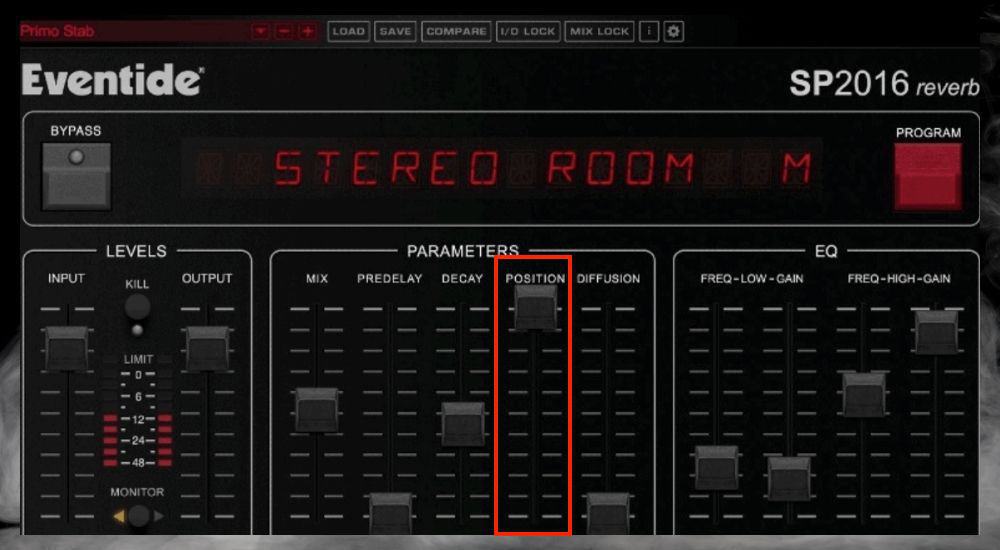
From what I understand, this is the plugin that really kicked off programmable reverbs back in the early 1980s, and since then, Eventide’s SP2016 (in plugin format) has been loved by a loyal fanbase. It’s cool that this plugin is so tried and true, however, the best feature of it is the “Position” knob, which allows you to control where the reverb is sitting in the mix. Definitely a cool tool.
Delay Modulator from Imaginado (Free)
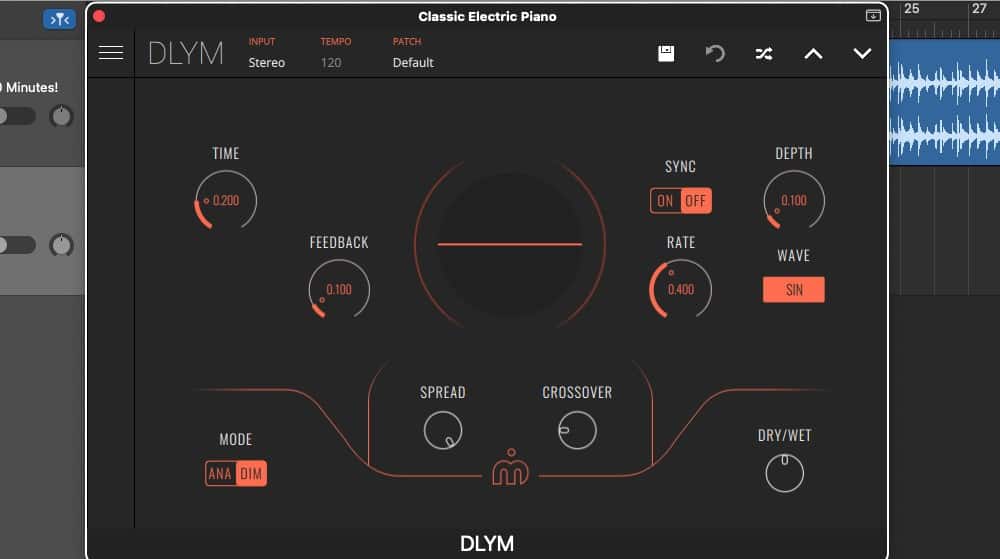
A feature-rich Delay Modulator (from their site), and the cool part about this plugin is that it’s also available in the App Store for Garageband iOS as I wrote in my other article. Similar to the Acon Digital Multiply Chorus, this Modulator leaves you wanting for nothing in terms of parameters and controls.
What I Like About the Imaginado DLYM:
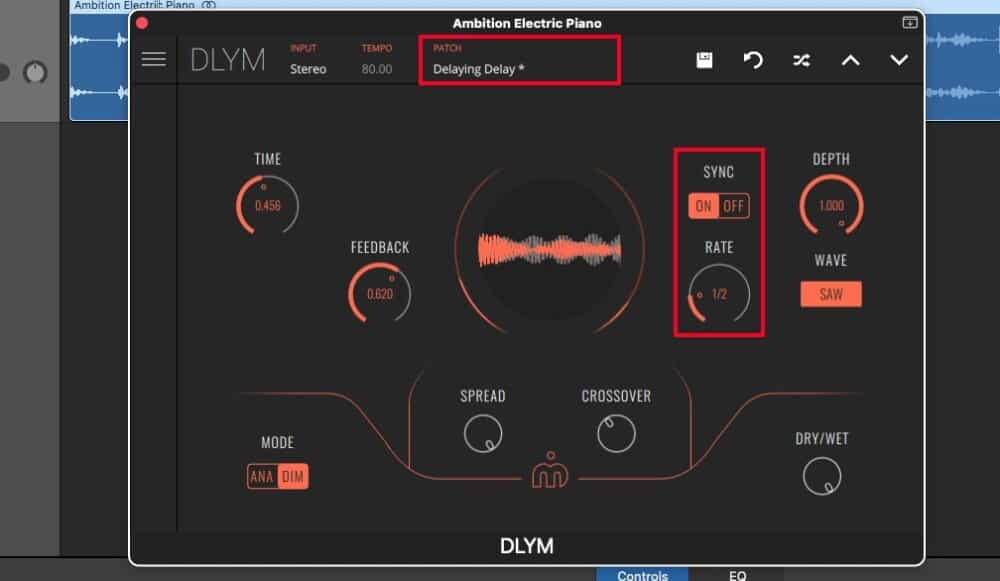
I’m a big fan of the “Delaying Delay” preset in addition to the Sync function which automatically syncs the plugin to your audio track. Give it a try and you’ll see what I mean.
Kilohearts Delay (Free)
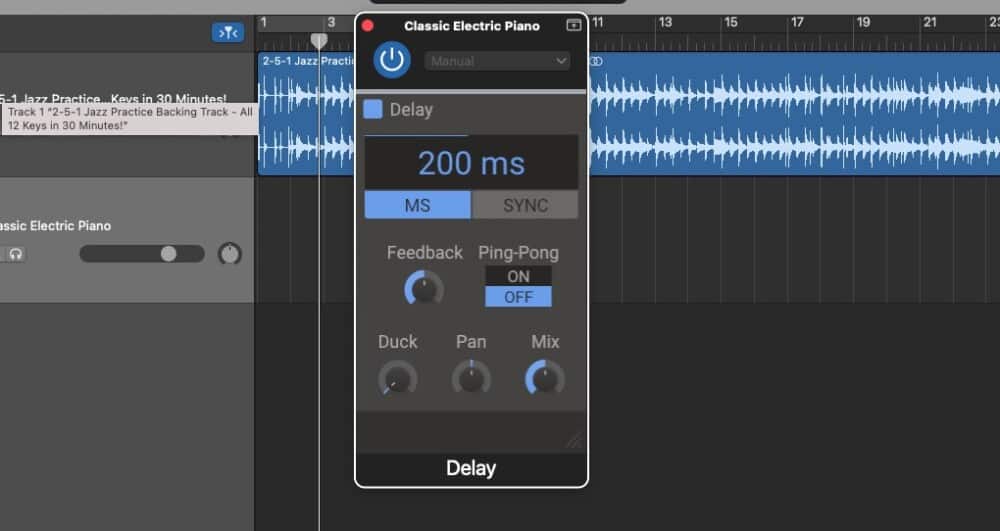
And last of the effects is the Kilohearts Delay, which is just a standard delay plugin that you’ll find from their site, but I like it because it actually gives you the timing option in milliseconds, unlike the delay plugins that come stock in Garageband. At one point, I used Valhalla’s delay, but I like to use this one a lot more because it’s easier to use.
What I Like About the Kilohearts Chorus and Delay:
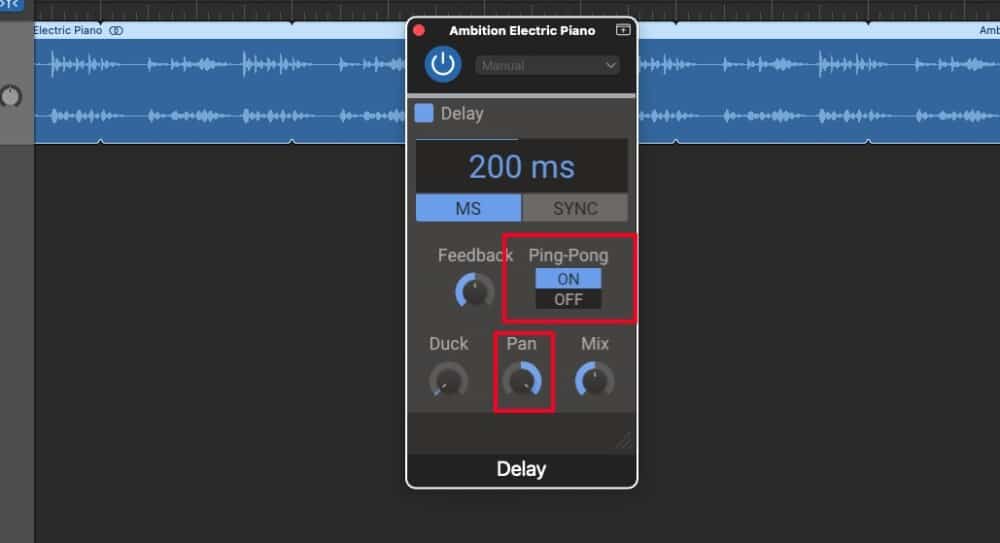
Undoubtedly, the coolest part of the Kilohearts Chorus and Delay is the Ping-Pong effect which you can see in the image above. What this does is that, when combined with the Panning effect, it bounces the delayed signal from the left and right speaker according to how you’ve set the panning.
Utility Plugins and Cool Tools
Celemony’s Melodyne 5 (Free Trial Available)
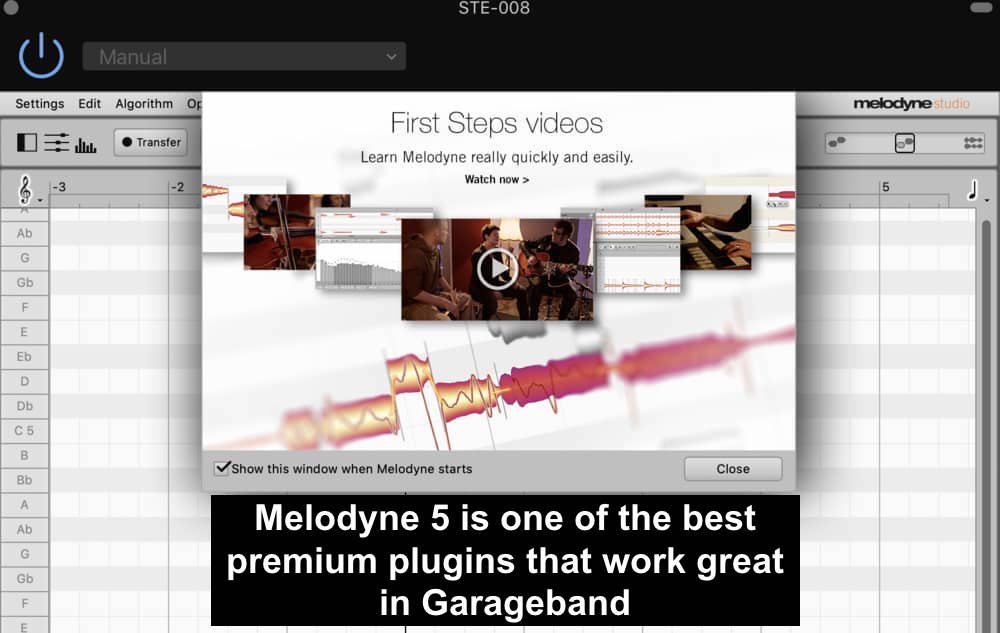
Melodyne 5 (get it on Plugin Boutique) is a feature-rich audio editing plugin that allows you to do so many things that you could write an entire book on it. In fact, my auto-tune article does go through a ton of its features. Melodyne is more than an “auto-tune” plugin, that’s a specific product from the company Antares which we’ll talk about in a moment.
Melodyne 5 is capable of doing all kinds of things that Garageband is not, including adjusting the amplitude of individual notes, spot-correcting the pitch of just one note, and a lot more. But the coolest aspect is its unique algorithms (access the free trial on Celemony’s website).
What I Think Is Coolest About Melodyne 5:
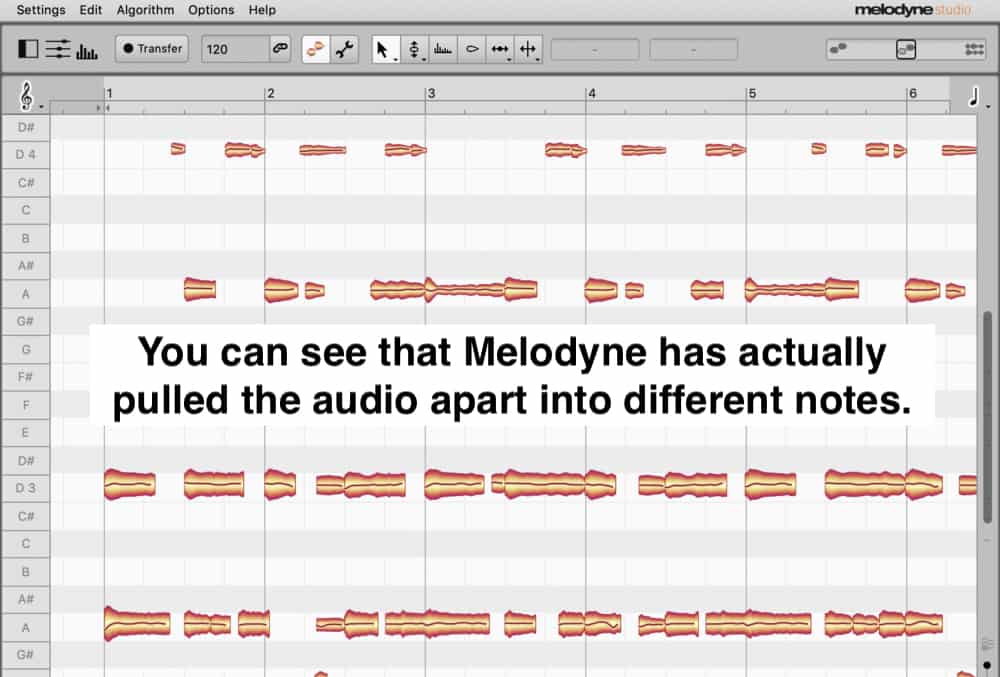
What this plugin allows you to do, is actually pull guitar and other recordings apart for editing. In other words, you can play a chord on the guitar and then actually go into the audio file and adjust the sound of individual strings and notes. I was amazed when I first saw it could do that.
Antares Auto-Tune Pro (Free Trial Available)
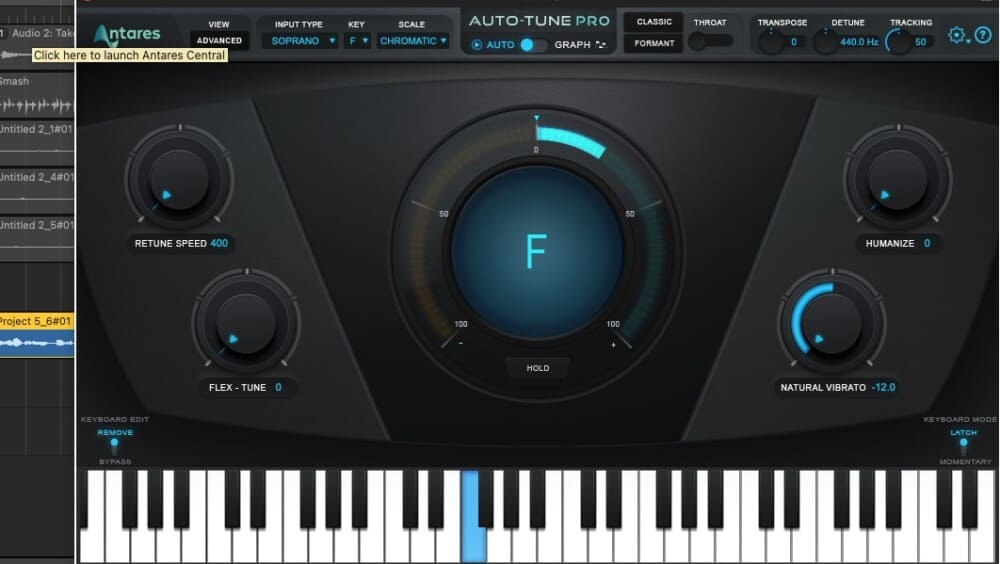
Auto-Tune Pro (here on Plugin Boutique) is the auto-tune plugin that people refer to when they talk about the effect. Rather than acting as a full-featured audio editing tool like Melodyne 5, Auto-Tune Pro is suited for vocals the most. Get this plugin if you want something to fix your vocals with total precision, quality, and clarity and you can try the demo from their site.
What I Like About Auto-Tune Pro:
I really like the Natural Vibrato function that you can see on the bottom right-hand side of the interface which does what the title suggests, as well as the handy “Transpose” knob on the top. The “Transpose” option is what I mentioned in my How To Pitch Vocals article as having the ability to shift up your vocals in a way that sounds great.
Reference 2
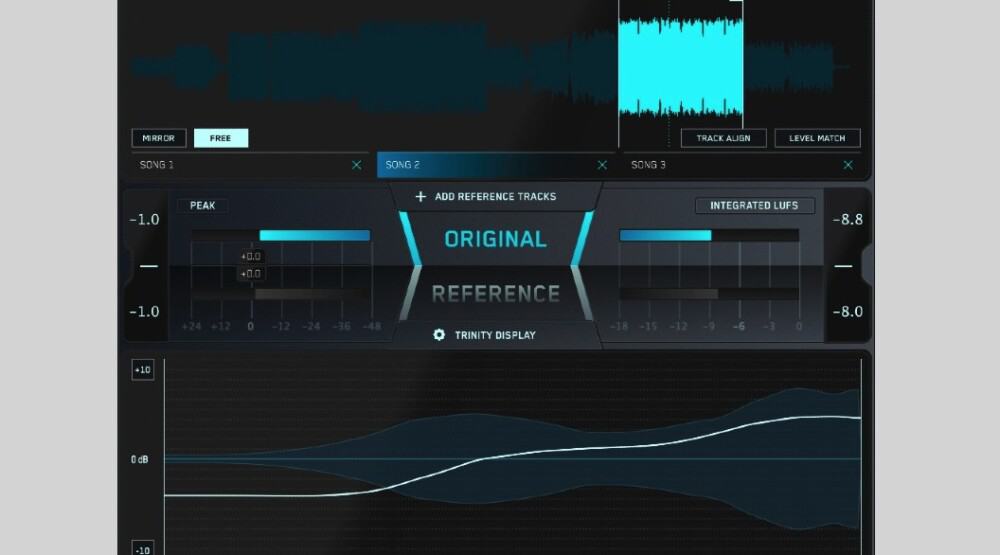
Reference 2 from Mastering the Mix (on Plugin Boutique) is undoubtedly the metering plugin that people rave about the most, alongside the Levels tool from the same company. It’s a metering tool that enables the most accurate measurements in a way that makes it much easier to match your music to the music made by others, while also getting your content up to streaming platforms’ standards.
The Coolest Feature of Reference 2:
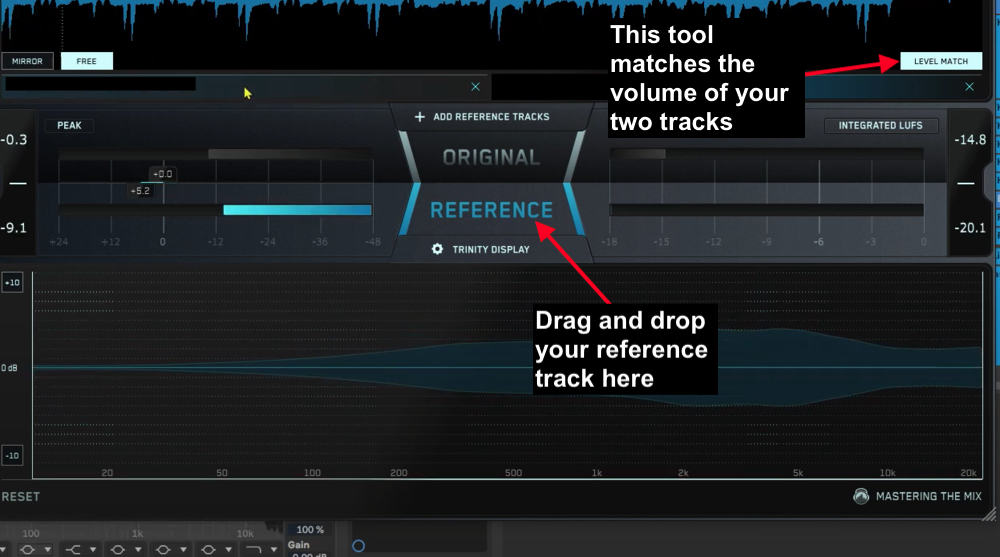
You can upload your reference track (more on those in my guide) right into this plugin and measure, compare, and contrast right in the interface. It’s definitely a useful tool and I’m not surprised that a lot of people like it so much. It’s inexpensive, it looks cool, and it works great.
The Best Garageband iOS Plugins
The main difference between plugins for macOS and iOS Garageband is that you’ll find all iOS plugins for Garageband in the App Store. This means each VST, effect, or processor has been vetted by Apple before making it onto their platform.
To avoid making this article 20,000 words long, you can find my article on iOS plugins here which dives into a huge list of many great VSTs, effects, and plugins for iPhones and iPad.
Honourable Mentions
All links take you to where you can download them.
- Big Cat Iowa Flute
- DSK Saxophone
- DSK Guitars
- Yojo Banjo
- JD Tech’s Serpo Multi-Instrument
- Audio Damage’s FuzzPlus3
- Amplitube 5 MAX Amp Modeler (on Plugin Fox)
- Bias FX 2 Amp Modeler (also on Plugin Fox)
- Neural DSP’s Archetypes Guitar Amp Modeler
- Voxengo OldSkoolVerb Reverb
- CamelCrusher Compressor
- Drumart SLD from Elektronik Sound Lab
- T-Chain Multi-Dynamics
- LePou Amps


 Written By :