Garageband has an in-built tuner that’s located in the control bar at the top of the Garageband window. The symbol for it is a tuning fork, and when you click on it, it turns purple and the tuner deviation display will appear, however, there are third-party tuners that are better.
While Garageband does have a tuner, it isn’t the best. Like every other tool in life, when it comes to getting the most accurate measurement possible, you’ll probably have to spend a bit of money. For many of us, a physical tuner or even a software plug-in might be a better option for reasons we’ll touch on in a minute.
How to Use Garageband’s Tuner (A Step-By-Step Guide)
To use Garageband’s tuner, connect your instrument via an audio interface like the Scarlett 2i2, and then adjust the input and output in the Preferences. Click the tuning fork on the top right-hand side to begin tuning. If your instrument doesn’t have an input, use a microphone to tune instead.

Step 1: Get an Audio Interface (If You Don’t Already Own One)

Get a Focusrite Scarlett 2i2 on my Product Page if you don’t already own one. As I argued in my definitive guide to audio interfaces, this is the best way for a beginner to connect any kind of instrument with a line input into Garageband or a similar DAW.
It won’t cost a fortune, and not only that, but it’ll likely serve all of your needs for several years (or at least until your needs become more sophisticated).
Step 2: Plug the Audio Interface into the Computer
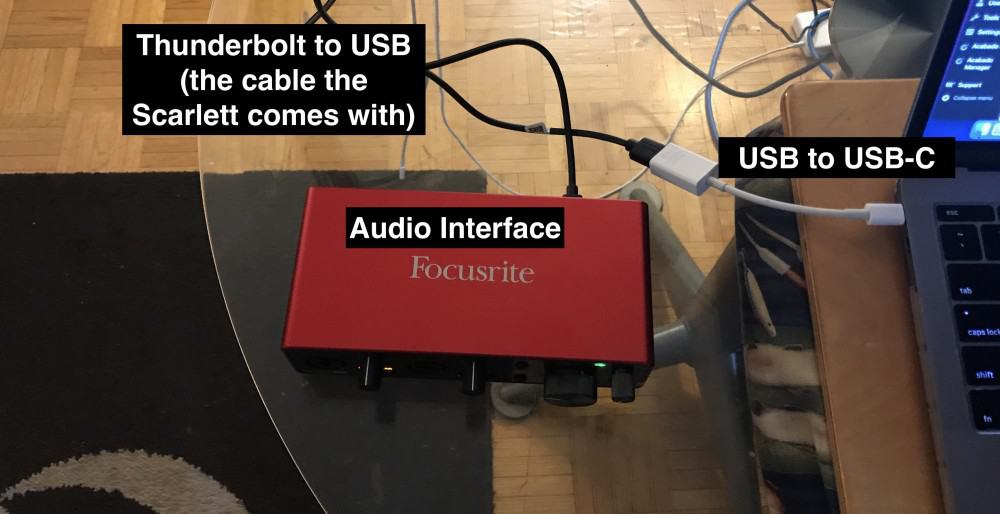
Setting up an audio interface is not very difficult, especially now that computer programs are automatic and user-friendly. You’ll need your interface with its USB-to-Thunderbolt connecting cable first.
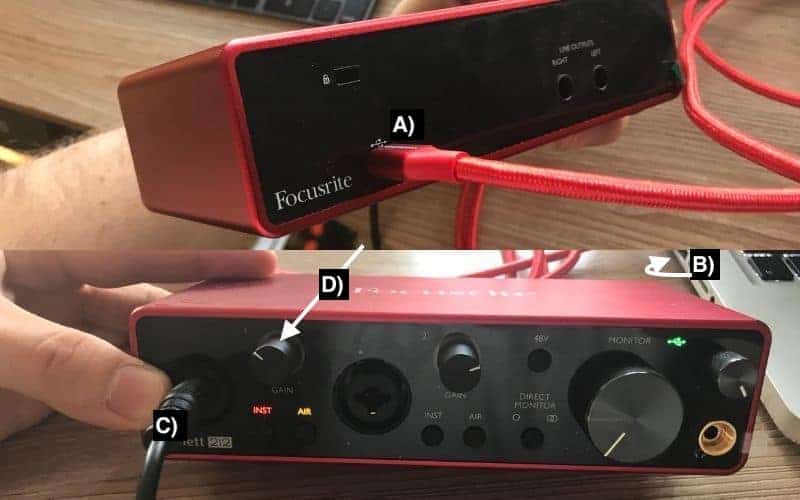
A) Plug in the cable to the rear-end of the interface.
B) Find an open USB port on your computer and plug in the USB end of the connecting cable (with a USB-to-USB-C adapter if you’re using a MacBook made after 2015 – I’m using a 2017 MacBook Pro).
C) Plug your instrument cable into the first input jack and switch the input to instrument.
D) Then turn up the gain dial but without causing clipping which is indicated with an orange (about to clip) and red light (full-on clipping).
It’s possible to bypass the interface if you can’t readily afford its price or a payment plan at a large retailer. You would need a guitar to USB cable to hook your guitar directly in your computer.
This is an inferior way to recording guitar but can be used if you are on a budget or if you don’t want to wait on an interface. The reason this option is inferior is that they don’t sound as good and they often cause latency.
Step 3: Plug the Guitar/Bass into the Audio Interface

A) Using a 1/4” jack, plug into the first input, which will be in the center of the XLR input.
B) Check to see that the computer recognizes the interface by checking your input setting. It is located in the bottom left corner of the main window.
If it says No Input, click on the toggle to the right and find your interface. You can also go to Preferences, and under Audio/MIDI, you’ll find the settings for input and output. Your input should be set to your interface and your output to where you want to listen back.
Step 4: Click the Tuner Icon

A) Make sure your audio track that you want to check is selected.
B) Click the tuning fork icon in the control bar.
C) Play any note to check the tuning. If the tuning is off, the tuner will glow orange until it is corrected. The Tune Deviation display measures the tuning in cents and can tell you just how far off you are.
D) Adjust the tuning of your instrument to show 0 cents in the Tuner Deviation display. The Tuner Display and keynote will appear green when the note is in tune and the line will be directly down the center, exactly like what’s shown down below.

2) Tuning An Instrument Without an Input (Acoustic Guitars and More)
If you wanted to tune an instrument without an input like an acoustic guitar, flute, saxophone, recorder, etc, you would just repeat this process except you’d use a microphone instead.
If you were using one of the most cost-effective USB microphones, the Samson Q2U (my review), you could just plug it into the computer and then click on the tuner.
A) Plug the USB Mic Into Your Computer Like What’s Shown Below
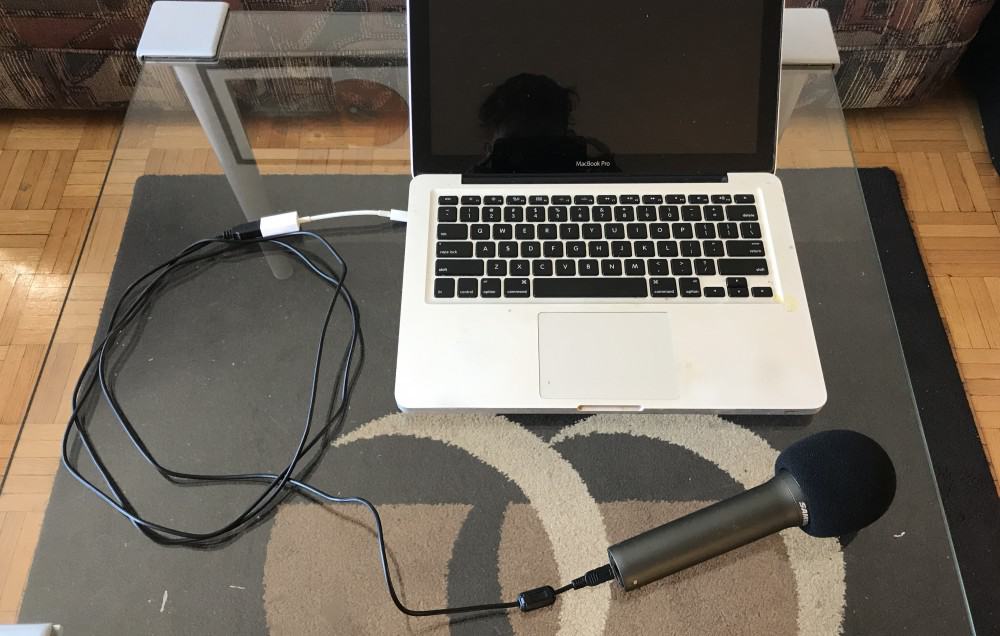
You could plug a microphone into an audio interface to do the same thing (my guide on connecting dynamic mics).
B) Set Your Preferences to Accomodate the USB Microphone

If you had connected to the system via an audio interface, you would select the audio interface’s name from the drop-down menu, rather than the Samson Q2U, ie, Scarlett 2i2.
C) Click on the Tuning Fork to Bring Up Garageband’s Tuner and Then Start Tuning
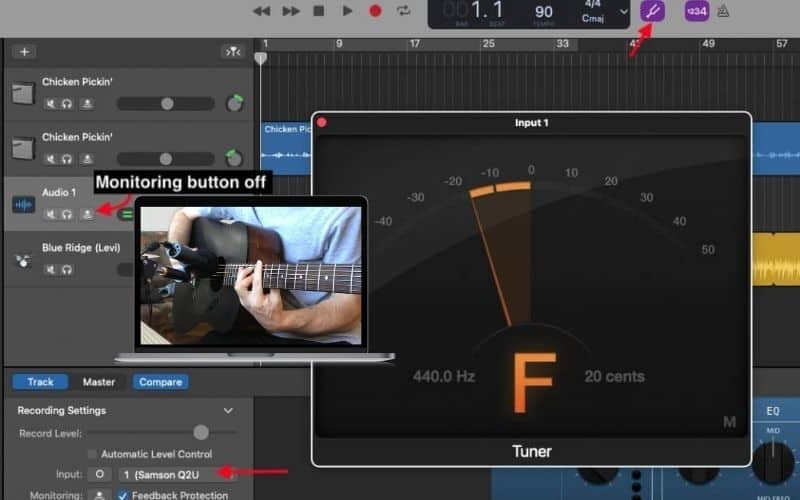
Make sure you’ve turned off the monitoring button because you don’t want the microphone to pick up on the instrument itself, AND the instrument as it’s being played through your speakers. Once the tuner’s interface has been brought up, pluck the string or play the note and then use the orange vs. green gauge to bring it into tune.
Alternatives to Garageband’s Tuner
Garageband’s tuner isn’t always accurate. The most precise tuner is your ear if you can train it, but most people still rely on a physical or plug-in tuner.
When using a computer with a DI to tune, always remember that the computer wasn’t made specifically for tuning guitars, so the software can’t possibly pick up the tuning with 100% accuracy.
Adding an external tuner or a high-performance plug-in can help correct that because they are made specifically with tuning in mind.
1) Boss (TU-3) Chromatic Pedal Tuner

The industry standard – the physical tuner that most touring musicians have is the Boss TU-3 chromatic tuner which can be found online. It is a little white box tuner with a digital screen and works with just about any instrument as long as it can plug into the tuner.
You can usually find them at most guitar retailers. Bypass the tuner by stepping on it, and you’ll be able to play out of your amp with or without the digital reference. It is also battery or phantom powered for convenience.
2) Blue Cat’s Hot Tuna

Blue Cat’s Hot Tuna as part of the Axe Pack is a great plug-in that you can add to Garageband simply and for a cheap price.
The features are about the same as every other software tuner that you can download, including the ability to mute and dim the signal, while also having the capacity to adjust the reference frequency (which is typically concert pitch).
However, what I like about it is that it doesn’t jump around in the same way that the Garageband tuner does.
More importantly, this is an accurate tuner that allows me to tune my guitar AFTER I’ve already sat down with all of my equipment plugged in.
I regularly forget to tune my guitar after I’ve set everything up, which means I then have to set the guitar back in its stand, disconnect it from the audio interface after turning the monitoring button off, and then I have to get up and actually go get my tuner.
The Blue Cat Hot Tuna allows me to avoid all that, and that’s what I like about it. So in simple terms, Hot Tuna does work great for Garageband, and like the representative pointed out to me, if you’re unsure if it’s capable of doing so, just try out the demo version first.

Alternatives to Garageband’s Tuner – Phone Applications
Phone applications have come a long way, and the guitar tuning apps available can easily help a guitarist out by not having to carry one around all of the time. Some are free, and some are paid for or come with paid apps.
Being a paid app doesn’t necessarily make them any better than the other, they just might have some extra bells and whistles that you may or may not like.
1) Fender Tune
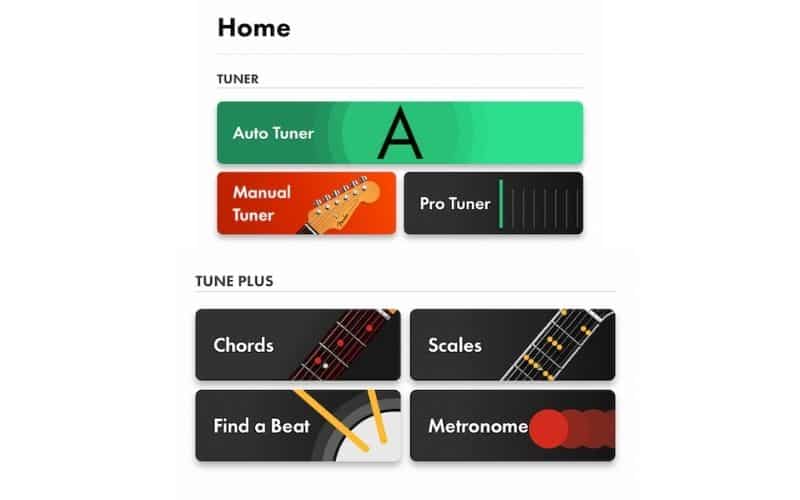
Without question, this is the best guitar tuner application that I’ve used thus far. Fender‘s tuner application not only has a standard tuner, an auto-tuner, a chromatic tuner, and a tuner that goes by hertz and cents.
But it also comes with different chord voicings, scales, beats, and a metronome. It’s pretty amazing what they give you for free. I might even pay for the premium version eventually because it’s that good.
One thing that’s worth mentioning, however, is that you have to make sure you’ve chosen the appropriate tuning reference in the settings, that being A440Hz.
Another cool thing I like about this one is that you can press on the “E-A-D-G-B-E” icons to get your guitar close to pitch, and then dial in those last few cents with the tuner, similar to how some of the old-school tuners like the Korg GA-30 worked.
2) D’Tools
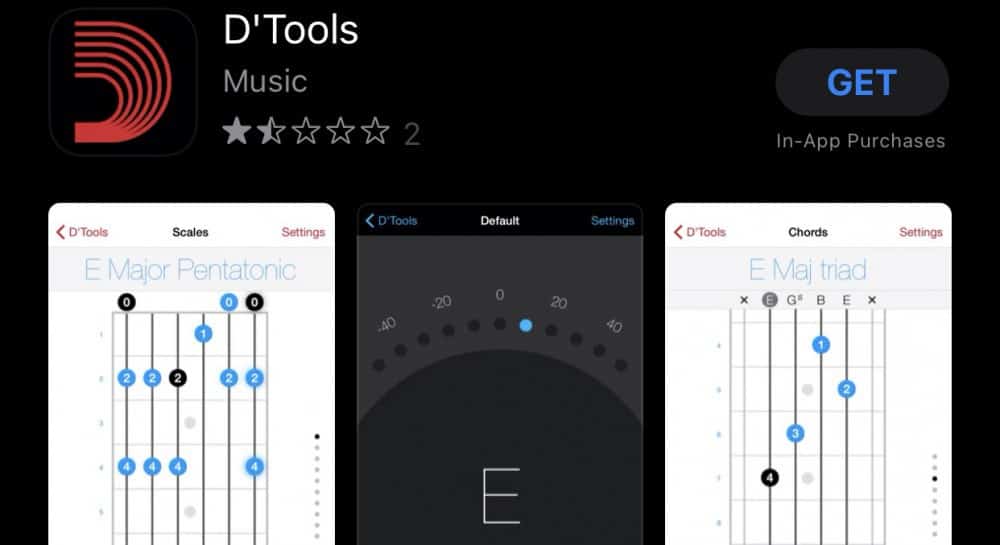
This isn’t a terrible option either. This app will work if you don’t have the time nor the patience to actually sign up with Fender – who will ask you for your name and email in exchange for access to their application.
Made by D’Addario, features that you might find helpful in the app are the chord finder, scales, and metronome. It instantly picks up on any instrument, even voice, without plugging in or needing a DI.
Like every other tuner that doesn’t feature a line input, it isn’t the most effective way of tuning an instrument but it works great if you’re at home on your own.
It just needs to pick up a clear signal from your device’s microphone, so ensure you’re not in a super loud area, have music playing in the background, or you have the TV playing music.
Similar to the Fender Tune application, both of these work better if they’re plugged in via an audio interface like the iRig HD 2.
I usually tune my ESP Eclipse to D Standard rather than E Standard (one whole step down), and both of the aforementioned tuners, including the one I’m about to mention below, accommodate that.
3) Cleartune

Cleartune is a paid-for app that has a tuner and a metronome, it’s not as versatile as the D’Addario app but is widely used. Phone tuning apps work with the speaker that is already on your phone.
However, your phone’s speaker was not created with the intention of tuning a guitar, so keep that in mind when using apps to tune before recording. Like I said above already, a tuner with a line input is always going to be better.
Important Things to Note About Guitar Tuners in Garageband
1) Garageband’s Tuner Jumps Around A Lot
One of the reasons why I suggested as many tuners as I did has to do with the propensity of Garageband’s tuner to jump around – A LOT.
For real, it jumps around constantly, almost to the point that it’s hard to use. I would suggest using a real-life tuner, a clip-on tuner that goes on the headstock, or the Blue Cat Hot Tuna. Any tuner where you plug into it is going to be superior.
2) Use the Same Tuner for Instruments in the Same Recording
If you use a tuner that is better than the other, you’ll find that one will be slightly off than the other. This may result in a song or recording that just sounds not quite right.
You’ll scratch your head wondering why something just sounds a little off. If you’ve recorded your guitar parts with one tuner, just use that same tuner for the other instruments after to avoid this issue.
YouTube Video Tutorial
Gear Mentioned
All links take you to Amazon unless noted otherwise
1) Melodyne 5 from Plugin Boutique
2) Focusrite 2i2 Scarlett Interface
3) Instrument to USB Cable
4) Boss TU-3 Chromatic Tuner
5) Blue Cat’s Hot Tuna from Plugin Boutique
6) iRig HD 2

 Written By :