 Written By :
 Parallel compression (New York compression) is when you mix a “dry” or unprocessed signal with a compressed signal of the same sound. Then you mix the two together. Put simply, it’s when you have two tracks that are the same sound, but you compress the one signal and then mix it with the other track without it. It’s simple to do.
To use parallel compression in Garageband, duplicate your track, whether it be guitar, vocals, bass, or drums, and then add heavy compression on the one but not the other. Adjust the volume so the two sounds mix well together, which usually means decreasing the volume of the compressed signal.
Essentially, there are two different ways of adding parallel compression to a sound in Garageband. You can use the method I just mentioned above, or you can use a separate plug-in like Audio Damage’s Rough Rider 3 which comes with a preset, NY Compression, installed.
How to Add Parallel Compression to Your Sound in Garageband
Whenever I mix a song for a client, I almost always use a bit of parallel compression on either the vocals or the guitar, in some cases, I’ll use parallel compression on both of them.
This has the effect of really thickening up the sound of both instruments, and also bringing it forward in the mix.
Tip:
It’s important to note that what I mean by “mix them together,” is the following: adjust the volume of the two signals, the uncompressed and the compressed, so they sound good together.
There is no extra step after you’ve compressed the one signal and not the other, other than changing the volume so they complement each other.
1) Choose What Sound Needs Parallel Compression

Because of the importance of electric guitars in the type of music that I create, I often use parallel compression on the guitars to get them to stand out more.
I’ll be using electric guitars for the example to illustrate how to set this up, but the same principle applies to virtually any other instrument.
Usually, my client will send me two different guitar tracks, one for the left-hand side of the stereo image and one for the right.
Because the electric guitars are so important in rock and punk rock music, I do whatever I can to get the guitars to stand out a little bit more and sound more aggressive and punchy, and I find parallel compression is great for this.
You may want to add parallel compression to a bass instrument, a kick drum, or even vocals, however. It’s really up to you and the style of music you’re creating.
2) Duplicate the Track
It would be better to use another audio recording of the same sound, but this isn’t always the most convenient, because then you would have to ask for another recording of a part that has already been tracked and exported.
For that reason, I simply duplicate the track that I want to add parallel compression to by using the (Command + C) and (Command + V) function.

Double click on the track you want to duplicate and add the option, “New Track With Duplicate Settings,” or use the (Command + D) function to duplicate the track with the same plug-ins.
Once I’ve created the new track region, I make sure to label it so it doesn’t get confusing. I’ll name it something like “Right Guitar (Compressed)” and the other one will be, “Right Guitar.”
3) Add the Compressor to the Duplicated Track

You can approach the compressor on the duplicated track in a couple of different ways, but I find it’s best to just use a preset of some kind.
For instance, in my case, I’ll use the “Crunch Guitar” preset for the compressor, and then I’ll turn the Ratio up just a little bit and also add some gain to it.
Once there is compression on the new track, it’ll increase the volume by a lot, so usually, it’s best to turn it down by around 5dB less than the original recording.
I find this is the best way to go about it because the compressor really beefs up the sound, and in some cases, it may be loud or overbearing.
The original recording will retain its dynamics because it’s not compressed, but the new signal will add some power and conviction which will lie underneath the more dynamic signal.
4) Turn Off or Turn Down Obtrusive Plug-Ins on the Duplicated Track
When you duplicate the track, all of the same plug-ins and effects will appear on the new track, which is what we want, however, it’s not a bad idea to turn off effects and other potentially obtrusive sounds that were already set up on the first track.
For instance, if there is already a lot of reverb on the original recording, I might turn that down a little bit on the duplicated recording that’s about to receive the compression treatment.
This is especially important for certain types of effects like reverb, flangers, phasers, and more because there will be a multiplicative effect if you have too many effects and sounds running on all of your tracks.
On the other hand, you may decide it’s better to turn down the effect by just a little bit, rather than turn it off entirely.
Additionally, you may decide to modify one of the other processors, like the EQ, to accommodate for the change in the way the compressed track sounds with the uncompressed.
For example, after compressing a signal, it’s not uncommon for there to be a bit of sibilance, in other words, harsh high-end sounds that have to be attenuated with a channel EQ or a deesser.
Also, you may find that you want to change the EQ on the duplicated track entirely. For example, you could add a bit more low-end on the duplicated track while keeping the original recording the same.
Compressed Guitar EQ

The changes are subtle, but there are there. As the image caption suggests, I dropped out the sibilance a bit on the guitars by simply attenuating the boost that already existed on the channel EQ preset, “Clean Up Guitar.”
I also added a bit more low-end by pulling the Peak back by a few Hz. The peaks are the controls by which you adjust the EQ, which I’ve explained in my guide here.
Uncompressed Guitar EQ

Compare and contrast this image to the compressed guitar signal. Adjusting the sound in this way is a great way to accommodate for the changes in sound as a consequence of the compression.
This concept can be used in a number of ways, and not just in the case of channel EQ, so keep that in mind.
5) Adjust the Panning (Optional)
Another thing you can do is actually pan the two sounds differently if you wanted. Using the electric guitars as an example, you could pan the uncompressed, or the “dry” signal,” to -30, but then pan the compressed signal or the “wet” signal to around -28.
Experiment with the panning a little bit to see how it sounds for you, but oftentimes, I’ll just leave the panning as it is.
Adding Parallel Compression – The Second Way

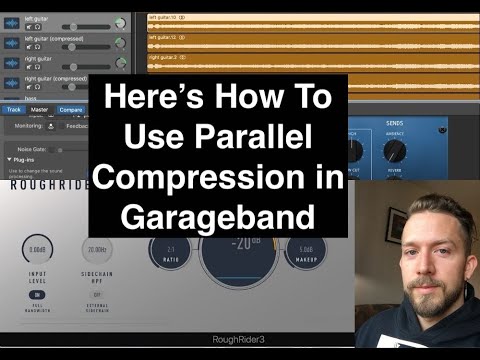
Another way to add parallel compression to your tracks in Garageband is to use Audio Damage’s plug-in, Rough Rider 3, which you can download here on Vst4Free.
This is a cool, and also very popular, compressor that a lot of YouTubers will recommend to you. It’s free, and it has a lot of useful presets that you can try to fatten up your sound and get everything to sound more in-your-face or even just more clear.
Install the plug-in by following my guide on how to install plug-ins, and then once it’s been added to your computer files, restart your computer, and bring up your GarageBand project.
1) Use the New York Parallel Preset on Rough Rider 3

After you’ve loaded the compressor on to your track, you just have to click on the presets in the top-center of the compressor’s interface, and you’ll see the option, “06-01 New York Parallel” and it will automatically load up a preset for parallel compression.

And it’s really as simple as that. Frankly, I’m not so sure that this preset works as good as the first method, but it’s an option you may choose to use if you want.
Rough Rider 3 comes with other presets and options as well, such as Side-chaining and External Side-chaining, as well as some other cool features like the “Mix” parameter.
It allows you to control how much of the wet (compressed) signal is being mixed with the dry (uncompressed) signal, which is going to be especially useful for the parallel compression preset.
I reached out to Audio Damage about the NY parallel preset and here is what they had to say:

Important Things To Note
The first method is a tactic I got from reading Bobby Owinski’s book, The Audio Engineer’s Handbook (check out my recommended gear page to read more about it).
This is a very helpful book that comes with a lot of interesting tips and guidelines, and I couldn’t recommend it enough.
YouTube Video Tutorial
Conclusion
There are two ways of adding parallel compression in Garageband, one is with the New York Parallel preset in Audio Damage’s Rough Rider 3 plug-in, and the other is to duplicate your signal and include compression on the one but not the other, and then mix them together.