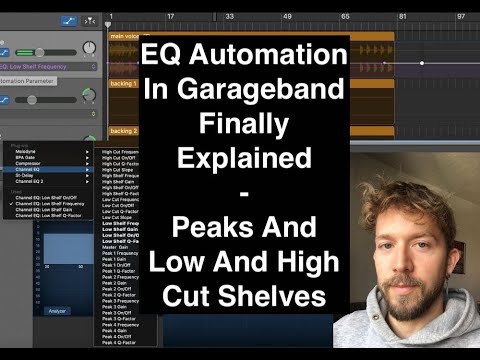
 Written By :
 To automate EQ in Garageband, open the Channel EQ plug-in in the Smart Controls.
Hit “A” to bring up the automation menu, and then select the Peak 1 Frequency, Peak 1 Gain, Peak 1 On/Off, and the Peak 1 Q-Factor.
Drop automation points on the line to change the frequency, gain, and the Q-factor.
In order to set up automation on EQ in Garageband, there are four main parameters you need to pay attention to, the Peak 1 Gain, Peak 1 On/Off, Peak 1 Frequency, and the Peak 1 Q-Factor.
If you’re anything like me, you first opened up the automation menu on the “Channel EQ” plug-in and discovered there are a lot of settings to adjust.
It wound up confusing me, but after some experimentation, I managed to figure out the fundamentals of automating EQ in Garageband.
Now that I’ve shown you the quick and simple way of automating EQ in Garageband, I’m going to explore how to set it up in detail. It’s worth mentioning that you can use these tricks and tips for external plugins like Fab Filter’s EQ, compressor, and limiter (one of the best) as well.
Using Automation on EQ in Garageband
As I mentioned above, when you first set up automation on the Channel EQ plug-in in Garageband, it’s very confusing because there are A LOT of parameters to adjust, and if you haven’t read my EQ starter guide yet, you’ll be in an even worse place.
You can see what all of these parameters look like in the image below:

There are things like the “Master Gain,” a “Low Pass Filter,” etc, but before we explore the more sophisticated settings and parameters of the plug-in in terms of automation, we’re going to talk about the fundamentals, which are the four main parameters that I mentioned above.
Essentially, if you want to learn 90% of how to work Automation on the Channel EQ in Garageband, you just have to adjust the following four settings (I have a guide for iOS as well).
Important Tip:
Down in your Smart Controls, there are two options on the Software Instrument Track, the “Controls,” and the “EQ.” Select “EQ” if you want to see the changes that you’re making to the EQ plug-in in real-time.
Furthermore, make sure you’ve selected the “Track” setting in the Smart Controls first, rather than the “Master.” We don’t want to set up automation on the Master Track EQ.

1) Peak 1 Frequency
The Peak 1 Frequency setting is how we adjust at which point the automation starts working in terms of the frequency range.
For instance, using the Peak 1 Frequency automation line will determine what frequencies are being automated.
Simply put, when you pull the Automation line up toward the top of the workspace, you’re going to increase the frequency range that the automation line is affecting.

If you drag it down, you’re going to lower the frequency range that the automation line is affecting.

The Peak 1 Frequency parameter is the first part of how you automate the EQ.
2) Peak 1 Gain
After you’ve set up what part of the frequency range you want to automate, you have to select the Peak 1 Gain option to change how large or small the boost/cut is of the Channel EQ automation.
Explained another way, the Peak 1 Gain controls by how much you’re boosting or cutting the signal in dB.
For instance, when you have the Peak 1 Gain option selected, A +0dB boost is right in the center of the Track Region in the workspace.

If you adjust the automation line so it’s all the way to the top, it’s going to max out the boost at +24dB.

On the other hand, if you pull the automation line all the way down to the bottom of the track region, it will set up a cut of -24dB.

In conjunction with the Peak 1 Frequency, the Peak 1 Gain is how you control the two primary settings of the Channel EQ plug-in while using automation.
3) Peak 1 Q-Factor
The next most important one is the Q-Factor.
The Q-factor, in case you don’t know, controls the width of the EQ.
If you want a very narrow Q, which means the boost/cut will be very skinny, you want to drag the Automation Line of the Peak 1 Q-Factor line all the way to the top of the track in the workspace.

If you want a very wide Q, you want to pull the automation line of the Peak 1 Q-Factor all the way to the bottom of the track in the workspace.

4) Peak 1 On/Off
The last parameter, the Peak 1 On/Off, essentially functions as an on-and-off switch.
This is very convenient because it allows you to set up a Channel EQ automation across the entire track, but then you can turn it on and off at certain points so you can specify at which point this effect will be felt.
Essentially, this parameter works very similarly to the others.
If you want the automation turned on, you drag the line to the top of the interface.
But if you want it turned off, you drag the automation line to the bottom of the interface.
In the image below, you can see how I’ve set it up so it’s turned on for the first part of the track, but then it’s turned off for the second part.

The Difference Between Peaks 1, 2, 3, and 4
The “peaks” respond to which band you’re adjusting.
The Channel EQ plug-in has eight different bands, or parameters, by which you can adjust the plug-in.
Each one is a different color, to make it easier to see what you’re doing, and it can be seen in the image shown below:

In the Automation Menu of the Channel EQ plug-in, as you’ve already seen, there are four different peaks, Peak 1, Peak 2, Peak 3, and Peak 4.
Peak 1 Adjusts the third from the left, which is a soft yellow color.
Peak 2 adjusts the fourth from the left, which is a green color.
Peak 3 Adjusts the fifth from the left, which is a turquoise color.
Peak 4 Adjusts the 6th from the left, which is a soft blue color.
You can see what this looks like in the image below:

The EQ Automation Presets – High Cut, High Shelf, Low Cut, Low Shelf, And Master Gain
While the 4 Peaks control the 4 main bands in the Channel EQ plug-in, the other bands on the far left and far right side are meant for the Low and High Cut/Shelves.
Explained in another way, each parameter in the automation menu corresponds to one of the 8 bands in the Channel EQ plug-in.

The other EQ Automation parameters function in pretty much the exact same way.
Put simply, they are pre-sets for various EQ tactics that audio engineers commonly use (check out Bobby Owsinski’s audio engineering guide to learn more).
The High Cut cuts out all of the higher frequencies, the High Shelf boosts them, and the Low Cut attenuates all of the lower frequencies, whereas the Shelf boosts them, and then the Master Gain increases the total volume of the Channel EQ plug-in.
In order to work these presets, you have to adjust all of them in conjunction with each other.
This part of the tutorial is going to be a bit repetitive, so stay with me. At the end of it, however, you should have a solid understanding of how these functions work.
The High Cut
The high cut is precisely what it sounds like.
It’s an automation tool that will cut out the highest frequencies according to how you’ve actually set it up with the Automation Lines.

Here are the following parameters of the high-cut:
High Cut Frequency
This determines at which point the High Cut automation begins in frequencies.
In the image you can see below, you can see that I’ve set up the High Cut Frequency so it says, “3400 Hz.”
This means that’s exactly where the High Cut will begin.

High Cut On/Off
Similar to the Peak 1, 2, 3, and 4 On/Off Switch, this setting determines whether the High Cut is turned on or off.
If you drag the automation line to the top, it’s going to turn the High Cut on, but if you’ve dragged it all the way to the bottom, it will be turned off.

High Cut Q-Factor
This parameter controls the shape of the actual High Cut.
For example, if you set it so that the Q-Factor is cranked to the maximum, it will continue cutting the frequencies as it normally would, but it’ll also boost the very start of the High Cut so it’s all the way to the top.

In other words, the High Cut Q-Factor controls how wide or narrow the High Cut is.
High Cut Slope
The High Cut Slope is somewhat similar to the Q-Factor, in the sense that it changes the shape of the High Cut.
As the title suggests, it changes the slope of the cut.
So it can either taper off more gently or be more of an abrupt filter so it practically looks like a wall.
This is what it looks like when the High Cut Slope is turned all the way up to the maximum:

And this is the way that it looks when the High Cut Slope is turned all the way down.

The High Shelf
The high shelf is an equalization (EQ) tactic where you increase the highest frequencies using a Q that resembles a shelf.
A high shelf looks like this:

It’s not uncommon for the term to be used interchangeably with boosts and cuts.
For instance, in the image above, the frequencies have been boosted, but they could all be cut as well and some people would still call it a shelf.
Personally, I prefer to call it a High Cut when the frequencies are being attenuated, because it’s literally cutting the higher frequencies.
High Shelf Frequency
The High Shelf Frequency determines at which point the High Shelf begins.
In the example shown below, I’ve set the automation line to 4150kHz, so that is precisely where it starts to work.

High Shelf On And Off
This turns the high shelf on and off according to how you’ve set up the automation points.
Set it to the top, and it’s turned on, and set it to the bottom, and it’s turned off.

High Shelf Gain
This parameter controls how strong or weak the boost or cut is in dB. For example, if you set the automation line all the way to the top, it’ll be a massive boost in dB.
The maximum is +24dB and the minimum is -24dB.

High Shelf Q-Factor
The Q-Factor, again, controls the shape of the high shelf. You can determine how the boost or cut actually looks.
You can make it a bit more narrow, wider, or mix it up with a boost and a cut.
Depending on how you set it up, I find it tends to twist and turn the EQ as if it’s a towel being drained of water.
Pull the Q-Factor all the way to the bottom, and it’ll make the shape look more like a ramp.
But if you pull it all the way to the top, it tends to change the shape so it’s steeper.

Low Cut
The Low Cut is similar to the high cut, except that it’s for the low-end frequencies rather than the high frequencies.

Low Cut Frequency
Determines the point at which the Low Cut starts working in frequencies.
Set the frequency using the automation line, and that’s where the filter will start working.
In this particular case, I’ve set it so it starts at 380Hz.

Low Cut On and Off
An on-and-off switch that has two parameters, on and off.
If you want to turn it on, you drag the line all the way to the top, and if you want it turned off, you drag it to the bottom.

Low Cut Slope
The Low Cut Slope adjusts the Slope of the EQ boost or cut.
Increasing it all the way to the maximum will make it look more like a wall, whereas decreasing it all the way to the bottom will make it appear as a ramp.
In the image below, I have it set so the slope is set to the absolute minimum.

Low Cut Q
The Low Cut Q is similar to the slope, in the sense that they both determine the shape of the actual low cut.
They work in conjunction with each other. A nice way of explaining the slope is that it adjusts how much the cut looks like a ramp.
Whereas with the Q, you can actually adjust it so that it boosts for a little while before turning into a cut.

Low Shelf
Similar to the High Shelf, a Low Shelf is a boost of the low-end frequencies

Low Shelf Frequency
This determines the point at which the Low Shelf starts to work in Hz. Using the automation line, you can set it at whatever point you want in Hz, for example, 670 Hz, which is shown in the image below:

Low Shelf On And Off
The same thing as the other On and Off switches. You can set it to turn on and off automatically depending on whether you’ve pushed the line all the way to the top or the bottom.

Low Shelf Gain
How strong or weak the boost/cut is in dB.
In this particular case, I’ve boosted it all the way to the maximum, +24dB, by dragging the automation line all the way to the top.

Low Shelf Q Ratio
Low Shelf Q adjusts the shape of the Low Shelf.
In this case, I’ve increased it all the way to the maximum, which means it’s going to contort the shape of the EQ.

Master Gain
The master gain is self-explanatory. What it does is that it increases the total gain of the EQ plug-in.

Tips And Tricks + Important Things To Note
1) Using A Different Channel EQ Plug-In
This is arguably the most important tip for making automation adjustments to the EQ.
Put simply, if you’ve chosen your EQ setting and you don’t want to mess with it at all, because it sounds great, then what you want to do is set up yet another Channel EQ plug-in that way you automate the Channel EQ in such a way where it doesn’t mess with the fundamental EQ adjustments you’ve made to the track.
In other words, the first Channel EQ plug-in is meant for the overall EQ adjustments you’ve made to the track.

For instance, maybe you’ve chosen the “Male Lead Vocal” and you don’t want to interfere with it any further.
The second Channel EQ plug-in is for the automation.

By changing the automation on the second plug-in, you won’t interfere with the primary Channel EQ settings.
2) All Four of the Parameters Work Together
In order to work the Channel EQ Automation, you have to understand that all of the parameters work in conjunction with each other.
It’s not enough to simply set up Automation on one parameter only, for instance, the Peak 1 Frequency.
If you want to adjust the Frequency, the Q, and the Gain, it has to be done with separate automation lines.
3) The Automation Menu Shows What Parameters Are Being Used
After you’ve selected the parameter you want to adjust by clicking on it, you have to click on the workspace to actually bring up the Automation line. This turns it on (I have another automation guide, by the way).
Once you’ve done that, Garageband lets you know which ones are turned on by including them in the list that says, “Used.”

4) The Order Of EQ Plug-Ins Determines Which One Shows In The Smart Controls
As I’ve explained before in my mixing tips article, the EQ analyzer down in the Smart Controls corresponds to the order of the Channel EQ plug-in in your plug-in menu.
For instance, in the image below, the EQ analyzer is showing the first Channel EQ plug-in in the signal chain.

If I want to see what I’m doing to the second Channel EQ plug-in, you can approach it one of two ways.
- You can either change the order of the plug-ins in the signal chain, which will ultimately affect the sound.
- Or you can simply click on the 2nd Channel EQ plug-in to bring it up outside of the Smart Controls.

YouTube Video Tutorial
Conclusion
That’s it for this tutorial. Do me a favor and share it with anyone who needs more tips on automation and general music production.