As an Amazon Associate, I earn from qualifying purchases. Additionally, I earn a commission through each purchase made on Amazon, Clickbank, zZounds, Plugin Boutique, Plugin Fox, Thomann, Jam Play, and Punkademic from one of my links.
The best vocal plug-ins for Garageband are the following:
- Melodyne 5 Studio
- Bob Perry Noise Gate
- MFreeFXBundle
- Acon Digital Multiply Chorus
- Klanghelm DC1A Compressor
- Voxengo Oldskoolverb
- DLYM Flanger
- Kilohearts Chorus & Delay
Here is the full list of some of the best plug-ins to use for vocals. The only one that costs money is Melodyne, but there is a free 30-day trial.
Check out my recommended gear page to get your hand on other music production equipment like audio interfaces, headphones, and microphones (there’s also a list of current deals, coupon codes, and sales). Here’s a video that shows you how to actually install plugins in the first place:
Right away, we’re going to start with easily the best audio-editing software on the market.
1) Melodyne (30-Day Trial is Free)
Grab Melodyne 5 Editor from Plugin Boutique here.
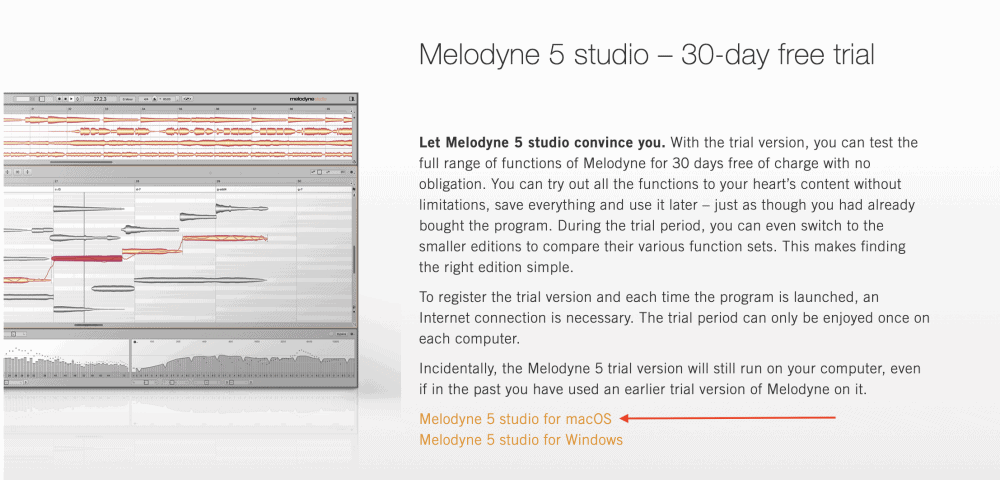
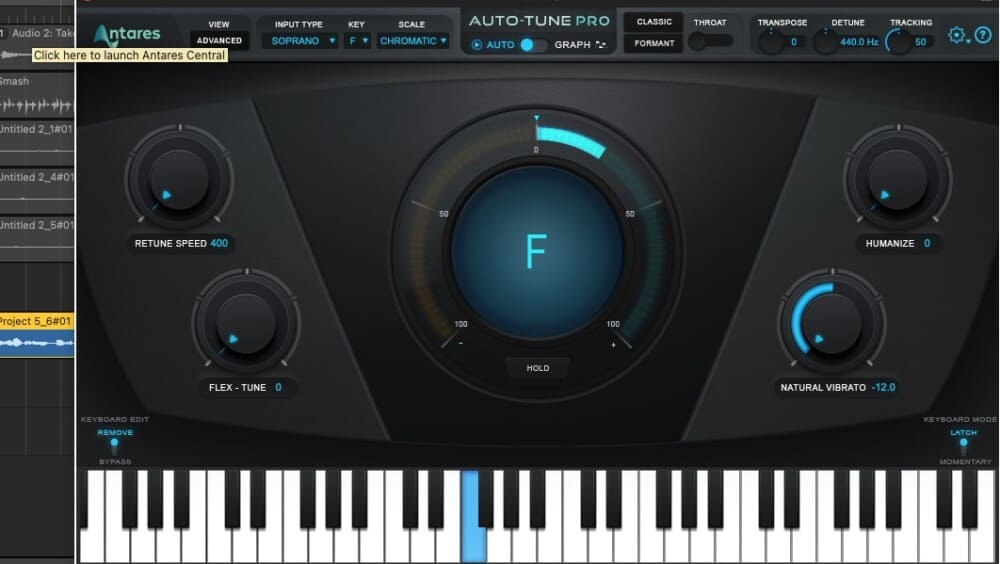
If you’ve read any of my other articles, you’ll know that I’m a huge fan of Melodyne. The software is packed with capabilities, many of which I’m still learning as well, although, these days I would recommend Antares Auto-Tune Pro (also from Plugin Boutique) if you were to ask me which one is better strictly for tuning vocals.
I recently learned it’s entirely possible to export the audio as MIDI using Melodyne 5, which can then be turned into a transcription in Garageband using the Score Editor feature (my guide on this).
This can be especially useful for vocals, because if you’ve created a melody with your voice or with an instrument of some kind, you can then transform the recording into a MIDI file, put it into the score editor, and now you have sheet music to give to whoever needs it.
This is just one feature of Melodyne that make it incredibly useful software. However, it comes with a whole host of other features that make it a great software for vocals. For example, Melodyne 5 allows you to spot-correct vocal errors and other issues.
Furthermore, you can actually adjust the degree of vibrato within a singer’s voice, as well as the pitch drift, for example, if the singer has slightly gone off pitch for just a moment.
If you know anything about Garageband’s default pitch-correction function, you’ll know it doesn’t allow you to correct very specific sections of the vocal track – I’ve explained this before.
You can cut the offending part, put it into a new section, and then auto-tune it specifically that way, however, Melodyne has a much better workflow and allows for more specificity.
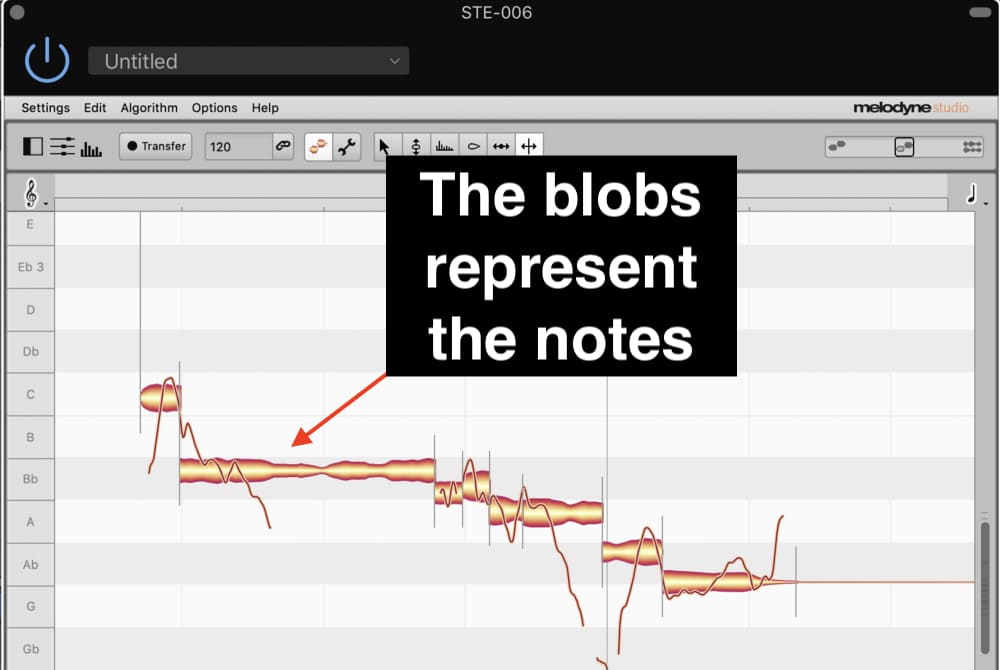
Once the recording has been printed into Melodyne’s interface using the transfer button, it’ll show up in a “blob” format. You just have to manually select the offending note and drag it up or down depending on what direction it needs to go.
What makes Melodyne 5 truly special is its ability to change the pitch of vocals and other offending sounds without messing with the natural human quality of the recording.
Put simply, when you change the pitch of an offending sound, it doesn’t sound bad. It sounds good.
Melodyne 5 is easily the best plug-in that you can get for vocals in Garageband. It has a multitude of uses and functions which eliminate the need for other plug-ins and software.
If you’re anything like me, you’d rather have one fantastic plug-in rather than hundreds of others that serve the same purpose but in an inferior way.
I don’t want to turn this article into a Melodyne 5 advertisement, so if you want to learn more, please check out my article on the subject. I explain more in there.
The Most Important Control:
Blobs: After printing in the music with the Transfer button, you can adjust the pitch of the notes by dragging the blobs up and down.
2) Bob Perry Noise Gate (Free)
Go to Vst4Free to get the BP Noise Gate.
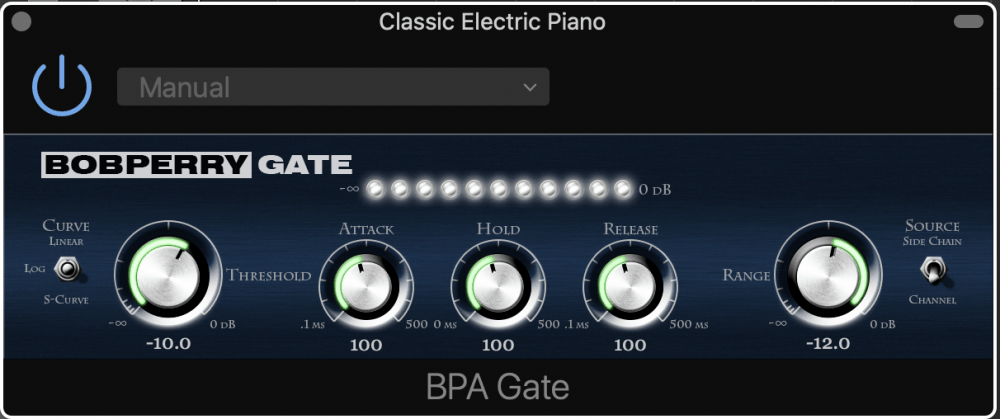
While Logic Pro X has a more sophisticated version of the same noise-gate plug-in, which includes a hold, release, and threshold parameter, Garageband doesn’t, and this is where the Bob Perry Noise Gate comes in handy.
The Bob Perry Noise Gate, like Melodyne 5, is essentially a far superior version of what Garageband has to offer.
The regular noise gate that comes with Garageband is quite limited.
There is essentially one parameter of the default plug-in, and it’s just the Noise Gate Control, which adjusts the level of gating in dB.
It doesn’t have a release, attack, hold, or side-chaining option, whereas the Bob Perry Noise Gate does.
Essentially, the point of a noise gate is to eliminate the sounds below the set threshold. For instance, if the noise gate is set at -50dB, that means that anything below that threshold will be muted.
I find that having a solid noise-gate plug-in is very useful for vocal tracks because there is often vocal bleed when the sound from the singer’s headphones can be heard in the actual voice recording.
You can also use Melodyne to eliminate these sounds, or just cut it out altogether using the Command + V function, but a noise gate is a great way to eliminate all of the offending sounds automatically, or at least nearly all of them.
The Most Important Controls
Threshold:
The threshold is the point at which the Noise Gate starts functioning. How you set it depends on the volume of the audio signal.
However, I find that setting the threshold between -40 and -50dB is normally a good place to start. This applies to vocals and other sounds as well.
Attack:
The attack is the amount of time for the noise gate to latch on to the signal and lower the volume.
Release:
The release, on the other hand, is the amount of time it takes for the Noise Gate to let go of the signal.
Hold:
The hold is for how long it holds on to the signal.
Sidechain (Available with BP Noise Gate Pro)
The side-chain feature is a way of feeding another signal into the plug-in so as to influence the main signal rhythmically.
For example, you could have a side-chain noise-gate on a vocal track and then feed that into another instrument so the vocals pump along with it.
Noise gates are essential for pretty much all kinds of recordings, but especially vocals, so make sure to download the Bob Perry Noise Gate.
As the title suggests, however, the Side Chaining feature is only available with the Bob Perry Noise Gate Pro.
3) MFreeFX Bundle (Free or Paid)
Grab it from their website here.
The MFreeFX Bundle is a commonly suggested batch of plug-ins, 37 in total, including things like an auto-panner, a filter plug-in, a spectral analyzer, a saturation plug-in, and an automatic pitch correction plug-in (MCompleteBundle on Plugin Boutique is the paid version that includes everything you could ever need).
Admittedly, some of these plug-ins are going to be more useful for vocals than others. The ones I’ve highlighted in bold and underline are, in my opinion, the best for vocals.
And I’ve explored the bolded plug-ins in more detail, that way you have a better understanding of what they do and how to work them.
Others, I’ve struck out because I can’t get them to work with Garageband.
Here is the full list:
| MAGC | A tool that allows you to match the volume of an input, output, and side-chain signal. |
| MAnalyzer | A spectrum analyzer tool that allows you to determine the loudness of a waveform in dB. It also contains other features like normalization, smoothing, prefiltering, and de-harmonization |
| MAutopan | An auto-panning tool. For example, you can use this to pan a track from left to right automatically. It will shift slowly from left to right depending on how you set it up. VERY useful for vocals. |
| MAutoPitch | A pitch correction tool and auto-tuning plug-in. You can use this to get the Travis Scott/T-Pain style. |
| MBandPass | Has a low-pass and high-pass filter as well as a modulator, so you can create a phaser-like effect. |
| MBitFun | A distortion plug-in that adjusts the sound on a bit-by-bit basis. This is especially useful for bass. |
| MCCGenerator | This plug-in allows you to load in other plug-ins and effects into one interface. For example, you can control a bunch of sounds and effects from one interface. |
| MChannelMatrix | This plug-in allows you to take the signal and feed it into either the left or right channel at a higher intensity. For instance, slightly more powerful on the left than the right or vice versa. |
| MComb | A wild effects modulator with more customization capabilities. |
| MCompressor | A compressor plug-in that comes with side-chain capabilities among other functions. A lot of people really like this compressor. Also has an analyzer on the bottom that’s really handy. |
| MConvolutionEZ | A convolution reverb plug-in. Has many impulse response loaders – a fancy way of saying that it imitates different rooms, ie, halls, theaters, etc. |
| MEqualizer | A 6-band equalizer with analog saturation. It has a spectrum and sonogram analyzer with a dope analog sound. |
| MFlanger | A flanger plug-in with a lot more capabilities than the stock Garageband plug-in. |
| MFreeformPhase | A phaser that attacks specific frequencies and not others. For instance, you can set up the phaser on just the low frequencies or the high, or even both if you wanted. |
| MFreqShifter | A frequency shifter that’s pretty nifty. Great for creating experimental-style vocals. |
| MLoudnessAnalyzer | A loudness analyzer. |
| MMetronome | This is a special metronome that will automatically analyze the speed of a track in BPM. It also comes with other useful features like the ability to change the volume, the style of “click,” etc. |
| MNoiseGenerator | A noise generator that allows you to create white-noises and other sounds. This can be used for creating static and other effects on your vocals. |
| MNotepad | A text editor. Admittedly, this isn’t much different from the text editor that comes with Garageband. |
| MOscillator | A customizable oscillator plug-in. You can create your synth sounds with it. |
| MOscilloscope | This plug-in allows you to analyze your synths and other waveforms. |
| MPhaser | A phaser plugin with more customization. |
| MRecorder | This is a plugin where you can record something and turn it into a WAV file right away. It’s basically just a faster way of exporting your recordings without using the “Export” or “Share” function. |
| MRingModulator | A plug-in with two oscillators to create all kinds of weird sounds and effects. |
| MSaturator | This is a tube saturation plug-in that you can use to warm up your vocals and give them an analog sound. |
| MSpectralPan | A spectral panner, where you can create a panorama effect on specific frequencies. Essentially, it’s like a panning tool but it pans only certain frequencies. |
| MStereoExpander | You can add more depth to certain frequencies. |
| MStereoScope | This is another analyzer plug-in where you can investigate certain parts of the wave-form, including the ability to solo each part of the signal. |
| MTremolo | A tremolo plug-in with more customization than what Garageband has to offer. |
| MTuner | A tuner plug-in for guitars and other instruments. |
| MUtility | An all-around utility plug-in that allows you to control things like phase inversion, panorama, volume, delay, etc. |
| MVibrato | You can modulate the signal’s pitch as much as you want. Very useful for changing the pitch-drift of your vocals, but not as good as what Melodyne can do. |
| MWaveFolder | A distortion plug-in. |
| MWaveShaper | A wave-shaper, or a plug-in that allows you to change the sound of a synth or other instrument. |
In the following list, I explore the bolded plug-ins.
***Every single one of these plug-ins has pre-sets, so make sure to try them out to see what the software is capable of.
A) MAutopan
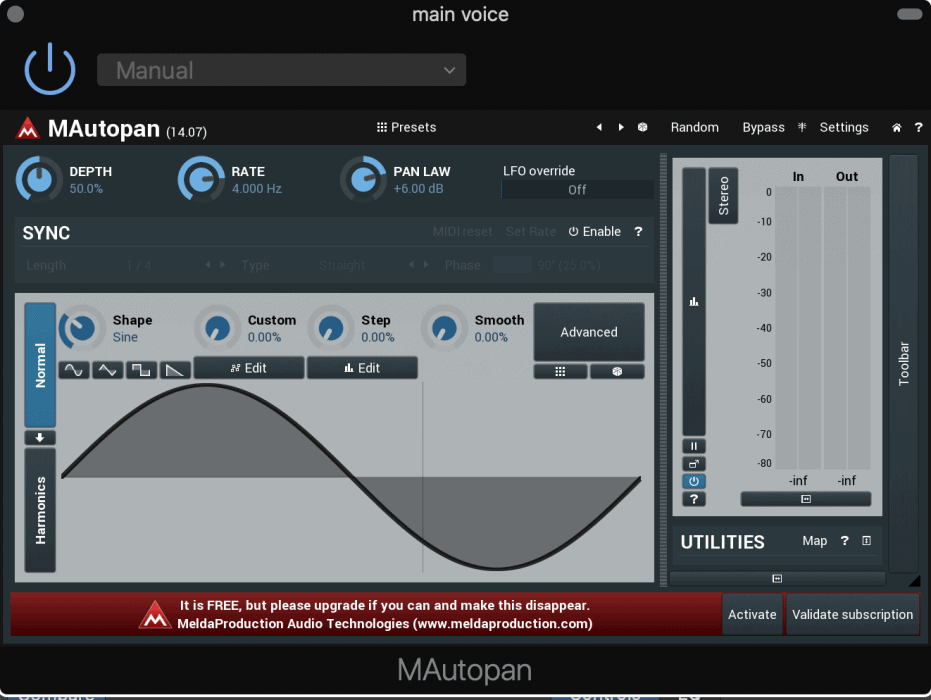
The MAutopan is really quite self-explanatory.
It’s an automatic panning tool, however, what makes it special is that you can adjust the speed at which the signal pans, the strength of the panning, as well as the shape of the sine wave.
The Most Important Controls
Depth: The depth adjusts how wide the panning is. For example, if the depth is set at 100%, that means it will pan all the way to the left and the right. If it’s set at 10%, it won’t pan all the way to the left and right.
Rate: The rate adjusts the speed at which it pans from left and right. Why it’s measured in Hz, I don’t know, but this is what it does.
A rate of 20.00Hz will make the panning so fast that it creates a fluttering effect. A panning rate of 0.4472Hz, the half-way mark, will create a medium-speed panning effect.
Pan Law: A makeup gain switch that adjusts for the loss in gain occurring as a result of the panning.
B) MAutoPitch
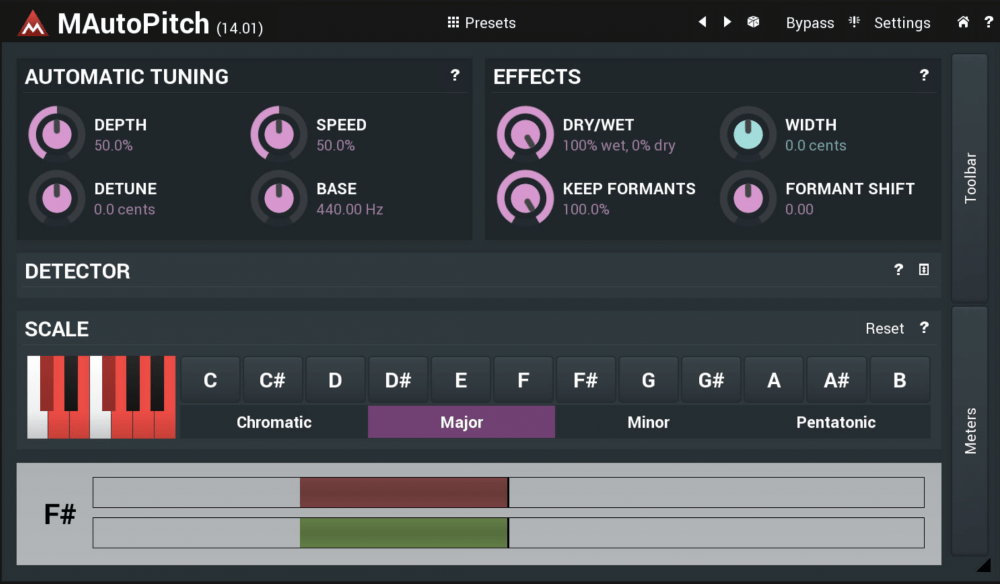
This is an autotune/pitch-correction plug-in that’s useful for creating the T-Pain/Travis Scott style-vocals.
Melodyne is better for making a vocal performance sound perfect, but I would argue that the MAutoPitch is better as an effect, rather than an audio-editing tool.
This might be one of the most useful plug-ins that come with the bundle, at least in terms of vocal recordings.

The Most Important Controls
Depth: The depth determines how much of the signal is being processed by the autotune plug-in. For example, a depth of 100% means all of the signal is being processed, and a rate of 0% means none of it is processed.
If you want the T-Pain/Travis Scott vibe, I recommend a depth of around 60%-70%.
Speed: The speed adjusts how fast the processor latches on to the audio signal. Set the Depth to 100% and the Speed at 5%. You’ll notice that it creates a light autotune effect.
Scale Detector: This meter shows you how close you are to being on tune. It’s important to know what key you’re in if you want to effectively create an autotune effect.
Click on the note as well as the tonality, ie, major, minor, chromatic, to set the scale by which it adjusts the signal.
C) MChannelMatrix

This plug-in allows you to input parts of the audio signal into either the left and right side of the stereo image.
Put simply, you can adjust the signal so it sounds much stronger on the left or right-side.
The Most Important Controls
Input: You just have to click on the 4 squares beside the numbers 1 and 2 to determine from which direction the audio signal is coming from.
Sidechain: The same thing can be said for the side-chain.
Try mixing both of them together for more results.
D) MComb

This is a modulator or comb filter that determines which parts of the audio signal’s frequencies hit the listener’s ears first due to a delay.
For example, you can set it up so that the low frequencies of the audio take longer to hit your ears.
The Most Important Controls
Dry/Wet: Determines how much of the signal is being processed. A value of 100% means all of the signal is being processed, whereas a value of 0% means none of it is processed.
Output: Determines the total volume of the final processed signal.
Gain: Adjusts the strength of the effect.
Frequency: Adjusts which frequencies are being effected the most.
E) MCompressor

The MCompressor is a standard compressor but with a few more controls, including the Knee Size, RMS, and Release, in addition to an analyzer so you can see how the audio signal is being compressed.
The Most Important Controls
Input: Defines the strength of the processing on the signal.
Output: Determines the total volume of the completed, processed, signal.
Threshold: Defines the point at which the compressor starts working in dB.
Ratio: How much of the signal is being processed above the set threshold.
Attack: How fast the compressor latches on to the signal.
Release: How quickly the compressor lets go of the processed signal after latching on to it.
F) MConvolutionEZ

A reverb plug-in and an impulse response loader. An impulse response loader is just a fancy way of saying that the reverb can imitate different settings and rooms.
For example, you can make it sound like the singer is in a church or in prison.
The Most Important Controls
Dry/Wet: Determines how much of the signal is being processed. A value of 100% means all of it is being processed, whereas a signal of 0% means none of it is effected.
Widening: Adjusts how wide the effect is. For instance, you can make it so that it’s completely spread apart from left to right in the stereo image. You can make it sound like it’s in mono, or in other words, right in the middle.
High-Pass: Defines the cut-off point in relation to the high frequencies. In other words, the frequency at which the reverb effect stops working.
Low-Pass: Defines the cut-off point in relation to the low frequencies.
Both the low and high-pass filters can be used to remove part of the reverb spectrum. Explained in another way, using these two parameters, you can apply reverb to just the low frequencies or just the high frequencies.
G) MEqualizer
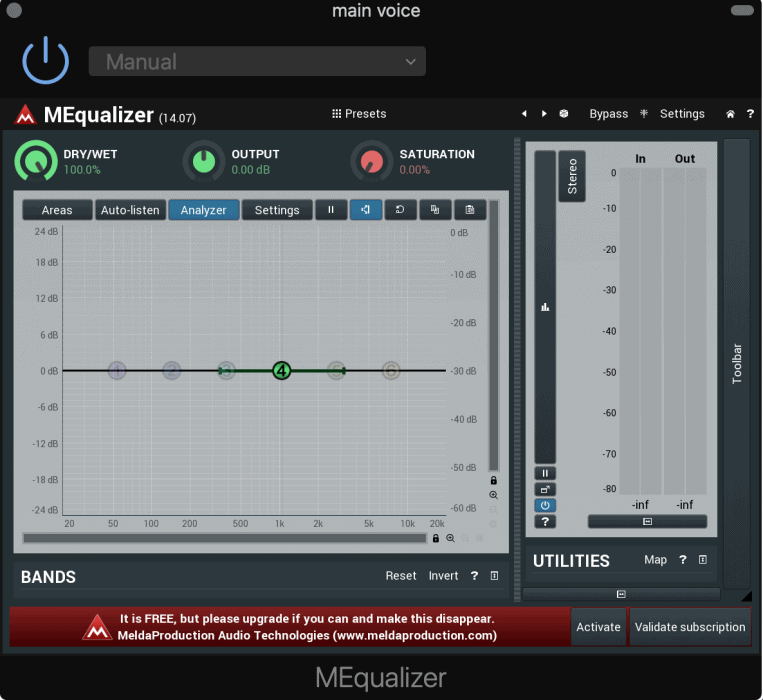
A standard equalizer plug-in with 6-bands. In other words, you can make adjustments to the frequencies at six different levels simultaneously.
What makes this equalizer superior to others is that it comes with a great analyzer including useful reference charts, more useful presets, as well as a saturation effect, however, it pales in comparison to Fab Filter’s Pro-Q EQ from Plugin Boutique which is one of the most acclaimed EQs ever.
The Most Important Controls
***Double click on the numbered bands in order to activate them.
Dry/Wet: How much of the signal is being processed.
Output: Total volume of the finished processed signal.
Saturation: An awesome saturation tool that makes the vocals sound thicker and juicier.
Areas: Switches between different reference charts, for instance, octaves, drums, frequency ranges, etc.
H) MFreqShifter

The title of this plug-in explains its effect. It shifts the frequencies by a designated amount, determined by the settings of the plugin.
The MFrequencyShifter changes the frequency relationship between the dry and unprocessed signals.
The Most Important Controls
Dry/Wet: How much of the signal is being processed, or how strong the effect is. It adjusts the ratio between the dry and unprocessed signals.
Shift: Determines how much of the signal is being shifted and by what amount, in dB.
Width: Controls the frequency shift between the left and right channels. For instance, a value of 0% will make it so the unprocessed signal is on one side and then the dry signal is on the other.
A value of 100% will spread it evenly on each side.
Shape: Controls the shape of the processed audio signal. In layman’s terms, it determines how messy the effect is.
For instance, if you crank it all the way to the right, it will say “mess,” because it literally makes a mess of the audio signal.
I) MSaturator

This is a saturation plug-in that is admittedly a little difficult to use. Saturation means we’re emphasizing the frequencies that already exist.
I like to compare it to the saturation effect on a TV. If you crank the saturation in the settings of your TV, it will make some of the pre-existing colors more vivid and pronounced.
That’s kind of like what a saturation plug-in does, except it affects audio rather than light.
For this plug-in, I recommend exploring the pre-sets.
The Most Important Controls
Input: How much of the signal is being fed into the plug-in.
Output: The total volume of the processed signal.
Dry/Wet: How much of the signal is being processed. A value of 100% means there is a 1:1 ratio of dry versus wet signal.
Changing the shape of the saturation is done in the harmonics and compounder section.
J) MSpectralPan
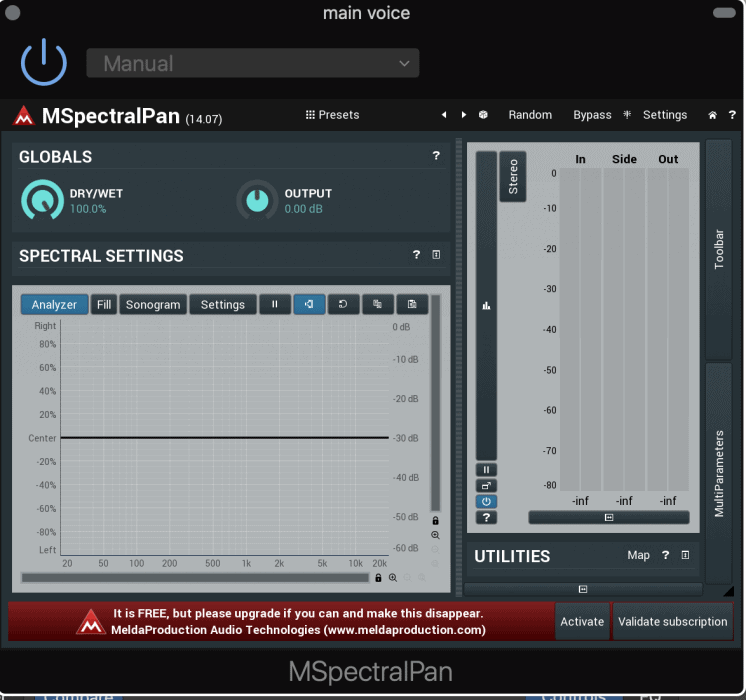
The MSpectralPan is a panning tool, and how it’s different from the auto-pan, is that it allows you to add panning to certain frequencies over others.
To work this plug-in, you have to draw in the frequency panning with the pencil tool in the analyzer chart.
The Most Important Controls
Dry/Wet: The ratio between the unprocessed and processed signals. In other words, how loud the processed signal is compared to the unprocessed.
Output: The volume of the total processed signal.
Analyzer Pencil: Hover your cursor over the analyzer graph, and then draw in what frequencies you want to pan.
4) Acon Digital Multiply Chorus (Free)
Grab it from their website here.
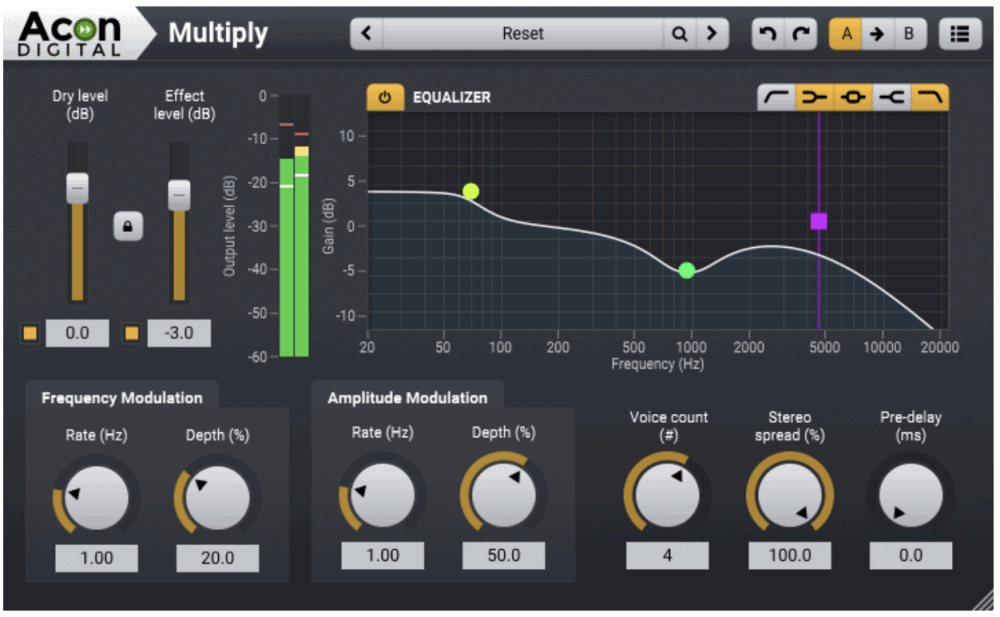
Chorus, essentially, is a whole bunch of really fast delays added to a sound. This has the effect of thickening up the sound of your vocals without making it sound cheesy or weird.
Vocals tend to need a bit of style or color to make them sound much better, and while the default chorus plug-in that comes with Garageband works alright, it’s not as good as this third-party plug-in.
Obviously, a chorus can be used for a number of other instruments as well, including the bass guitar, which is a common instrument that uses a chorus sound.
The idea behind using this plug-in is, as I said before, to liven up the sound, thicken it up a little bit, and make it sound a little bit better in the context of the rest of the mix.
On its own, you may find it doesn’t sound as good, however, in the context of the other sounds and instruments, it’ll be the right way to add more flavor to the vocal track.
The Most Important Controls
Dry Level: The volume of the unprocessed signal
Effect Level: How loud the processed signal is.
Rate: How fast the tone fluctuations are, measured in Hz.
Depth: Determines the loudness of the frequency fluctuations.
Definitely check out this software if you want to spice your singing up a bit.
5) Klanghelm DC1A Compressor (Free)
You can find it here on Klanghelm’s website.

This is a simple and easy-to-use compressor that sounds a little bit better than what Garageband has to offer although it’s not quite as premium as Fab Filter’s Pro-C 2 Compressor from Plugin Boutique.
It only has two parameters, Input, and Output, and it’s a great feature to have if you just want to quickly add a compressor in a way that’s not overly complicated.
What’s cool about this plug-in is that it’s practically automatic. You can add a smooth, genuine, practically invisible amount of smooth leveling to your tracks.
Moreover, it can also be used to get a heavy pump on the sound. It also comes with a bit of a saturated vibe, imitating a real-life analog compressor.
It’s not hard to understand why this is great for singing. If you want your vocals to stand more “up-front” in the mix, but also have a warm quality, then this plug-in is for you.
The DC1A has the capability to use negative compression, parallel compression, a dual mono-switch to compress left and right channels on their own, peak and RMS compression, as well as high pass filter to reduce the pumping sound on bass-heavy tracks.
The Most Important Controls
Input: How much of the signal is being compressed.
Output: The total volume of the processed signal.
Press the four buttons on the bottom, Deep, Relaxed, Mono, and Negative, for more effects.
6) Voxengo Oldskoolverb (Free)
It’s on Voxengo’s website here.

We can’t even talk about vocals without at least mentioning reverb, because let’s be real, it’s often the first effect we reach for when we want to mix our vocals to sound great.
Often times, reverb is what’s needed to make the vocals sound less dry and boring.
Admittedly, Garageband’s reverb is actually pretty good, including the vast array of pre-sets that it comes with as well as the multiple types of reverb plug-ins right inside the DAW.
It also comes with the ambience function which is quite useful like I’ve said before.
However, the Oldskoolverb has even more settings in case you don’t find what you need among Garageband’s presets.
Moreover, the Oldskoolverb has a different quality to it. These days, nearly every company comes out with a reverb plug-in due to the effect’s popularity.
There’s certainly no shortage of them, but some of them are better than others. Either way, this is just another one that I think is worth trying out.
The Most Important Controls
For this one, I simply scroll through the presets.
7) DLYM Chorus/Flanger from Imaginado
You can grab it off their website here.

This is a flanger/chorus plug-in that’s a lot better than what Garageband has to offer.
This is more of an effects plug-in frankly, so it’s best for adding more effects to make the vocals more interesting and cool.
It isn’t really a “mixing” plug-in, so to speak, it’s more for adding a cool effect.
The Most Important Controls
Time: The timing length of the delay
Feedback: The amount of delay feedback.
Rate: The rate of modulation.
8) Kilohearts Delay (Free)
Grab it from their website here.

This plug-in is useful for the delay by itself. What’s so useful about it is the simplicity of the plug-in similar to their other units that come as part of their more premium package on Plugin Fox.
Essentially, there are six controls, the timing, ducking, ping-pong, feedback, pan, and mixing.
And what’s so useful about it is the amount of feedback that you adjust, the timing, as well as the amount of signal that passes through the plug-in.
What this means is that you can control how much the delay lasts, so you can control by how much the sound appears to be crashing off against the walls over and over again.
Moreover, you can control the degree at which the plug-in actually influences the sound with the “Mix” option.
For example, if you find it’s too overbearing, you can just turn down the mix, and then it won’t sound so influential on the track.
The delay that comes with Garageband allows for this as well, but I find this plug-in is easier to use and the controls seem to do what it’s supposed to a lot more.
The Delay plug-in that Garageband comes with tends to be somewhat confusing, whereas this one is much easier to use.
This plug-in is great for using the Haas effect, which is when you have the vocal track panned in one direction, and then you add a delay between 1-35 ms on the other track which is panned the opposite way.
This has the effect of creating more of a wide and spacious sound. To do the Haas trick, I’ve already written an article about it which you can read more in my article on 8 tips for Garageband Users That You’ve Never Heard Before.
The Most Important Controls
Numbers: Adjusts the speed of the delay.
Feedback: This determines how much the delay decays
Mix: The Dry/Wet ratio. In other words, how loud the processed and unprocessed signals are.
Ping-Pong: Oscillates the delay between the left and right channel. If used in combination with panning, it will shift the delay between the right and left speakers.
Important Things To Note About Vocal Recordings and Plug-Ins
1) The Vocal Performance Has To Be Good
I think it’s essential to discuss the importance of recording vocals properly and also knowing how to sing which is one reason why I recommend people get Singorama from their site if they want to improve their skills on the mic.
While there are definitely plug-ins that will make your vocal recordings sound a lot better, the truth is that recording them properly to start is easily the most important part, in addition to actually executing a good vocal performance.
2) A Good Microphone Is More Important Than Plugins
You have to have the appropriate microphone including an understanding of how to work a mic in the first place. If you’re looking for a beginner mic, I suggest reading this article here. You don’t have to spend thousands on an expensive microphone to get a good sound, in fact, the room might even be more important.
3) The Room You Record In Is Also Important
It’s better to have a properly treated room. Most of us won’t be recording vocals in a treated room, however, there are some things we can do to help including using a good microphone like this Audio Technica Condenser AT4040 bundle from Amazon which comes with a stand and isolation wedges.
One example is that it’s important to not sit with your back against the wall because this position leads to an echo, effectively making your recordings cheap and “tinny.” You can download 1,000,000 plug-ins but nothing will ever fix a poor recording done with a poor-quality microphone and bad room treatment. At the ending of the day, it comes down to these things rather than plug-ins.
YouTube Video Tutorial
Conclusion
That’s all for vocal plug-ins. There are a ton of other options available, especially once you start paying for them.


 Written By :