 Written By :

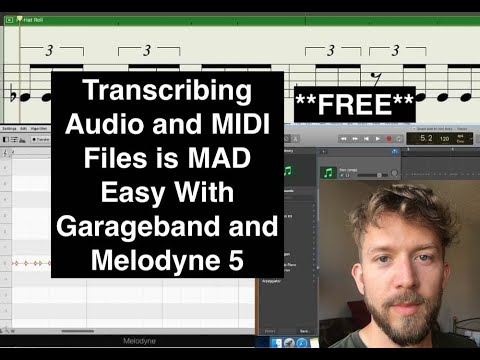
To transcribe music in Garageband, use the Score Editor down in the Smart Controls. This automatically converts the piano roll MIDI notes into standard notation.
Additionally, Celemony’s Melodyne 5 allows you to transform audio recordings into MIDI for transcription as well.

One of the great functions of a DAW is the interchangeability between audio recordings and MIDI notes.
In Garageband’s case, there are three different types of notes, MIDI notes, regular audio recordings, and then the drummer track.
Each type of note comes with certain advantages and disadvantages, and one of the advantages of MIDI notes is the ability to transfer the piano roll in the Smart Controls into a Score Editor.
Essentially, what this does is that it turns the MIDI notes into standard notation using the treble and bass clef.
Transcribing Music in Garageband – (A Step-By-Step Guide)
As I said above, it’s really quite simple.
Note: you can only transcribe MIDI notes in Garageband, and not drummer tracks or audio recordings.
If you want the ability to transcribe audio recordings, you would be much better off to get your hands on Celemony’s Melodyne 5 – Editor, from Plugin Boutique.
Celemony’s Melodyne 5 comes with a plethora of functions and capabilities that are definitely worth reading about elsewhere on my site.
1) Click on the Software Instrument Track That You Want To Convert to Standard Notation
Double-click on the track region, the green MIDI region, in order to bring up the piano roll and smart controls at the bottom of the interface.

2) Open up the Smart Controls
You can simply hit (P) on your keyboard, and that will bring up the Piano Roll (more piano roll tricks in my guide).
3) You’ll See Two Options: Piano Roll and Score Editor
4) Choose Score Editor

And that’s pretty much it.
It really doesn’t get easier than that.
Now, in the case that you actually want to get your hands on the physical sheet music to give to your bandmate or your friend, know that it’s just as easy. Get PianoForAll from their website if you’re unfamiliar with standard notation or you don’t know how to use the piano-roll/MIDI keyboard for music production.
How To Print Transcribed Music In Standard Notation in Garageband
If you want to get your hands on the actual sheet music in physical form, thankfully, the (Command + P) function does just that.
Now that you’ve converted the MIDI notes into Standard Notation, the process for printing the music is even easier.
1) Bring up the Score Editor using the same method that I showed you above.

2) Click on the region that you want to print.
3) Now, hit the (Command + P) Function.

From here, you can choose how you want to print the file.
What I would do, however, is actually do a preview first, that way you can see what the sheet music is actually going to look like.
4) Click on the drop-down menu that says “PDF” on the bottom-left-hand side.
You’ll notice that you get a few options, including “Open In Preview,” “Save as PDF,” “Open In PostScript,” etc.
Obviously, choose the option, “Open in Preview,” to see what this is going to look like when you’ve printed it.

And that’s pretty much it for printing the transcribed music in Garageband.

Frankly, I find Garageband’s ability to make a piece of legitimate sheet music very impressive.
As you can see in the image above, it pumps out clean, error-free, sheet music incredibly fast. And it’s ready to be sent to whoever needs it.
How To Transcribe Audio Recordings Using Celemony’s Melodyne 5
As I’ve said already, you can’t actually transcribe audio recordings with Garageband’s default plug-ins and processors, however, if you have Melodyne, you can.
It’s really quite amazing.
However, let’s say that you just want to transcribe a song or two and you don’t have the need to have the entire Melodyne 5 – Studio package. If that’s the case, don’t worry, because you can just download the Trial version and go from there.
For the sake of this tutorial, I’m going to go ahead and assume that you just want the trial version of Melodyne 5.
Essentially, what we’re going to do with Melodyne 5 is we’re going to transfer our audio recording over to Melodyne, and then save it as a MIDI file and export it to our desktop (you can also export MIDI using aif2midi like I showed in my other guide).
After that, you just have to re-insert the audio recording into Garageband as a MIDI File, and Garageband will immediately recognize it for what it is, and then you can use the “Score Editor” to see what the notes look like as Standard Notation.
Without further ado, let’s dive into how we can convert an audio recording into a MIDI file, which can then be transcribed in sheet music format.
1) Download the Trial Version of Melodyne 5
To do this, just go to their website and download it through the link I’ve given you here.
Once you’re on the page, choose the option, “Melodyne 5 studio for macOS”

Download the file, and then run through the normal procedure for downloading software on your computer including running through the license agreement and so on and so forth.
Once you’ve downloaded Melodyne 5, you’re almost done.
2) Restart Garageband
It’s not a bad idea to re-start Garageband, that way the software will scan the new AU Plug-ins and it’ll actually show up in your Smart Controls.
Usually, you won’t have to restart the computer to get this to work, but in some cases, I find that it’s necessary to get Garageband to scan the new plug-ins.
3) Go down into the Plug-Ins And Choose “Celemony.”

For this part, it’s important to choose one of the secondary plug-in slots, rather than the main plug-in slot.
This looks like what you can see in the image below:

Of course, you want to set up the Melodyne 5 plug-in on the track region that has the instrument or recording that you want to turn into standard notation.
4) Open The Plug-In
From here, you have to click “Activate,” and then it’ll take you to Celemony’s website again where you have to agree to the terms of using it and so on.
Once Melodyne 5 is ready to use, the process by which you convert the files into MIDI is incredibly easy.
5) Transfer the Recording Into Melodyne 5
Transferring the audio into Melodyne is easy.
Hit the “Transfer” button on the top-left-hand side of the Melodyne 5 Plug-in. This means the software is now ready to take recordings for correction and adjustment.
6) Hit Play On The Project File in Garageband
One the transfer button has been turned on, hit Play on the project file.
Because the Melodyne plug-in is set up only on one track, it will automatically begin printing only that recording into the software. You don’t have to worry about it printing everything into it.

You’ll notice that it’ll start transferring the recording into a “Blob” format.
Once the part is over, Melodyne 5 will analyze the recording and put all of the notes on the grid according to the pitch, note, etc.
7) Go Into Melodyne 5’s Settings and choose “Save As MIDI”

Export the MIDI file onto your desktop, that way it’s nice and easy to find. This is a practice I always use and I recommend you do the same thing for all of your imports and exports.

At this stage, the MIDI recording should be sitting neatly on your desktop waiting for you to insert it back into the DAW.

8) Import the MIDI file into Garageband as a Software Instrument Track
This is self-explanatory.
Just drag and drop the MIDI file into a Software Instrument track region, which is, by default, MIDI notes.

However, you’re going to come upon a prompt that asks if you want to import the tempo as well, which you do.
9) Choose “Import Tempo.”
Click the “Import Tempo” option.

Now, the recording is loaded into the DAW as a software instrument track in the same way that it was exported.
You’ll notice that the audio recording has been turned into a MIDI file, which means you can make all kinds of changes to it, including changing the actual instrument itself or adjusting the velocity.
10) Choose Score Editor, in the Smart Controls
Choose Score Editor, in the Smart Controls, and voila! You now have a transcribed version of the audio recording you created.

Now, you have the ability to print off the transcription and send it to whoever needs it, whether it’s your vocalist, guitarist, etc.
Follow the instructions that I laid out above if you want to print off the file as a PDF.
Important Things To Note
1) Transfer Error
When I started using the trial version of Melodyne 5, I ran into an error. I wasn’t able to get the transfer button to work, for whatever reason.
So what I had to do, is I just restarted Garageband and then loaded up Melodyne 5 on one of the plug-ins again.
I had to go activate the trial version of the plug-in for the second time for whatever reason.
2) Melodyne Trial Lasts 30 Days
As the sub-heading suggests, the trial version of Melodyne 5 only lasts 30 days, but hopefully, this is enough for you to get the work done that you need too.
If you want to do this on a regular basis, I highly recommend getting your hands on a copy of Melodyne 5. It’s a truly amazing software, and it never ceases to amaze me.
3) Limitless Capabilities – Transcribing Other People’s Music And More
Now that you’ve seen what Melodyne 5 can do, in terms of transferring audio recordings into actual MIDI files and then inserting them back into the DAW, your mind will probably light up with other ideas of what can be done.
For instance, if you have a guitar part recorded in Garageband or some other DAW, you could actually use Melodyne to export it as a MIDI file, and then re-insert that file back into Garageband as some other MIDI instrument.
You could take the very same guitar part and load it up as a piano instead, or really any instrument of your choosing.
Additionally, and perhaps more importantly, you can upload music of your choosing that hasn’t been transcribed before, and by separating the tracks with Melodyne, you can create sheet music for a song where none exists online.
YouTube Tutorial
Conclusion
I hope this was helpful to you. At some point, I’m going to see if there is a way to transcribe drummer track recordings so that drummers have the same ability to do this.