Using the piano roll in Garageband, like other DAWs, is one of the most useful features of using any digital audio interface, mostly because you can draw the notes that you want to use directly in the workspace, without actually playing them.
To use the piano roll in Garageband
1) Hit (E) on your keyboard to bring up the Piano Roll.
2) Use the (Command + Click) to bring up the pencil that will allow you to quickly draw in MIDI notes
3) Draw MIDI notes on and off the grid-line
4) Use the Time Quantizer to fix imperfections
Structure of the Piano Roll
The Piano Roll, essentially, is a bunch of grid lines and bars that are separated evenly across the Garageband interface.
Additionally, these same grid lines and bars are situated right beside a piano that’s laid out across the screen vertically. Each grid line corresponds to a specific note on the keyboard (by the way, it wouldn’t hurt to learn the secrets of piano from PianoForAll if you’re serious about making the most out of the keyboard).

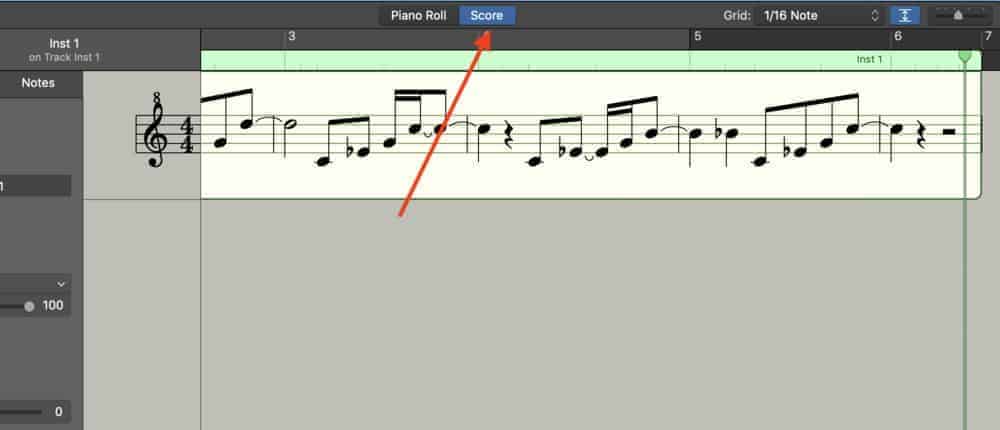
You can zoom in and out of the interface to have a closer look at what you’re doing, or you can switch it to the score editor, which will layout the notes in actual standard notation, rather than just MIDI notes (more on the score editor in my guide).
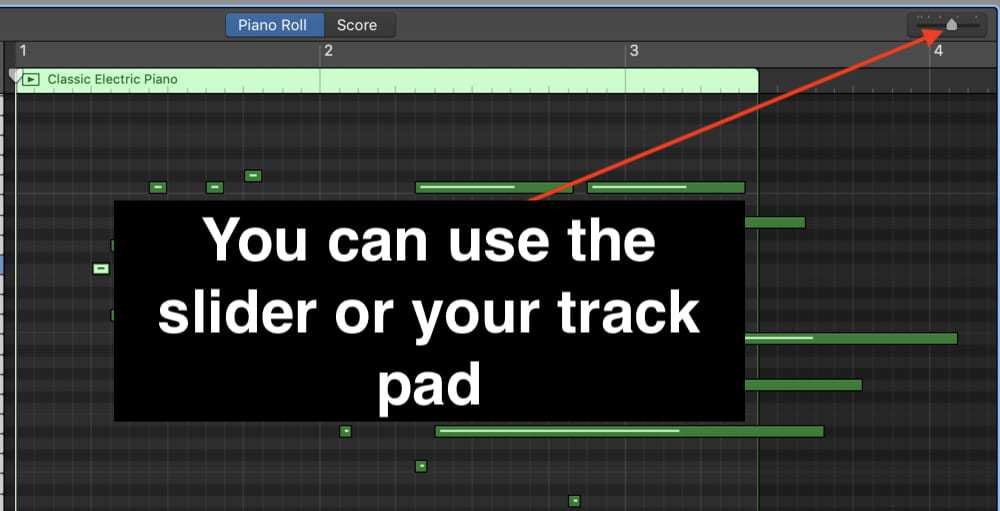
You can use the Horizontal Zoom Slider, which will zoom in and out of the interface, or you can use the same option on your trackpad, which means that you’re spreading your fingers either apart or closer together on the trackpad.
It has the same effect.
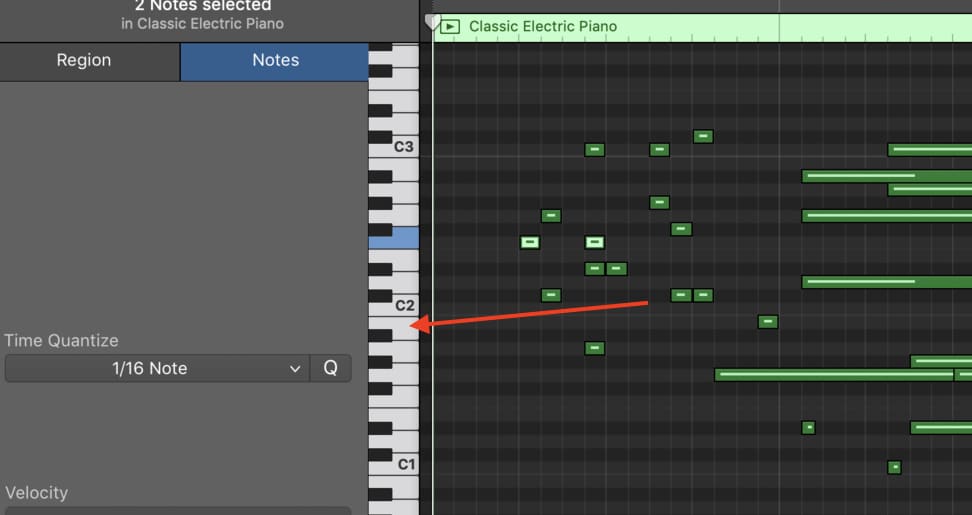
On the left-hand side of the Piano Roll, you’ll notice that you can actually see the notes of the piano.
Each octave is separated by numbers and letters, including C0, C1, C2, C3, and so on and so forth. These are the octaves on the keyboard (Mark Sarnecki’s Complete Elementary Rudiments and the Answer Book from Amazon are great for music theory fundamentals).
For instance, the C3 is typically the Middle C, so keep that in mind. You can actually play each note of the keyboard on the left-hand side to see what it sounds like. The piano roll on the left-hand side of the grid-lines looks like what you can see in the image below:
The grid-lines are separated into groups of four, and the numerical value of each grid-line changes depending on how you’ve selected the time signature in the top center of the DAW.
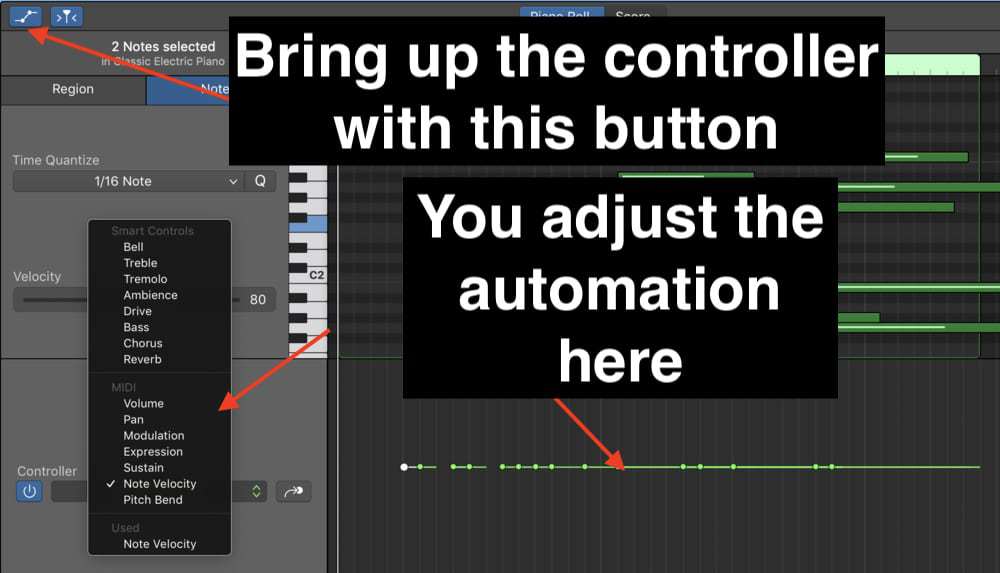
On the top-left-hand side of the Piano Roll, you also have at your disposal an automation function that’s useful for adjusting the velocity of several different parameters.
For instance, you can adjust the velocity or the strength of the notes, or you can adjust the chorus, bass, ambiance, pitch bend, sustain volume, panning, modulation, expression, drive, bell treble, or the reverb.
Of course, you also have your transposition functions in addition to time quantization (my guide), which means that you can adjust the actual pitch of all the notes automatically just by selecting by how many semi-tones you want to change everything.
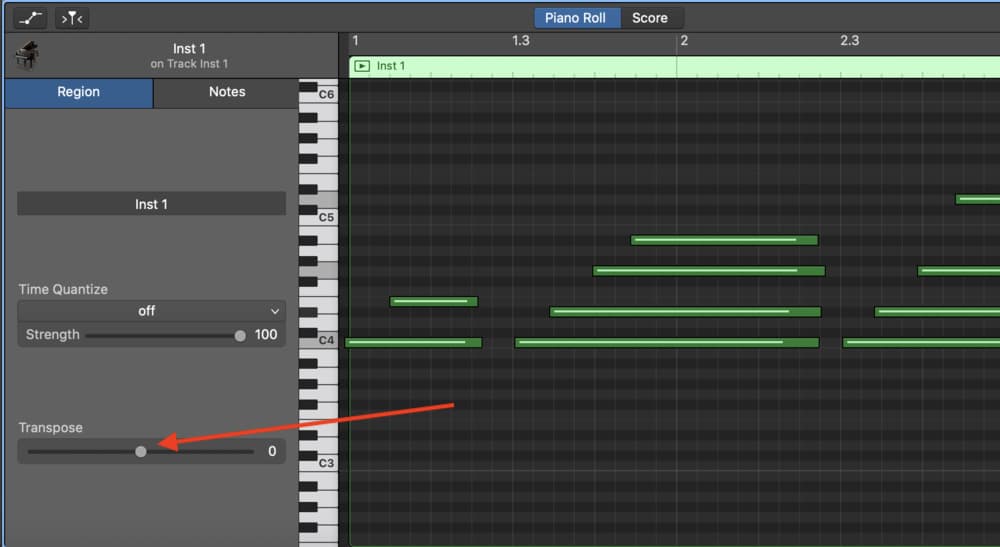
Unfortunately, there are some limitations to using the piano roll in Garageband.
For instance, you can’t copy and paste the notes into the interface as quickly and as efficiently as FL Studio users can for when you want to quickly create snare or hi-hat rolls, although, there is a fast way to do it in Garageband with my guide.
Regardless, there are many different shortcuts for using the piano roll, and we’ll explore some of them here.
Tips And Tricks For Using The Piano Roll
1) Command + Click
The (Command + Click) option is how you draw notes right in the piano roll as efficiently and as easily as possible.
Clearly, the method for doing this is quite self-explanatory, you just want to hit the (Command + Click) option, and by click, I mean hitting the trackpad.
What this does, is that it allows you to draw the notes into the Piano Roll very fast. Typically, when I create music with Garageband, I either use a MIDI keyboard like M-Audio’s Oxygen Pro Series, or I play my PRS SE Custom 24 guitar and create melodies that way.
However, some people like to use the piano roll primarily to actually draw the notes right in the piano roll space. If that’s what you like to do, this command is for you.
This is also useful for creating things like snare and hi-hat rolls.
It’s definitely worth mentioning that this is the same way that you add notes in the score editor, in case you want to add them as actual units of standard notation.
Truthfully, most producers don’t know how to read music, so this feature isn’t mentioned as much, but either way, it is there for you to use in case you do know how to read standard notation.
2) Hit (E) To Bring Up The Piano Roll
This one is self-explanatory. The Piano Roll can be selected either by hitting the ‘E’ on the keyboard or by going up to the top-left-hand side of Garageband’s interface and hitting the icon that looks like a pair of scissors.
In the case that you need help with some of the symbols and icons, there is the Help button (?) that will allow you to drag the cursor over different aspects of the DAW.
As your cursor moves across different functions, a little yellow text box will appear that explains precisely what it does.

3) Copy and Paste The Notes
When using the MIDI notes in the piano roll, there are a number of things that you can do to save time, including copying and pasting the notes into the piano roll if you want things to repeat.
For example, you would just drag a selection box around all of the desired MIDI notes, and then hit the (Command + C) function, and then use the function right after, (Command + V), to paste the notes wherever you want.
It’s important to note that the notes will be pasted according to the Playhead bar, which, as I’ve explained in my 16 tips for editing tutorial, is the little bar that moves along with the piano roll as it’s playing.
In other words, it’s the little bar and arrow which looks like what’s shown in the image below:

4) Select and Extend/Retract the MIDI Notes
Similar to the function above, you can actually make adjustments to every single MIDI Note in the piano roll at once, after selecting all of them together.
Using the Select Box – or whatever you want to call it – your trackpad mouse, drag a box around each note, and then extend the length or retract the length of one note, and you’ll notice that every single note in the piano roll will extend in the same way.
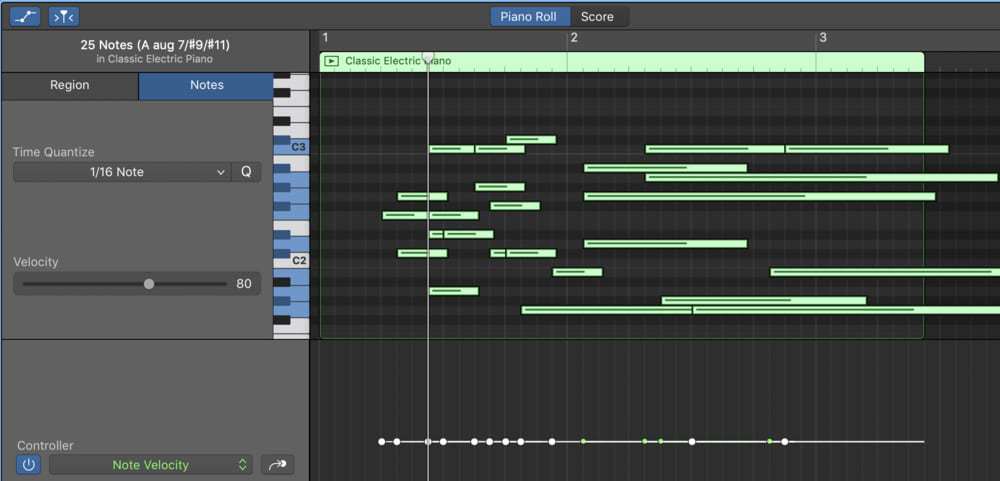
This is another useful time-saving feature.
5) Copy and Paste Using The Playhead Arrow
There are a number of ways of doing the same thing in Garageband, with some being more useful in different contexts.
For instance, using the playhead arrow, you can copy and paste the notes in such a way where Garageband does it automatically, according to how many MIDI notes you’ve copied.
What I mean by that, is that you copy a group of notes by using the (Command + C) function, and then you drop the playhead arrow right after that same group of notes.
From here, you hit (Command + V), and then Garageband will automatically copy and paste the notes according to the location of the playhead arrow, and it also moves forward by the number of MIDI notes.
I understand that what I just said is somewhat of a word salad, so make sure to check out the video below to see what I’m talking about. It’s right around the 4:33 mark.
And that’s pretty much it for the piano roll.
YouTube Video Tutorial
Conclusion
Ultimately, the piano roll isn’t the most sophisticated interface in Garageband, so frankly, there isn’t much else to say about it in terms of what can be done with it. I can’t think of anything else to show you in terms of the piano roll. If I ever come upon additional tips and tricks, I’ll make sure that I update this article.
As I mentioned above, there are some limitations to the Piano Roll in Garageband, but ultimately, it’s very easy to use and for the most part, it has most of the functions that other DAWs have. Make sure to do me a favor and share this on social media with your friends.

 Written By :