Explained simply, Quantizing is the method by which the sound is processed so it falls more in-line with the beat and the overall rhythm of the track. In other words, it allows us to alter the notes after the fact, to make the music more “on-time.”
To use the quantizer in Garageband:
1) Select the track you want to quantize
2) Hit ‘B’ on your keyboard to bring up the Smart Controls
3) Choose the note value, ie, 1/16, on which you will base the time quantizer
4) Drag the “Strength” bar toward 100 to increase quantization
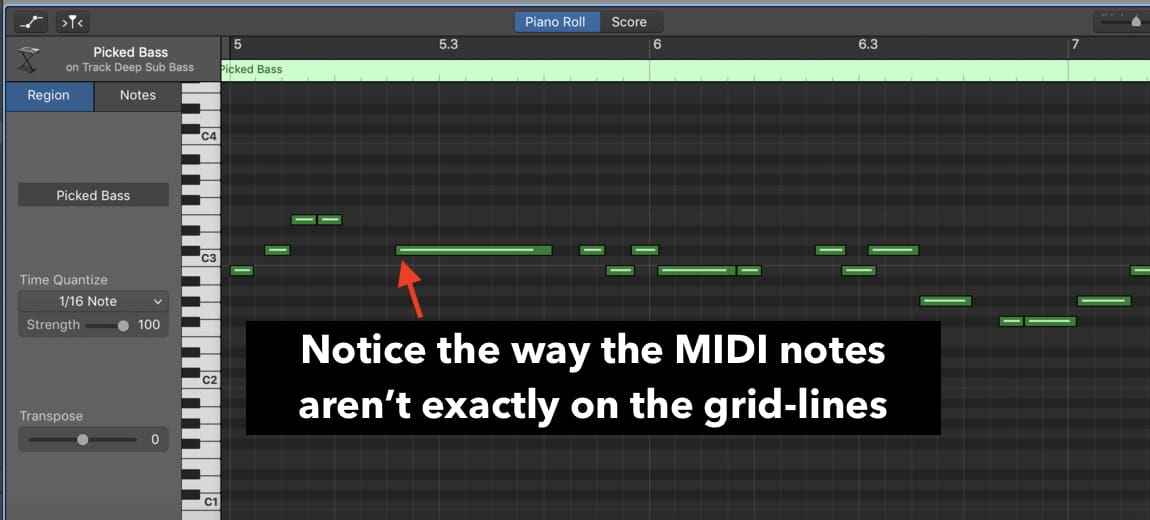
The above summary is the nuts and bolts of how you quantize notes in Garageband, but to further illustrate what I’m talking about here, check out the two images that I’ve created below. In the first one, we can see that the MIDI notes fall slightly off the grid, which means they’re a bit off-time.
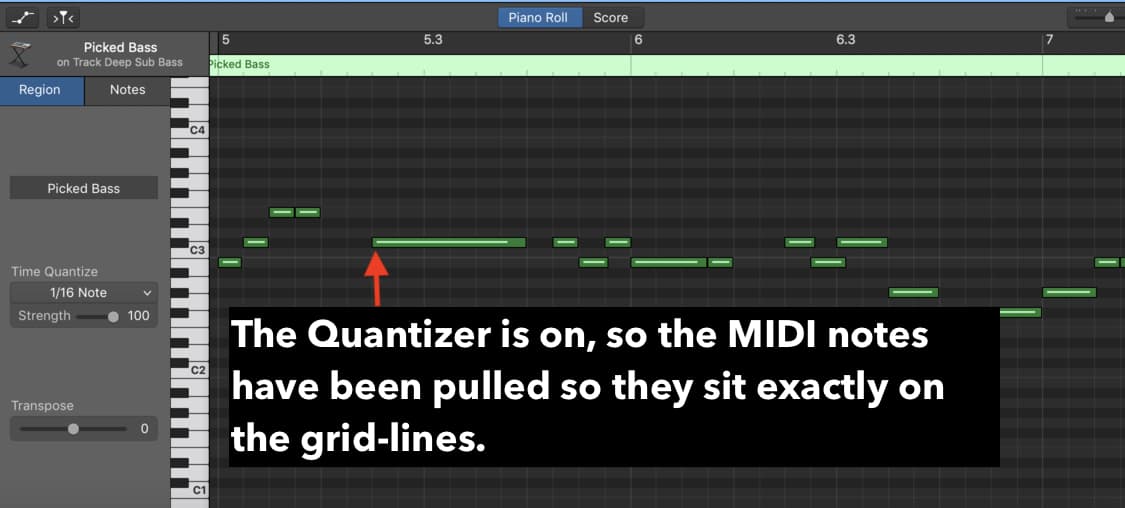
In the following image, we can see that the MIDI notes have been pulled exactly on to the grid. That, essentially, is what we’re doing when we quantize music.
When I first started using this software, I used to go through each MIDI note, select it, and manually push it on to the grid line, until I discovered that with a few clicks of the Trackpad, you can just do it automatically without wasting so much time.
Another way to cut your learning curve with this stuff is to use PianoForAll (on my Product Page), which is one of the best ways to learn the keyboard for music production purposes.
How To Use The Quantizer Function
The Quantizer function is in the bottom of the Garageband interface within the section of the DAW that’s called the “Smart Controls.” It’s the section pointed out in the image shown below:
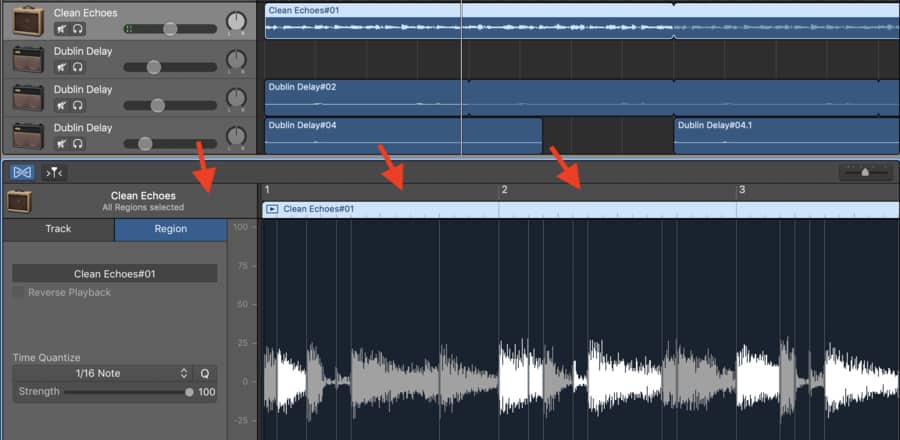
Let’s say that you’ve created a track, whether it’s MIDI or a traditional recording.
If you want to bring up the Smart Controls, including the part where the Quantizer function is visible, you can just double-click on the MIDI/Audio region and it’ll bring up the Smart Controls in the bottom of the screen.
You can also hit the ‘B’ part of your keyboard, or click on the dial in the top-left-hand corner of the DAW.
Once you’ve brought up the Quantizer, you can see the parameters, which there are two, the type of note and how strong you want the quantizer to function.
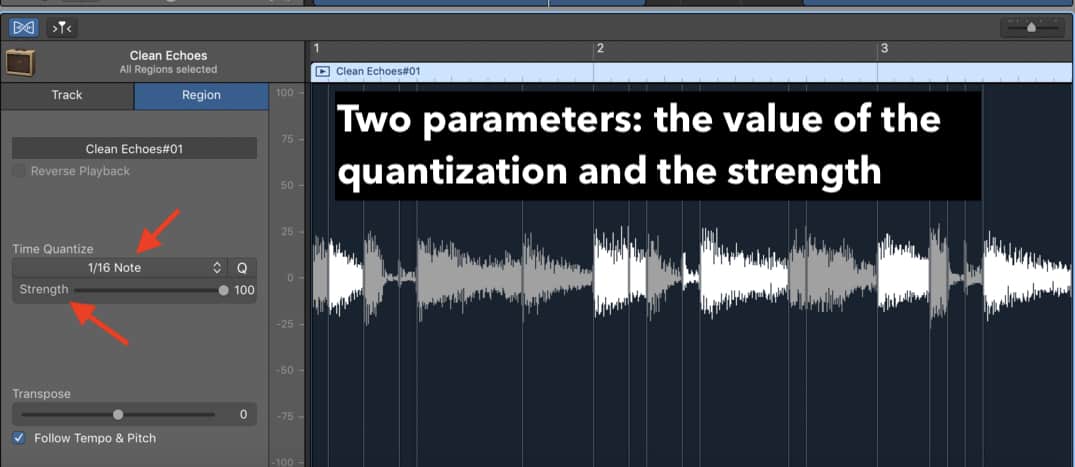
It’s really not too complicated.
While the options are based on traditional musical notation, for instance, 1/16th notes, 1/4 notes, and 1/8th notes, etc, you don’t have to have an understanding of music theory or standard notation to use the function.
When Quantizing Drum Tracks from really awesome drum programs like EZ Drummer 3 or even just Garageband’s drummer track, I pretty much always have it set to 1/16 notes, and then I slide the meter all the way to 100 to pull the notes exactly on the grid.
Essentially, that’s what the Quantizer does. It pushes the notes back or forward until they snap exactly to the grid.
As I’ve explained in my guide all about the piano roll, the intuitive part of it is the fact that the grid-lines are split up so it matches, mathematically, the traditional time measurements of standard notation.
Explained in another way, if you look at how many grid-lines there are between the 1 and 2 in the Piano roll, you’ll notice there are 16 grid lines.

If you set the Quantizer function to 1/16 notes, that means it’s going to snap each note to the closest grid line exactly, which is much better if you have a ton of different notes in each bar.
On the other hand, if you only play one note per measure, the 1/16 function wouldn’t be as useful. Let’s say, hypothetically, there is one note per measure, and it’s right near the beginning of the bar.
In that case, it would be best to use the 1/4 note function. However, with all of that said, I find that the 1/16 note option is pretty much always the setting you want to have it at, but I’m sure this depends on for what instrument you’re using it for.
Using the example of 1/1, if you select this option, the Quantizer Function is going to snap each note so it falls exactly on the Grid Line for each new beat, (1, 2, 3, 4,) and not the grid-lines that fall between them. This looks like the image shown below.
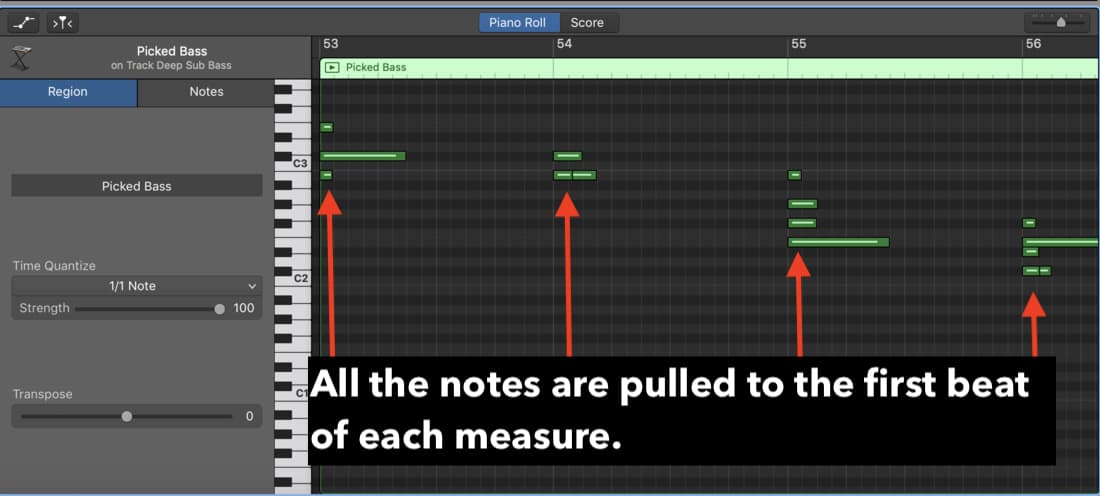
If you use the 1/2 (Half-Note) function, it’ll snap each note to the grid-line on every beat and the beat between each beat. Check out the picture below:.
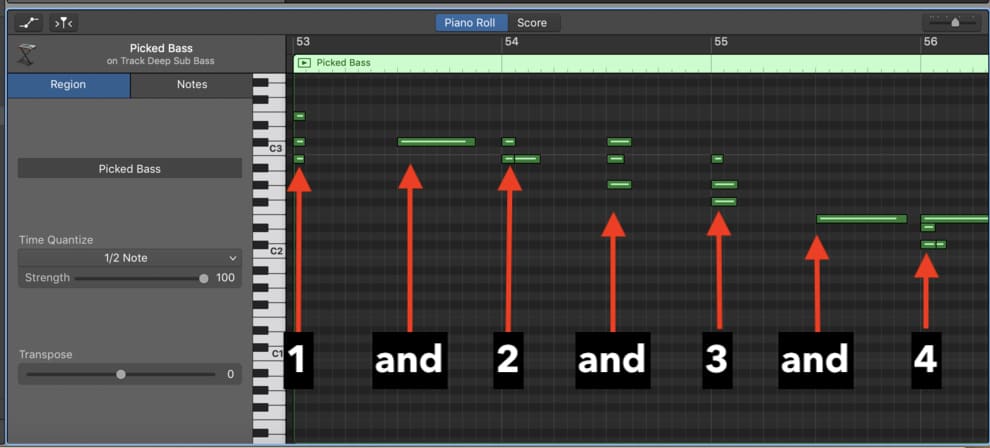
Select the Quarter note function, 1/4, and it’ll bring the notes to every quarter grid-line.

Select the 1/8 note function, and it snaps the notes to one of 8 of the closest grid-lines.
I hope you’re able to get the picture from here. ***Keep in mind, each of these images is the same melody, just quantized differently.

It’s really just as simple as that. The Quantizer function isn’t very sophisticated, but it is extremely useful.
Using the Quantizer With Actual Recordings (Not MIDI)
This function is just as useful.
In fact, it’s of incredible value. If you’ve recorded a performance and a note is just slightly off-time, you can go into Garageband’s Smart Controls and push the note over just a tiny bit to make it perfect. It’s pretty amazing.
Click on your Audio Region, the Blue Region, and then hit the Region button.
First things first, you want to check the box that says, “Enable Flex.” This allows us to actually make changes.
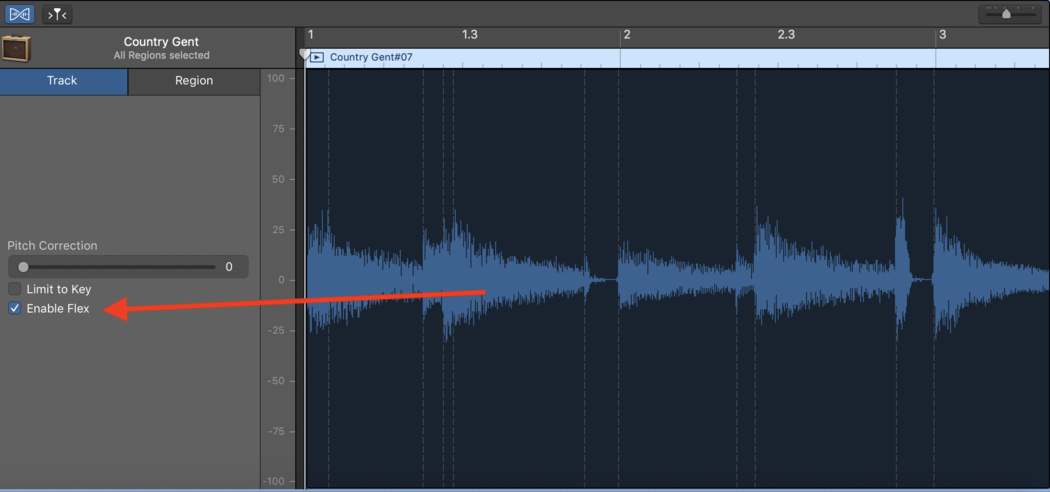
Down in the Smart Controls, we can see the Quantizer function, and we’ll set it, again, to 1/16 notes.
Once you’ve done this, you’ll notice that Garageband will drop a bunch of different lines in the Smart Controls between the soundwaves that represent your recording.

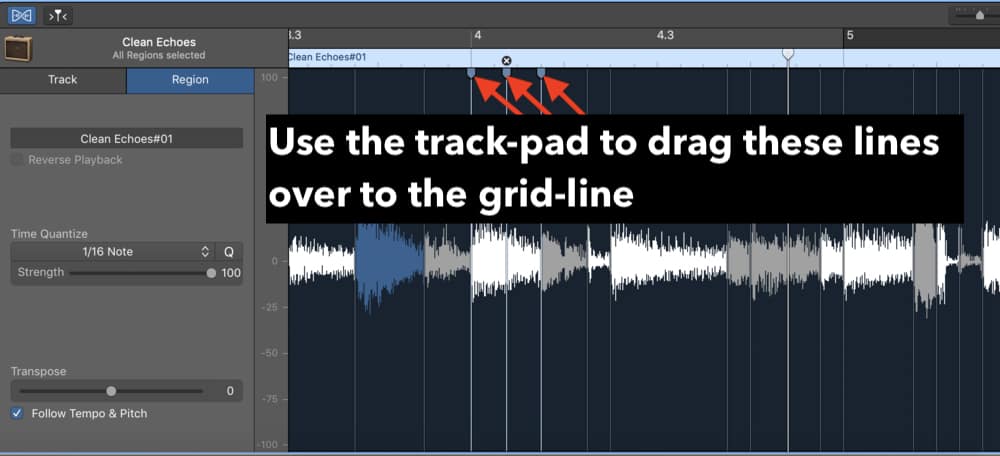
From here, you can simply use your Trackpad and the cursor to manually move notes around.
Match up the beginning of the soundwave with the grid-line, as what’s seen below, and voila, you’ve got a piece of music that is more on time.
Drawbacks Of Quantization
An important thing to note is that the Quantizer function, in the eyes of some musicians/engineers, can have the unintended consequence of eliminating the “soul” of the music.
In other words, human performances of music will regularly have mistakes and imperfections, which is kind of what makes the music more human and impactful.
If every note is constantly on key and every note is exactly on time, the effect of this is that it doesn’t have the same amount of humanity.
Whether or not you agree with this, I don’t know, but it’s something to think about. It’s one of the reasons why some people rail against Melodyne 5 – although, I think it’s easily one of the greatest tools you can get from Plugin Boutique.
Using the example of Punk Rock or even Jazz Improvisation, quantizing everything is likely going to make the music seem way less cool to fans of these genres.
With hip-hop and modern rock, and regular pop/dance music, this is less the case, as listeners of this music typically care a lot less about the production methods.
Some people make the same arguments about pitch correction (which I also have a guide on), but whether they like it or not, music editing is here and it’s here to stay (also my editing tutorial). If you need a video tutorial, I have one at the link shown below.
I run through the exact same principles laid out in this article, but you can hear how things sound after using the quantizing function.
YouTube Video Tutorial
Conclusion
I hope this short article was helpful to you. Do me a solid and share this on social media with your producer friends.


 Written By :
Hi Andrew,
Your articles have been spot on. Thank you for taking the time to explain some of the features that I’ve not fully implemented or executed properly.
Anytime brother.