The best free piano sounds for Garageband are the 4Front piano and the Soft Piano from Spitfire Audio Labs.
Not only are these two plug-ins much better than the stock Steinway straight out of the box, but with some dynamics processing and effects, they can be improved significantly.
You can get the 4Front Piano at this link here and then the Spitfire Audio Lab Soft Piano at this link.
The stock piano in Garageband doesn’t have the best sound, let’s be honest. However, there are some things that one can do to increase the quality of it while simultaneously making it sound better in context with other instruments.
While we can increase the quality of Garageband’s piano sounds using EQ, compression, reverb, and ambiance, the best way to get a superior piano is to simply download another plug-in that sounds way better right out of the box.
How To Get The Most Out Of Garageband’s Steinway Grand Piano
Technically, I’ve already shown how I go about doing this in my article on how to get Garageband instruments to sound more professional. However, I’m going to briefly run through it in this article as well.
To make the most out of the Steinway Grand Piano, you can do a number of things, including the addition of reverb, ambiance, compression, EQ, parallel compression, panning, along with a little bit of delay.
You can make significant improvements also by learning from PianoForAll (on my Product Page), which is probably the cheapest and most efficient way of learning.
If you use several of the aforementioned tactics, the piano is going to sound much better, but of course, it’s still not going to sound as good as a piano that you’ve actually paid for.
Regardless, I’m going to run through some of the things that I like to do to get a piano to sound a bit better.
1) Reverb
Reverb is the easiest thing to add to pretty much any instrument.
It’s as simple as going down into the Smart Controls like what’s shown in the image below on the right-hand side:

Typically, I’ll increase the reverb to around 4-6 on the dial, or 11:00, if you think of it in terms of a clock.
Additionally, you could go into the plug-ins and choose an entirely different type of reverb, including EnVerb, Platinum Verb, SilverVerb, and Space Designer, and there are a number of pre-sets that come each one.
With that said, I’ll typically use the regular reverb that’s included right there in the smart controls.
2) Ambience
Regarding ambience, which I’ve explored entirely in a separate guide, it functions the same way that reverb does in Garageband, in that, you just turn the dial until you think it sounds good.
For the sake of this tutorial, I’ll just quickly state that ambience is like a short reverb that creates somewhat of an echo effect, but in the same way as reverb.
It often has the effect of making the sound more stereo, that is, coming from two different channels rather than just one, in addition to bringing a bit of thickness to the sound.
I commonly put the Ambience to about 5 on the dial, or 11:00, when thinking of it in terms of a clock.

3) Delay
For the delay, I approach it in the same manner as the reverb and the ambience.
I prefer not to complicate these things too much, and instead work with the functions that I’m given in Garageband.
I typically put the delay to around 4 on the dial, or 10:00 when thinking of the dial as a clock. Any more than that, and it gets to be too much.

I would say that the reverb and the delay, when coupled together, can really give the piano the sound that you’re looking for. But it’s best not to use it too much. A little goes a long way I find.
Additionally, if you’re interested in another delay plug-in, check out the Valhalla Freq Echo plug-in at this link
4) Use Two Pianos and Pan Them in the Opposite Direction (Optional)
This is something that works best if each piano is recorded separately on its own with an actual piano, rather than just a plug-in piano. Regardless, I find that it gives more options for mixing and ultimately making it sound superior.
This is where it starts to get a bit more complicated, at least in comparison to the rest of the tutorial.
What you want to do is simply copy the software instrument track after you’ve created your melodies and then paste it into a new track region.
It looks like what you can see in the image below:
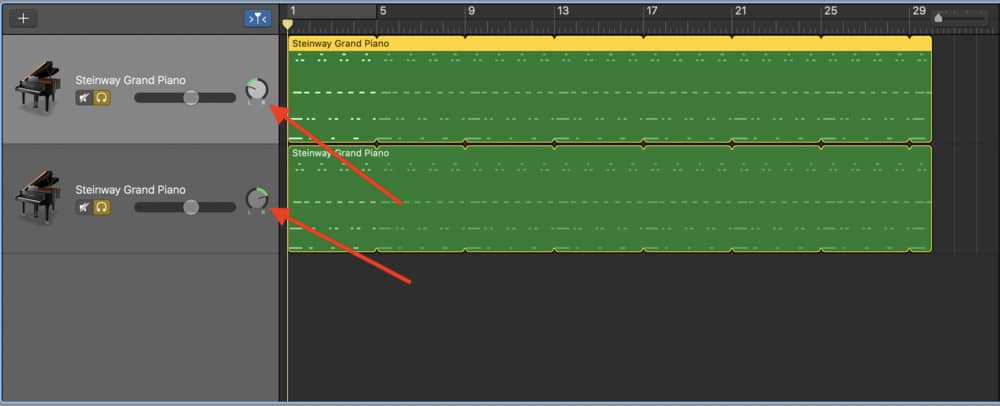
From here, you can go ahead and pan one of the pianos to -30 and then the other to +30.
This is going to have the effect of widening it out a lot more, and it also allows for more adjustments to the sound, which I’ll explain in a second.
Now that you’ve panned the pianos, you can probably hear that not only does it sound a bit louder, but it’s also more stereo. From here, we’ll move on to adding dynamics processors to each piano differently.
It’s definitely worth mentioning that if you intend on using two different pianos panned in the opposite direction, the volume has to be turned down quite a lot because they amplify each other.
For instance, I’ll have both of them turned down to about -9.0dB, but it really depends on the volume of the other instruments in the mix.
5) EQ
Garageband and Logic Pro X both come with quite a few pre-sets which are honestly pretty good, as you probably already know.
Regarding the piano, you can see that the software comes with many pre-sets for the piano alone.
Here are some of the pre-sets you can see here:
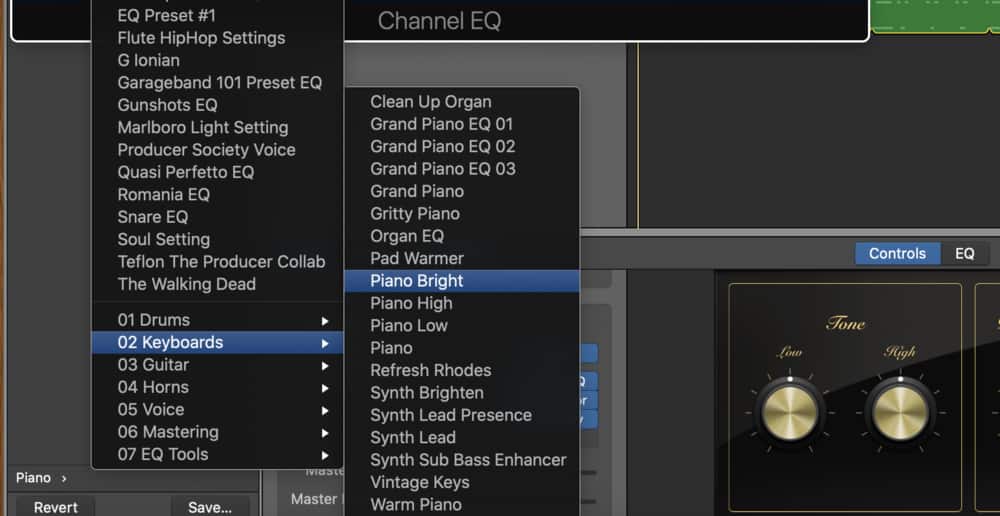
You can go through each one and discover what you like the best with one of the pianos on solo.
Personally, I find that the standard grand piano is enough, and I might take the liberty of attenuating some of the mid frequencies a little bit like what you can see in the image here, additionally, you could use Fab Filter’s Pro-Q EQ from Plugin Boutique if you wanted to actually solo certain frequencies to see how they sound in isolation.
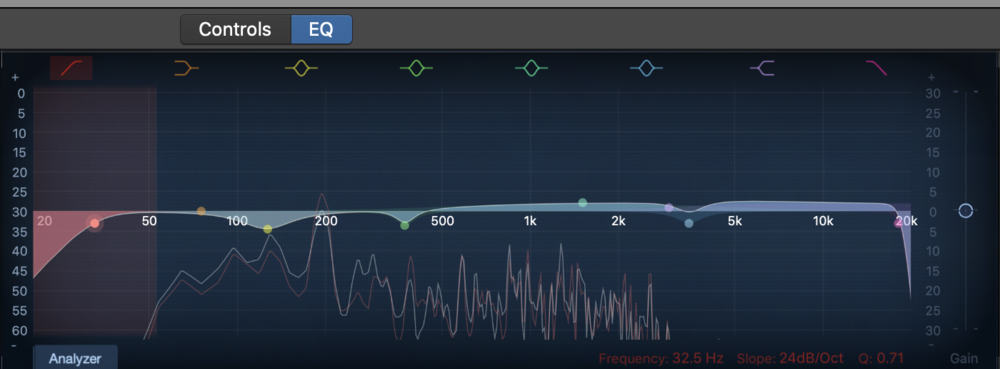
As I explained in my EQ/piano tutorial, I’ll also use the same EQ on both of the pianos that are panned in the opposite direction, although, I might EQ one slightly different than the other just by a little bit if I feel like it.
In fact, this is one of the benefits of using two pianos.

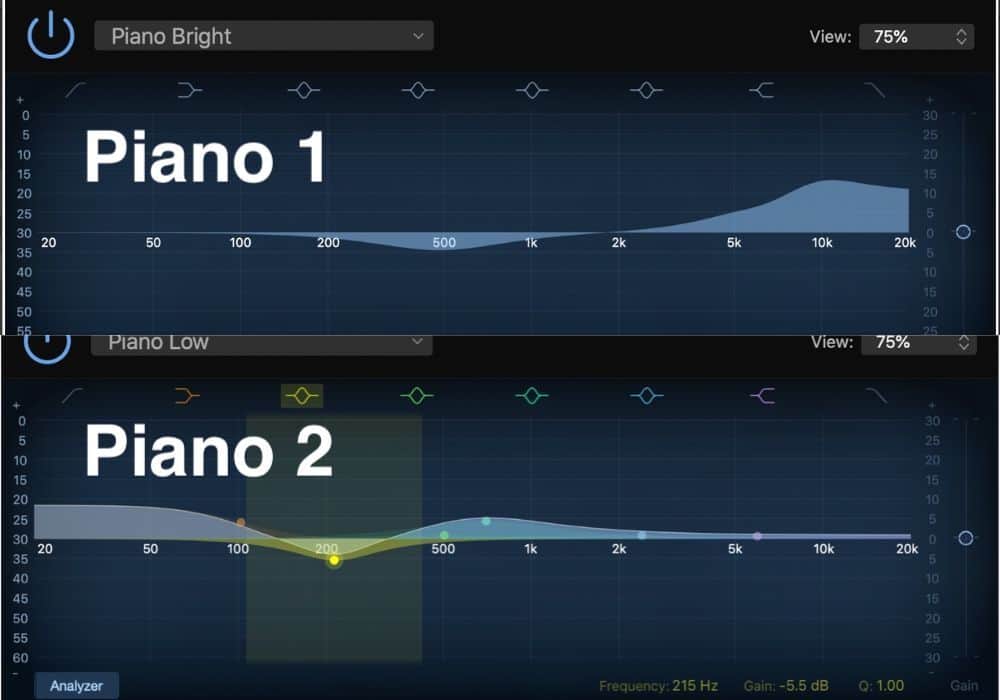
You can attenuate or boost certain frequencies for a different effect, for instance, maybe you’d want to boost the highs on one piano, and then on the other, you could attenuate the frequencies in the mid-range.
This can work in the same way if the pianos are playing different notes. For example, if the one piano is playing a rhythm section and the other is playing the lead.
You can see what this looks like in the image below:
6) Compression
Regarding compression, it’s best to go real easy on it, because otherwise, you get distortion super easily, at least from what I’ve noticed anyway.
What I’ll usually do is just use the “Piano” pre-set within the compressor, and I find that it works the best.
You’ll notice that it’s parameters tread very softly, with a ratio of just 1:4:1 and a threshold of -20dB.
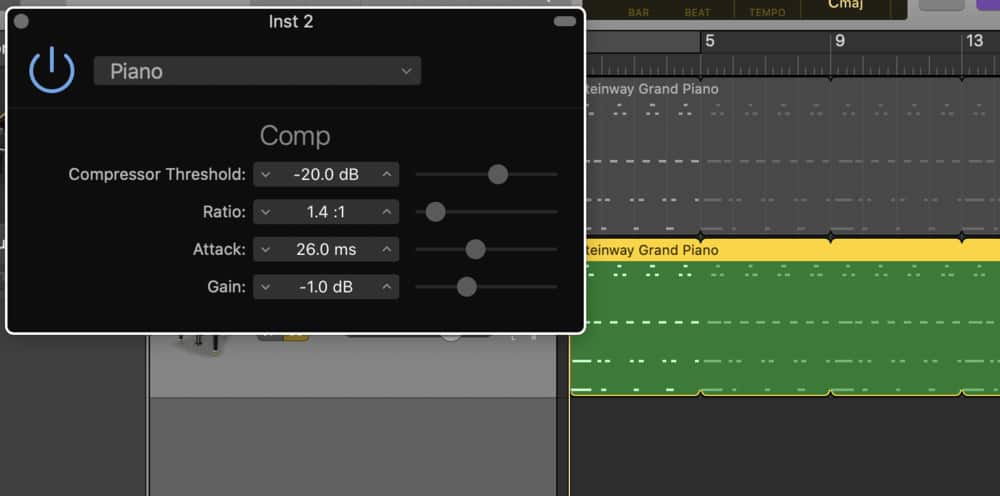
Additionally, I’ll use ONE compressor like Fab Filter’s Pro-C 2, on one of the pianos, and then for the other piano, it’s simply turned off. From what I understand, this also imitates what’s called parallel compression, at least in the DAW format.
That’s pretty much it for making the pianos sound a bit better in Garageband.
There’s also a really cool trick that not a lot of people talk about on the internet for some reason, which is the Haas Trick which I’ve talked about before.
Even though a lot can be done to make a piano sound a bit better, superior plug-ins are always going to sound quite a bit better.
For instance, you can go ahead and apply the same principles that I mentioned above, but instead of using the stock Steinway Grand Piano, you can use the 4Front Piano instead.
The 4Front Piano
4Front Piano at this link here
The 4 Front sounds a lot better than the stock Steinway Grand Piano, and I find that mixing it takes somewhat of a different approach.
For instance, I would take it easy on the reverb, ambience, and delay, when it comes to this particular instrument.
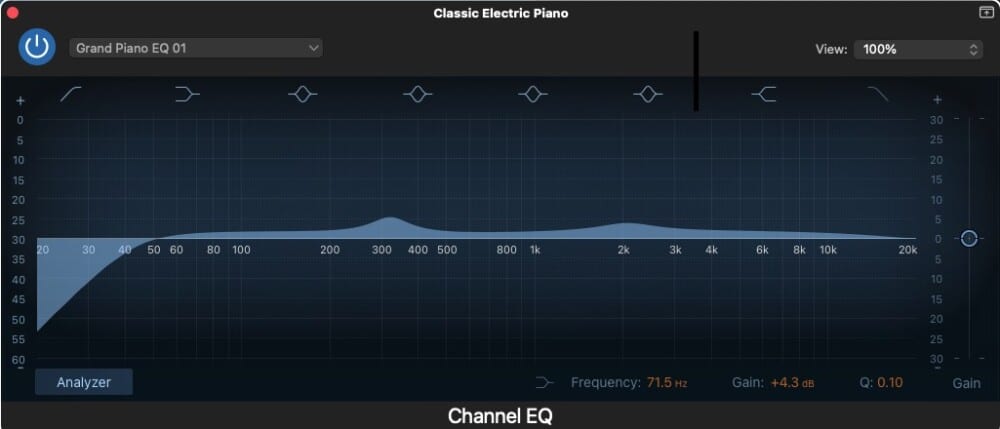
Channel EQ
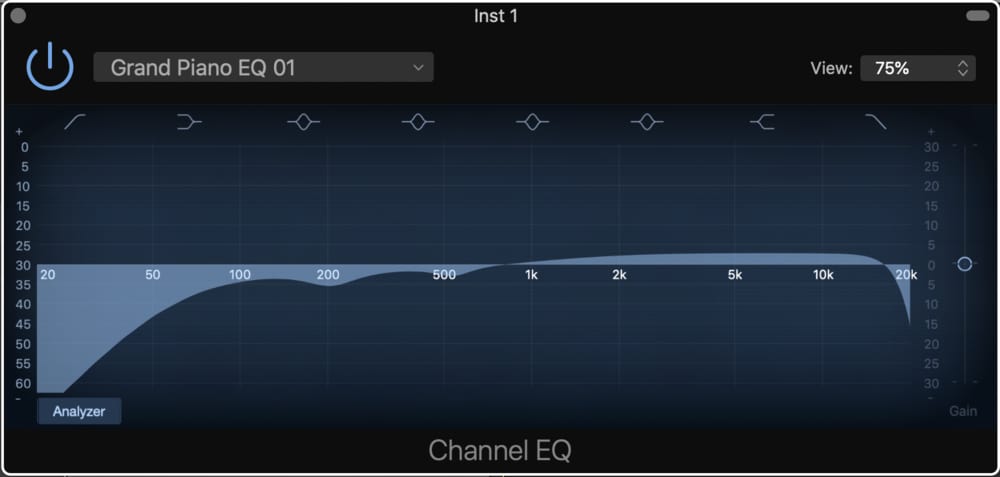
For the EQ, I’ll use the Grand Piano EQ 1, and I might increase the low frequencies just by a little bit.
Compression
For the compression, I’ll use the standard “Piano” preset compression, and then I’ll typically leave it as it is.
If you wanted to, you could increase the gain on it just by a little bit or maybe the ratio just to bring down the loud peaks and increase the quiet sounds.
It’s best to use it sparingly.

Soft Piano from Spitfire Audio Labs
The Spitfire Audio Lab Soft Piano at this link.
The Soft Piano from Spitfire Audio Labs is definitely the best free piano plug-in that I’ve found thus far.
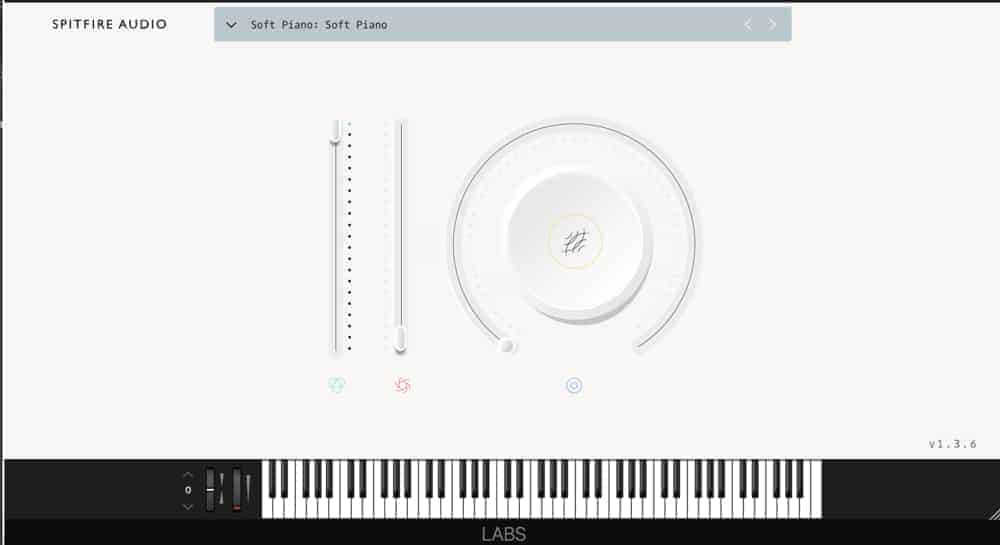
To download it, you have to install not only the plug-in itself but also the Spitfire Audio application that looks something like what you can see below.
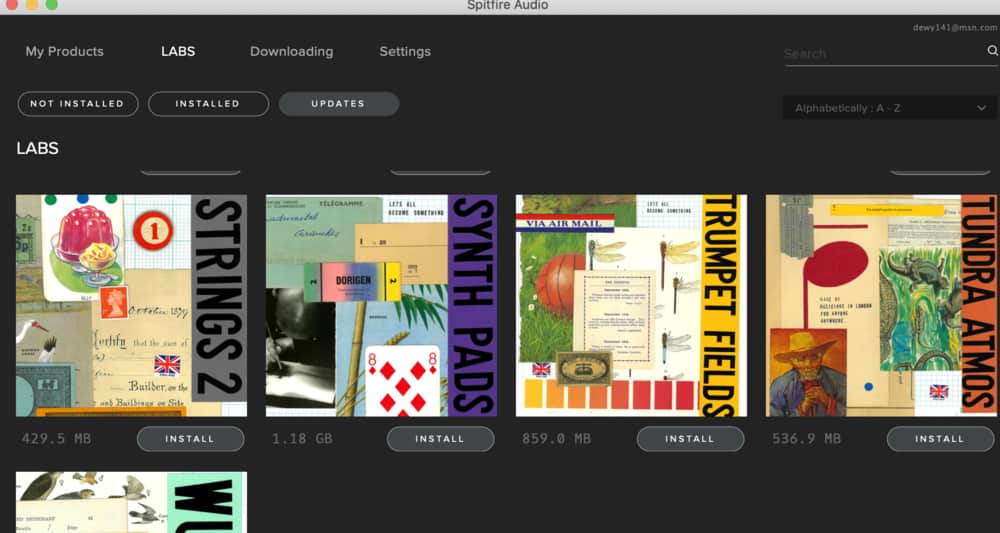
You also have access to other free sounds from Spitfire Audio Lab, so that’s great news too.
It’s worth mentioning that the title of the plug-in really explains what it sounds like.
It’s not a standard piano, it has a very soft and ambient quality to it that makes it great for chill songs.
The settings for how I would get the Soft Piano are much the same as the ones listed above.
Although, it’s important to note that this piano tends to sound a lot warmer than the other pianos. I would account for that fact while using the Channel EQ.
Channel EQ
Compressor

YouTube Video Tutorial
Conclusion
There are a lot of free plug-ins out there that sound pretty good, however, nothing is ever going to sound just as good as the real thing. That’s definitely something to consider.
KeyZone is also known for their piano VSTs, however, I’ve found that as a consequence of the recent Catalina update, I can’t get those plug-ins to work anymore.
I imagine that eventually, they will come up with an update.
Regardless, there are a lot of plug-ins out there, so this guide is just scratching the surface. As time goes on, I’ll make sure I’ll add even more to this article.


 Written By :