Some users like to “pitch” their vocals as an effect. This is another way of saying “to increase the pitch” like what can be heard in “Alvin and the Chipmunks,” but not everyone knows how to do it.
To pitch vocals in Garageband, select the vocal track that you want to change, and then go down into its plug-ins in the Smart Control section. Select “Pitch” from the drop-down menu, and then “Pitch Shifter.” You can adjust by how many semi-tones the vocals have been increased from 0 to 12.
3 Methods For Pitching Vocals in Garageband – A Step-By-Step Guide
1) Using the Pitch Shifter to Pitch Vocals in Garageband
As I said earlier, pitching your vocals means increasing or decreasing the pitch of the vocal track by a certain amount of semi-tones or tones.
It can be done with the default plug-ins available in Garageband, notably, the Pitch Shifter which can be found in the “Pitch” sub-heading within Garageband’s plug-ins in the Smart Controls.
A) Select or Highlight Your Vocal Track
This is the same process for adjusting nearly any other plug-in in Garageband. What you want to do is select the software instrument or audio track region by simply clicking on it. When it has been selected, the track region will turn a light grey color, similar to what can be seen in the image below:

B) Go Down into the Plugins in the Smart Controls
To do this, you can either hit “B” on your keyboard to bring up the Smart Control with your track region selected, or you can simply click on the region in question. Either one will bring up the Smart Controls where the plug-ins can be found.

C) Click on the Plugin Slot and Choose the Category, “Pitch”
Once you’ve brought up the plug-ins in the Smart Control section, click on the right-hand side of the empty slot or a slot that has a plugin in it already and bring up the menu which is going to show all of the different types available, including “Dynamics,” “Amps and Pedals,” “Distortion,” “EQ,” and many others.

D) Select “Pitch Shifter”
Select the category, “Pitch,” and then you’ll be given two different options, “Pitch Shifter,” and “Vocal Transformer.” Truthfully, either one will work for getting the effect that you want, however, using the “Pitch Shifter” is the easiest one.
E) Set Up The Pitch Shifter
After you’ve chosen the Pitch Shifter, there are a couple of different parameters to play with, including “Semi-Tones,” and “Mix.”
How you want your vocals to sound is up to you, but the one rule of thumb that I would use for increasing the pitch in this regard is to have the “Mix” set to 100% because this will ensure that none of the original signals will shine through.
Go ahead and set the “Semi-Tones” parameter to around 12 semi-tones, and then set the Mix to “100%,” and you can see how it sounds a lot like Alvin and the Chipmunks.

This is the first way of pitching your vocals using Garageband, however, there are other ways of going about it as well.
In fact, I think the following tactic might even be the best one in terms of the way the audio actually sounds when it’s all said and done (by the way, if you’re in the market for singing lessons, you won’t go wrong with Singorama which is probably one of the most efficient ways of learning).
2) Using the Vocal Transformer to Pitch Your Vocals
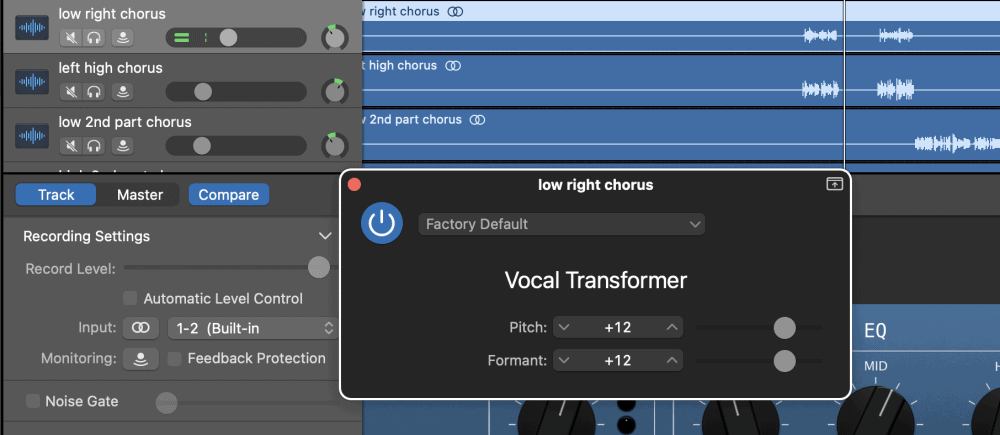
To set up the Vocal Transformer, you just have to follow the same process shown above, but choose the Vocal Transformer instead of the Pitch Shifter, and you can see that this plug-in is a bit different. There are two different parameters on this plug-in, the “Pitch,” and the “Formant.”
The first one is self-explanatory, in that it merely adjusts the pitch by what I believe are tones. The “Formant,” on the other hand, is actually how you get that “Alvin and the Chipmunks” sound which can sound really cute and cool at the same time.
Adjust the “Pitch” to around +1, and then set the “Formant to around +12, and you can see how it sounds. Conversely, you can set the “Pitch” to the same amount and then drop the “Formant” down to +0, and you can see how it merely pushes the pitch up by one tone but doesn’t add the “Alvin and the Chipmunks” style sound.

Play around with this to find the sound that you want, but to get that high-pitched cute sound you may be looking for, I would recommend setting up the Vocal Transformer’s “Pitch” to +12 and then the “Formant,” to around +12 as well.
And this is the second way of changing the pitch of your vocals in Garageband. There is one final way of doing it.
3) Using Melodyne to Pitch Your Vocals in Garageband

Using Melodyne 5 – Editor (on my Product Page) is the best way of changing the pitch of a note in Garageband, however, if you’re looking for the pitch-change to come along with that cutesy Chipmunk vibe, then don’t use it.
Melodyne is more for adjusting the pitch of notes while retaining the natural human quality, rather than as an effect like what can be heard from using the Pitch Shifter or the Vocal Transformer.
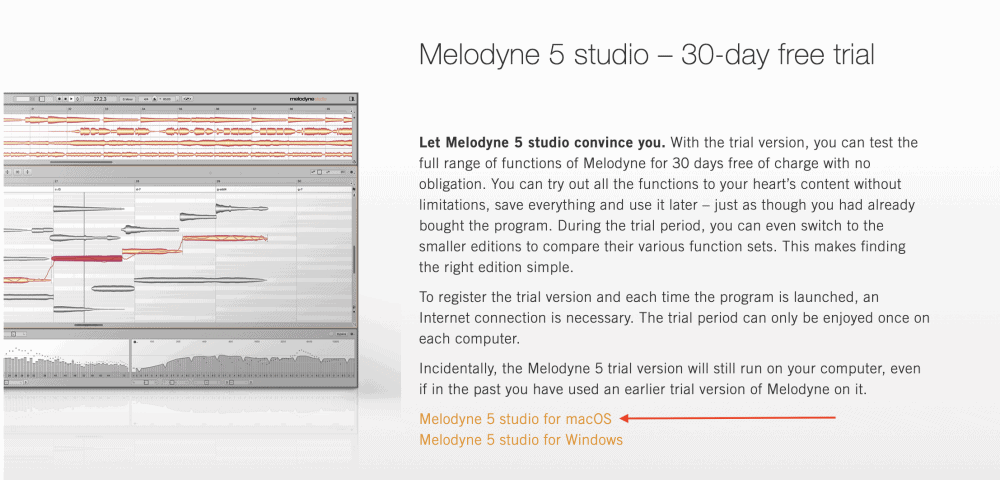
Using Melodyne is very easy to do, but if you haven’t done so already, don’t fret because I’ll make sure to walk you through it. The first step is to download the plug-in using my guide and then simply hit the transfer button in Melodyne after you’ve set it up in the plug-ins of the vocal track’s Smart Controls.
A) Hit the Transfer Button to Record Your Vocals
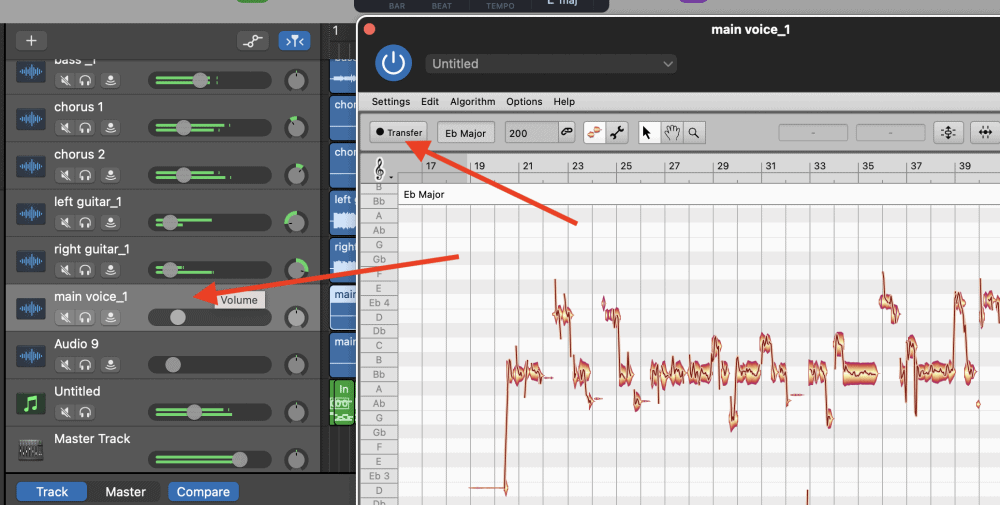
With the vocal track selected and ready to go, open up Melodyne in the plugins of the Smart Controls, and then hit the red “Transfer” button to begin recording your vocals into Melodyne so it can work its magic. Once you’ve done that, you just have to select all of the notes.

B) Select All the Notes and Then Drag Them Up One or Two Octaves
After you’ve selected every single note in Melodyne, you just want to drag them up as many notes as you want. It’s important to pay attention to the first note of the vocal recording. For example, in the image, you can see below, the first note is a “Bb.”
To move them up one octave, grab the notes and then drag them all so the first note is the Bb above the first one. This means you’ve moved everything up exactly one octave. As I already mentioned above, this is a great way to change the pitch, but it’s not the best if you want the “Alvin and the Chipmunks” vibe.

Using Antares Auto-Tune Pro to Pitch Shift Vocals in Garageband

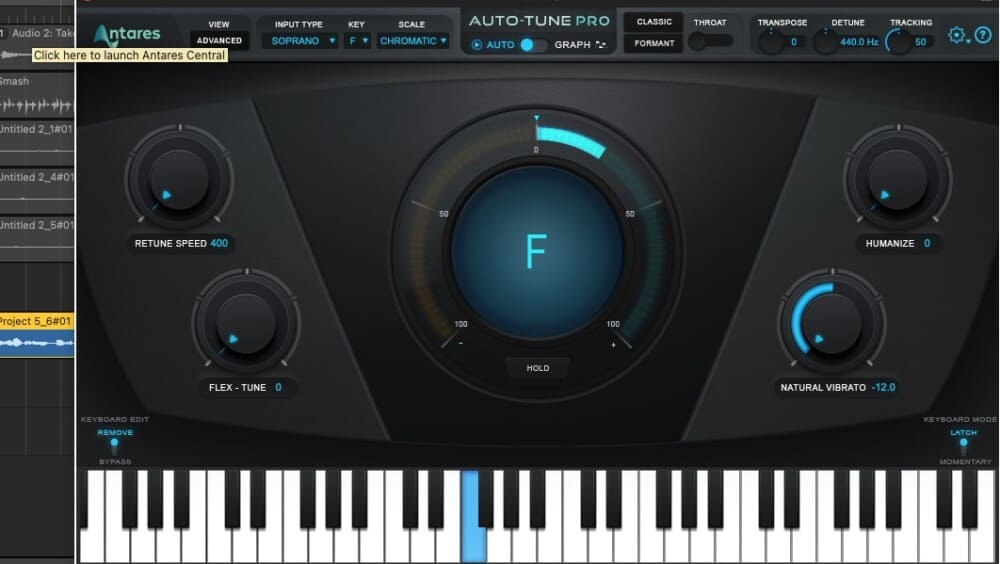
Another good way of pitch-shifting your vocals which I recently discovered is Antares Auto-Tune Pro, which, other than Melodyne 5, is the best vocal tuning plugin that’s compatible with Garageband. It goes for a surprisingly reasonable price and it’s quite simple to use.
Essentually, to pitch your vocals with Auto-Tune Pro, you just have to use the transposition button on the top-right hand side of the Auto-Tune Pro interface. Turn it up 12 to get the desired effect. Check out the video here to see what I’m talking about:
YouTube Video Tutorial
Other Articles You May Be Interested In
- How Loud Should Vocals Be? [ANSWERED – With Examples]
- Can Melodyne Fix Bad Vocals? [ANSWERED]
- How To Mix Vocals In Garageband
- How to Use Auto-Tune (Pitch Correction) in Garageband
- How To Change The Key Signature (Pitch) In Garageband
Conclusion
And that’s all for this tutorial. It’s really not that difficult to pitch shift your vocal recordings, in fact, it just takes a few seconds, regardless if you choose the Pitch Shifter or the Vocal Transformer. How you go about it changes only slightly if you’ve used one or the other.
To pitch vocals in Garageband, you just have to use the “Pitch Shifter” or the “Vocal Transformer” within the Smart Control’s plugins, and then adjust either the “Pitch” and the “Mix,” if you’re using the Pitch Shifter, or the “Pitch” and the “Formant” if you’re using the Vocal Transformer.


 Written By :