To use the piano in Garageband
1) Select Steinway Grand Piano or Processed Pianos from the Software Instrument category
2) Use the (Command + K) shortcut to bring up Musical Typing
3) Press the keys in the center of the keyboard to play the notes
4) Use ‘Z’ and ‘X’ to change octaves
The guideline shown above is the quick and dirty way of playing the piano in Garageband, but there are some other methods that are worth talking about, including using a solid MIDI keyboard, connecting an electric keyboard to your DAW, or installing a third-party piano VST.
Piano Instruments You Can Use in Garageband
How you go about using the piano in Garageband depends on what method you’ve chosen. I’ve talked about a few of these before in my guide on getting the best free piano sounds, but the long and short of it is that there are a few really solid options for pianos for Garageband.
1) Garageband’s Stock Steinway Grand Piano and Processed Pianos
Even though it might not have the best reputation, I think Garageband’s Steinway Grand Piano sounds alright considering it’s free. Additionally, with the latest Garageband update, Apple introduced 17 more processed piano sounds that are really impressive.
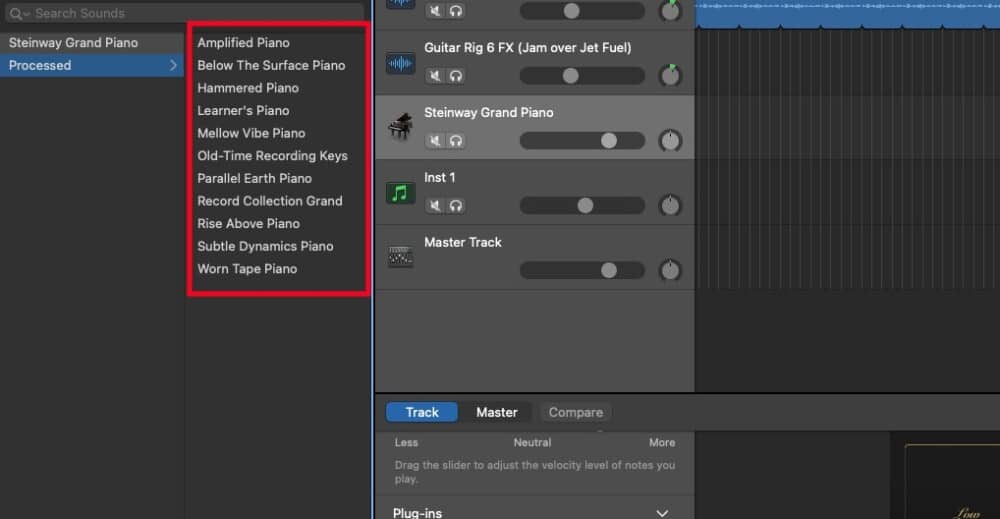
I particularly like the Old Time Recording Keys and the Parallel Earth, both of which I used for my lo-fi piano melody tutorial. Before the update, all we had was the Steinway and then all the synths – which are awesome by the way – but the piano sounds were severely lacking.
2) Piano VSTs, Plugins, and Other Alternatives (That Sound Good)
There are many different piano VSTs that you can get for Garageband, particularly if you’re willing to spend a bit of money. At one point in time, I would’ve recommended the KeyZone Piano or the 4Front Piano, but neither of these work anymore in Garageband.
That said, there are many that still work and sound great. All of these plugins I’ve talked about before in my guide to the best plugins for Garageband, but they’re worth talking about again here briefly.
A) Spitfire Audio Labs’ Soft Piano – FREE
Spitfire Audio LABS’ soft piano is probably one of the better piano sounds that you can get for free, at least until Garageband came out with their processed piano section. There was a time when the soft piano was the best free option, and maybe it still is, but the processed pianos are stiff competition now.
Either way, this is a piano that’s still worth getting because it sounds awesome, and plus, when you get Spitfire Audio LABS, you get access to a ton of other amazing VSTs like Peel Guitar, the Mandolin, the Moon Guitar, a String Quartet, and the list goes on.
I find that the soft piano sounds amazing for lo-fi-sounding chords like min11th chords and major 9 chords. If you don’t know what these terms mean, I recommend picking up PianoForAll – it’s how I learned about extended chords and inversions.
B) Komplete 13’s (Noire, Una Corda, The Maverick, The Giant, The Grandeur, The Gentleman)
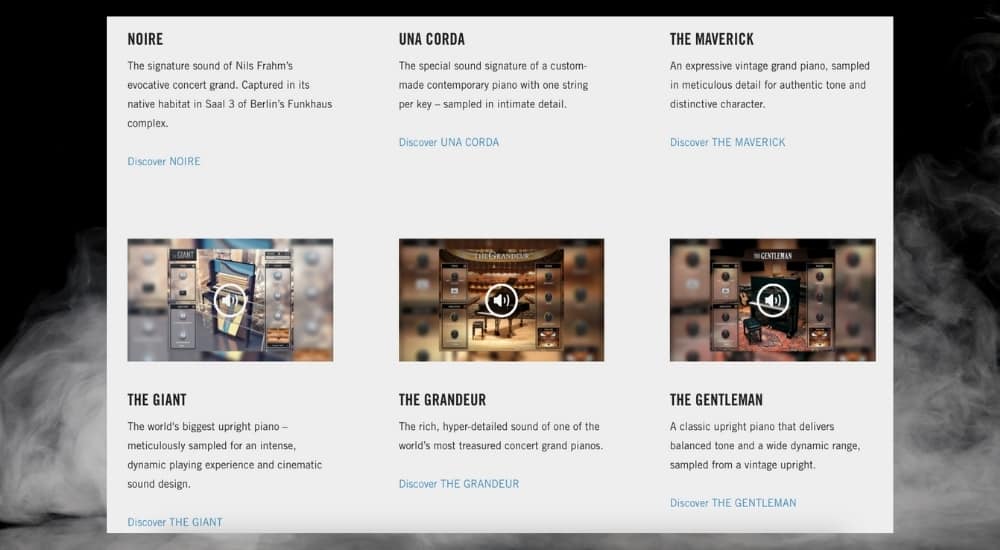
Komplete 13 some of the greatest sounding VSTs, samples, libraries, and sounds you could ever get your hands on, including some other great stuff too like Middle Eastern, Cuban, and African instruments, among many others.
In my opinion, you can’t praise Komplete 13 enough because it has many, many, many great sounds and it leaves very little to be desired. You can check out how these pianos sound in this YouTube video here. The guy does a great demonstration of the sounds.
C) Komplete Start (Hybrid Keys) – FREE
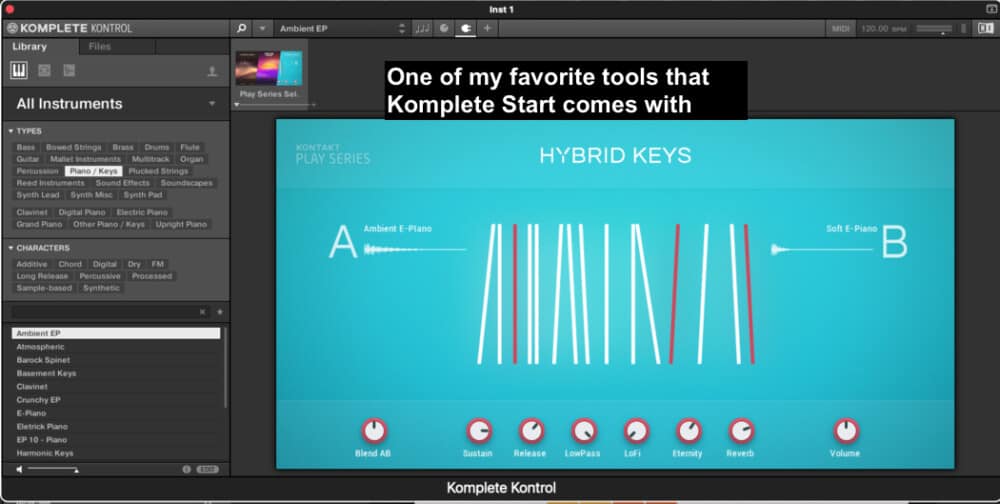
The Hybrid Keys is a cool sampler instrument that you get when you download the free version of Komplete 13, Komplete Start from their website, and it’s a great-sounding instrument. I would say it’s slightly better than the Soft Piano, but they both have their strengths and weaknesses.
I guess the strength of the Hybrid Keys is that you get more than one piano sound, whereas, with the Soft Piano, there is only one (but it excels at it). I’ve done a demonstration and a tutorial on Komplete Start before on my YouTube channel here and in my article.
D) XPand!2’s (Acoustic Pianos) – Very Inexpensive

Air Music Tech’s XPand! 2 is incredibly popular because it comes with a lot of great sounds and it’s very inexpensive if you get it on Plugin Fox. If you take a look at the hip-hop and beat-making subreddit, you’ll see that a lot of people praise this thing, and for good reason.
Most of the instruments – and there are probably a few hundred of them – sound mad good for the price. That said, there are some instruments in there where you say to yourself, “Nah, that’s not it.”
As a guitar player, for example, it’s hard for me to be satisfied with most guitar VSTs especially in this one, although, there are some good ones out there like the ones in my guide to guitar plugins.
3) With Loops and Samples (Apple Loops, Cymatics, Loopmasters)
Apple Loops
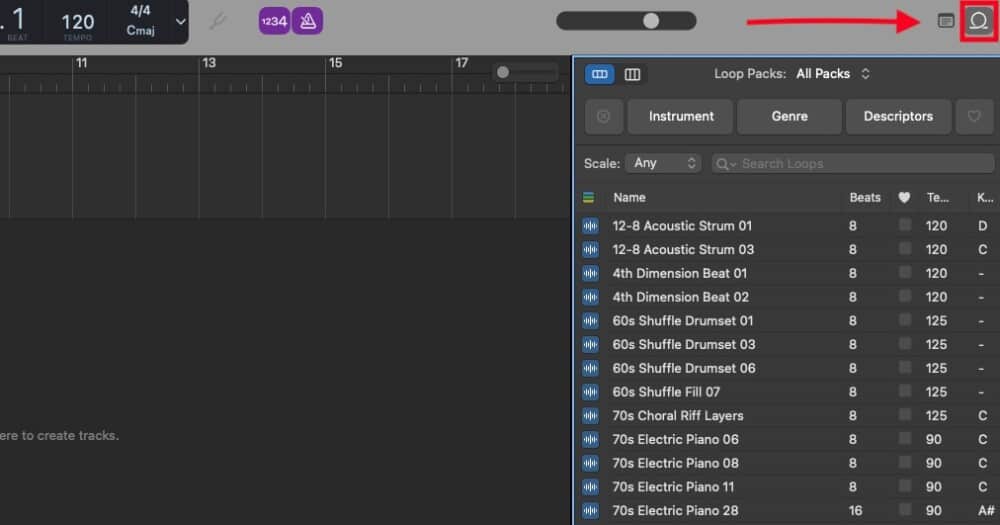
Another great way to use the piano in Garageband is to just head on over to the Apple Loops section on the right-hand side, select the “Piano” category, and then use something from it. People who are familiar with Apple Loops, Garageband, and Logic Pro X know the loops are surprisingly awesome.
Like I stated in my guide to Apple Loops, they often come in MIDI format, with the key signature and tempo, and none of them are cheesy. They all sound really good. You also don’t have to worry about royalty or copyright issues with them because they’re free of that like what is suggested here:

Cymatics
Cymatics is another great place to find loops, samples, and drum kits. I talked about the drum kits in my lo-fi tutorial (they’re great too), but there are all kinds of loops and stuff that you can get from them. Personally, I’m privy to the drum kits over everything else.
Loopmasters
Loopmasters are good too, and what I like about them is that their loops are cheap. I also find that their customer service is really good, as the people who respond are helpful, kind, and they don’t take forever to respond to your email.
For instance, when I asked them about nefarious actors who try and copyright claim you when they’ve used the same loops as you, one of their guys responded to me and had this to say (you may have to flip your phone on the side if you’re reading it that way):

How to Use Garageband’s In-Built Piano – Musical Typing
Garageband’s default Musical Typing feature is likely the keyboard we all use when we first start using Garageband. I know it was for me because I didn’t have a MIDI keyboard when I first started using it a few years ago before I made my article on how to connect a keyboard.
Even though I’ve since moved on to a MIDI keyboard (the Oxygen Pro Series 61), I’ll still use Musical Typing every once in a while because sometimes I’m too lazy to reach over and turn it on.
How to Bring up the Musical Typing in GarageBand
To bring up the Musical Typing in Garageband, use the keyboard shortcut (Command + K)
It’ll look like what you can see in the image below, including the sustain pedal, the ability to shift between octaves, modulation, a pitch bend, and then you can use the white and black keys which function the same way any piano or keyboard instrument does.

The nice thing about the musical typing is that it does a lot of the things that a MIDI Keyboard does (although obviously not as good). One thing that they might as well do away with though is the pitch bend which only bends by 20 cents, which isn’t much. It’s still cool that it’s there though.
It’s worth pointing out that you can also control the Musical Typing with your mouse and your keyboard. By that, I mean you can click on the actual buttons or you can hit the corresponding key on your keyboard.
For instance, if you want to use the Octave switcher, just hit Z or X. You can use this feature to its fullest when you use the full range piano which looks like what you can see here:

Using the Pitch Bend
The pitch-bend on a MIDI keyboard is way better to use because you can actually control the nuances of the pitch-bend, although the range is the same.
That said, you may find a good use for the pitch bend just by messing around with it. Press 1 and 2 with the Musical Typing open while holding a note to increase or decrease the pitch of the same note.
Using the Sustain Pedal
The sustain pedal functions on the Musical Typing keyboard simply by pressing the “Tab” button. The nice thing about it is that it works really well. I find the sustain function on the Musical Typing works – and sounds – nearly as good as a real piano. So that’s nice.
The only caveat is that you have to press and hold the “Tab” key in order for it to stay activated. Really, what the sustain or “Tab” button does is that it just extends the length of the MIDI notes as if you continued to hold them down.
This means that if you want to add a sustained effect after the fact with the Piano Roll, you just have to extend the notes manually and for as long as you want. I’ve said more about this in my article on how to sustain a note in Garageband, but that’s all for this section.
Adjusting the Octaves
The octaves on the Musical Typing function the same way as it would on a MIDI Keyboard, which is to press them to either decrease or increase the octave. You’ll have to press 1 or 2 on your keyboard to decrease or increase the octave respectively. You’ll know that it works because it’ll refer to a different ‘C’ note of the piano, ie, C3, C4, etc.
Adjusting the Velocity
Adjusting the velocity is straightforward as well, in that all you have to do is press ‘C’ or ‘V’ to decrease or increase the velocity respectively. I almost never use this feature because it’s just way easier to do so in the Piano Roll after the fact.
Adjusting the Modulation
The modulation effect on the Musical Typing functions a little differently in the sense that you have 5 options from 3-8, with 8 being the most intense and 3 being the least intense. Interestingly, I find this function only works on some instruments and not others.
You have to experiment for yourself to find out where it works and where it doesn’t. The modulation sounds similar to a phaser.
The Arpeggiator
Now, the arpeggiator is something else entirely, and really it warrants an entire article on its own, in fact, I’ve written one here, but the long and short of the arpeggiator is that it does what the name suggests – it takes one note or multiple and then plays them as a large arpeggio, depending on how you’ve set it up in the settings.
If you’re serious about learning how to use the arpeggio, take a look at the article above, because there is a decent amount to cover. That said, it’s fairly straightforward to use. All you have to do is click on the icon on the bottom right-hand side and it’ll bring up a large menu filled with different options.
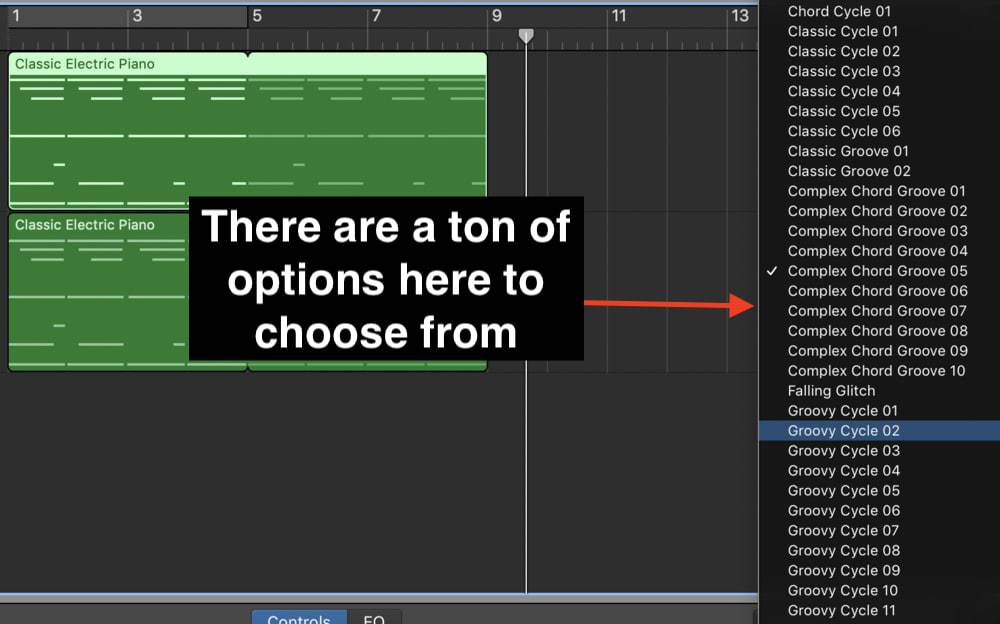
Try out Complex Chord Groove 1 and then play any note or any chord on the musical typing or on your MIDI keyboard to see how it sounds. And yes, as I just stated, the arpeggiator works just fine with your MIDI keyboard as well so that’s great.
Cool Plugins to Use on the Piano
I don’t have much to say about the kind of effects you would use on a piano, other than delay and reverb, because that’s what I use.
Additionally, I’ll use EQ on the piano as I talked about in this guide here, but in my opinion, there are so many piano types out there that you can often find one that sounds good right out of the box.
How to Play the Piano With A MIDI Keyboard
Connecting Your MIDI Keyboard to Garageband
To play the piano with a MIDI keyboard in Garageband, you first have to connect it which you can do by following this video down here. The video will show you how to connect more than one MIDI device in addition to some basic troubleshooting.
Factors That Determine How You Play the Piano in Garageband
How you go about playing the piano in Garageband also depends on a few factors including what kind of keyboard you’ve actually chosen.
For instance, some MIDI keyboards have weighted keys on them so it feels a lot more like a real piano; some of them have drum pads right on them, and some of them have all kinds of knobs and dials for you to control things in the DAW.
Some of the other features include the ability to adjust the VU meters in Garageband, you could switch between octaves on it, you could adjust the modulation, do more realistic sounding pitch bends, and you could change parameters in the smart controls with the dials on top.
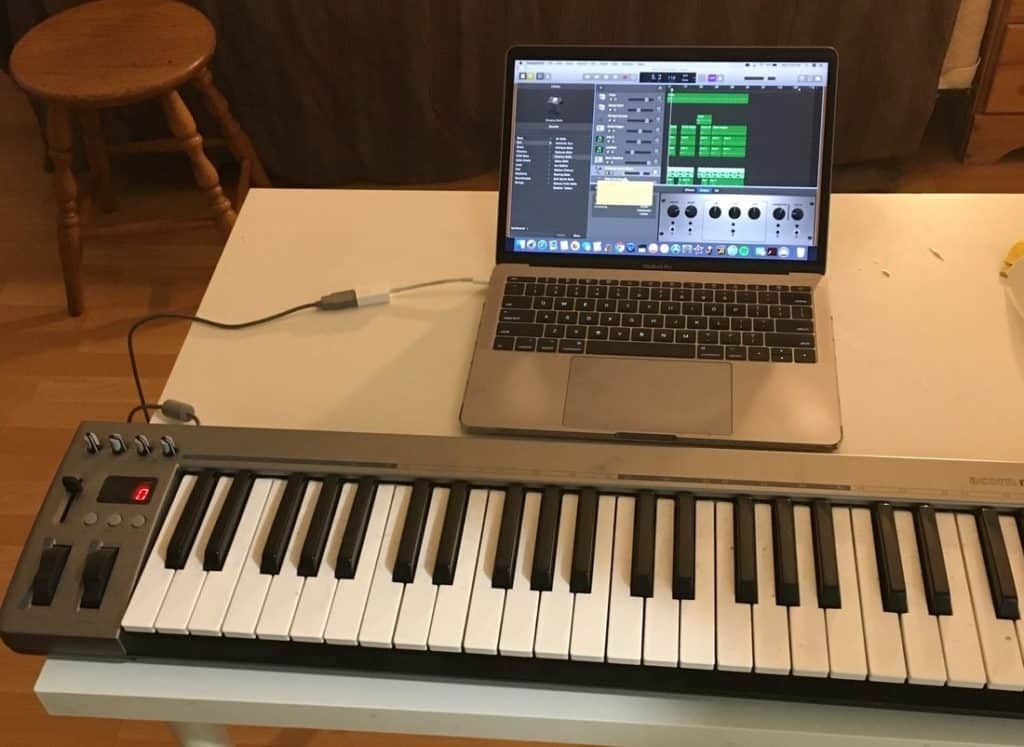
All of that is neither here nor there though. To play the piano in Garageband with a MIDI keyboard, you first have to connect it with a USB to Firewire cable or a USB cable. Use a USB-C adapter if your computer is a model made past 2016, and reset the MIDI drivers if you run into connectivity issues.

From there, you have to select one of the pianos from the plugin menu in the Smart Controls or in the Software Instruments category which is in the library.
Press the (Option + Command + S) keyboard shortcut to bring up a software instrument, choose your instrument on the left-hand side, and then with your keyboard connected and everything working, you can start playing it.
Troubleshooting If Your MIDI Keyboard Doesn’t Work in Garageband
Every once in a while, I get an email or a message from someone on my YouTube channel who says their device doesn’t work for whatever reason. Often, it’s the type of device that was hidden away in someone’s closet never to be used again, but now the person is trying to use it because they don’t want to get a new one.
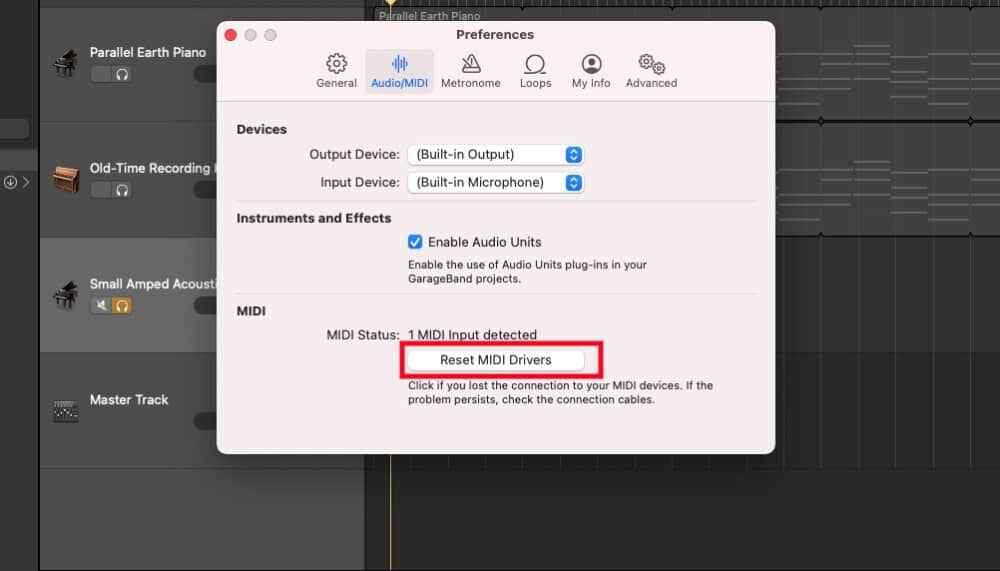
If you aren’t one of these people, you may just have to reset the MIDI drivers like what’s shown in the image here. Also, it’s worth mentioning that when you do connect your MIDI device, it’ll usually say there is 1 MIDI input detected.
How to Use the Piano Roll to Compose Piano Melodies in Garageband
Using the piano roll to compose piano melodies is really the same as using it for any other instrument. I’ve written a guide on how to use the piano roll here, but know that the parameters don’t really change in the piano roll with the instrument.
That said, as the title suggests, the piano roll is built using the piano as its template, so it’s incredibly straightforward to go about composing with it if you’re somewhat familiar with the piano as an instrument. Although, the piano roll and learning sheet music are separate things for sure.
Here are some quick tips for using the piano roll to compose your own melodies – also, check out this guide for more info on composing piano melodies with or without the piano roll:
1) Use the (Command + Click) to Draw in Notes Easily
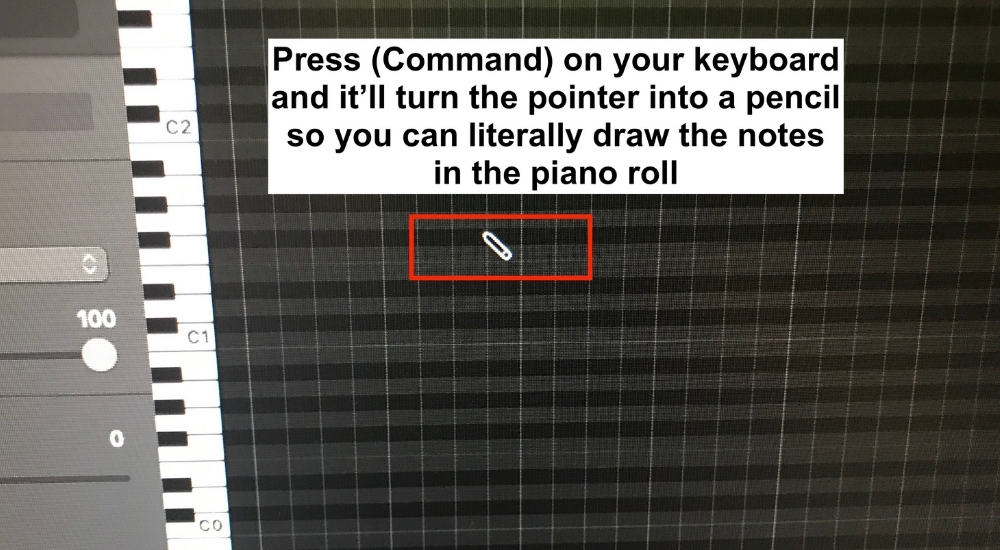
This function is really underrated in my opinion because not a lot of people talk about it when they mention the various tips and tricks they have for using Garageband.
Regardless, by using the (Command + Click) function in Garageband, you can save a lot of time drawing in notes, otherwise, you’ll have to right-click them in or play them on the keyboard.
2) Clicking A White or Black Key on the Left-Side Selects All Events of that Note

This is another one of those huge time-saving tips that I learned about later on in my “Garageband career” if we’ll call it that. As a matter of fact, I didn’t learn about it until someone mentioned it to me on my YouTube channel. I later wrote about it in my guide on how to separate the drums for mixing article.
Simply put, you just have to find the corresponding piano note that triggers the MIDI note, and then if you want to select all occurrences of that note in the piano roll, you press the key and it’ll grab every single one.
3) Use the Score Editor to See the MIDI Notes in Standard Notation
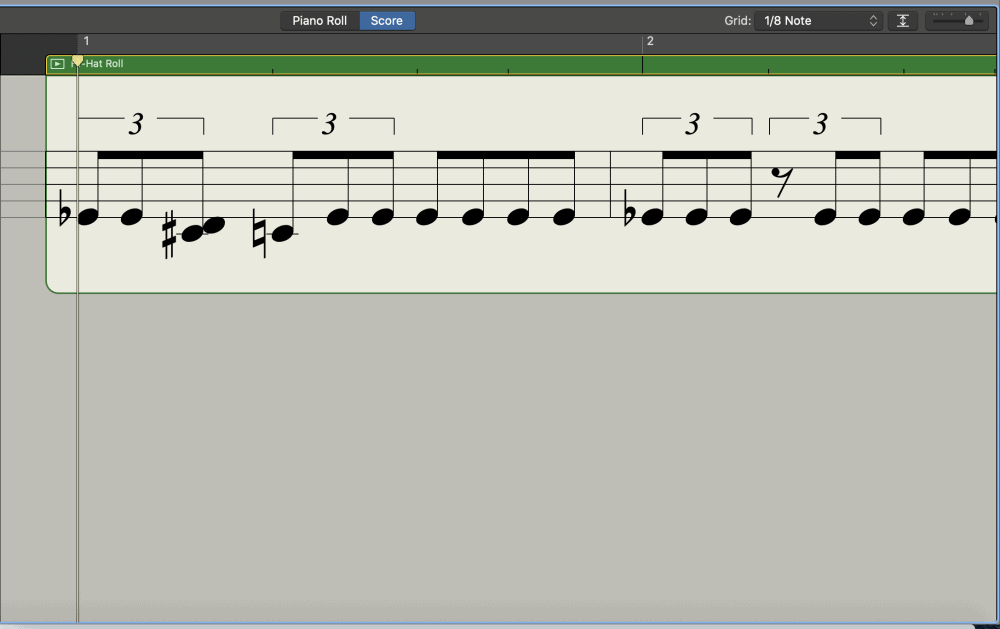
I use the Score Editor every once in a while, especially if I’m trying to figure out how to play something with another instrument.
For instance, I actually just use it today when I was learning how to play an E5b13 arpeggio on the guitar, that I figured out how to play on the piano. There are many uses for this thing, including printing off your own score which I wrote about in my article on the score editor.
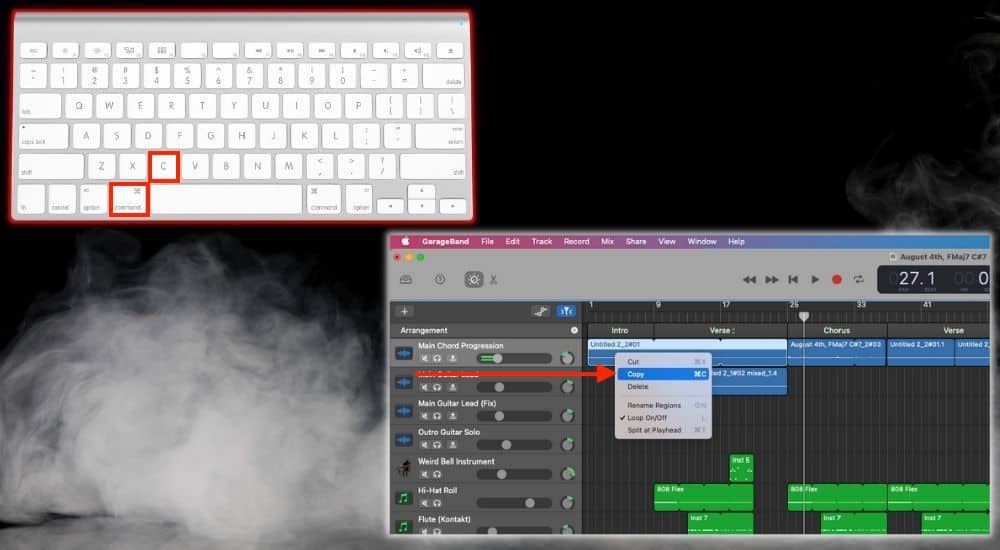
4) Use (Command + C) and (Command + V) to Copy and Paste
(Command + C) to Copy
(Command + V) to Paste
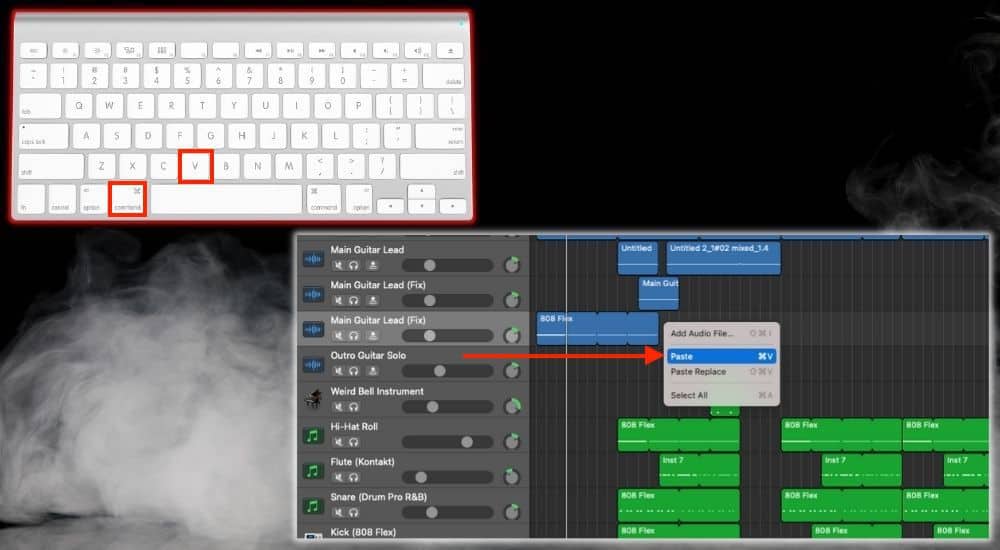
It’s not hard to imagine that these two keyboard shortcuts – by the way, I have a comprehensive list of shortcuts – make a big difference when you’re trying to use a DAW. And everyone has one, so it’ll probably be one of the first ones you use when you first start messing around with your DAW.
5) Use the Playhead Arrow When Copy-Pasting
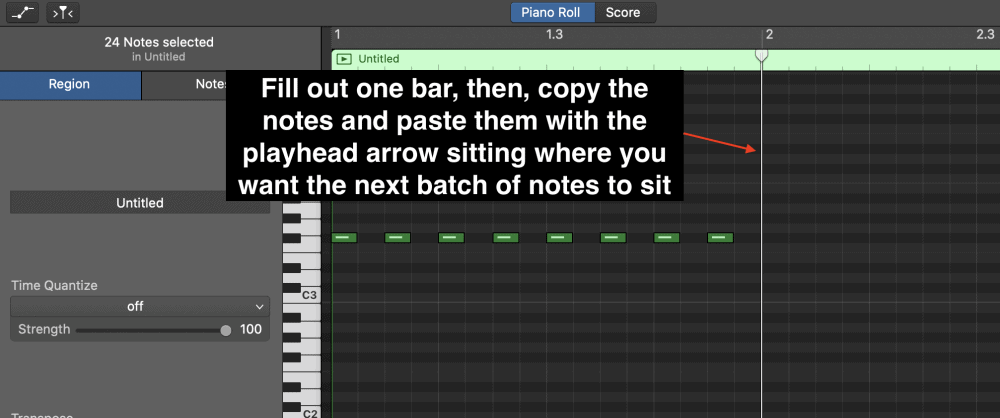
Admittedly, Garageband’s ability to copy and paste method for moving notes around leave something to be desired. There are certainly better DAWs with superior workflows in this regard. That said, the playback arrow is the arrow you need to use if you’re trying to designate where a batch of notes will be pasted.
6) Use Time Quantization To Fix Timing Mistakes

Turn on the time quantizer by pressing the ‘Q’ or by selecting a time value, ie, 1/16 Note, and then pulling it to the grid according to how much you’ve adjusted the strength of the quantization. I use the time quantizer all of the time, and there are a few tricks to using it which I’ve written about more in my guide.
7) You Can Watch the MIDI Notes in Real-Time As You Play

Not sure how useful you’ll find this feature, but I think it’s pretty cool that you can watch the MIDI notes on the grid as you can record them. I guess it’ll give you an idea of how on time you are with your playing.
8) Use the Transposition Function to Adjust by Semi-Tone
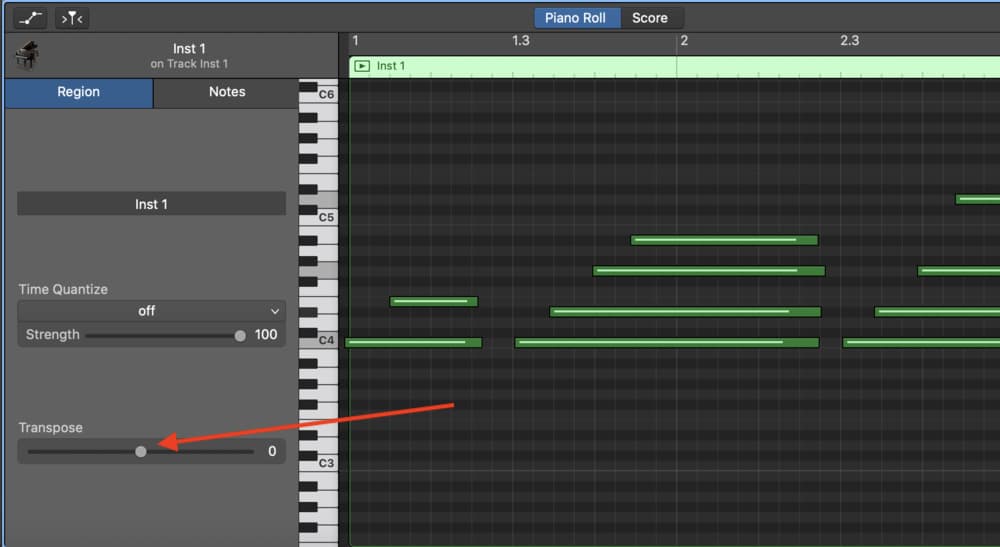
This is a cool feature if you want to quickly see how a chord progression or melody sounds after having adjusted the pitch. Pull it to the left to decrease the pitch by semi-tones and to the right to increase it. It goes by 24 on each side of 0.
9) Extend/Retract Many Notes At Once
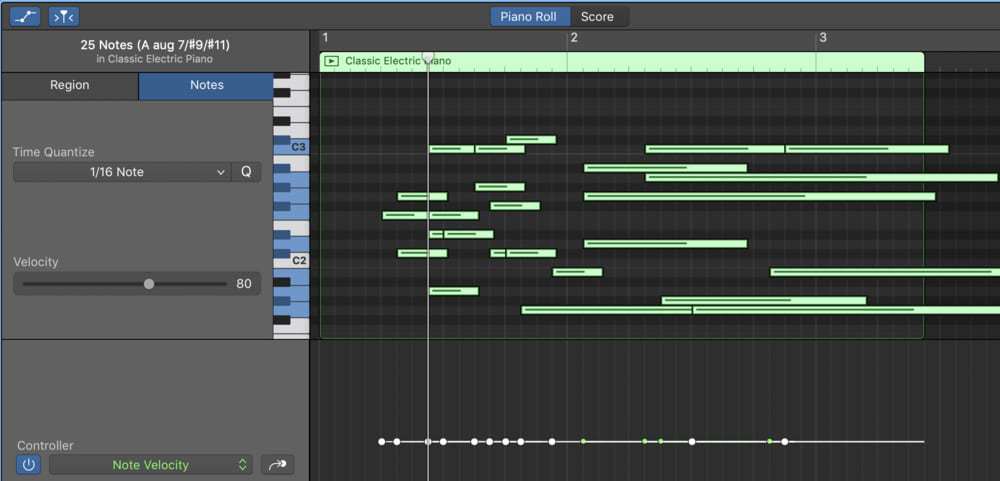
I use this all of the time if I want to add sustain to the notes that I’ve just played, that way it brings a bit of cohesiveness to a progression I’ve created.
10) Garageband Detects What Chords You’re Playing
As you can see in the video shown above, Garageband will actually tell you what chords you’re playing in real-time, which is a feature that I definitely appreciate. I’ve noticed that it’s quite accurate as well, although, it obviously doesn’t identify inversions very well.
Important Things to Note About Using the Piano in Garageband
1) Do You Need Help Making Piano Melodies?

If you need help learning the piano, look no further than PianoForAll which I already mentioned. What’s special about this E-Book/Video Course is that everything in it is taught in a very digestible way that gets you started playing right away. I couldn’t recommend it enough – in fact, I already did once in my other article.

 Written By :