Connecting a keyboard MIDI controller to Garageband is incredibly simple. I’ll walk you through a quick summary of how to do it, followed by a more in-depth step-by-step process afterward.
To connect a MIDI keyboard to GarageBand, connect a USB Cable (USB to USB-C or USB 2.0) between your computer’s USB port and your keyboard. For MIDI cable devices, older MIDI controllers, or electric pianos that don’t have USB, use a MIDI Cable or a MIDI interface like M-Audio’s 2×2 MIDISport.
The process for connecting a keyboard to your computer and DAW is identical for nearly all of them nowadays. However, you’ll probably have to buy a USB-C to USB Adapter sooner or later because most new manufacturers are using USB-C. Anyway, let’s dive into it down below.
Connecting A MIDI Device to GarageBand (A Step-By-Step Guide)
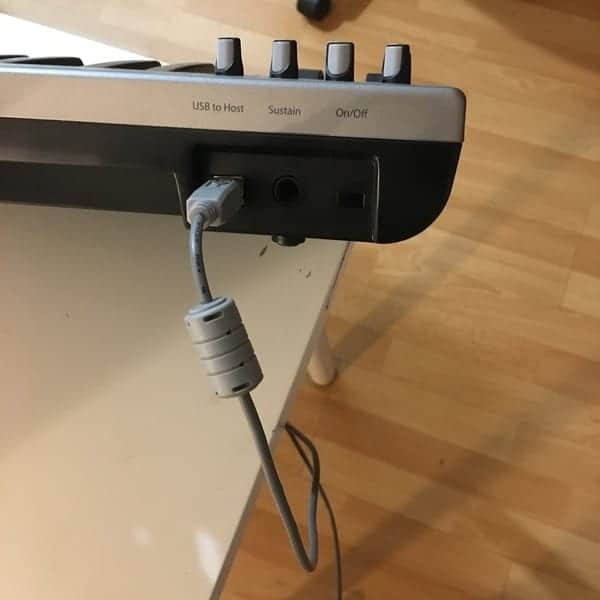
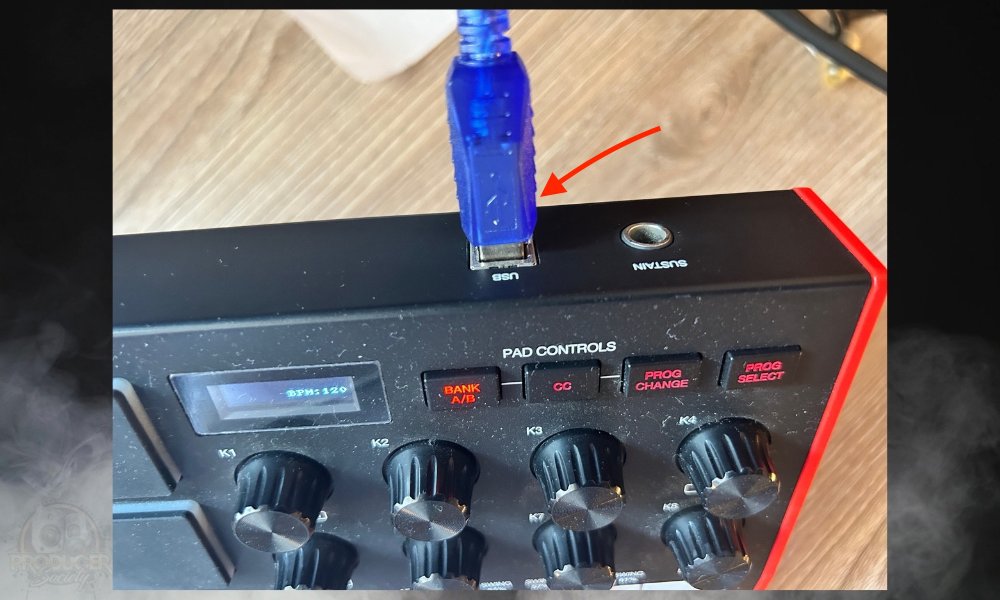
1) Connect the USB 2.0 Printer or USB-C Cable to the Back of your Keyboard
In most cases, your keyboard will have a USB port on the back of it. In this case, I’ve chosen my old-school Acorn MIDI Keyboard as an example because it uses the USB 2.0 Printer Cable port.
2) Connect your USB to USB-C Adapter to Your Laptop or PC
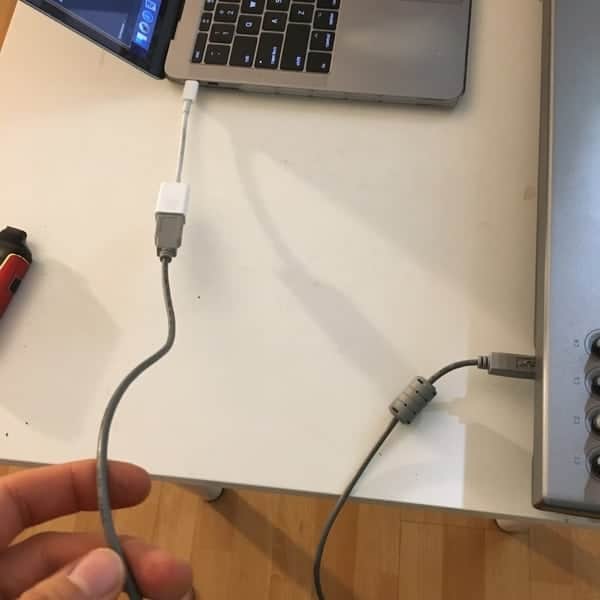
3) Plug Your USB 2.0 Printer Cable into Your *USB-C to USB adapter
4) Open Garageband
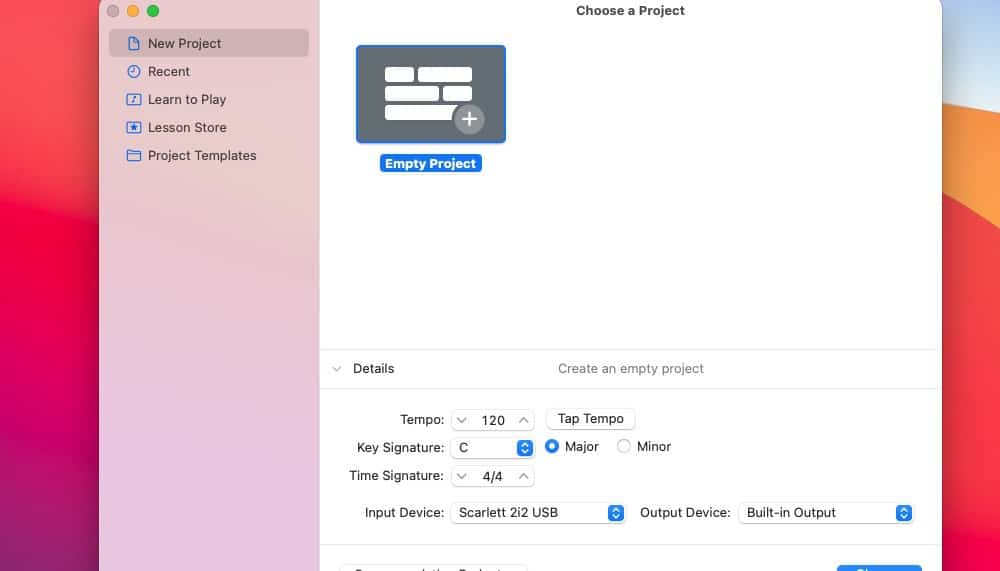
5) GarageBand Will Recognize Your MIDI Device Automatically

After you’ve opened up the program, you don’t have to use musical typing anymore. The keyboard will automatically work right away, without any problems.
*If you have an older computer, it’s possible that you may not even need this adaptor. The keyboard, through the USB port, should be able to connect to your laptop.
In the past, MIDI Keyboards were connected through the use of Pin Drivers, but new MIDI Keyboards use USB. If you want to connect an older keyboard to Garageband, you’ll need a MIDI to USB adaptor.
What MIDI Keyboard Should I Use for GarageBand?
| Ranking | Best for Portability | Best 61-Key | Best 88-Key |
|---|---|---|---|
| 1# | AKAI MPK Mini Play | M-Audio Oxygen Pro 61 | M-Audio 88 Hammer Pro |
| 2# | M-Audio 25 Oxygen Pro | N/A | N/A |
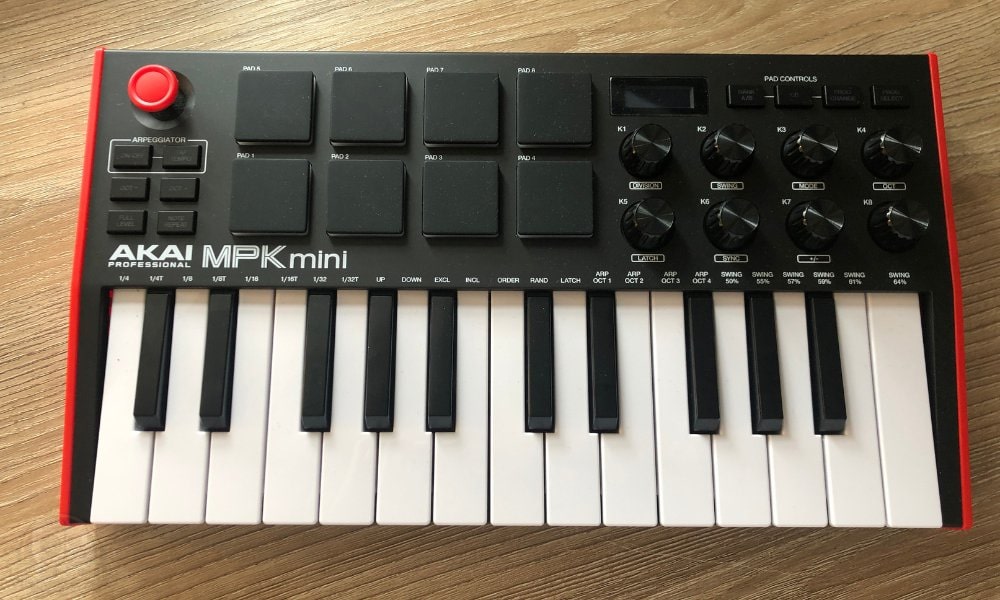
For most people, this keyboard will work perfectly because it’s cheap, and unless you’re a great piano player, it’ll have all the keys you need.
AKAI MPK Mini Play vs. M-Audio Oxygen Pro 25
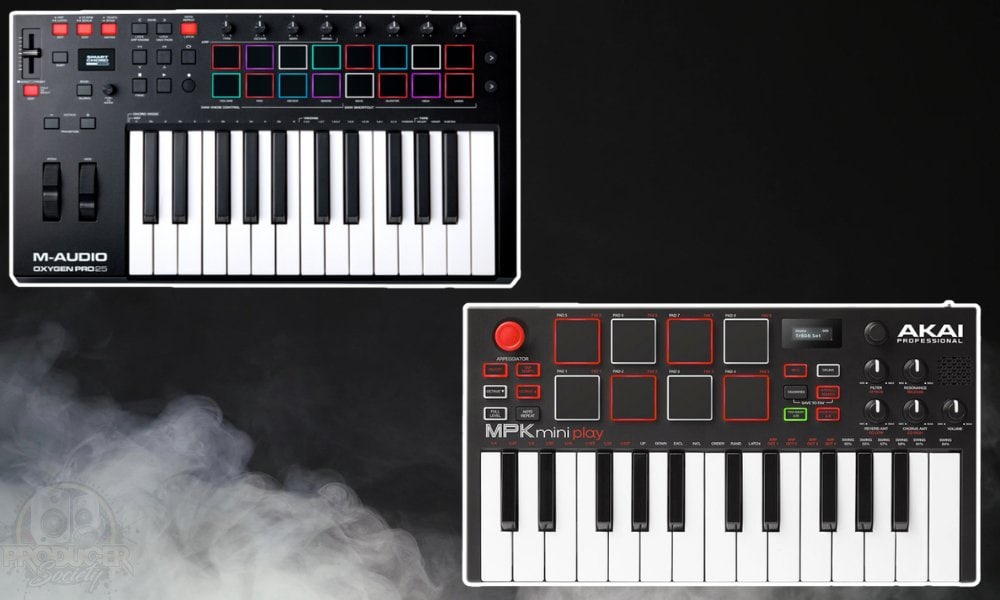
In my opinion, a 25-key is good for travelling and when you need something on the road, but for regular music production, a 61 or 88-key is best.
The M-Audio Oxygen Pro 25 is actually a better unit than the AKAI MPK Mini but it costs more money, which is why I put the AKAI MPK Mini before it.
Additionally, you’ll notice I’ve included the AKAI MPK Mini Play instead of the regular one. The reason is that I wish I had gotten it instead of the regular AKAI MPK Mini MKIII. It has an in-built speaker and its own sounds so you can use it as a creative jamming tool.
M-Audio Oxygen Pro 61 vs Arturia KeyLab 61 MKII

If you want a 61-key keyboard, the M-Audio 61 Oxygen Pro is really sick for the price and I would recommend it if you’re looking for something bigger. A lot of people like the Arturia KeyLab models, but personally, I think they’re overpriced.
For most people, the M-Audio keyboards are going to be the most valuable for the price, especially when comparing the 61-Key and 88-Key versions.
M-Audio Hammer Pro vs. the Arturia KeyLab 88 MKII

Get the 88 Hammer Pro from the same company if you want a full-size MIDI keyboard. The same thing I said earlier applies to the Hammer Pro and the KeyLab 88. The 88 Hammer Pro is more valuable for the price.
Grab PianoForAll To Learn the Keyboard

While you’re at it, do yourself a favour and get the inexpensive video course PianoForAll because then you’ll actually know how to the piano keys to their potential.
I used to think that it wasn’t possible to assign samples to individual keys in Garageband, however, it’s very capable of this feature, In fact, you can check out the video for yourself below to see a step-by-step tutorial on how to do it.
At one point, you could do it right in Garageband’s default keyboard, Musical Typing, like what’s shown in this YouTube video here but now it has to be done in the AUSampler.
To assign samples to the keyboard in Garageband, you just have to use the Key Range parameter in the Sampler. It’s not hard. I showed how to do it in a separate article, however, I’ll show you how to do it here as well.
1) Open Your Smart Controls (‘B’ on your Keyboard)
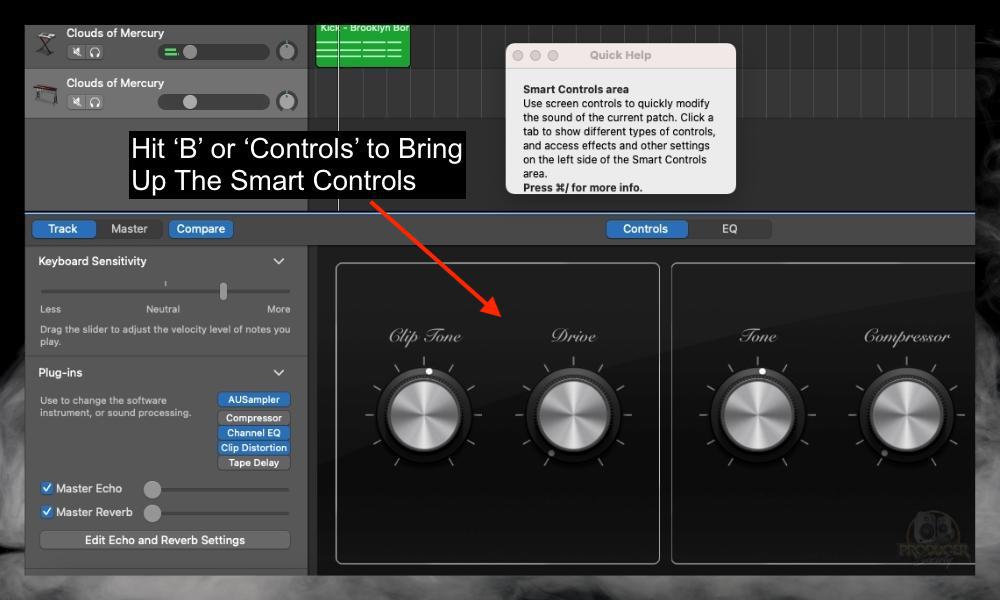
2) Click on A Plugin And Choose AUInstruments > Apple > AUSAmpler > Mono

3) Click the Gear Button and Choose “Add Sample”

4) Choose the Sample File And Select “Open”

5) Choose “Sine 110 Built-In” > Then Press the “-” Button
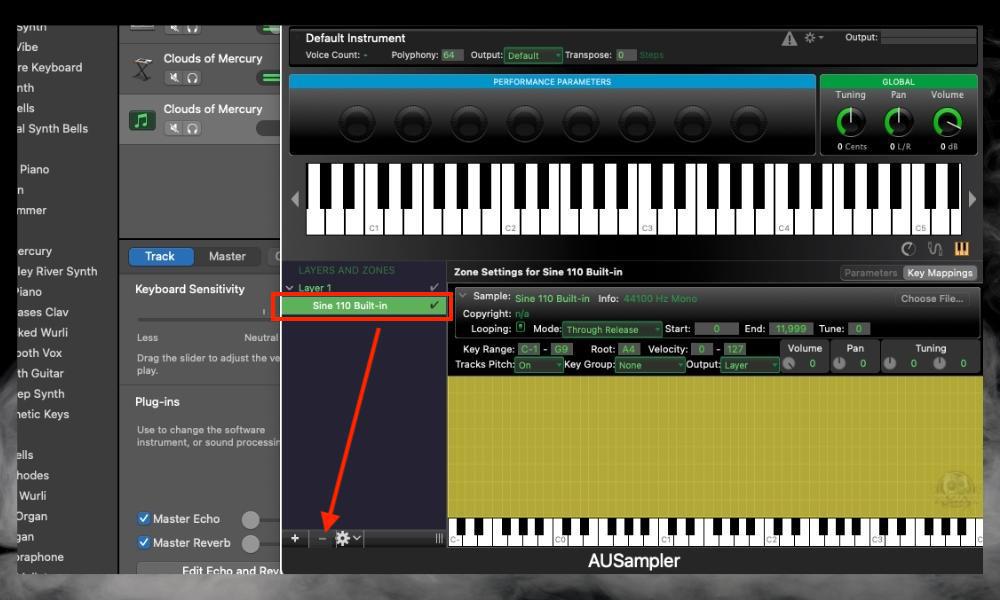
6) Select “C-4” in the Key Range and then the Key “C4”

7) Repeat Until You’ve Mapped Every Sound With Every Key
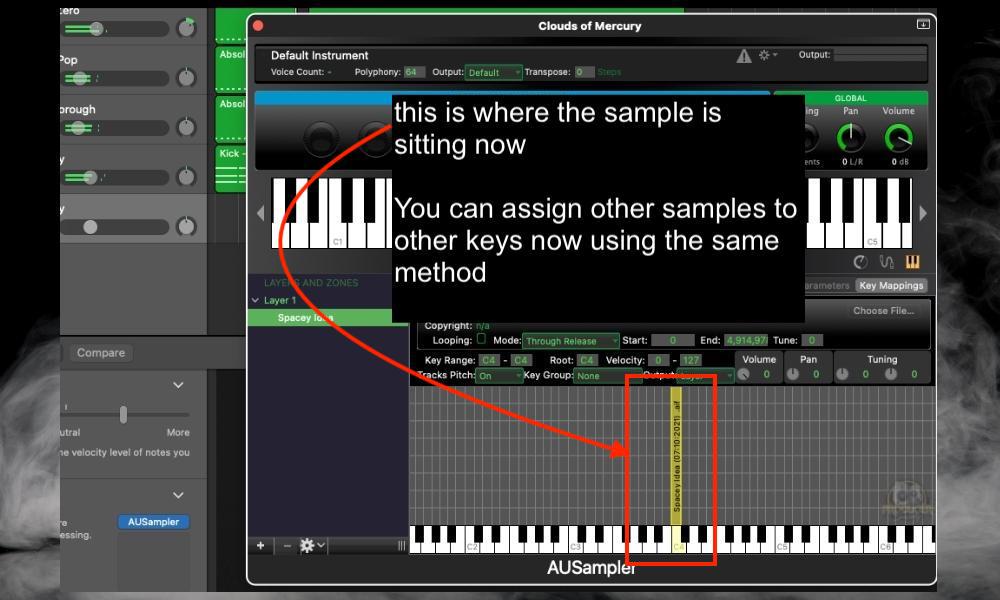
Quick Tip: Make sure you keep your sample files in the same location so GarageBand doesn’t have trouble finding them if you choose to save it as a preset and recall it later.
How To Use A MIDI Keyboard in Garageband?
Background and General Information
The moment you connect your keyboard to your computer, it should work right away. Garageband will recognize exactly what tool you’re using when you connect it.
It works the same way that the Musical Typing option does, but with a much bigger range, which makes writing music a lot easier, especially if you like to use the piano.
MIDI stands for Musical Instrument Digital Interface. The ability to change phrases of music after you’ve recorded it is the main benefit of using MIDI.
For instance, if you’ve written a piano riff using a MIDI Controller, you can go back and adjust the timing, velocity, rhythm, as well as pitch of the note.
It’s a lot easier to change and modify music created through a MIDI Controller, in comparison to an analog recording.
Tip: After making a melody with a MIDI Controller, open a new track with whatever instrument you want, and then copy and paste it into the new Software Instrument Track.
For instance, if you’ve created a melody using the Steinway Grand Piano, you could copy and paste your music into a new Software Instrument Track like String Movements, thus, filling out your mix within seconds.

How to Use the MIDI Keyboard and Its Parameters in GarageBand
To use the MIDI Controller, you’ll have to open a “Software Instrument” track. On the left-hand corner of the string, Garageband has all of the different instruments and settings that you can use.
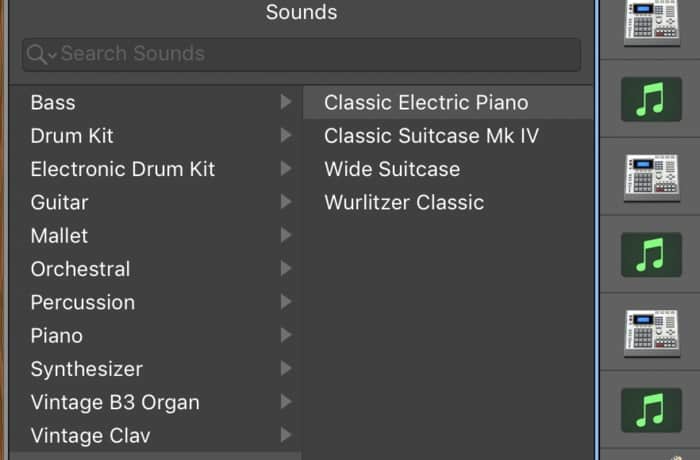
When using the MIDI controller for creating drums, the drum sounds will usually be within the first octave of the keyboard. Most drumkits have a limited number of sounds, usually around 9-12.
When creating melodies, whether, through the use of the Steinway Grand Piano, or a Synth, the MIDI controller offers the range of however many keys you have with your controller.
1) Creating A New Software Instrument Track
If you want to create another Software Instrument track, click on the Track Header using the “secondary click (right click)” function, and choose New Software Instrument Track, or New Track With Duplicate Settings.

2) Deleting the Software Instrument or Audio Track
If you want to delete the existing Software Instrument Track, use the (Command + Delete) function.
3) Changing the Timing, Pitch, and Velocity (loudness) Of Your MIDI Notes
Through the use of the “Piano Roll Grid,” at the bottom of Garageband, you can adjust the timing and pitch of each note played.

Some people don’t even use the keyboard to create melodies and drum tracks, you can manually type in each MIDI note by double-tapping your trackpad and selecting the “create note” option.
As I said before, the best part about using a MIDI controller is that you can fix mistakes that you’ve made simply by changing the position of the MIDI note.
4) How To Change The Timing Of Your MIDI Notes
The notes, which are little green squares, can easily be moved around by clicking and dragging it to the desired pitch and time.
If you use the Zoom-In function on your Mac, you’ll see that the Piano Roll Grid is divided up with equally distributed lines.
If you want your music to be perfectly in time, just drag and drop the MIDI notes to the closest line, that way your melody is in time, and when you create drums later, everything will be synchronized.

This is legitimately important. Otherwise, your melody is going to sound off-balance and weird. Although, maybe that’s what you want.
5) How To Change The Pitch Of The Notes
Drag and drop the MIDI notes either up or down to the desired pitch. On the left-hand side of the “Piano Roll Grid,” you’ll notice there is a vertical keyboard, showing at which point each note is played according to the piano.

Also, if you hover your cursor over the note, it’ll tell you the pitch, as well as the velocity (strength) of the sound.
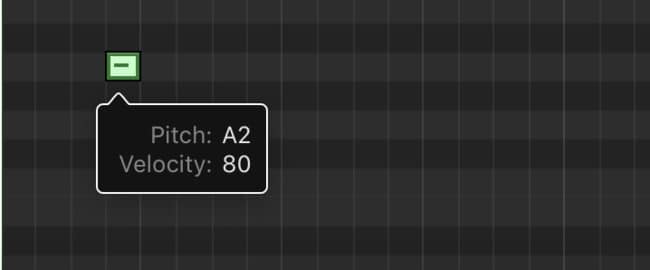
6) How To Change The Velocity (Loudness) of the Notes
To my knowledge, there are two ways of doing this in the newest version of Garageband. On the left-hand side of the “Piano Roll Grid,” you’ll see a slider along with the title, “Velocity” (there are some cool things you can do with this which I’ve explained before my comprehensive Piano Roll tutorial).

After selecting your note, you can change the loudness or strength of that note by dragging the slider to the left or right. Increasing the value, (0-100), will make it louder, and decreasing it will make it softer.
Underneath that option, there is also the “Controller” option. You get to this setting by clicking on the button, “Show/Hide Automation.”

Click the power button that looks like a typical “Power” Function.

Then you can drag the vertical slider up and down to change the loudness of that note.
Truthfully, using a MIDI Keyboard in a DAW is a straightforward process, and through a bit of trial and error, you should be able to figure it out.
How To Open the Keyboard in GarageBand
Use the (Command + K) option to bring up musical typing in Garageband (I’ve got more keyboard shortcuts in my guide, by the way). You can also select the “Show Musical Typing” option in the settings in the toolbar up top in the DAW.

Additionally, if you want access to a much bigger, but more limited way of playing the keyboard, then click on the option, “Show Keyboard.”
This isn’t nearly as good as using a regular MIDI Keyboard, but it’ll do if you don’t want to go out and buy a keyboard, which you definitely should do.
Why Isn’t My MIDI Keyboard Working?
1) Check Your Input and Output Options in GarageBand’s Settings

Make sure that you’ve selected the correct input and output options within your Garageband preferences to start. Usually, this part isn’t even necessary, but if your MIDI controller isn’t working for whatever reason, you can adjust these settings.
2) Reset Your MIDI Drivers

If your MIDI Keyboard isn’t working, go into your Garageband Preferences, Select “Audio/MIDI,” and then click the “re-set the MIDI Drivers” button.
3) Ensure You Haven’t Accidentally Muted or Isolated the Track

Is it possible that your Instrument Track has been muted? In the “Track Header” region, you can see there are two buttons, one that looks like a loudspeaker with a line through it, and another one that looks like a pair of headphones.
The one that looks like a speaker is the “Mute” button, and the Headphones button is the “Solo” button that isolates that particular sound within your mix, in case you want to just hear that one track, and not the others.
You’ll know your mute button is selected because it’ll turn a turquoise green and the MIDI region is no longer green, but a darker shade of grey. When the “Solo” button is turned on, it’s yellow.
Also, if you’ve accidentally isolated a track using the “Solo” button, you won’t be able to hear the MIDI controller, unless you’re currently playing the MIDI Controller through that particular “Software Instrument” track.
4) Have You Turned Down the Volume By Accident?

Another potential reason is that you’ve slid the “Volume Slider” all the way to the left, effectively muting the track.
5) Restart Your PC and GarageBand and then Reconnect it
If your computer isn’t recognizing your MIDI Controller, unplug and plug it back in after restarting Garageband. A way to tell if your computer has recognized the controller is by hitting a note on your MIDI Controller, and seeing if it registers that note at the top of the DAW.
If you hit one note, a little circle will appear in the top right-hand corner of the “Beats Position Display” at the top-center of Garageband.

If you play a chord on the MIDI Controller, Garageband will tell you the exact chord. Another way of checking to see if your computer recognizes the keyboard is to go into the “About This Mac” settings. Then click on “System Report.”
Go all the way down to where it says “USB,” and click on that. On the right-hand side of the menu, it will say what’s connected to your computer currently. On mine, it says the name of the device, “Masterkey 49.”
6) Try Another USB 2.0/USB-C Cable or Adapter

Try another USB (USB-C) Port on your computer. If you’re using the new MacBook, try a different device, it may be the adaptor. Remember, the simplest solution is usually the correct one.
YouTube Video Tutorial
For older keyboards and other devices, you might have to use a MIDI cable and an audio interface like the Scarlett 4i4 which has the necessary MIDI IN/OUT ports on the back.
Other Articles You May Be Interested In
- How To Connect MIDI Controller to Garageband iOS
- How to Connect an Old MIDI Keyboard To PC/Mobile (Any DAW)
- How to Use A MIDI Keyboard Without A Computer [SIMPLE]
- How to Use a MIDI Keyboard As A Piano [With & Without A DAW]
- How to Connect A MIDI Keyboard to FL Studio Mobile [EASY]
Important Things to Note About A MIDI Controller and GarageBand
1) Don’t Worry About the MIDI Controller Drop Down Menu in the Settings
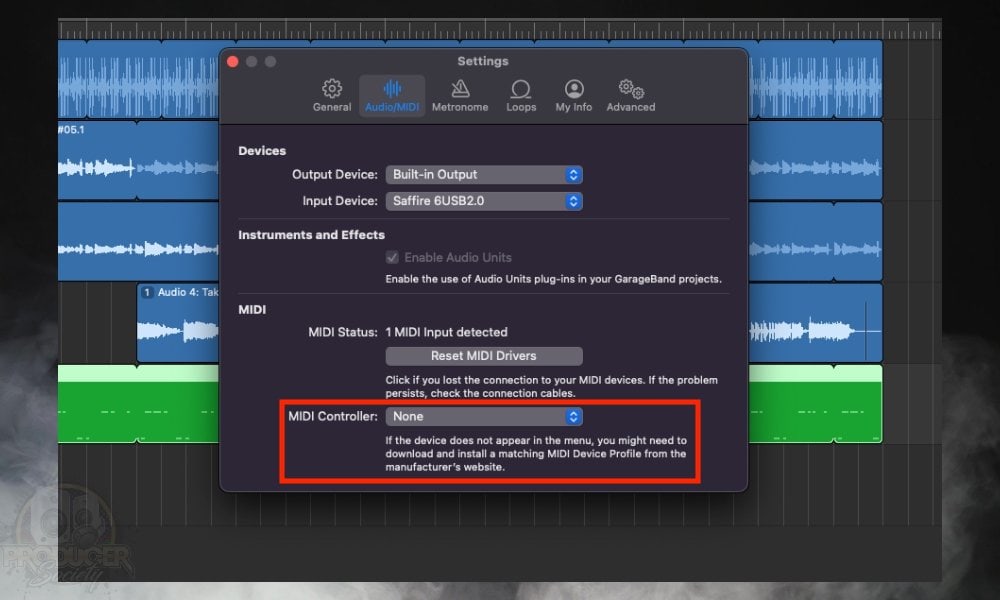
GarageBand has made many changes over the years, while mostly keeping the foundational features the same. For instance, this MIDI Controller menu recently appeared but frankly, I don’t know what it’s for considering it doesn’t seem to do anything.
Gear Mentioned
1) USB-C to USB Adapter
2) AKAI MPK Mini Play
3) M-Audio 25 Oxygen Pro
4) M-Audio Oxygen Pro 61
5) M-Audio 88 Hammer Pro
6) M-Audio 25 Oxygen Pro
7) Arturia KeyLab 61 MKIII
8) Arturia KeyLab 88 MKIII
9) USB to USB-C Adapter
10) USB 2.0 Printer Cable
11) USB-C Cable 6-Feet
12) Scarlett 4i4
13) PianoForAll


 Written By :
This was really helpful, but may I ask, how do I fix the ”connection problem”. When I first opened garageband, it asked me if I wanted to connect my midi keyboard, I pressed connect and it worked fine, I could toggle the commands from the knobs and switches of the keyboard. The last time I used it I pressed the ’do not connect automatically again’ box and connected it, but after that, I couldn’t control garageband from the keyboard knobs/switches. I hope you are able to help me.
Thankyou
Best regards, Sean Malvaroza
Try going into “Garageband,” then “Preferences,” then “Audio/MIDI,” and then hit the button that says, “Reset MIDI Drivers.” Let me know if that works.
Thank you for this advice, but im sorry to say it didn’t work:(
If you could send me a screenshot of the message you’re getting that’d be great.