 Written By :

Using a MIDI keyboard as a piano is an easy and dirt cheap way of doing so, moreover, it can add a level of versatility you may not even find with a traditional piano. But setting one up is not necessarily the easiest thing to do, at least when you’ve never done it before.
To use a MIDI keyboard as a piano, connect it to your computer with a USB, Thunderbolt, or USB-C cable. Download QuickMIDI (macOS), or Synthesia (PC/macOS/Linux), and then configure them so your MIDI keyboard is a recognized MIDI device. You can also use a free DAW like GarageBand or BandLab.
How to Use A MIDI Keyboard as a Piano (Without A DAW)
If you hate the sound of installing a DAW or some other software that takes a ton of space then you’re in the right place. In simple terms, using a MIDI keyboard often necessitates other gear like a computer or a smartphone, iPhone, or iPad.
But there are other programs you can download, stand-alone software, plugins, etc, that can also be used instead of a DAW and the plugins it requires. We’ll look at a few ways that you can use your keyboard without requiring a DAW. The first is what I think is the best: Quick MIDI for macOS/iOS.
1) QuickMIDI (macOS)
QuickMIDI is a program created for macOS/iOS and may also be available for Android. This means that you cannot directly use it on your Windows computer unless you first install an Android emulator following the instructions on this page.
Regardless, this is a super cool program. Not only is it easy to install and configure, but it also sounds really cool and there’s no start-up time really.
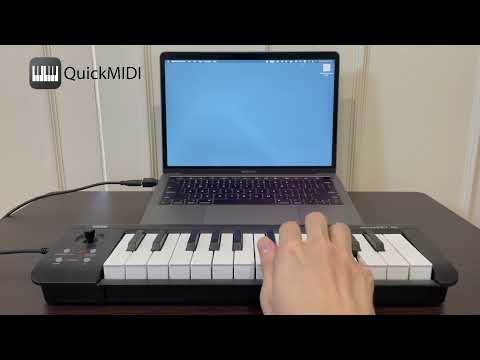
What I like about it is there is just a little keyboard icon on the top of your desktop screen, and then you just start playing your MIDI keyboard. This is why I included it first: it is the easiest way to get started.
![QuickMIDI - How to Use a MIDI Keyboard As A Piano [With & Without A DAW]](https://producersociety.com/wp-content/uploads/2022/05/QuickMIDI-How-to-Use-a-MIDI-Keyboard-As-A-Piano-With-Without-A-DAW.webp)
You don’t really have to configure any settings, open an application, or anything like that. It’s much closer to acting as a browser extension rather than something you have to open and use.
Just install it, have your MIDI keyboard connected and turned on, and it should just recognize your keyboard right away. Once installed, connect your keyboard using the simple steps outlined below or by taking a look at their video (if you do find yourself needing further instruction).
A) Connect Your MIDI Keyboard (USB) to Your Computer or Mobile Device
For Bluetooth (Wireless) Connection > Go to Step 4 Below
B) Launch QuickMIDI and Click on the Keyboard Symbol at the Top Menu of the Program
C) From the Drop-Down Menu – Click on “MIDI Device” and Choose Your MIDI Keyboard
D) For Bluetooth connection, Enable Your MIDI Keyboard’s Bluetooth Connection
E) Launch QuickMIDI and Click on the Keyboard Symbol at the Top Menu of the Program
F) From the Drop-Down Menu, Click on “Open Bluetooth Configuration”
G) Wait For it to Scan > Once It Shows Your MIDI Keyboard > Click on “Connect”
H) Once Connected > Click on the Keyboard Symbol at the Top Menu Again and Perform “Step 3” Above
Your MIDI keyboard is now connected and ready to be used. As I said a moment ago, if you’re running macOS or iOS, Quick MIDI is an awesome way to go. I’m glad that I gave it a shot because it makes jamming on the piano lightning quick.
If you’ve got an idea you want to test out, it takes seconds to start. The next option, Synthesia, is also a great program and it’s good for Windows and macOS. Let’s have a look at that now.
2) Synthesia (for Windows and macOS)

Synthesia is actually a game that makes it easy for you to learn piano pieces and exercises. The software offers a free version which you can use if you do not want to pay the $29 required to unlock its full features. To connect and use Synthesia, follow the steps below.
A) Download and Install Synthesia
B) Connect Your Keyboard to Your Computer or Mobile Device (Android and iOS) on Which Synthesia Is Installed
You will need to connect it with the appropriate USB cable.
C) Once Your Keyboard is Connected, It Should Immediately Be Visible in Synthesia.
If you cannot find it, visit the website of your keyboard’s manufacturer, download the driver and install it to solve this problem. Assuming you’re using a modern MIDI keyboard though, you shouldn’t have to download any drivers or anything like that. Unless you’re using something unorthodox or an older device.
D) Next, Open Synthesia (With Your Keyboard Connected) and Go to “Settings”
E) Choose “Musical Devices” & Enable the Input & Output of Your MIDI Keyboard Which Should Be Listed
F) On Your Keyboard – Play the First Note & Then the Last Note to Enable the Software’s Note Range
Map the exact number of keys on your keyboard. You should be ready to start playing or practicing on Synthesia. You’ll find preinstalled songs that you can learn to play at your pace if learning is your focus.
3) MIDIEditor (For Windows and Linux Only)

MIDIEditor (on their site) is a program that can be downloaded to your computer and used with your MIDI keyboard. This program is just about 10MB so it requires very minimal power to run. This software will allow you to play and record your music or the progress you’re making. To use this software, follow the steps below.
A) Download and Install MIDIEditor
B) With Your MIDI Keyboard Already Connected – Launch MIDIEditor
C) On The Top Menu – Click on “MIDI”
D) In the Drop Down Menu – Select “Settings”
E) Select Your MIDI Keyboard From the Dialogue Box
F) Close the Box and Begin to Play With the Default Piano Tone
If you require additional tones or want to record and edit your recordings, you can get all that additional information here.
4) Stand-Alone VST Plugins like Keyscape or Komplete 13

In terms of premium piano sounds, Keyscape and Komplete 13 are two of the most popular ever made. Keyscape is just piano sounds so it’s stacked with pretty much every piano sound you could ever want or need, whereas Komplete 13 comes with piano sounds but different instruments and effects as well.
Simply put, when used as standalone programs, you do not need to open up any DAW. You simply launch the program and you can immediately begin to play your MIDI keyboard through it. Let’s use Keyscape as an example. Follow the steps below to use Keyscape as a standalone program for your MIDI keyboard.
A) Ensure You Enable the “Standalone” Option to Install the Standalone Keyscape Program
B) Launch the Standalone Keyscape Program & Go Through the Process of Activation & Authorization
C) At the Top-Left of the Program – Click on “View”
D) From the Drop-Down Menu – Choose “Settings”
E) On the Window that Opens – Go to “Active MIDI Inputs” to Select Your MIDI Keyboard
You should now be able to play and hear your MIDI keyboard. If you cannot hear your keyboard, go back to “Step 4” above and check that the selected “Output Device” is the one from which you are monitoring the sound. If you encounter any more issues, you can look for a fix on the Spectrasonics website.
In terms of Komplete 13 Standard, many of the applications you get with it can either be loaded as stand-alone applications themselves or as plugins within a DAW. For instance, when you get Kontakt 6, this is just a plugin that you can use straight up as a DAW, itself. So you can load any piano in there and start playing.
Now that you’ve got an idea of how to use a MIDI keyboard as a piano without digital audio workstations, let’s take a look at how you would use a DAW.
How to Use A MIDI Keyboard As a Piano (With A DAW)

There are lots of music professionals and enthusiasts who love the piano but do not own one. The reason for this is usually an inability to afford one or a lack of space to accommodate it.
In most cases, it’s actually both, because, unless you plan on getting a Yamaha P125, you’re going to pay through the nose, although, a few people have told me that auctions are a great place to get pianos.
Regardless, technology has now made it possible for you to own, not just one, but as many pianos as you wish – but in the digital domain. I argued this in my article on keyboards versus pianos, for example.
Best of all, you can get all these in a simple, compact package that can fit into even the smallest of spaces if you follow the steps I’ll share now. If you already own a MIDI keyboard, click this link to skip to the section on setting your device up with your computer.
1) Buy a MIDI Keyboard

The first thing you’ll need to do is to get a MIDI keyboard. This can be a confusing task as there are many options based on the different features they can offer. To help you make the right choice, we’ll list some features that you can look for depending on your needs.
If however you just want to get started right away, you can get the M-Audio Oxygen Pro 61, a 61-key MIDI keyboard that will be more than sufficient for most users. You could get a 25-key AKAI, but as I said in this article on learning with 25 keys, this won’t be enough for learning the piano at least in the long term.
To make your own choice, consider the following features:
I: Number of Keys
The number of keys you’ll find will range from about 25 to 88. For standard use, go for the 61 keys, and for a true piano feel, go for the 88 keys.
As I’ve said before, I would say the bare minimum for playing the piano is 61 keys, because anything smaller than that, and you’ll find yourself limited when trying to play slightly more complicated pieces and with more range. This is what the Piano For All (on my Product Page) creator Robin Hall had to say when I asked him this as well.

ii: Velocity Sensitivity
This feature determines whether the keys will respond to how hard or softly you play. If you want to be anything close to how a real piano works, you’ll need a keyboard with some decent keys on it, otherwise, it’s just going to feel like a toy.
iii: Weighted Keys
The weight of the keys will determine how much pressure you’ll need to play a key. You can go for weighted keys if you want to enjoy the true feel of a piano or semi-weighted keys for a balance between a piano feel and that of an electronic keyboard.
iv: Connectivity Options
The connectivity option will determine how you will connect the keyboard to your computer. Your options will usually be any or all of the following: USB (regular or Type-C) or MIDI if you’re using a much older controller. These days, it seems like manufacturers are switching to USB-C.
V: Additional Controls
Aside from the keys, your MIDI keyboard can also include things like dials, volume faders, and drum pads that can be used with nearly all DAWs. Should you be considering production, then these added functions may come in handy.
2) Connect it to a Computer

Now that you have your MIDI keyboard of choice, the next step is to connect it to your computer. In most cases, this is a pretty straightforward process which I showed you how to do in this article.
Essentially, you just connect the USB-C, Thunderbolt, or USB cable from the port on the keyboard directly into the USB port on the computer. You may need a USB-C adapter to do this. Here’s a short video down below showing you how to do everything.
That said, most of the MIDI keyboards you’ll find today will have USB, Thunderbolt, or USB-C connecting ports. These can be connected directly to your computer and used without the need for downloading any additional drivers.
This is certainly the case with the M-Audio Oxygen Pro 61 that I recommended to you a moment ago.

There’s however the possibility, albeit slim, that you may have gotten a much older MIDI keyboard that requires a MIDI connection. In such a situation, you will require an audio interface with MIDI I/O to be able to complete the connection.
In that case, a PreSonus AudioBox 96 (also on my Product Page) will do. I would tell you to get a Scarlett 2i2 for this, but the newer generations have eliminated the MIDI IN/OUT for some reason – probably because most of their users don’t have this equipment anymore, but I digress.
The MIDI cable will connect to the keyboard’s MIDI OUT and then connect to the MIDI IN of your audio interface of choice. The audio interface will then connect to your computer.
Though we stated above that most current MIDI keyboards are “plug and play”, that is, that they will likely not require any additional driver download, there may be some exceptions.
Always check for and download the latest driver of your chosen MIDI keyboard from the manufacturer’s website if there’s one. Anyway, let’s get into how to actually set this stuff up.
3) Configure the Settings in the DAW
To ensure you really understand how to set up your MIDI keyboard in your DAW of choice, we will run through how to do this in a number of popular DAWs. Note that even if your DAW is not specifically mentioned here, the steps are very similar across the board.
FL Studio
To configure your MIDI keyboard in FL Studio, you’ll need to enable it from the MIDI device menu.
Step 1) Go to the Toolbar at the Top and Click on “Setup”
Step 2) Click on MIDI Settings and Look for MIDI Options
Step 3) In MIDI Options, Go to Input Settings
Step 4) Look for Your MIDI Keyboard and Click on Enable
Step 5) If You Can’t Find the Name of Your MIDI Keyboard, Find and then Enable “USB Audio Device”
Step 6) Change the Controller Type to “Generic”
Step 7) Confirm That FL Studio Is Recognizing Your Device By Pressing A Note
Ableton
To get your Ableton DAW to recognize and work with your MIDI keyboard, take the following steps:
Step 1) Look for the “Options” Tab and Click On It
Step 2) Next, Click on “Preference”
Step 3) Click on “Link MIDI” on the Left Menu of the Page
Step 4) On the “Input” Column, Click The Box To Choose Your MIDI Keyboard
Step 5) In the Next Section Under “MIDI Ports”, Find Your MIDI Keyboard and Turn the Track Button to “On”
Step 6) Repeat This Process for the “Output” Column
You should now be able to play your MIDI Keyboard through Ableton Live.
Logic Pro X
On Logic Pro X, connect using the steps below.
Step 1) Click on Logic Pro on the Top Left of the Screen
Step 2) On the Drop Down Menu – Click on “Control Surface”
Step 3) Choose “Setup” and Click on “New”
Step 4) Click on “Install” and Look for Your MIDI Keyboard From the List of Devices Listed
Step 5) Click on “Scan” and Logic Will Begin the Process of Installing Your Keyboard
Step 6) Close the Window When the Installation is Done – You Should Be All Set
GarageBand
With GarageBand, the DAW in most cases will automatically recognize and install your MIDI keyboard. This means that all you may need to do is plug it in and that will be it. However, if you plug it in and can’t still get a signal from your MIDI keyboard to your DAW, you can take the following steps.
Step 1) Click on Garageband on the Top Left of Your DAW
Step 2) On the Drop-Down Menu – Choose “Preferences”
Step 3) Click on Audio/MIDI
Step 4) Finally If You’re Running Into Issues, Click on “Reset MIDI Drivers”
The steps above will rescan and install the drivers needed to connect your MIDI keyboard to your DAW. Your keyboard should now be ready to work with GarageBand (here’s my beginner’s tutorial, by the way).
Tip
You can also connect your MIDI keyboard straight to your phone with a USB to Thunderbolt adapter as shown in my guide on connecting a keyboard to an iPhone for GarageBand iOS. Then, you can open GarageBand or the smartphone version of FL Studio, and then use that as a way of playing the piano.
4) Choose & Then Open a Piano VST (Virtual Software Technology) Plugin

At this point, all you may be getting on your DAW may just be the movement of the level meter showing that a signal is coming in from your MIDI instrument. This is quite normal for many DAWs. In GarageBand and Logic Pro X, for instance, you’ll also see a little dot in the BPM region.
Because of the way MIDI works, you’ll need virtual instrument software that will provide the piano tone that your MIDI keyboard will trigger. There are many different options to choose from, with the VST variety being the most popular.
The fact of the matter is that nearly all major DAWs have a stock piano that comes with them. FL Studio has a stock piano that you can use called FL Keys, GarageBand, and Logic Pro X both have the Steinway Grand Piano among many other free piano VSTs, and Ableton has a Grand Piano as well.
If you decide that these free pianos aren’t for you though, I would recommend getting a more serious piano sample library like Keyscapes.
Another great way to get a piano as I pointed out in my guide all about free piano sounds, is Spitfire Audio Labs which gives them away for free in the form of a soft piano. AIR’s Piano Pack is incredibly popular as well. Because of GarageBand’s latest update, there are a ton of processed pianos now too.
5) Use the Metronome and Recording Option

One of the benefits you can enjoy when you use a MIDI keyboard is the easy access to features like metronome and recording. Whether you are performing or simply practicing, these two functions can serve you really well.
The major function of a metronome is to provide a click track that will help you stay locked on to your rhythm. On most DAWs, you can usually activate it with just one click.
When you add the recording function, you can hear what you’ve played to know how well you sound. This means that your DAW can actually be a personal training ground and not necessarily a production center. Anyway, that’s how you use a MIDI keyboard and a DAW to play the piano.
Important Things to Note About Using A MIDI Keyboard As A Piano
1) There Are Other Softwares You Can Use
There is other software you can use to convert your MIDI keyboard into a piano, without loading up a DAW which tends to take up quite a bit of space on your hard drive. They also take a long time to download; they sometimes take a minute to load, etc. This dude from MIDINation has a lot of options you can check out on his site.