The audio interface with MIDI IN/OUT ports and a MIDI cable is all you need to get this set up. Don’t worry about a MIDI to USB Adapter. And it’ll work for most devices, ie, iPad, iPhone, MacBook Pro, PC/Android.
To connect an electric keyboard or an old MIDI controller to your PC or mobile device, you need a MIDI Cable and an audio interface with MIDI IN/OUT ports. Run the MIDI cable from the keyboard’s MIDI OUT to the audio interface’s MIDI IN after connecting the audio interface to your PC/mobile device.
What You Need To Connect An Old Keyboard To Your DAW
1) An Audio Interface With MIDI IN/OUT

You don’t have to get this one, specifically, to get your keyboard to work with your computer or DAW. It’s just the one that I own, so I can vouch for it. Another great audio interface to get is the aforementioned Scarlett 4i4, although, it’ll likely cost a bit more money.
I also have a Focusrite Sapphire 6USB which has MIDI IN/OUT ports as well. Regardless of the one you’ve chosen, just ensure the sound card you get has the ports on the back because it’s crucial for this to work.
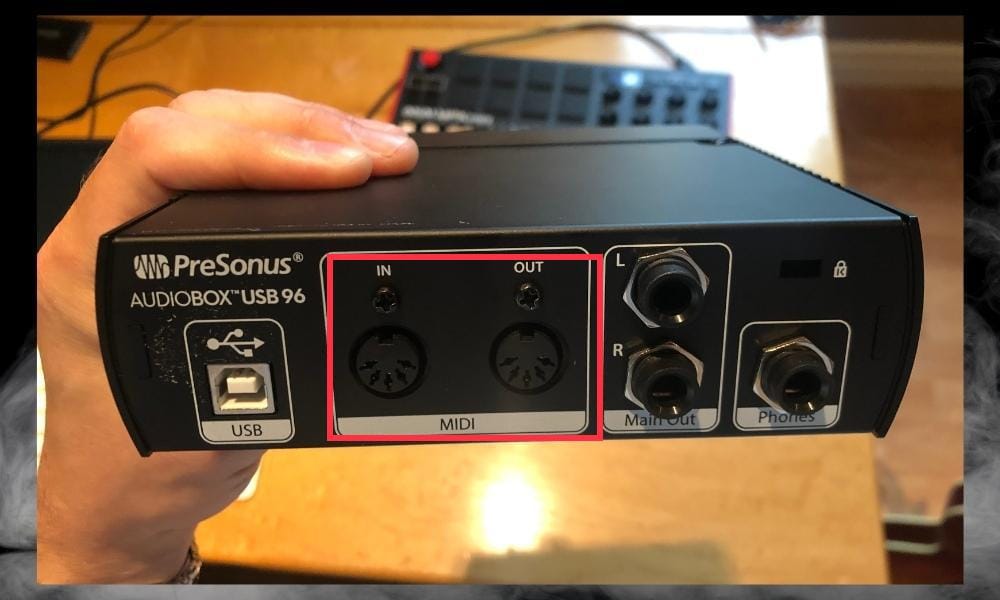
As I explained in my guide on the pros/cons of MIDI, the technology has been around since the early 1980s so any electronic keyboard, synthesizer, or drum machine that has MIDI IN/OUT will act as a MIDI controller for modern DAWs and plugins.
In the era of planned obsolescence and continuously changing multiport adapters, the fact that your super old electric keyboard from 1982 can control FL Studio 20 is impressive. At least it sure is to me. But I digress, let’s talk about the second thing you need.
2) A MIDI Cable
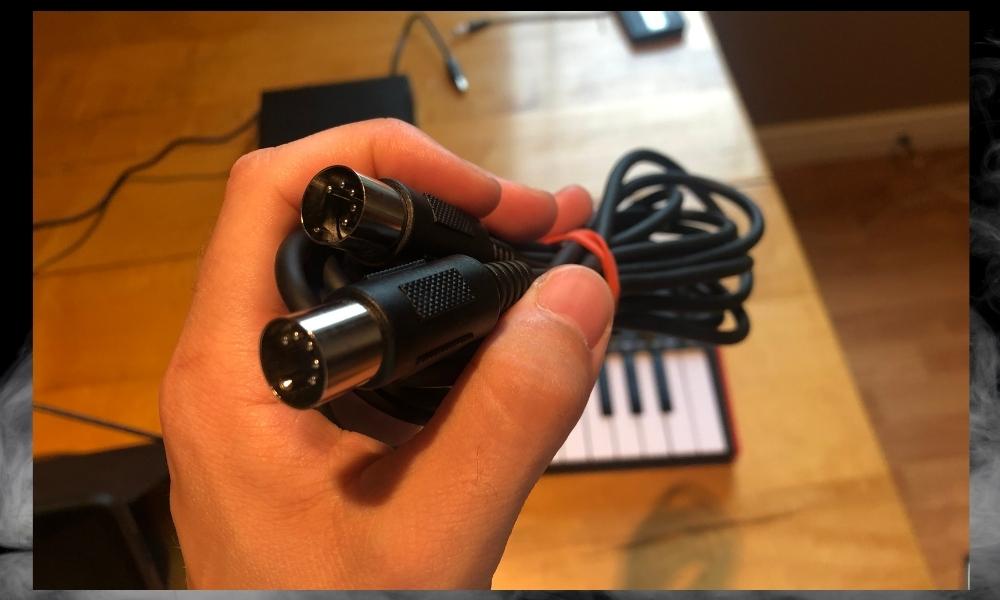
The next thing you need is a MIDI cable like the one shown in the image above. There’s not much to say about it, really, other than that I would recommend getting a 10-foot cable or even a 15-footer like the one I linked to.
The reason is that you want plenty of wiggle room because you don’t know how far away your electric keyboard has to be from the rest of your set-up.
I know that with the way that I currently have everything set up in my basement, it’s imperative for me to have a long MIDI cable because the keyboard is actually behind the chair that I’m sitting in and the audio interface is on the table in front of me. You can see what that looks like here:
![Electric Keyboard MIDI Set-Up - How To Connect An Old Keyboard to Your PC/Mobile [Any DAW]](https://producersociety.com/wp-content/uploads/2022/07/Electric-Keyboard-MIDI-Set-Up-How-To-Connect-An-Old-Keyboard-to-Your-PCMobile-Any-DAW-.jpg)
How To Connect An Old MIDI Keyboard To Your PC/Mobile
![How to Connect an Old Keyboard to PC/Mobile (Any DAW) [Diagram]](https://producersociety.com/wp-content/uploads/2022/07/How-to-Connect-an-Old-Keyboard-to-PCMobile-Any-DAW-Diagram-1-2.jpg)
1) Connect Your PC/Mobile Device With USB-C to USB or USB Multiport Adapter
![The Adapters for the iPhone/iPad - How to Use the AKAI MPK Mini Without A Computer [Guide]](https://producersociety.com/wp-content/uploads/2022/07/The-Adapters-for-the-iPhoneiPad-How-to-Use-the-AKAI-MPK-Mini-Without-A-Computer-Guide.jpg)
If you’re just trying to get an old keyboard set up with your DAW and device, and nothing else, then one of the adapters shown in the image above will work great. I chose the USB/Camera adapter for iPhone because older iPhone models may need to connect to another power source to power an audio interface.
I’ve talked about this before in my guide on connecting the Scarlett 2i2 to the iPad/iPhone and the AKAI MPK Mini with the iPhone, but the long and short is that the USB/Camera adapter will save you a bit of headache.
All that said, I don’t think either of these adapters are what you should use. A much better option is to get a high-quality Kramer adapter. I have one just like it and it works extremely well. You can see what it looks like in the image below:
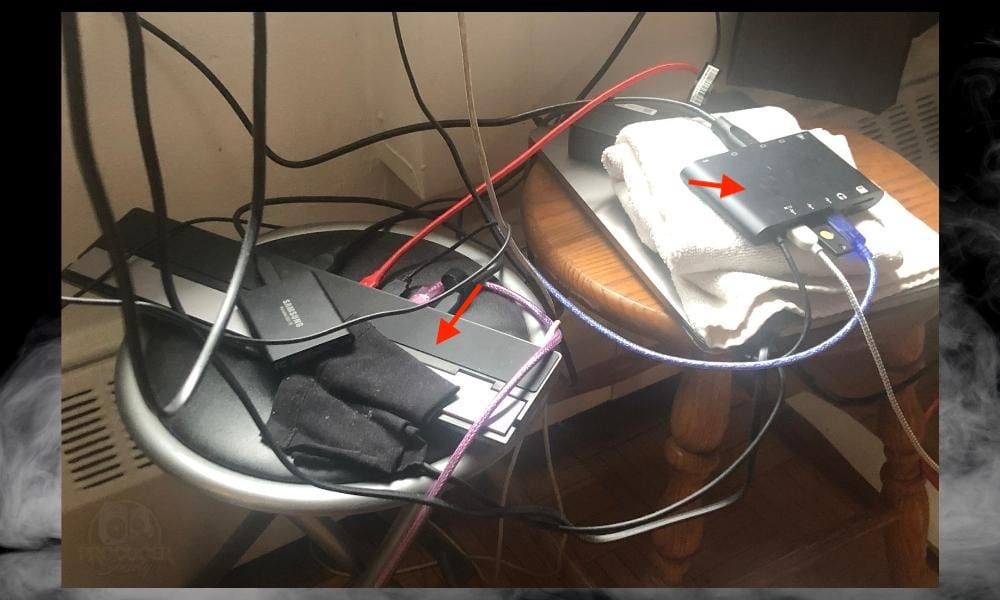
It has every kind of port you’d ever need and the cable is nice and long. It doesn’t get hot either, which is a common problem with Multiport USB Adapters. I understand they’re quite expensive though, which Is why I showed you the cheaper ones first.
2) Connect Multiport Adapter And Audio Interface With USB 2.0 Cable

My set-up isn’t the most organized, but the multiport adapter allows me to connect every single thing I need, including multiple USB devices, a Yubikey, headphones, Memory Cards, HDMI cables, and any other necessary tools.
Most audio interfaces these days use a USB 2.0 cable, also called a printer cable, but newer sound cards like the Scarlett 2i2 (3rd Generation) use a USB-C cable instead.
3) Plug A MIDI Cable Into the Audio Interface’s MIDI-IN Port
![MIDI IN Port - How to Connect An Old Keyboard to Your PC/Mobile [Any DAW]](https://producersociety.com/wp-content/uploads/2022/07/MIDI-IN-Port-How-to-Connect-An-Old-Keyboard-to-Your-PCMobile-Any-DAW-.jpg)
Connect your MIDI cable into the IN port on the back of the audio interface. The nice thing is that it works the way that makes sense. Because we’re outputting MIDI information from the electric keyboard, we’re inputting MIDI information into the audio interface, hence, MIDI IN and MIDI OUT.
4) Run that Same Cable From the MIDI-IN Port to the MIDI-OUT Port on the Keyboard
![MIDI OUT on Keyboard - How to Connect An Old Keyboard to Your PC/Mobile Device [Any DAW]](https://producersociety.com/wp-content/uploads/2022/07/MIDI-OUT-on-Keyboard-How-to-Connect-An-Old-Keyboard-to-Your-PCMobile-Device-Any-DAW-.jpg)
As I said earlier, we’re outputting information from the MIDI keyboard, so we want to connect the MIDI cable to the keyboard’s MIDI OUT.
5) Turn on the Electric Keyboard and Your PC/Mobile Device
![Turn on Keyboard and iPad - How to Connect An Old Keyboard to Your PC/Mobile [Any DAW]](https://producersociety.com/wp-content/uploads/2022/07/Turn-on-Keyboard-and-iPad-How-to-Connect-An-Old-Keyboard-to-Your-PCMobile-Any-DAW-.jpg)
The next thing you want to do is ensure your keyboard is connected to its power source, assuming it isn’t bus-powered, and then turn on your PC or mobile device if you haven’t done so already.
6) Open the DAW > Choose a Software Instrument
![Piano in GarageBand iOS - How to Connect An Old Keyboard to Your PC/Mobile [Any DAW]](https://producersociety.com/wp-content/uploads/2022/07/Piano-in-GarageBand-iOS-How-to-Connect-An-Old-Keyboard-to-Your-PCMobile-Any-DAW-.jpg)
Open up your DAW, and then choose a software instrument because you won’t be able to control anything if you’re using the wrong style of track. This is important, otherwise, you’ll feel like nothing is working even though you just haven’t chosen the proper track.
How to Configure the Old Keyboard and Your DAW [GarageBand macOS]
What DAW you’re using plays a role in how you set it up. For example, if you’re using GarageBand macOS or iOS, you won’t have to configure anything in the preferences. By the way, the short video down below shows you how to connect any standard MIDI device to your computer in case you need help.
In GarageBand, you would go to Preferences > Audio/MIDI > and then choose AudioBOX USB. It’s pretty straightforward. If you run into problems though, try selecting Reset MIDI Drivers.
![Preferences AudioMIDI - How to Connect An Old Keyboard to Your PCMobile [Any DAW]](https://producersociety.com/wp-content/uploads/2022/07/Preferences-AudioMIDI-How-to-Connect-An-Old-Keyboard-to-Your-PCMobile-Any-DAW-.jpg)
How to Configure the Old Keyboard and Your DAW [FL Studio]
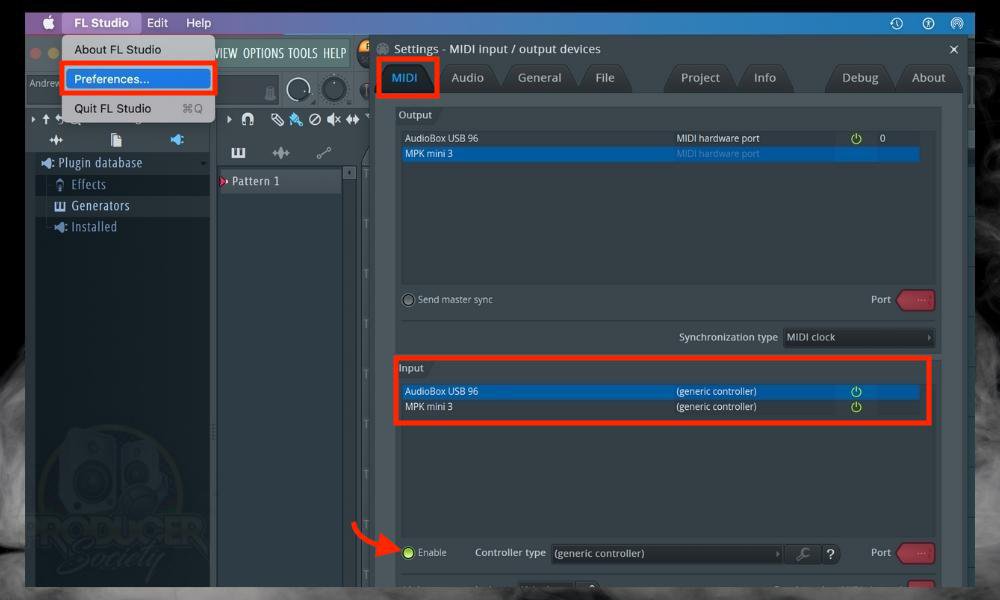
However, if you’re using FL Studio or something similar, you’ll have to go into FL Studio > Preferences > MIDI > Select the Device > Check the Enable box.
7) The Electric Keyboard Will Control the Software Instrument
Start pressing on the keys on your electric keyboard, and you’ll notice that it controls your DAW perfectly and without any issues. Check out the video above that I made which demonstrates this whole process.
5 Tips for Using An Old Keyboard or MIDI Controller With Your DAW
1) Disconnect Your Power Source from the Multiport Adapter First

For whatever reason, I’ve discovered that the power adapter that’s plugged into my multiport adapter will often interfere with the connectivity of other devices, including external monitors, as well as the electric keyboard. If you find yourself unable to get the keyboard to connect to your DAW, try unplugging the power source and then plugging it back in.
2) You Can Also Use A MIDI to USB Adapter for Connecting Old Keyboards
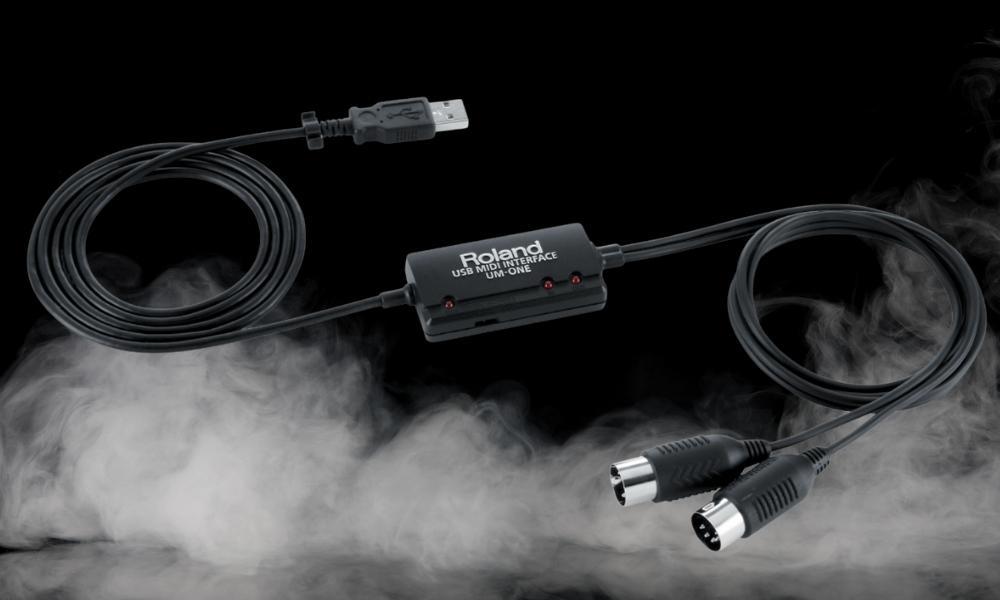
A lot of people recommend using a USB to MIDI adapter or USB to MIDI interface, however, I find that just using an audio interface as I’ve already shown you is superior for a few reasons.
One reason is that most people into music production and home recording will already have an audio interface at their disposal.
The other reason is that I find USB to MIDI adapters to be unreliable and annoying. For example, I wasn’t able to get the USB to MIDI adapter to work with GarageBand and my Yamaha electric keyboard.
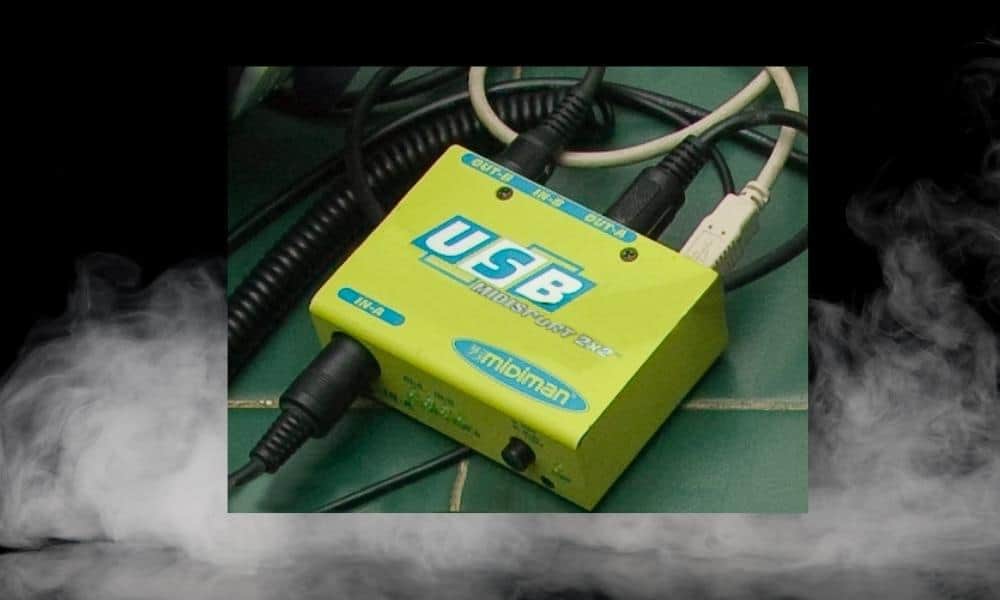
If you’re absolutely hell-bent on not using an audio interface, you can also get a USB to MIDI interface like this one down here:
3) You’ll Need Headphones or Speakers If You’re Using A Mobile Device, ie, iPhone/iPad
![iLoud MTM Speakers and Beyerdynamic DT 990 Pros - How to Conenct An Old Keyboard to Your PC/Mobile [Any DAW]](https://producersociety.com/wp-content/uploads/2022/07/iLoud-MTM-Speakers-and-Beyerdynamic-DT-990-Pros-How-to-Conenct-An-Old-Keyboard-to-Your-PCMobile-Any-DAW-.jpg)
If you’re going to use an iPad or iPhone with your audio interface and electric keyboard, you’ll probably need to connect headphones or speakers to your audio interface, or the mobile device, itself.
I find this to be the case if you’re using GarageBand iOS. I’m unsure if Android devices function in this way, but I digress. There are a couple of ways to connect headphones.
A) Connecting Headphones to your Multiport Adapter
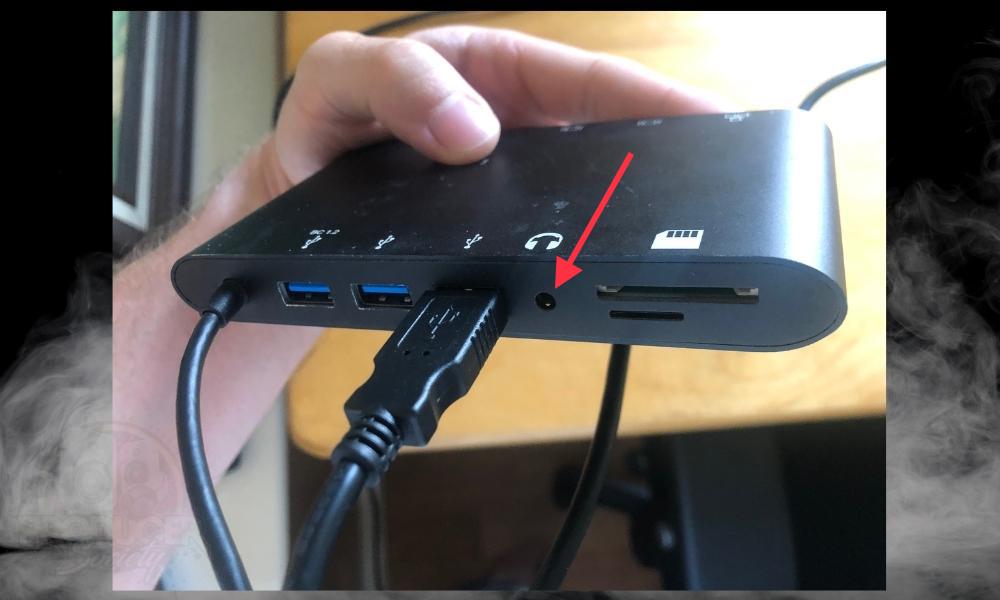
The first way is with the USB-Multiport adapter which has a headphone port right on it. This is the nice thing about multiport adapters, so make sure you get one that has a headphone port.
B) Use the Line L/R Speaker Outputs on the Audio Interface
![Connecting Speakers to L/R on Audio Interface - How To Connect An Old Keyboard to Your PC/Mobile Device [Any DAW]](https://producersociety.com/wp-content/uploads/2022/07/Connecting-Speakers-to-LR-on-Audio-Interface-How-To-Connect-An-Old-Keyboard-to-Your-PCMobile-Device-Any-DAW.jpeg)
The next way is to connect speaker cables to the left and right outputs on the back of the audio interface, then you connect your speaker monitors if you choose to do it that way.
C) Using AirPods to Connect To Your Mobile Device
![AirPods - How to Connect An Old Keyboard to Your PC/Mobile [Any DAW]](https://producersociety.com/wp-content/uploads/2022/07/AirPods-How-to-Connect-An-Old-Keyboard-to-Your-PCMobile-Any-DAW-.jpg)
You could also use something like AirPod Pros to connect to your device, but you’ll probably run into latency issues. I think Bluetooth speakers and keyboards are probably the future though, so keep in mind that latency issues won’t always be a problem.
D) Using the 1/4” Headphone Jack on the Back of the Audio Interface
![Audio Interface Headphones Output - How to Connect An Old Keyboard To Your PC/Mobile [Any DAW]](https://producersociety.com/wp-content/uploads/2022/07/Audio-Interface-Headphones-Output-How-to-Connect-An-Old-Keyboard-To-Your-PCMobile-Any-DAW-.jpg)
Another thing you can do is use a 1/4” to TRRS adapter and plug the headphones into the back of your audio interface.
4) Turn Down The Volume of the Electric Keyboard
![Volume on Yamaha Keyboard - How to Connect Old Keyboard to Your PC/Mobile [Any DAW]](https://producersociety.com/wp-content/uploads/2022/07/Volume-on-Yamaha-Keyboard-How-to-Connect-Old-Keyboard-to-Your-PCMobile-Any-DAW-.jpg)
If your electric keyboard has a built-in speaker which most of them do, you’ll want to turn down the volume on it so you don’t hear it as well as the software instrument coming from your PC/mobile device.
5) You Can Connect More Than One MIDI Controller If You’re Using A Multiport Adapter
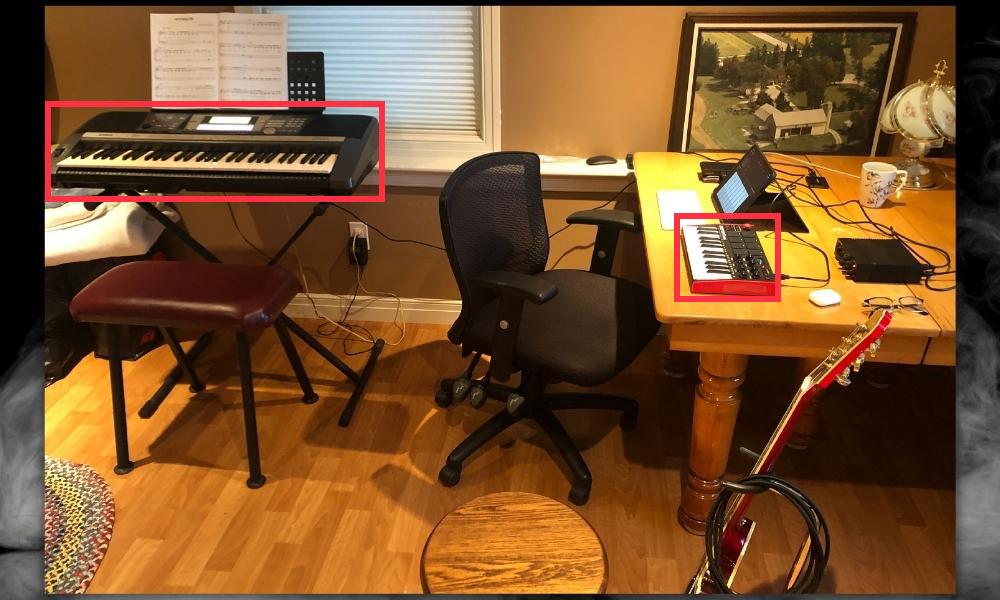
As I was saying earlier, the multiport adapter is great for connecting more than one device. There’s no reason why you can’t use a modern MIDI controller like the AKAI MPK Mini that you can see in the image above as well as the older electric keyboard.
Personally, what I like to do is have the MIDI controller to my right or in front of me, and then I’ll have the electric piano on the left side. I’ll go to the piano if I want the full range that I can get with 61 keys, compared to the 49-keyboard that I have in front of me and the AKAI MPK which only has 25.
Other MIDI Keyboard and Audio Interface Articles
- How To Connect MIDI Controller to Garageband iOS
- How to Connect MIDI Keyboard Into Garageband
- How to Set Up The AKAI MPK Mini With FL Studio [macOS/iOS]
- The Definitive Guide to Audio Interfaces for Garageband
- The Best Audio Interface For Beginners
Important Things To Note About Connecting Old Keyboards to Your Device
1) Adapter Types Will Vary Depending on Your Device
As you may know from getting this far, what kind of adapter and cables you’ll need depend on your device. The audio interface and MIDI cable remain unchanged. If you’re using an iPhone or another device that uses Thunderbolt, the USB Camera adapter is a good choice.
But if you plan on using a PC or a newer iPad, I would recommend the USB-C multiport adapter from Kramer because then you’ll be able to connect a ton of equipment if you need to.
Gear Mentioned
1) AudioBox USB96
2) Scarlett 4i4
3) MIDI Cable [15-Feet]
4) USB/Camera Adapter
5) USB-C adapter
6) j5 Create Multiport Adapter
7) iLoud MTM Monitors
8) Beyerdynamic DT 990 Pros [80 ohms]
9) 1/4” Headphone Adapter

 Written By :