 Written By :

To use a Scarlett 2i2 with an iPad/iPhone
1) Connect a USB to USB-C Adapter to your iPhone/iPad
2) Connect a USB-C cable between the iOS device and the Scarlett
3) Open GarageBand > Click Audio Recorder > Select Your Instrument
4) Select the Input and then turn on the monitoring
The thing about iPhones and iPads is the pre-2018 models don’t have enough juice to power the Scarlett 2i2 on their own.
The Scarlett has a couple of preamps and other bells and whistles that an older iOS device doesn’t have the capability to power.
That’s why you need a multiport adapter, and a power bank/charger to be able to run the audio interface and iOS device at the same time. I know from experience.
How to Set Up A Scarlett 2i2 With An iPad/iPhone
![Connecting Scarlett 2i2 to an iPhone - How to Use the Scarlett 2i2 With A Microphone [EXPLAINED]](https://producersociety.com/wp-content/uploads/2022/06/Connecting-Scarlett-2i2-to-an-iPhone-How-to-Use-the-Scarlett-2i2-With-A-Microphone-EXPLAINED-1.webp)
All Scarlett devices are what’s called “class-compliant,” which means they’re built so they can function with the iOS core audio driver by default. This is great news for us because it ensures the Scarlett is ready to use after having plugged it in. There usually aren’t any other steps.

The same thing goes for MIDI keyboards too which I showed you how to connect in this guide for iOS. Keyboards like the AKAI Mini MPK 25-Key or the M-Audio Oxygen Pro 61 will work just fine for iOS because you don’t need to install any additional drivers.
This is especially important for devices like the iPad or iPhone because you usually can’t install drivers on them, as far as I know. One area where it does get a little more complicated though is in regards to powering the audio interface.
Pre-2018 iPads and iPhones don’t have enough power to run the Scarlett 2i2 on their own, so they necessitate a USB multiport adapter (also called the USB camera adapter), a power bank or block charger, and then a second USB-C cable.
For example, my iPhone 6s and iPhone 7 + can’t power the Scarlett 2i2. But my iPhone X can drive the Scarlett 2i2 just fine.

As I was saying at the start of the article, the Scarlett 2i2 requires a good amount of power to operate properly. And it’s buss-powered, which means it takes its juice from the device you’ve connected to.
This will be the message you get if you try and connect the Scarlett to your pre-2018 iPhone or iPad without an external power source:

If you’re using an iPhone X and up, you won’t need anything but the standard USB to USB-C adapter and the cable that comes with the Scarlett 2i2.
In other words, you just have to connect it to your device the same way as you would with your computer. I talked about this a bit more in my other guide on the topic.

What You Need to Operate the Scarlett 2i2 With an iPad/iPhone
1) USB-C Multiport Adapter (Camera Adapter)
![Camera Adapter - How to Use A Scarlett 2i2 with iPad/iPhone [Full Guide]](https://producersociety.com/wp-content/uploads/2022/06/Camera-Adapter-How-to-Use-A-Scarlett-2i2-with-iPadiPhone-Full-Guide.webp)
This camera adapter with the USB-C and USB adapter attached to it is an essential part of this process. It is what’s going to allow you to drive the bus-powered audio interface with your older generation iPhone/iPad.
The one I linked above to Amazon works great, and I haven’t had any problems with it thus far. For whatever reason, the one made by Apple costs an arm and a leg.
2) USB-C Cable x2

It really doesn’t matter what kind of USB-C cable you get, but I like the one that I’ve linked to Amazon because it’s incredibly long. This is perfect for my set-up because I have my cable running underneath my desk and whatnot.
For a portable set-up, which I imagine you’re going to use this for, it’s probably not necessary. However, I find that it’s always best to be too long than too short. The Amazon Prime cables are surprisingly high-quality so don’t be afraid to get one.
3) A Power Bank (Optional)
![External Power Bank - How to Use A Scarlett 2i2 with iPadiPhone [Full Guide]](https://producersociety.com/wp-content/uploads/2022/06/External-Power-Bank-How-to-Use-A-Scarlett-2i2-with-iPadiPhone-Full-Guide-1.webp)
And finally, with the assumption again that you’re going to be using your iPhone/iPad with your Scarlett 2i2 on the road, you’ll probably want some kind of a portable power bank like the one I’ve shown above.
This specific one was a gift and it’s not on Amazon, however, there are plenty of others like it on the internet. There are even power banks with solar capability which is extremely cool and worth trying out. But I digress, I’m going to show you how to set this stuff up. It’s really, really easy.
1) Connect the Camera Adapter to Your iPhone/iPad
![Connect Camera Adapter - How to Use A Scarlett 2i2 with iPadi/Phone [Full Guide]](https://producersociety.com/wp-content/uploads/2022/06/Connect-Camera-Adapter-How-to-Use-A-Scarlett-2i2-with-iPadiPhone-Full-Guide-.webp)
The camera adapter is going to allow us to connect a third-party power bank as well as the audio interface. As I said earlier, if you try to plug the Scarlett 2i2 directly into a pre-2018 iPhone, you’ll get an error saying that the phone doesn’t have enough power to turn on the audio interface.
2) Connect the Power Bank to the USB-C Port on the Camera Adapter
![Connect Power Bank - How to Use A Scarlett 2i2 with iPad/iPhone [Full Guide]](https://producersociety.com/wp-content/uploads/2022/06/Connect-Power-Bank-How-to-Use-A-Scarlett-2i2-with-iPadiPhone-Full-Guide.webp)
One thing I should say is that you don’t necessarily need a power bank for this to work. You could also use a regular iPhone or block charger, which would work just fine. A power bank is better for portability, however.
3) Connect the Audio Interface with A USB-C Cable
![iPhone Connected to Scarlett - How to Use A Scarlett 2i2 with iPad/iPhone [Full Guide]](https://producersociety.com/wp-content/uploads/2022/06/iPhone-Connected-to-Scarlett-How-to-Use-A-Scarlett-2i2-with-iPadiPhone-Full-Guide.webp)
Once you’ve connected everything, you’ll notice how the Scarlett 2i2 turns on and it’s ready to go. And really, getting your device to work with your iPhone/iPad is as simple as what’s shown in this tutorial.
In some cases, you may need to choose a few extra steps in the preferences, but in my experience, the iPhone is good at recognizing standard devices like the Scarlett 2i2.

The Scarlett 2i2 will normally be plug-and-play. If I use this set-up and then open GarageBand, I’m able to connect my guitar or microphone and then start recording instantly.
You should be good to go with no extra steps, with the exception of turning the monitoring button on. Speaking of which, there is one thing you should know about this setup though which has to do with monitoring and playback.
Why Can’t I Hear When the Scarlett Is Connected to the iPhone/iPad?
1) You Have to Connect Headphones or Speakers to the Scarlett To Monitor
Simply put, you have to connect either headphones or speakers to the Scarlett 2i2 when you’re connected to an iOS device like the iPhone or iPad. Whenever you connect an audio interface to an iOS device, it takes over the input and output audio.
![14 to TRS Adapter - How to Use A Scarlett 2i2 with iPadiPhone [Full Guide]](https://producersociety.com/wp-content/uploads/2022/06/14-to-TRS-Adapter-How-to-Use-A-Scarlett-2i2-with-iPadiPhone-Full-Guide.webp)
There’s probably a good reason for this that I’m unaware of, but either way, that’s the deal. So you’ll either have to connect speakers to the line outputs on the back of the Scarlett 2i2, or you’ll need to connect headphones to the headphone jack. For that, you’ll need a 1/4″ to headphone adapter (on my Product Page).
If you’re looking for a great pair of monitoring headphones, I would recommend getting the 80 ohms Beyerdynamic DT 990 Pros (also on my Page).
Get these instead of the 250 ohms, that way you don’t need so much power to drive them. If you’re looking for earbuds instead, the Etymotic ER4SEs are a great choice too.
2) You Can Use the L and R Line Outputs on the Back of the Scarlett 2i2

I’m sure you can figure out how the line left and right outputs work on the back of an audio interface. You run a 1/4″ speaker cable from the left speaker to the left output, and then the same goes for the right speaker and right output. And finally, let’s talk briefly about how you would configure other Scarlett devices, not just the 2i2.
How To Configure the Scarlett 4i4, 8i6, 18i8, 18i20 With iPad/iPhone
Because this article is concerned primarily with the Scarlett 2i2, I won’t be diving into detail on how to set up your Focusrite 4i4 and great with the iPad or iPhone. The video above is detailed, however, and walks through every part you’d need.
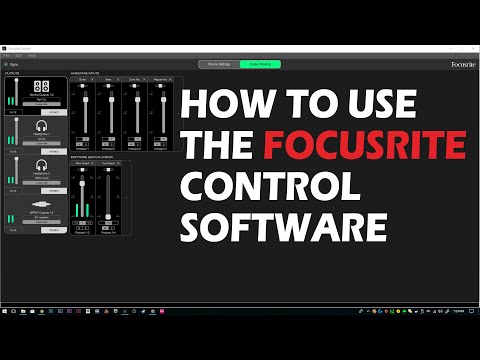
To put it simply and quickly though, to configure a Scarlett 4i4, 8i6, 18i8, or a 18i20 with an iPad, you have to open Focusrite Control, and then change the inputs to your iPad or iPhone. Additionally, you can control the routing of the outputs as well.
The unfortunate nature of this, however, is that you’ll need a macOS device to use Focusrite Control. You can’t use Focusrite Control on an iPad or iPhone. If you do want to get your hands on Focusrite Control, get it from their website.
Important Things to Note About Connecting the Scarlett 2i2 to Your iPhone/iPad
1) Bluetooth Speakers Won’t Work Properly With the Scarlett 2i2 and an iOS Device
One thing I’ve tried to do before but it didn’t work was using a Bluetooth speaker for the iPhone while I have the audio interface connected. As I said earlier, you can’t output the audio signal to a Bluetooth speaker while you’re recording in real-time.
On the other hand, you could disconnect it briefly and then play it back through the speaker just fine, although, as I’ve said in other articles like this one on latency, Bluetooth equipment and recording don’t go well together. This problem seems to get worse when using a platform like TikTok as well (also my guide).
2) Older iPhones and iPads Need A Power Bank to Run A Scarlett 2i2
I want to clarify what I was talking about earlier with the Scarlett 2i2 and older iPhones and iPads. I can’t say for certain when Apple improved their battery so the phones could drive Scarlett 2i2, but I know that my iPhone X can drive the Scarlett 2i2 without a power bank, but my iPhone 7 + and my iPhone 6s cannot.
Gear Mentioned
1) AKAI Mini MPK 25-Key
2) M-Audio Oxygen Pro 61
3) Camera Adapter
4) USB-C Cable
5) Power Bank
6) 1/4″ to Headphone Adapter
7) 80 ohms Beyerdynamic DT 990 Pros
8) Etymotic ER4SEs
I’m trying to connect a 2i2 3rd gen straight to an iPhone 13 Pro and it doesn’t power on at all. USB-C from 2i2 to Lightning into the 13 and there’s nothing
That’s strange. Did you try using a USB Camera Adapter. It has a USB port on it and a thunderbolt port on it. This one. Try connecting a powerbank or charger to the camera adapter as well and see if that fixes it.