Setting one up with GarageBand is easy.
To use the Scarlett 2i2 with GarageBand
1) Connect the USB-C cable between the Scarlett and your PC
2) Open GarageBand > Select GarageBand > Preferences > Audio/MIDI
3) Select “Scarlett 2i2” As ‘Input Device’
(For pre-2018 iOS devices, you need a USB-C camera adapter to connect a power source)
This is the long and short of connecting a Scarlett 2i2 to GarageBand. If you want to connect GarageBand iOS, the primary difference is you need a USB-C multiport adapter – also known as a USB camera adapter – to connect your iOS device to a block charger or power bank.
This is because older iPads and iPhones don’t have enough power to drive the audio interface on their own, although, newer models seem to work just fine without them.
How to Use the Scarlett Audio Interface With GarageBand macOS
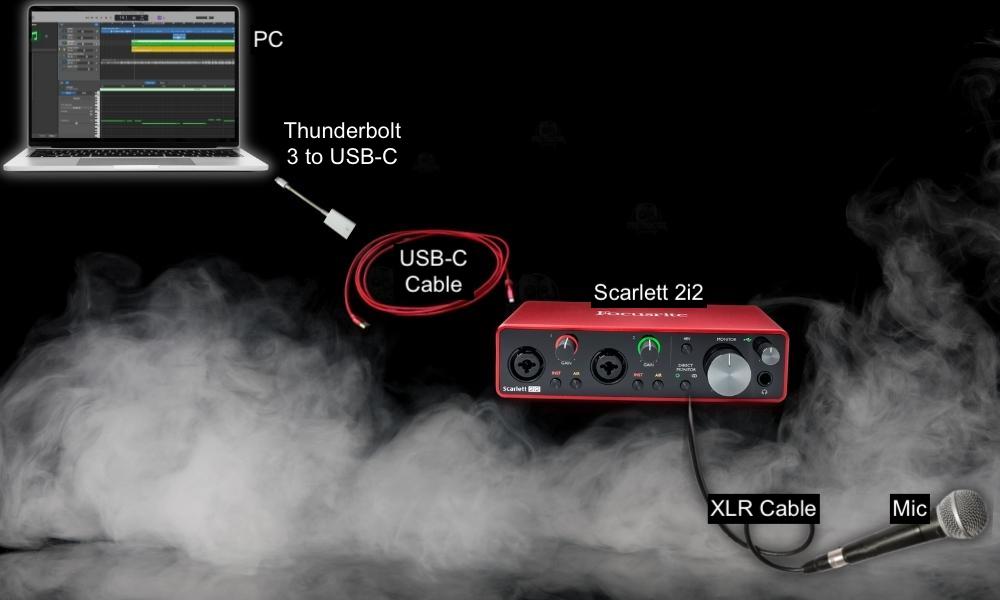
Connecting a Scarlett 2i2 to GarageBand really isn’t difficult at all, however, there are a couple of ways to do it. For the most part, there is only one way when it comes to the actual hardware, but you can configure things differently on the software side.
For example, you can change things around in the Smart Controls of GarageBand or in the track header, depending on your needs and specifics.
Another thing that’s possible is actually adjusting the settings and parameters right in the settings of your MacBook, instead of GarageBand, but that usually isn’t necessary. That all said, let’s talk about some of the cables and accessories you need first.
What Gear You Need to Use the Scarlett with GarageBand macOS
1) USB-C Cable
I recommend getting this very one from Amazon, although the color doesn’t matter, that way you absolutely have enough length. It’s always better to be too long than too short.
I bought this one a long time ago, and it made my life much easier. As I’ve shown in my studio setup guide, I use a stand-up desk and a lot of adapters, so I need a cable with enough length.
2) Thunderbolt 3 to USB Adapter
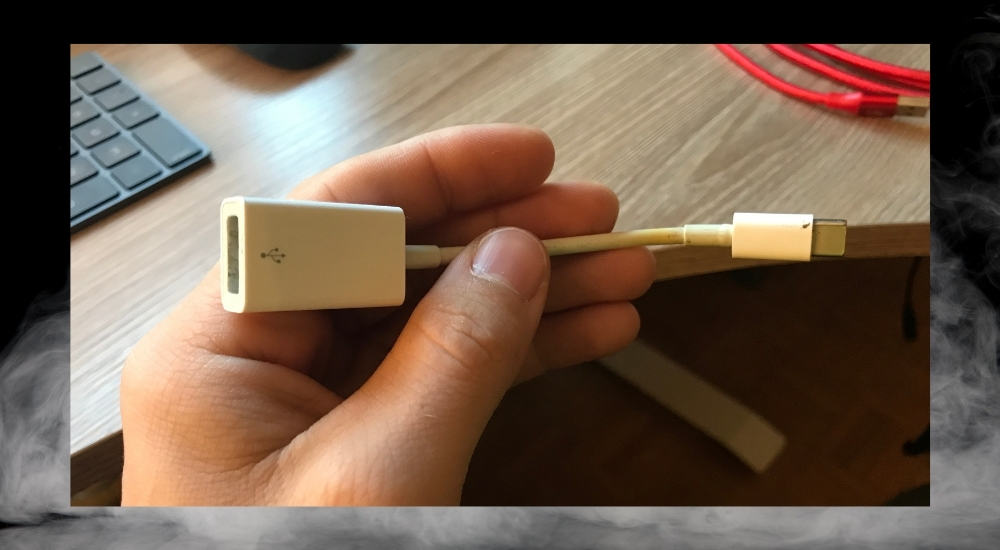
I chose this particular adapter because it works and it’s the least expensive way to go about it when you’re first starting out. However, I wouldn’t personally recommend one of these because your needs are going to expand beyond its capabilities.
You can only connect one device with it. These days, I’m using not one but two multiport adapters because I have so much gear at this point.
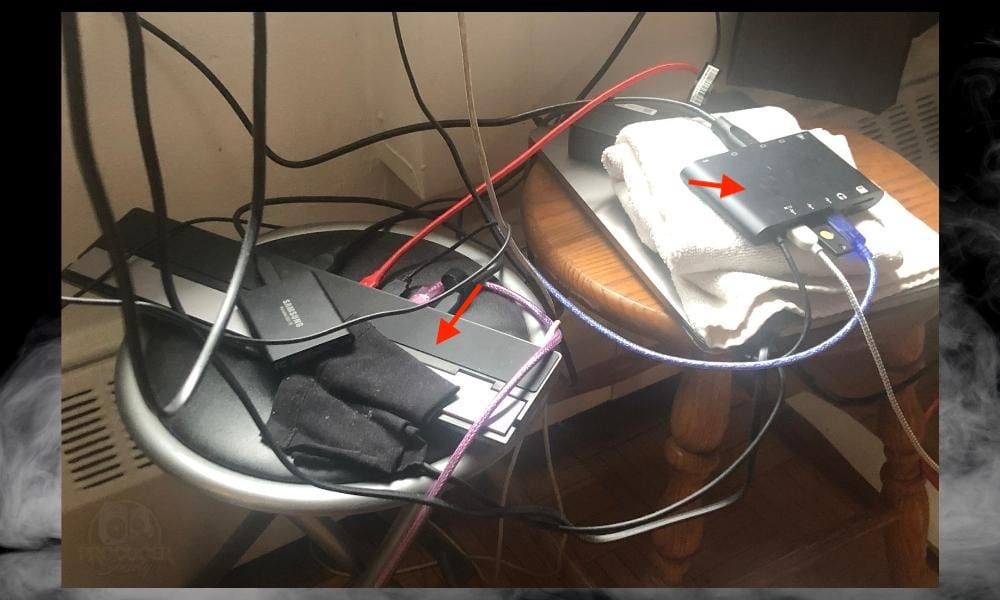
I have to give the MacBook Pro credit for being able to power as much gear as it can. I have two Samsung monitors running, iLoud Micro Monitors, an external SSD, MIDI keyboards, and a Yubikey all connected to it.
As you can see, one adapter isn’t enough for me, and it won’t be for you either as your needs slowly expand. I’d recommend this one Thomann instead. Maybe you’ll do a bit better than me though in terms of organization though.
3) Scarlett and macOS Device
You probably own both of these, so it’s not worth diving into the specs and whatnot. Let’s get into the actual steps of how to connect everything. It’s not complicated at all, so no worries there.
1) Connect the USB-C Cable Between the Scarlett and Your Computer
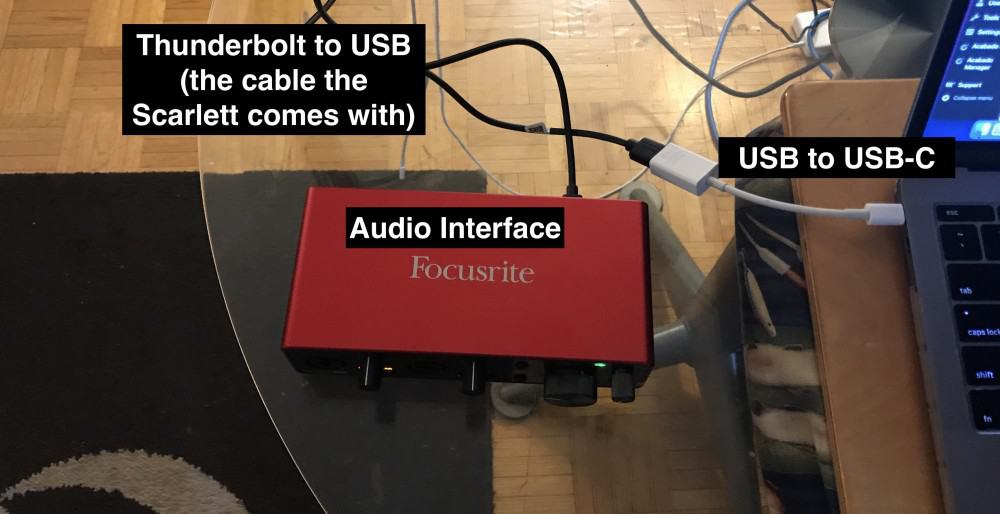
Once you’ve connected your Scarlett to the macOS computer, it’ll light up and start flashing. Connect your guitar or microphone (my guide on this), and then get ready to open GarageBand.
2) Open GarageBand > Choose Empty Project
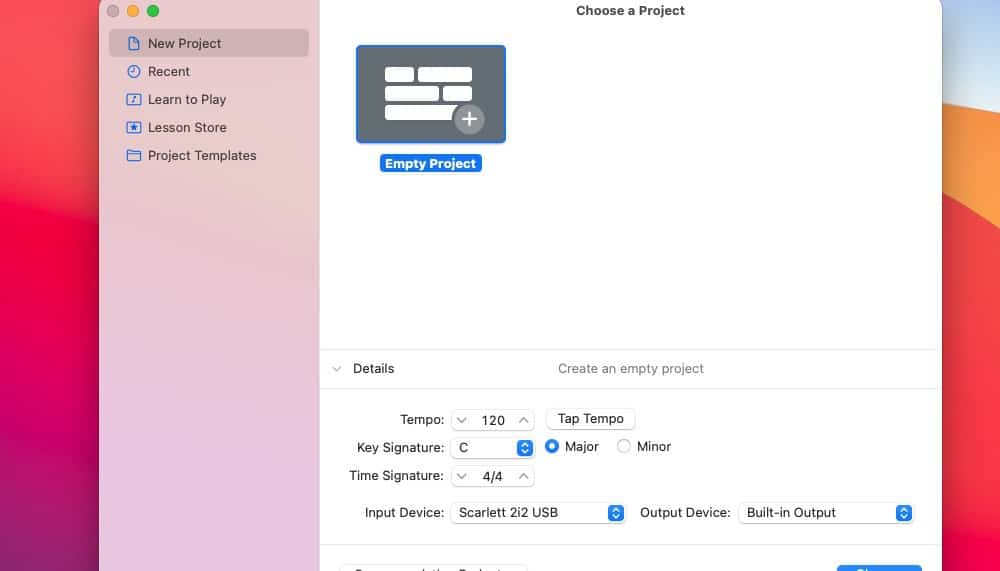
3) Select “Scarlett 2i2 USB” As Your Input Device and “Built-in Output” As Your Output Device
A) Choose “Scarlett 2i2 USB” As Your Output If You’ve Connected Speakers/Headphones to the Scarlett
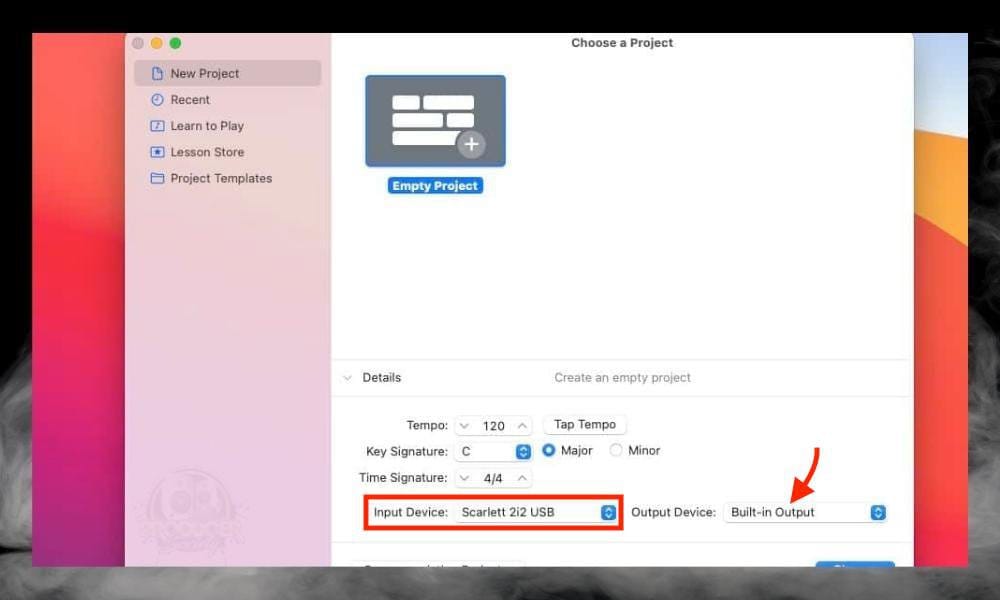
4) Select “Choose”
This part is pretty self-explanatory. Just hit the “Choose” button to go to the next step.
5) Select Your Track Type – Software Instrument, Audio, or Drummer
![Input 1 Mono - Are Scarlett 2i2 Inputs Stereo or Mono? [Simple Answer]](https://producersociety.com/wp-content/uploads/2022/06/Input-1-Mono-Are-Scarlett-2i2-Inputs-Stereo-or-Mono-Simple-Answer.jpg)
Because you’re connecting an audio interface to GarageBand, it would make sense to choose either the microphone or the guitar from the audio track section.
By the way, it doesn’t have to be just a guitar. You could also connect a violin or any other instrument that uses a 1/4″ instrument jack.
6) Choose “Input 1” or “Input 2” for a Mono Track or “Input 1 + 2” for a Stereo Track
![Input 1 + 2 - Are Scarlett 2i2 Inputs Stereo or Mono? [Simple Answer]](https://producersociety.com/wp-content/uploads/2022/06/Input-1-2-Are-Scarlett-2i2-Inputs-Stereo-or-Mono-Simple-Answer.jpg)
As I said in this article, choosing “Input 1,” “Input 2,” or “Input 1 + 2” determines whether you choose a mono or stereo track. The first two are mono tracks, and then the last one is a stereo track. Input 1 is the input on the far left side of the Scarlett 2i2 audio interface, and Input 2 is the one next to it.
![INput 1 and 2 - Are Scarlett 2i2 Inputs Stereo or Mono? [Simple Answer]](https://producersociety.com/wp-content/uploads/2022/06/INput-1-and-2-Are-Scarlett-2i2-Inputs-Stereo-or-Mono-Simple-Answer.jpg)
If you plan on recording one guitar, direct input, with a guitar amp simulator or a similar device, you want to choose a mono track. But if you want to record two devices together at the same time within one track, you have to choose the stereo track instead.
Tip:
In most cases, it’s simplest to record with a mono track. So choose “Input 1” or “Input 2” if you want to make it easy on yourself.
7) Select Create and then Press the Monitoring Button
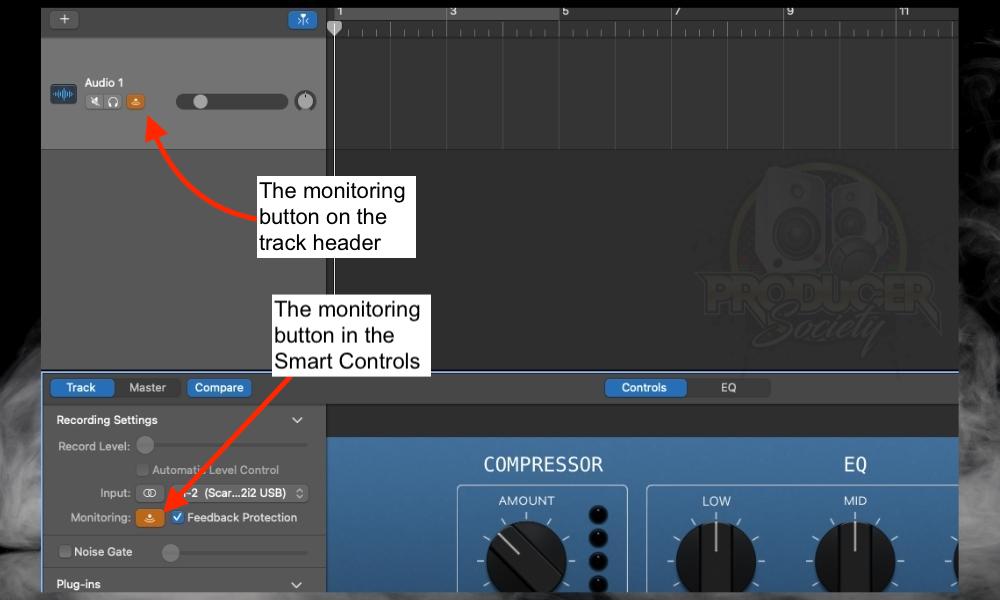
In simple terms, the monitoring button allows you to hear yourself while you’re recording (more on this in my guide). This is crucial if you’re a singer or a guitar player that wants to lay down your parts alongside other instruments and sounds.
Another tip is to have the Automatic Level Control turned off. I usually do choose to have the Feedback Protection turned on, as you can see in the image above. I often turn the Noise Gate on as well and have it hover around-35dB to -50dB (my noise gate tutorial). These functions are ancillary but worth bringing up.
8) Ensure the Input is Set As “Scarlett 2i2 USB” in the Smart Controls
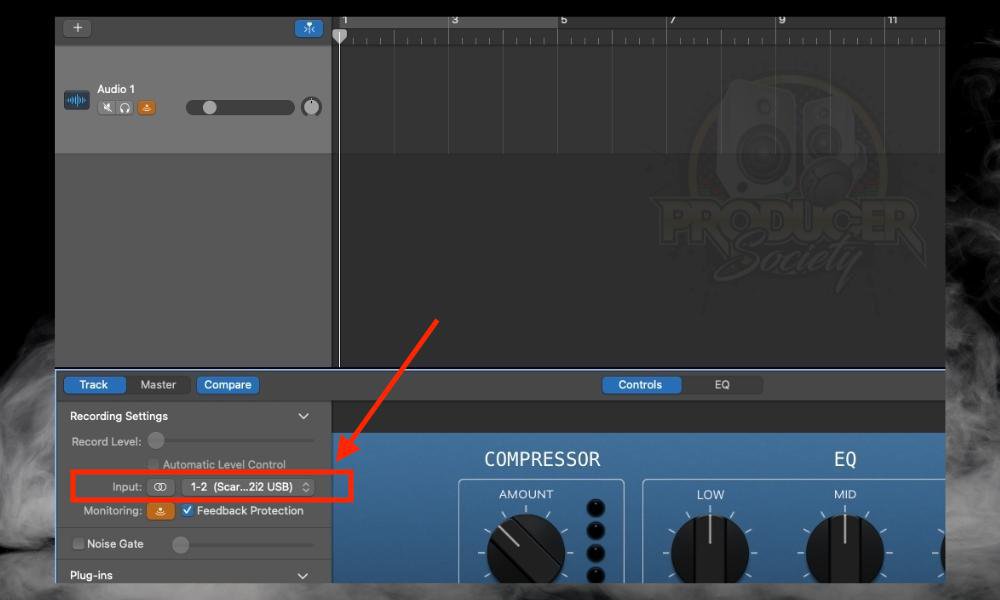
In most instances, you won’t have to adjust the input device in the Smart Controls because you already made this configuration when you first opened your GarageBand project. Sometimes things get switched around though, and in these cases, you can quickly make the needed adjustment in the Smart Controls.
9) Connect Your Instrument or Microphone and Then Hit Record to Start
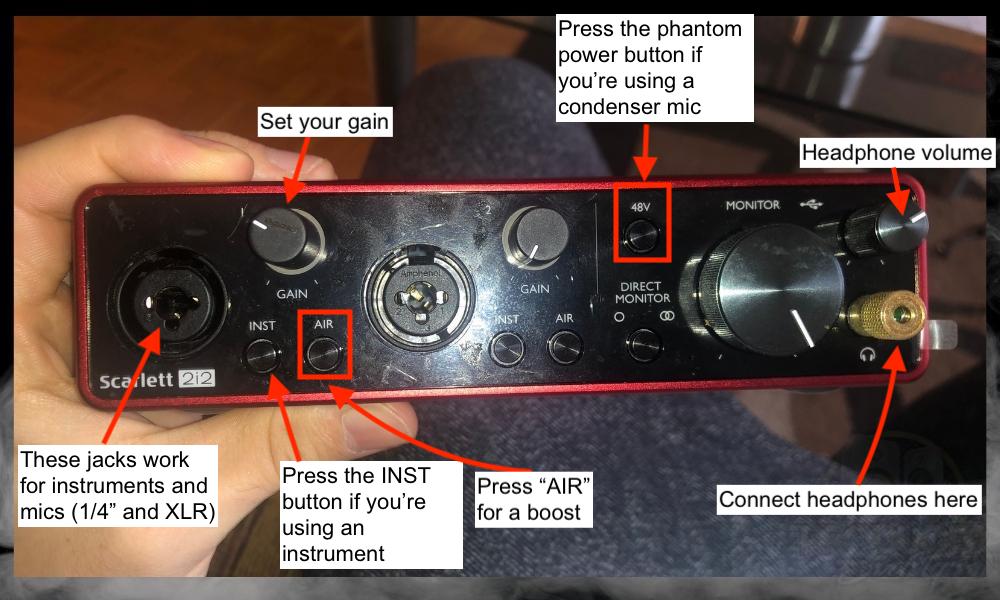
Once you’ve hooked up your gear, you can press “Record” in GarageBand and then you can start recording. And that’s pretty much it. Now that you’ve got an idea of how to use your Scarlett audio interface with GarageBand macOS, I’ll show you how to do it with the GarageBand iOS version instead.
How to Use the Scarlett Audio Interface With GarageBand iOS
![Connecting Scarlett 2i2 to an iPhone - How to Use the Scarlett 2i2 With A Microphone [EXPLAINED]](https://producersociety.com/wp-content/uploads/2022/06/Connecting-Scarlett-2i2-to-an-iPhone-How-to-Use-the-Scarlett-2i2-With-A-Microphone-EXPLAINED-1.jpg)
While there are some differences between GarageBand macOS and iOS, many of which I’ve discussed in this guide, they’re fundamentally the same.
What impresses me is that Apple has managed to make GarageBand iOS recording even easier, however, in some cases, you’ll need extra equipment if you’re trying to power an audio interface.

For example, my iPhone X has enough power to drive the Scarlett 2i2 without any problems. But the same thing can’t be said for my iPhone 7 + or my iPhone 6s. If you’re using an older iOS device, ie, pre-2018, you’ll probably need a power bank or a block charger to run the Scarlett 2i2 and GarageBand.
Assuming you’re using a newer device (2018 and newer), you probably won’t need to use a block charger or power bank. You just have to connect your iPhone or iPad to the Scarlett, the same way you would with the computer – with the appropriate USB adapter and a USB-C cable.
Instead of the Thunderbolt 3 to USB adapter which is what the MacBook Pro would use, you’ll need to use a standard USB to USB-C adapter.
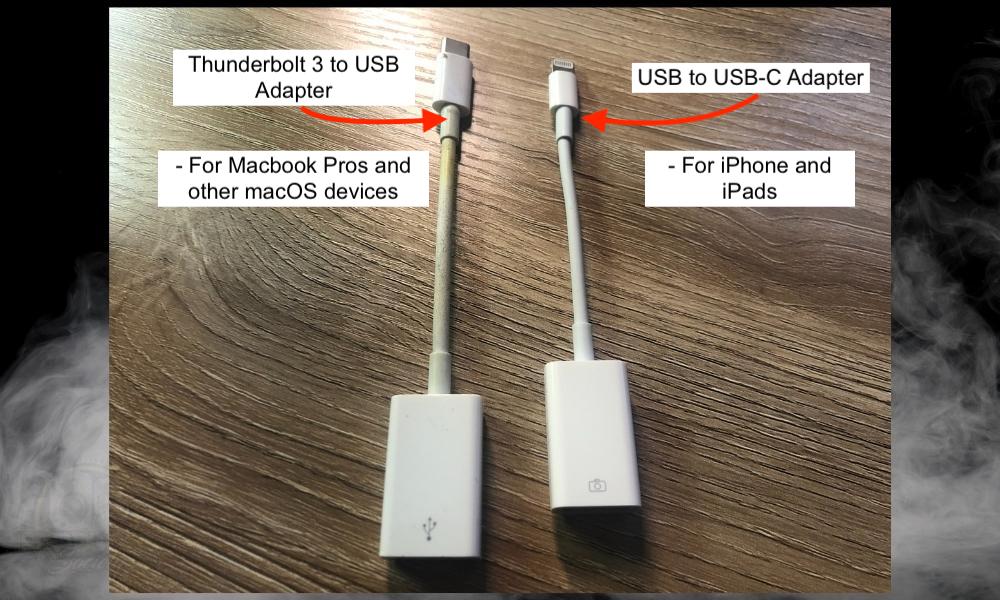
What Gear You Need to Use the Scarlett with GarageBand iOS
1) USB-C Multiport Adapter (also called a Camera Adapter)
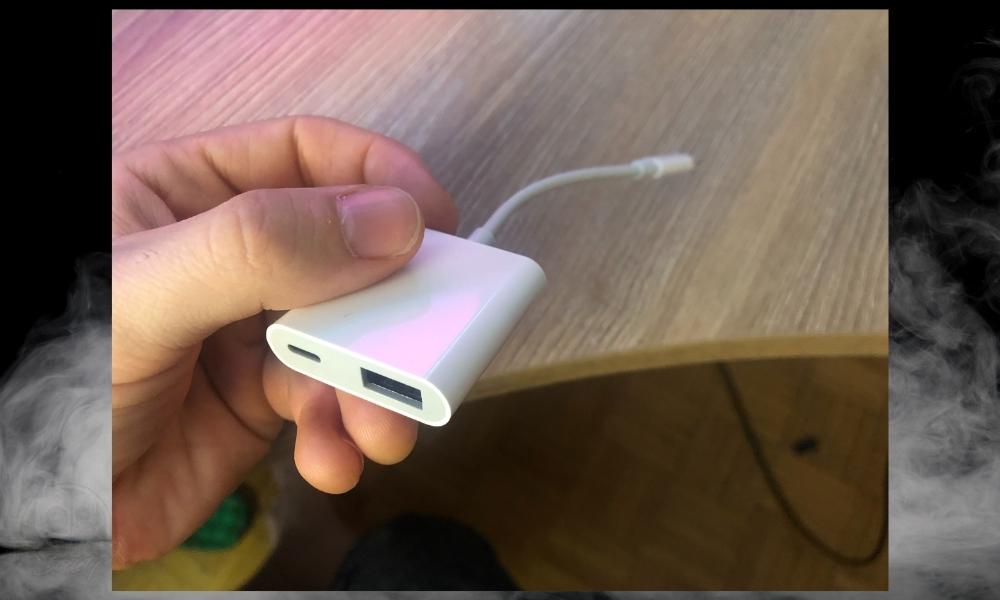
If you are one of the people who’s using an older iOS device (pre-2018, I believe), you’ll need a USB Camera Adapter like the one that’s shown and linked in the image above.
2) USB-C Cable (x2)
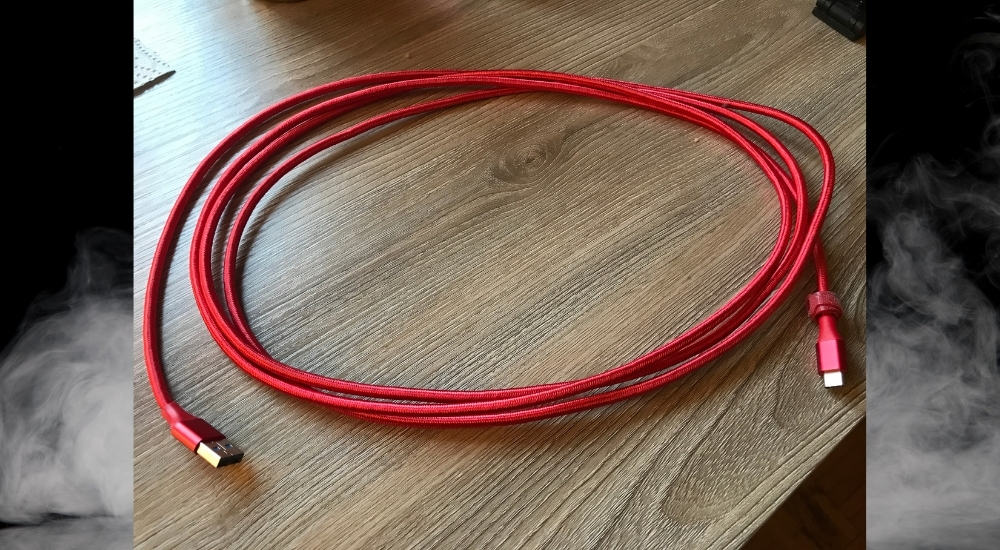
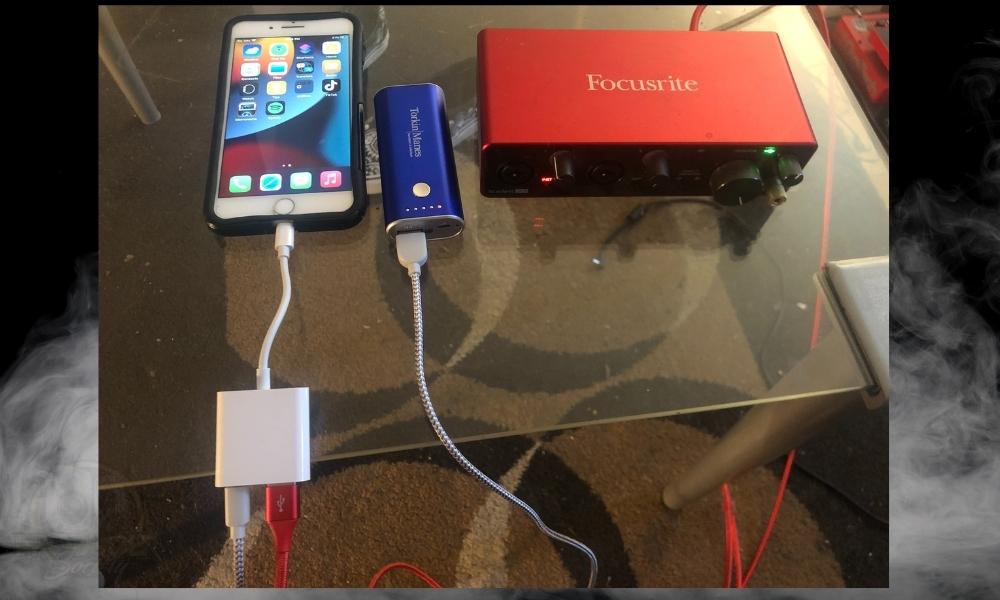
You need two of these because one has to connect to the power bank or block charger, while the other one connects from the Scarlett 2i2 to the iPhone/iPad.
3) Headphones/Speakers
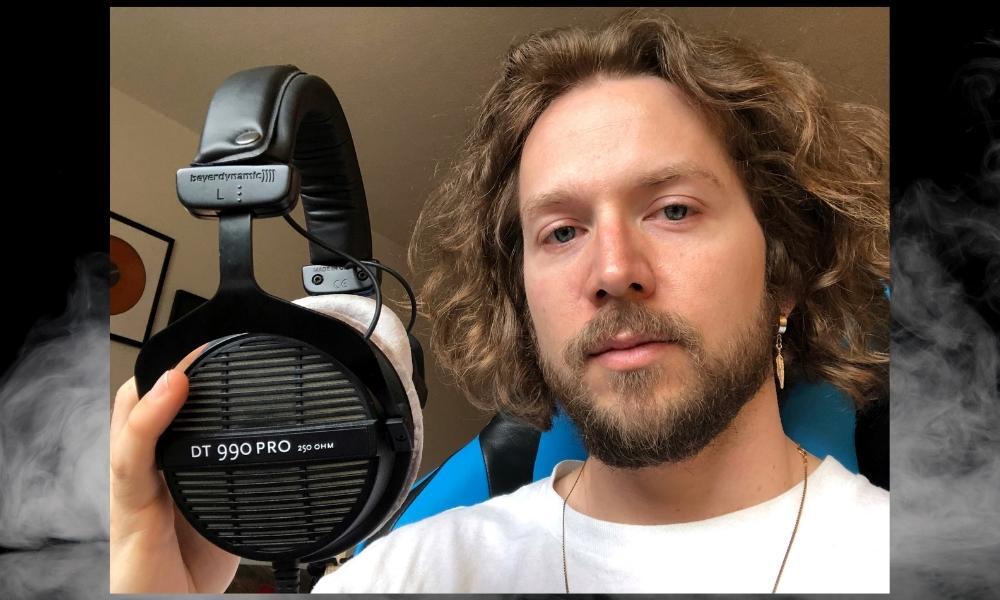
The reason you need headphones has to do with the use of the audio interface. The Scarlett takes over the input and output of the iOS device, so you can’t just use the iPhone speaker, unfortunately. I’m not sure why Apple designed their system to be like this, but this is how it works – for now.
4) 1/4″ to Headphone Adapter
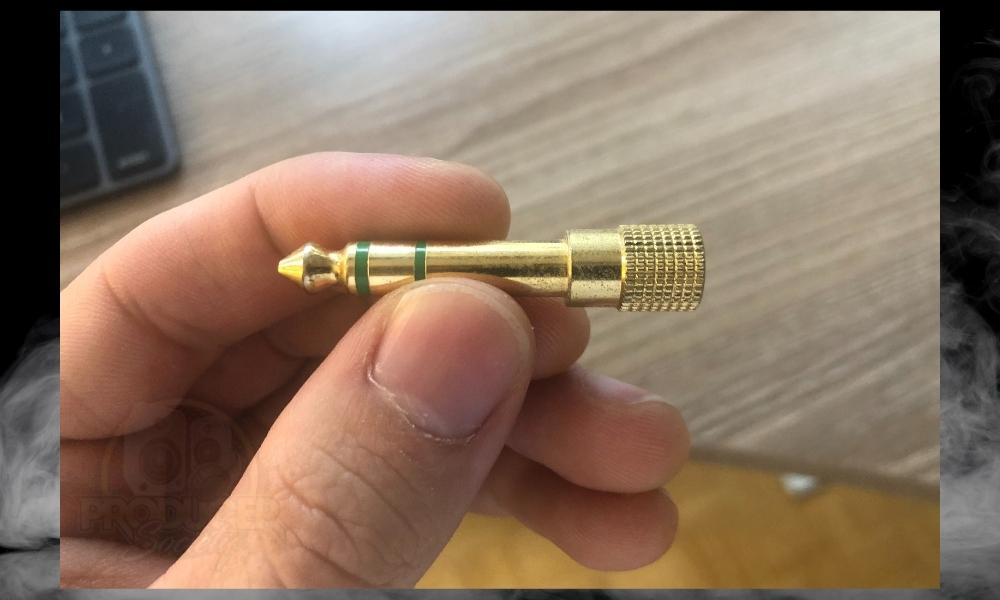
If you plan on using headphones with your Scarlett 2i2, then you’ll need this adapter for sure. However, if you want to connect speakers, you can just use the L and R outputs on the back of the Scarlett instead. These are 1/4″ jacks.
5) Powerbank or Block Charger
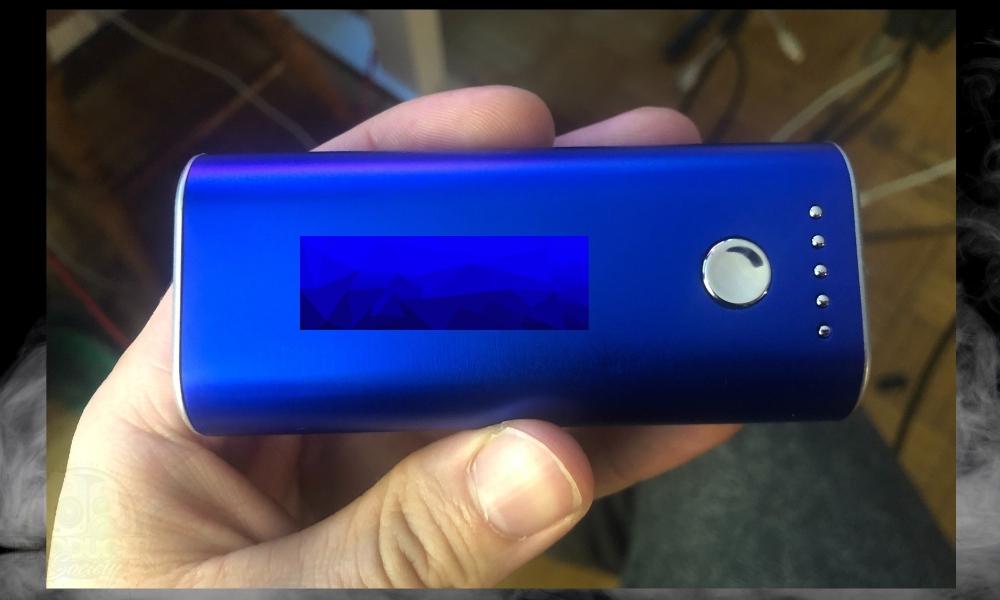
The power bank or block charger is absolutely essential because – as I said before – pre-2018 iPhone/iPads do not have the juice to drive the Scarlett 2i2. As you may know, the Scarlett 2i2 is bus-powered, which means it relies on the power from the connected device to run. Without further ado, let’s dive into how to set everything up.
![Connecting Scarlett 2i2 to an iPhone/iPad with Power Bank - How to Use the Scarlett 2i2 With A Microphone [EXPLAINED]](https://producersociety.com/wp-content/uploads/2022/06/How-to-Connect-Older-iPhones-and-iPads-to-an-Audio-Interface.jpg)
1) Connect the USB-C Multiport Adapter to Your iOS Device
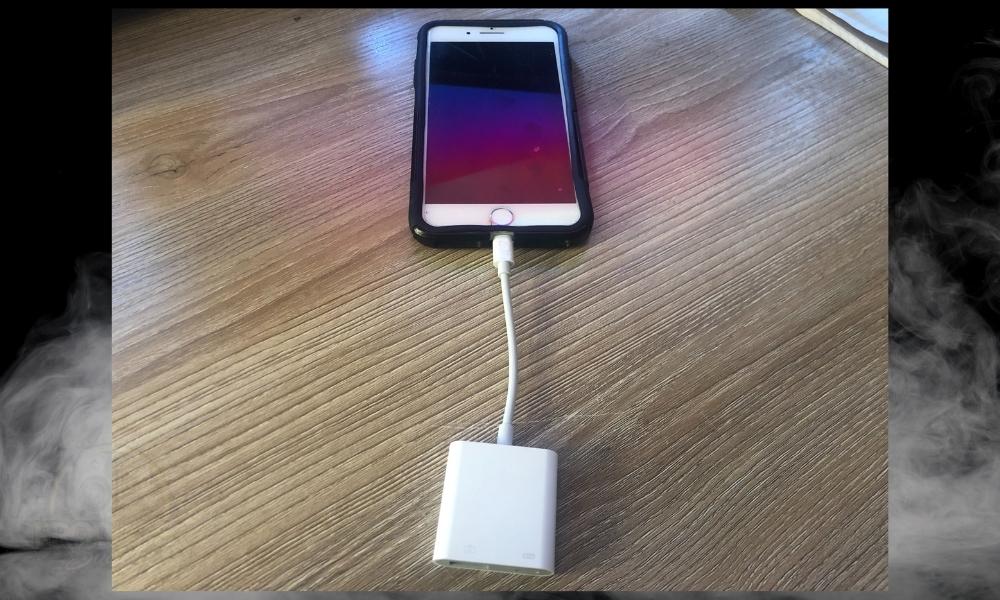
2) Connect the Power Bank or Block Charger to the Camera Adapter
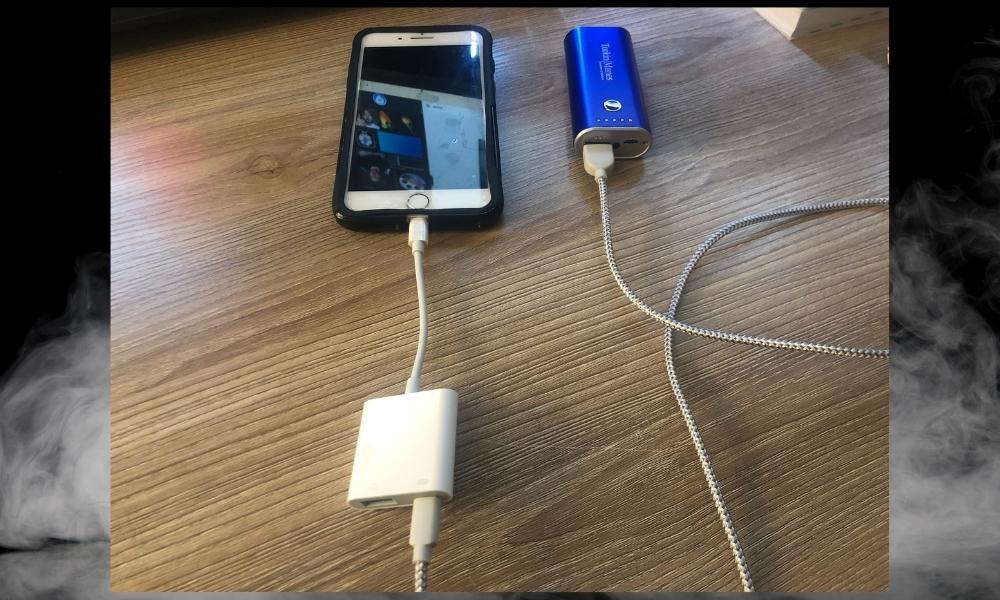
3) Connect the Scarlett with the USB-C Cable
4) Open GarageBand iOS and Choose Audio Recorder (Voice or Instrument)
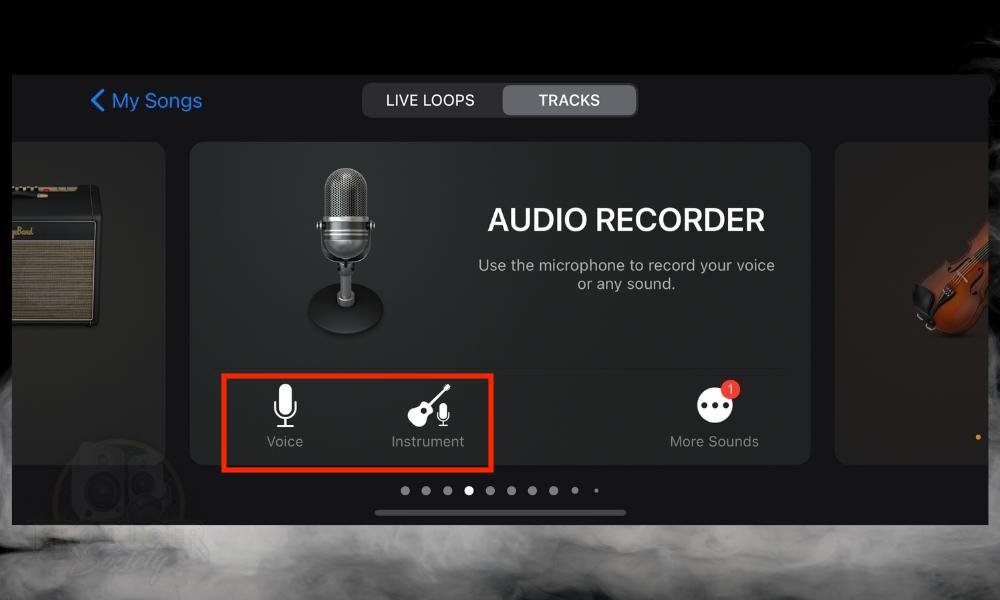
If you’ve connected a guitar or a bass guitar, you can also use the Amp Designer for both of these instruments instead. This will give you a virtual guitar amplifier simulator, rather than a direct input guitar recording.
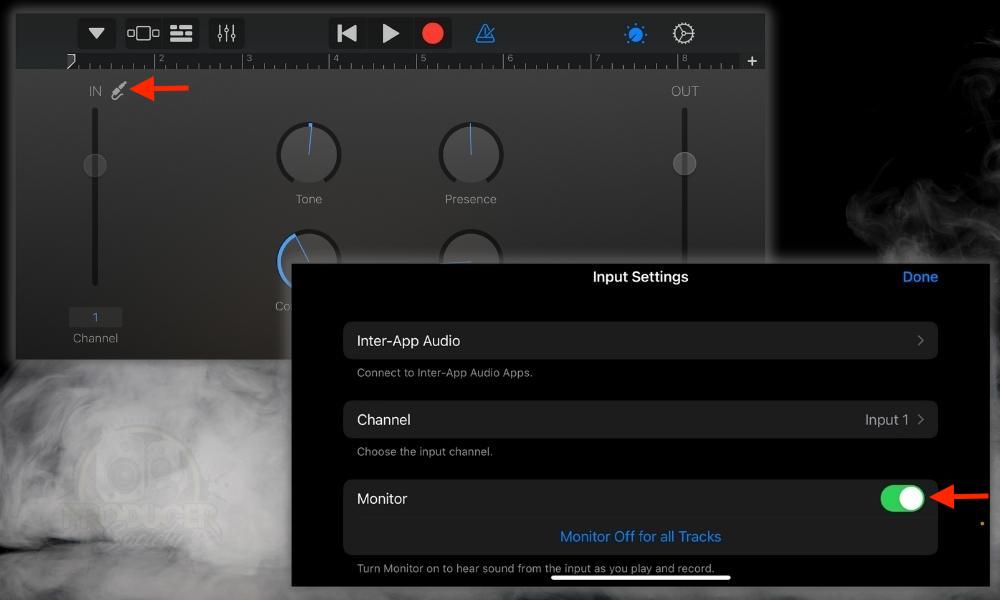
5) Click on the Input Device and Turn On Monitoring
6) Press Record Whenever You’re Ready to Start Recording
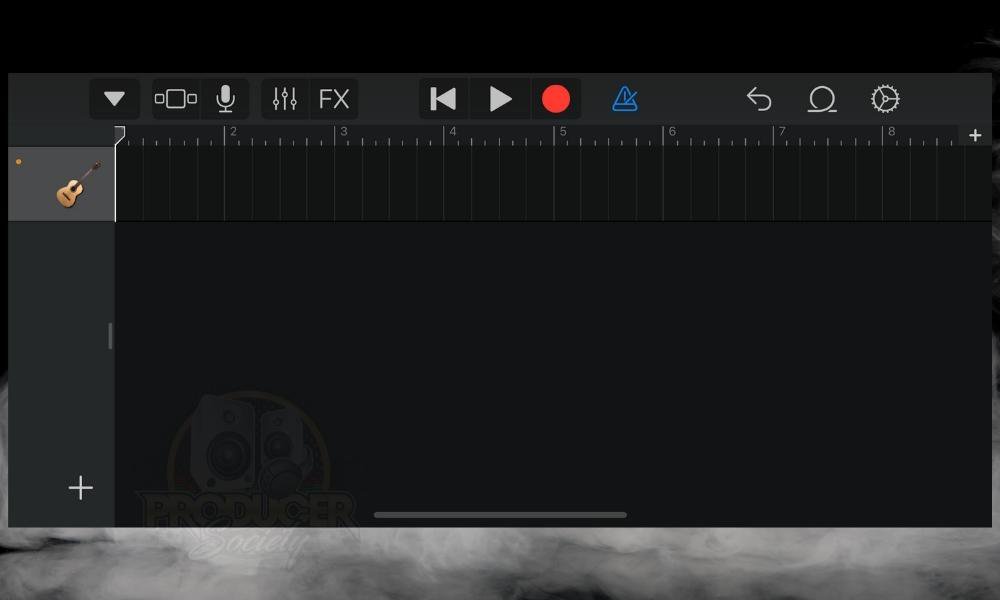
And that’s it. You now know how to use the Scarlett with GarageBand macOS and iOS. You may run into some issues though, including when it comes to monitoring. I’ve added a brief section to walk you through a few of the most common issues.
Why Can’t I Hear When Recording With GarageBand and My Scarlett?
1) You Haven’t Turned on the Monitoring Button

The primary reason why you can’t hear yourself while recording or monitoring in GarageBand with your Scarlett 2i2 connected is that you haven’t turned on the monitoring button.
To do this, press ‘B’ on your keyboard to open the Smart Controls and then click the symbol that looks like an upside-down WiFi icon (by the way, I have a whole list of keyboard shortcuts here).
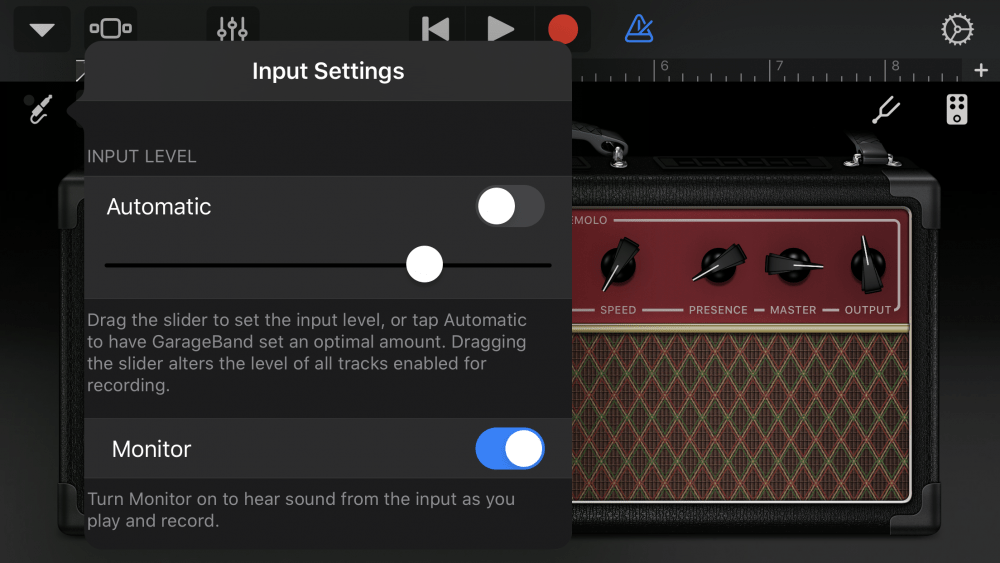
While this solution seems rudimentary, it’s a big one that a lot of people forget. As a matter of fact, I have an entirely separate article that discusses this very thing.
2) You’ve Forgotten to Disconnect Your Bluetooth Speaker
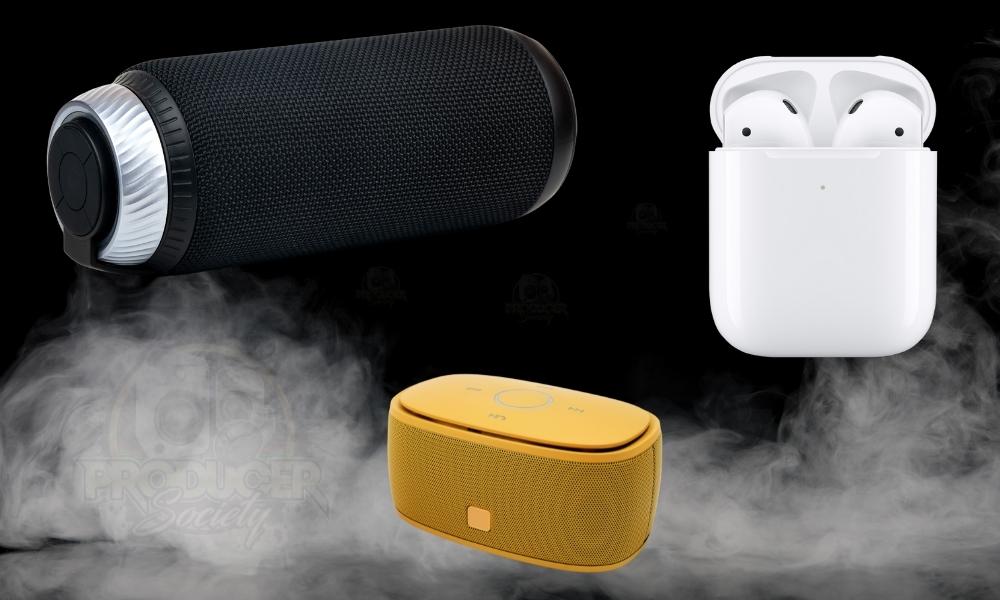
This one usually concerns GarageBand iOS, primarily, and it’s that you’ve forgotten to disconnect your iPad or iPhone from your Bluetooth device, whichever one it may be.
In some cases, it’s because you’ve forgotten to disconnect your AirPods, or it’s because you’ve forgotten that you’re connected to your Google Home or Amazon Alexa.
The fact of the matter is that you can’t use these devices to monitor in GarageBand iOS while you have an audio interface connected. As I was saying earlier, the iOS operating system has it set up so that when you connect an audio interface, the input and output audio are now routed to and from the audio interface.
3) You Need to Reboot the Settings Configuration
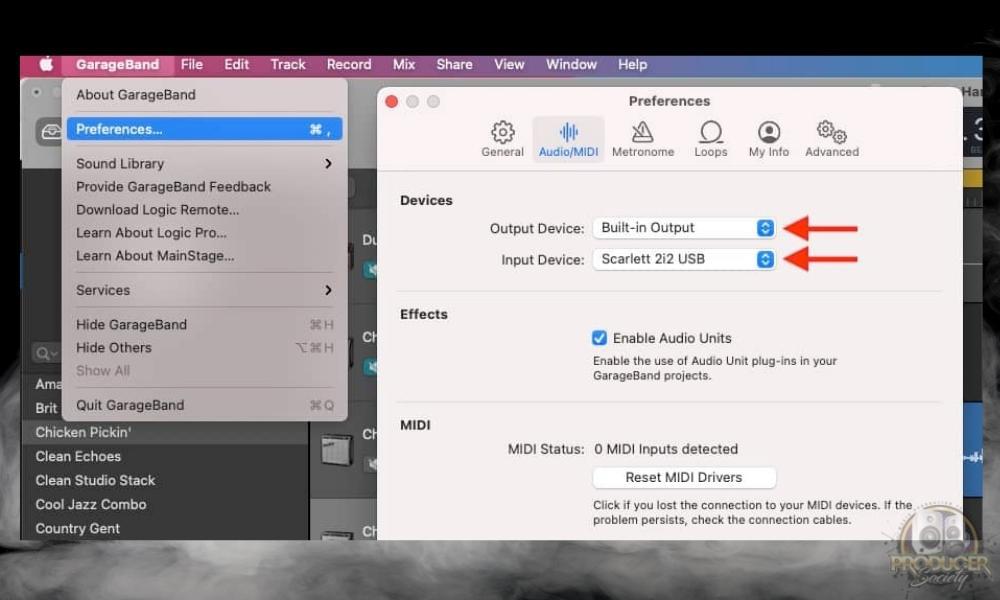
Every once in a while, GarageBand macOS won’t configure the settings properly, despite the fact that you’ve made the change in the Preferences and maybe even down in the Smart Controls.
To fix this, you just have to switch the Preferences to something else briefly, and then switch it back to the Scarlett 2i2, or whichever device you’re using.
The same thing goes for the Smart Controls as well. Additionally, it’s worth stating that sometimes you must make the change in the Smart Controls because the settings in the Preferences don’t always configure things properly. I’m not sure why this is the case, but it’s easily fixed.
Also, for reasons that are unknown to me, there are cases where GarageBand will continuously switch to a different input/output device.
For example, if you try and switch to a different device, it may work for a few minutes, but then switch back to the previous input/output device. As I said a moment ago, I’m not sure why this is, but again, it’s easy to fix.
4) You Haven’t Connected Headphones/Speakers to the Scarlett (GarageBand iOS)
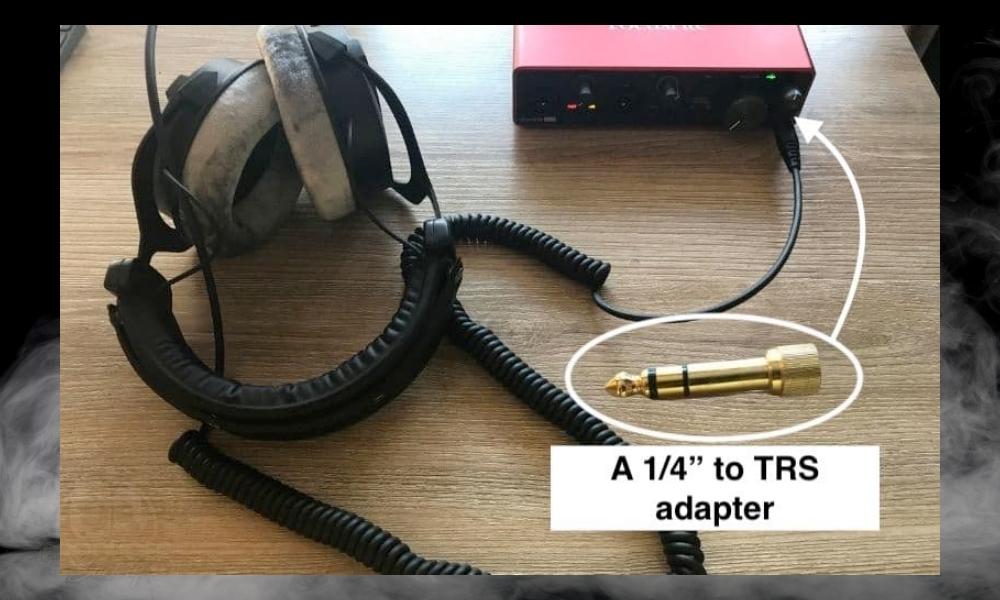
This is another big reason why you can’t hear yourself while using GarageBand iOS and an audio interface. You probably just didn’t know that you have to connect headphones or speakers to your device. This is a simple fix.
However, you probably will need a 1/4″ to headphone adapter which is easily found on Amazon for cheap. If I were you, I would even buy a bunch of these, especially if you work with a lot of people. They always go missing, and I imagine it’s because people either pocket them and forget about them, or they just straight-up steal them.
Important Things to Note About the Scarlett Series & GarageBand
1) A Scarlett 4i4, 8i6, 18i8, and 18i20 Require Configuration With Focusrite Control
As I said in my other article on how to connect the Scarlett 2i2 to an iPhone or iPad, if you’re using a Scarlett series audio interface that’s above the 2i2 and an iPad/iPhone, then you’ll need to configure your settings with Focusrite Control.
This means you’ll need a desktop computer to switch things around because Focusrite Control isn’t available on iOS. This is not the case, however, if you’re using one of these devices with a computer that’s running macOS.

Gear Mentioned
1) Scarlett 2i2
2) USB-C Cable
3) USB-C Adapter
4) 2021 MacBook Pro with M1 Chip and 1TB
5) Kramer Multiport Adapter
6) Camera Adapter
7) 1/4″ to Headphone Adapter
8) Beyerdynamic DT 990 Pros – 80 ohms

 Written By :
