Generally, the best way for the average GarageBand user to fix latency is to avoid using Bluetooth speakers, including headphones like AirPods. If that doesn’t work, use the “Track Lock” option in the Track Header (Option + T) to disable rendering and reduce the load on your computer.
Your device & audio interface need time to convert signals into sound. If you’ve used Bluetooth speakers/headphones, essentially what you’ve done is added even more time between when the note is played and when it can be heard.
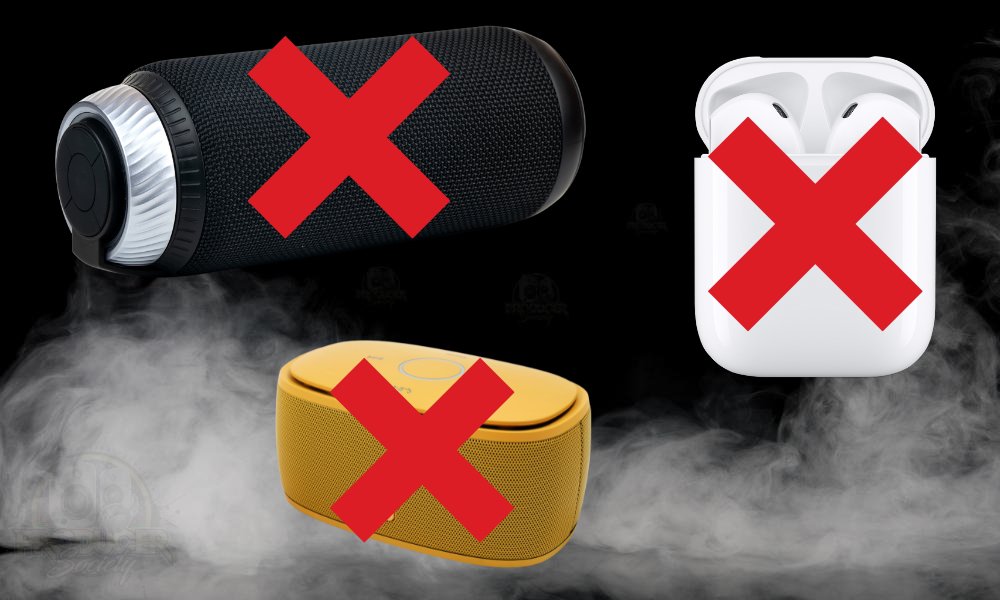
If you’re trying to eliminate all sources of latency, It’s best to use speakers or headphones that employ a wired connection rather than Bluetooth.
One Quick Example:
If your PC is hooked up to Bluetooth headphones like AirPods and a MIDI keyboard, you’ll notice a delay between when you play the note, and when you can actually hear it through the speakers.
Usually, latency is caused by some kind of problem with one’s set-up and gear, but in many cases, it’s easy to fix just by changing a few things.
18 Solutions to Latency in GarageBand
1) Use the Track Lock Feature to Disable Rendering
You can lock your tracks in GarageBand and stop them from rendering temporarily. What this does is it reduces the load on your CPU. You’ll need to bring up the Track Header settings to do this.
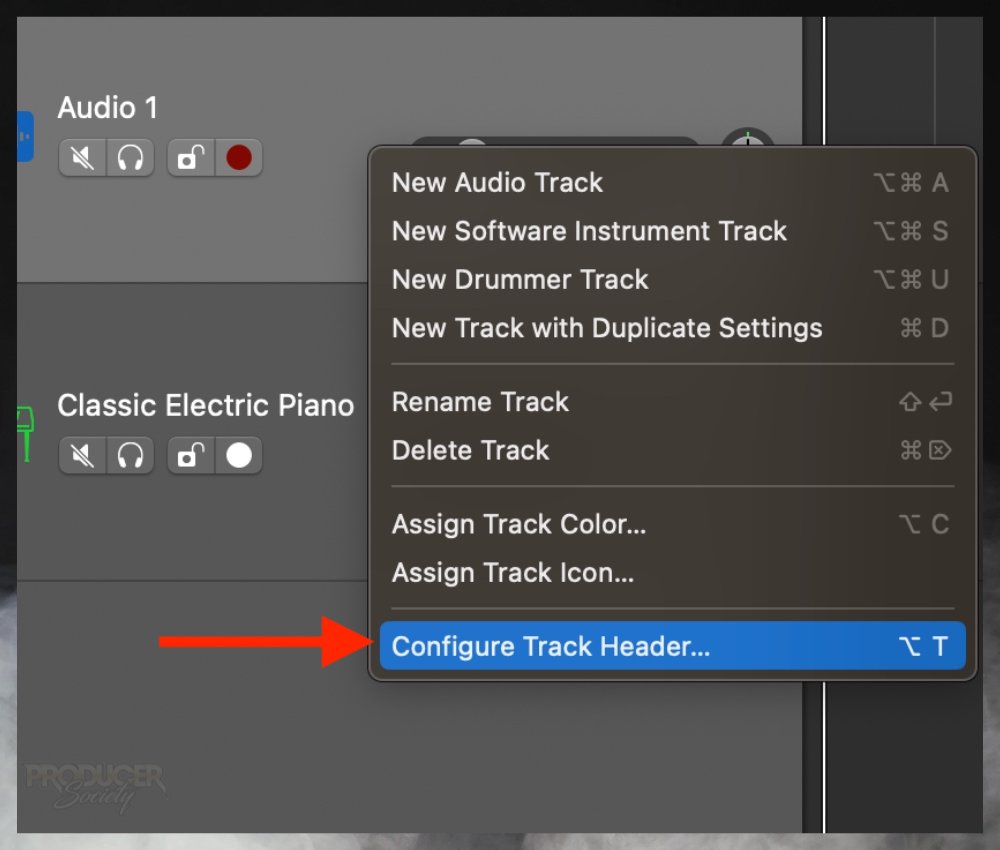
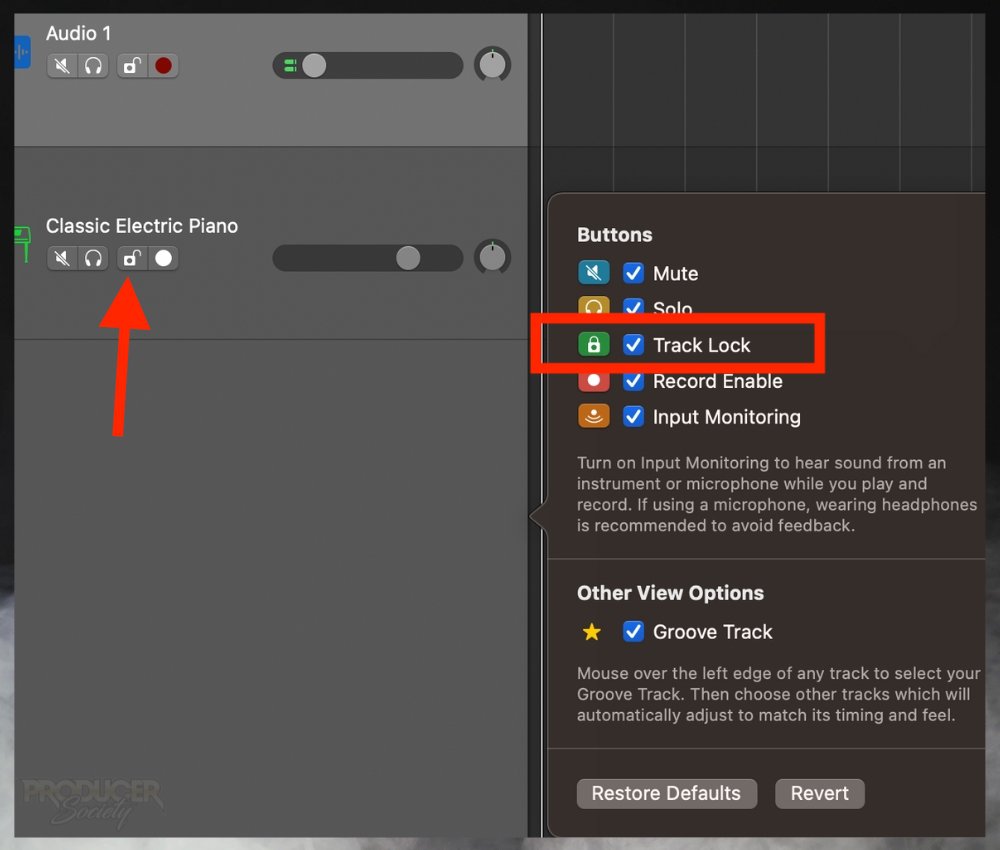
You need to do this to the tracks where you ARE NOT currently recording.
2) Disconnect Your Gear and Reboot Your Computer
A) Disconnect your audio interface, midi keyboard, and everything else from your computer and restart it.
B) After you’ve turned it back on and re-booted GarageBand, reconnect all of your gear and try it again.
3) Save Your Project And Reboot GarageBand
A) Save your file. Assuming that you’re an absolute beginner, you just go into the File setting, and click “Save,” or “Save As.”
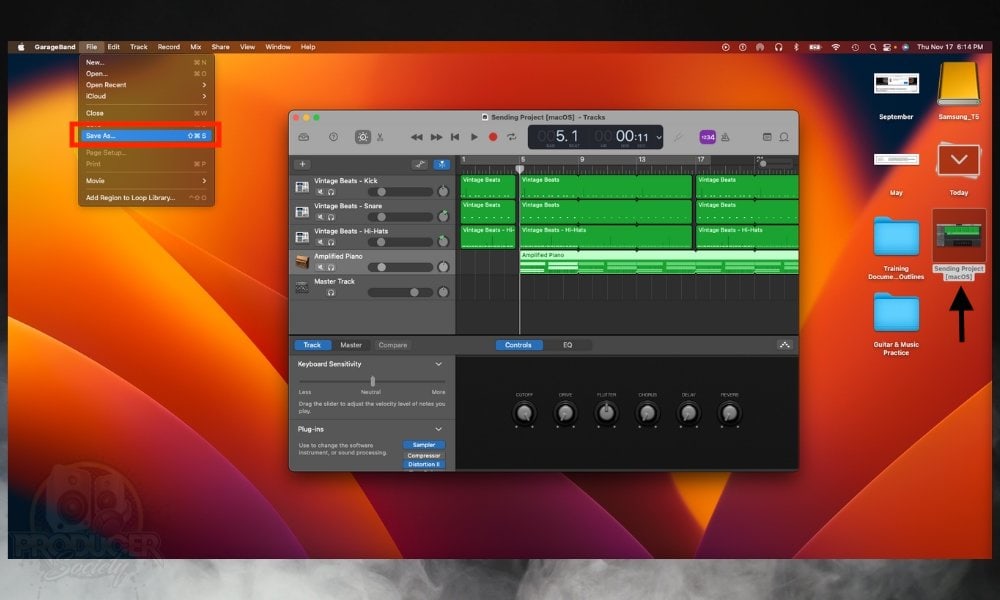
B) Re-start GarageBand
Even though this is a really simple solution, it works quite a bit, especially for those who have an old computer, and don’t have enough RAM to properly run a software that uses a lot of data.
4) Use the macOS “Built-In Output” Instead
A) Unplug the external speaker.
B) Use your MacBook’s built-in speakers, instead.
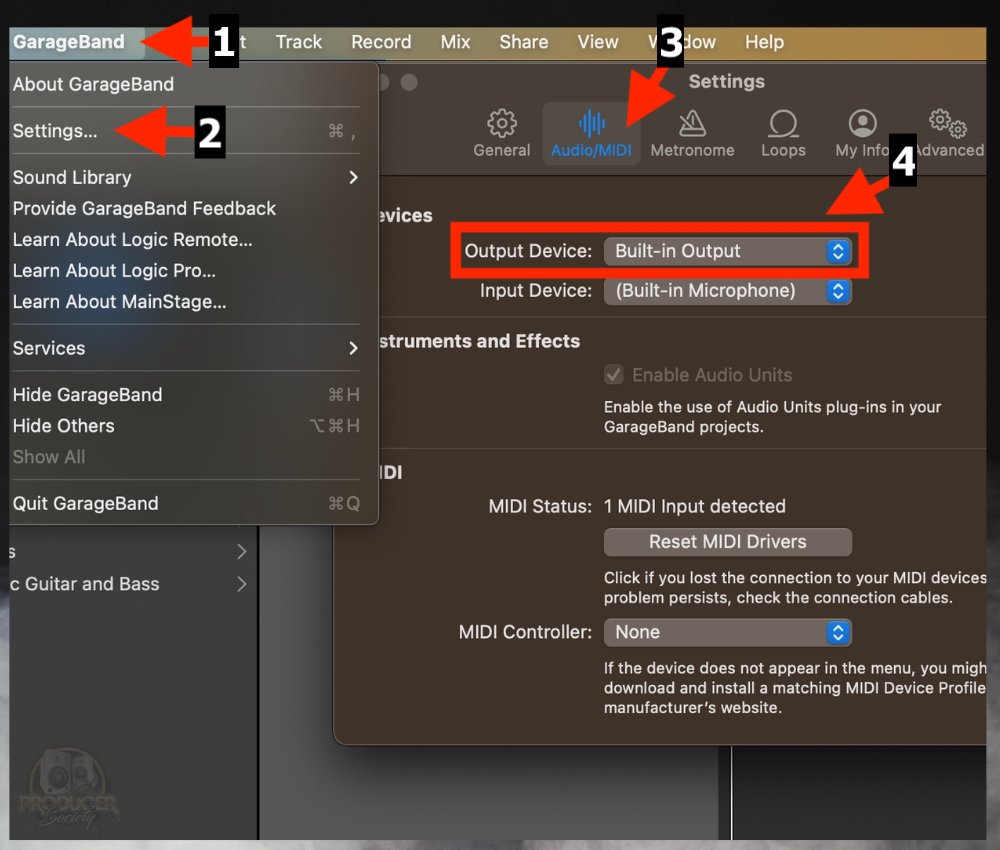
For whatever reason, this works for some people, probably because of the way they’ve connected their speakers to their computer.
A lot of people make the mistake of trying to connect Bluetooth headphones and speakers when recording, which won’t work nearly as well, unless – similar to the iLouds – you choose Audio Technica’s ATH-M50x Bluetooth headphones that have both wired and Bluetooth capability.
5) Don’t Use Bluetooth Speakers or Headphones
Like I noted above, if you’re experiencing this nagging problem, it may have something to do with the way in which you’ve hooked up speakers to your computer. Using a Bluetooth speaker, in most cases, is not going to work.
A) make sure you’re directly connecting your sound system to your computer, through the appropriate cables, depending on what system you’re using. Don’t use a Bluetooth sound system.
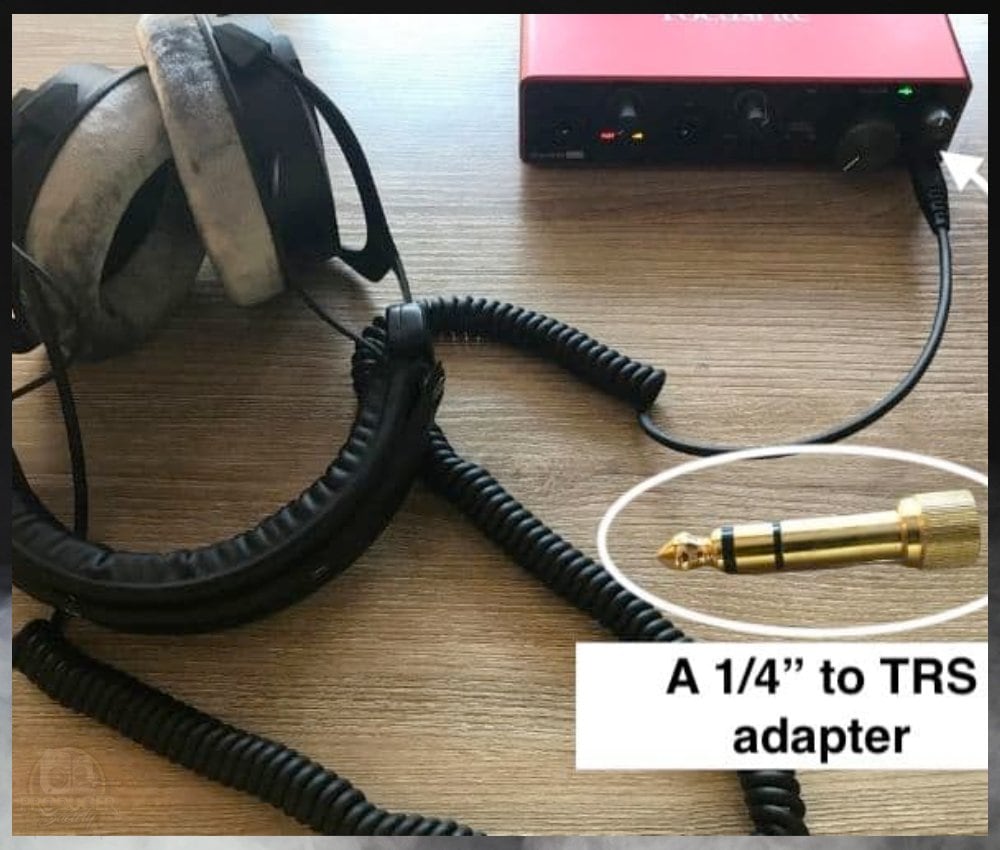
You can get the DT 990 Pros and the TRS adapter on my Product Page.
6) Re-configure Your Input and Output Settings
Just change the configuration for a moment, and then turn it back to the way that it was.
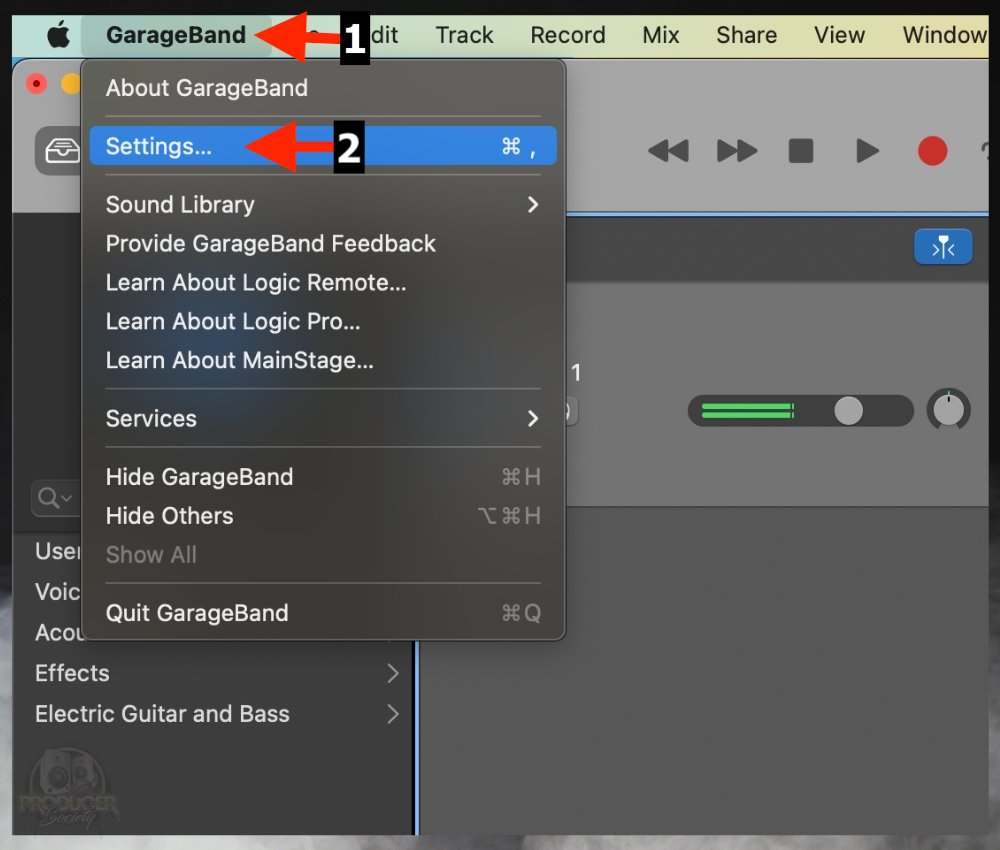
A) Go to the GarageBand menu on the top left-hand corner

B) Click on “Settings”
C) Click on Audio/MIDI
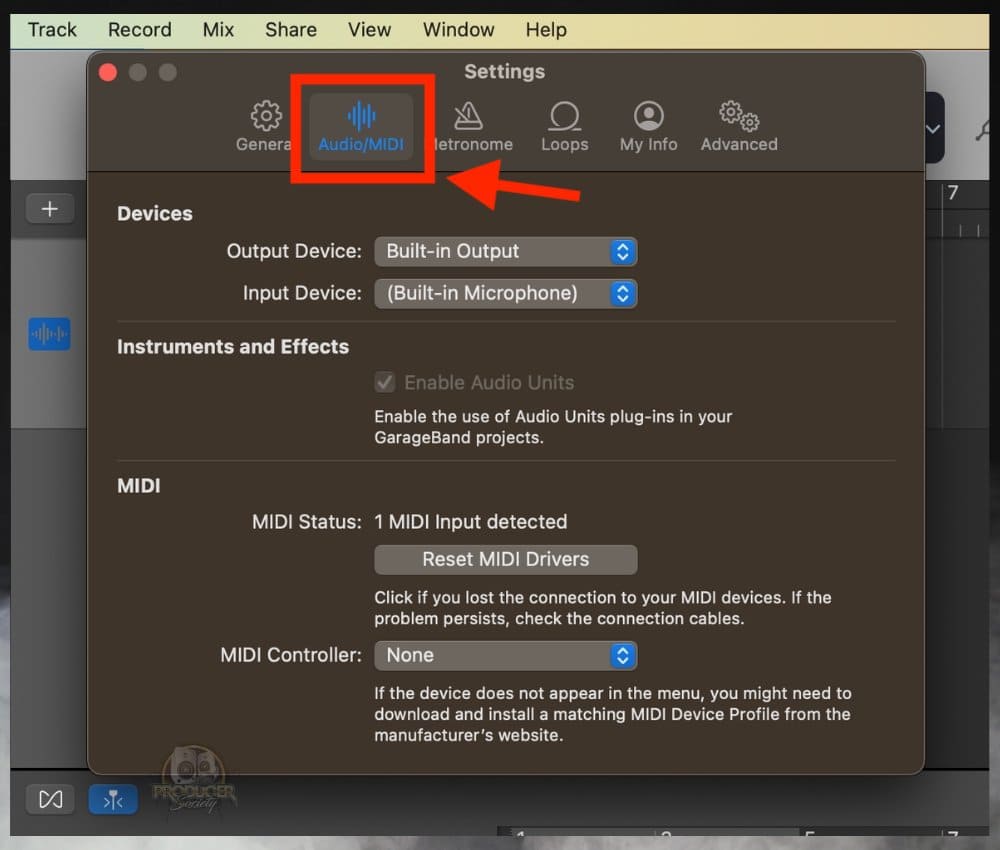
D) Change your Audio Input & Output – Then switch it back again
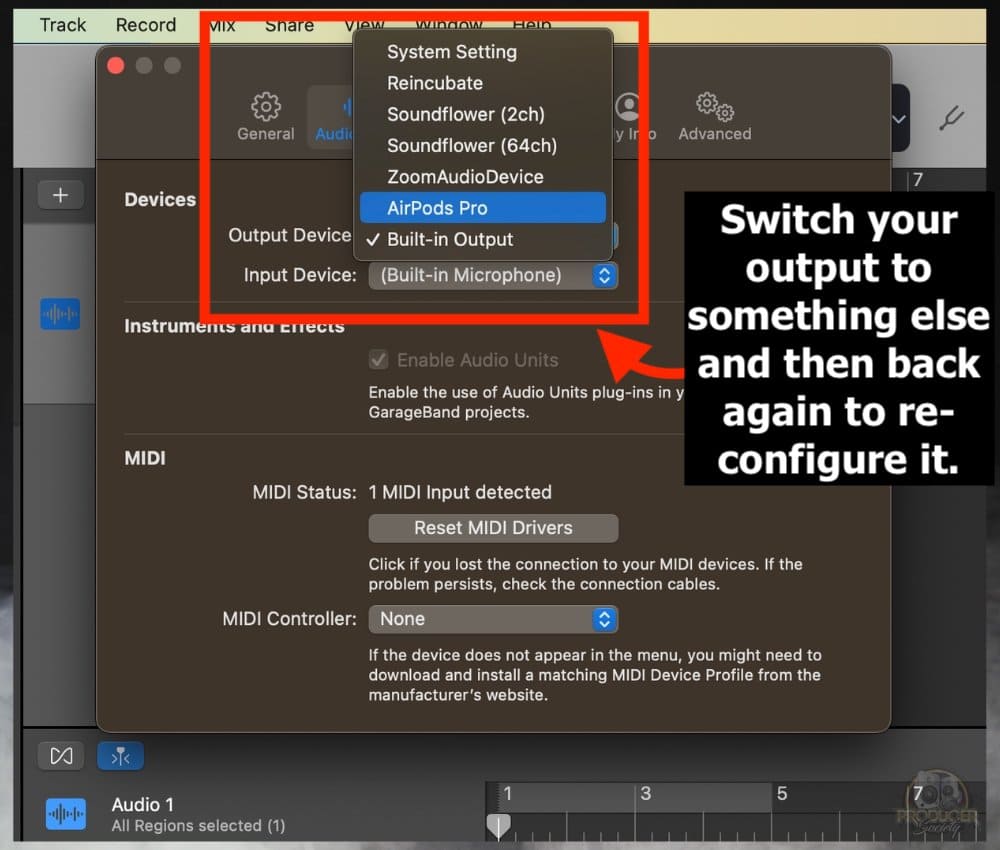
Assuming that you have an audio-interface hooked up, (which I don’t right now), the name of your audio-interface will be sitting in that menu.
7) Update to the Latest Version of GarageBand

Typically, this can be done through the App Store (my guide on this). When you click on the App Store icon, it should bring up all of the updates that are available on your computer.
Now, some people might contest this solution, but the truth is that developers usually issue updates for a reason. They’re fixing bugs and cleaning up the program so it’s easier to use.
I always use the latest edition of whatever software I’m using, just to avoid problems.
8) Use A Reputable Low-Latency Audio Interface
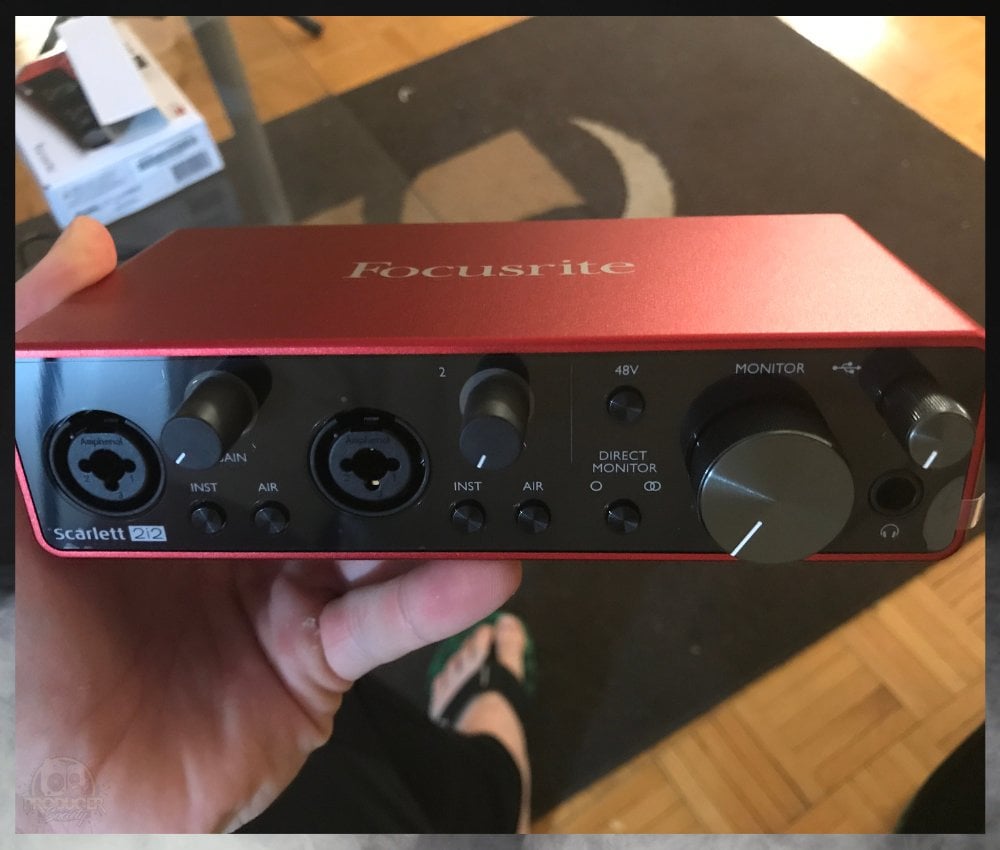
Now, obviously there are a million of these products to buy, but I’m using a Focusrite Scarlett 2i2, although, I had previously used the Saffire 6USB for approximately 8 years without any problems.
9) Disconnect and Reconnect Your Audio Interface Again
Where it shows “Software Instrument” setting or Microphone setting, there should be a control at the bottom of the pop-up that says: “Input.”
When recording with a guitar or some other external advice, you need to either click on the Guitar icon, or the microphone icon, depending on what you’re using.
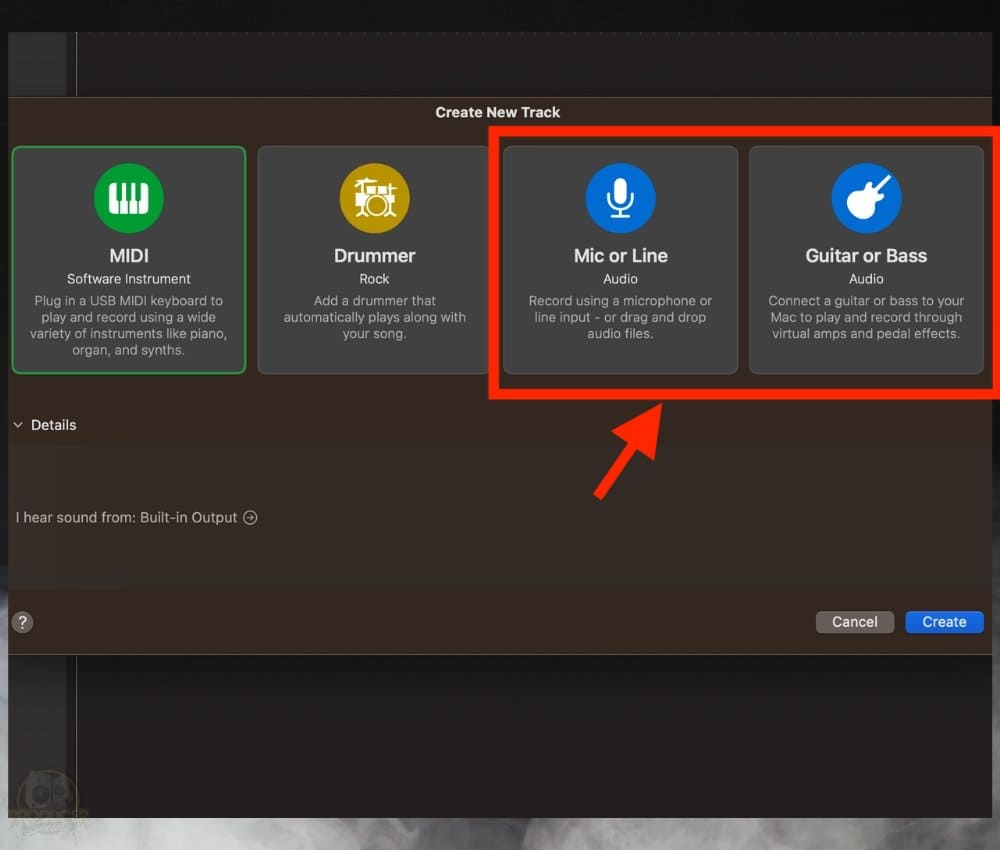
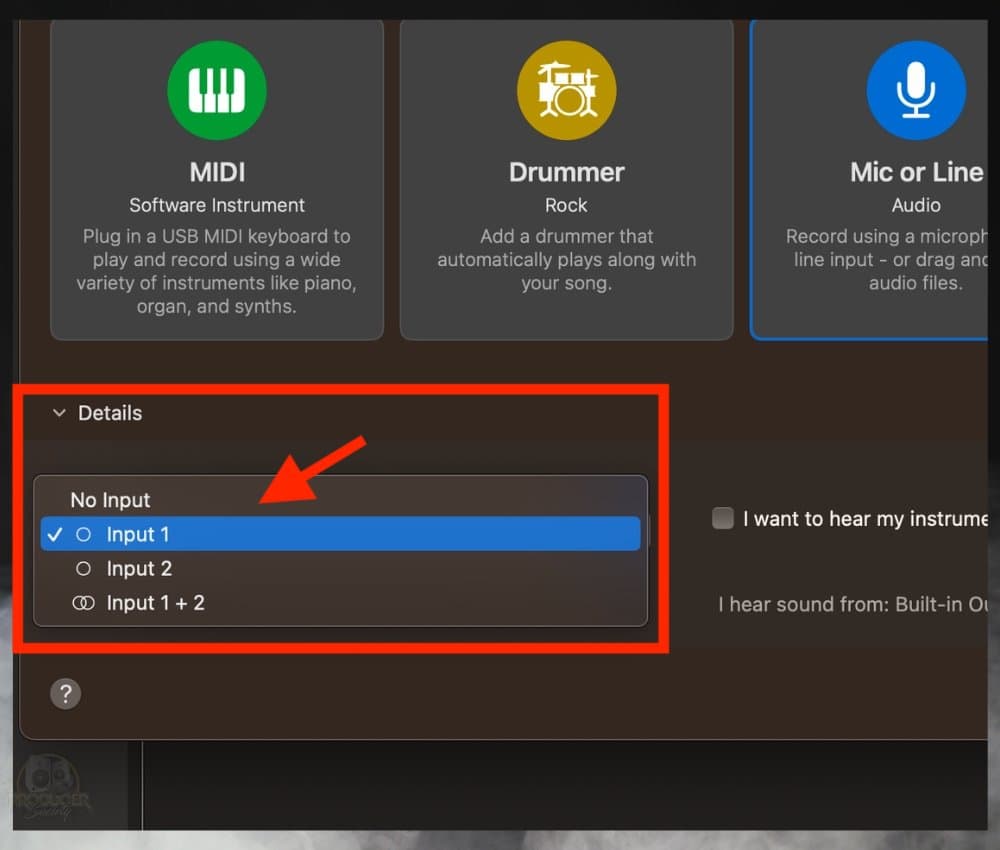
Once you’ve chosne your input, it should bring up a new track-header. A track header is where the audio is shown in your DAW.
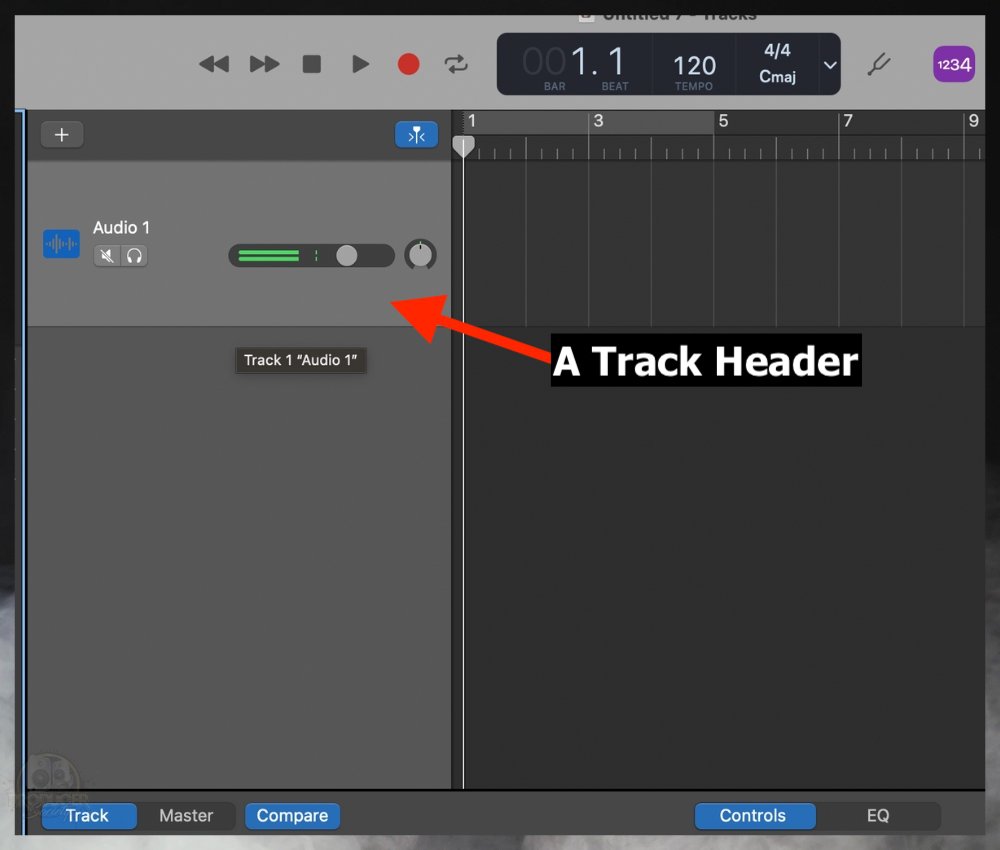
After it’s been brought up, you should be able to see the bottom portion of the DAW, which says, “Recording Settings” and “Plug-Ins.”
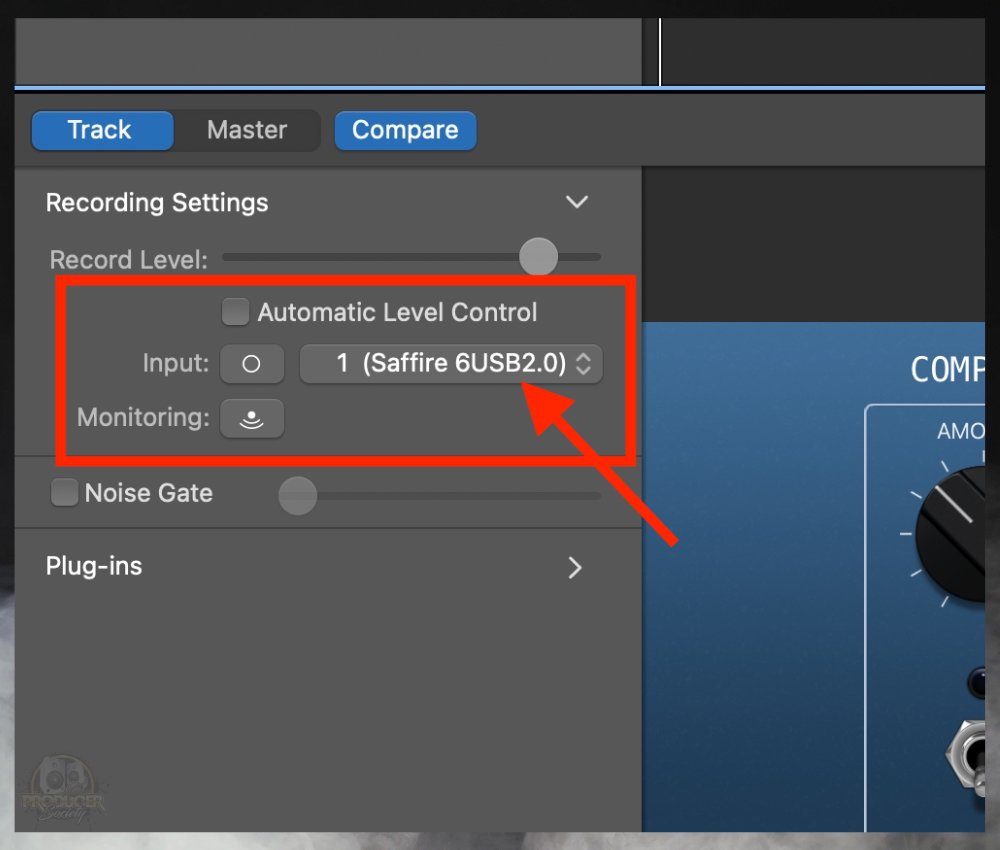
Click on where it lists what your audio interface says, and make sure your audio interface is your input, rather than something else.
On mine, it says, “Saffire (6USB2.0)” because that’s the one I use most. It’s an old-school Focusrite product.

10) Have A Look at Focusrite’s Troubleshooting Page
Go to Focusrite’s troubleshooting page.
While you might own a different audio interface, this website has a useful explanation for why you may, still, be experiencing latency issues even after trying all of the aforementioned solutions.
11) Try Disengaging All Monitoring During Playback
Make your that whenever you’re playing back your audio recording in GarageBand, the “Monitor” button is turned off.
The “Monitor button,” (the symbol that looks like an upside down Wi-Fi signal); there should only be one turned on and yellow when you’re recording.
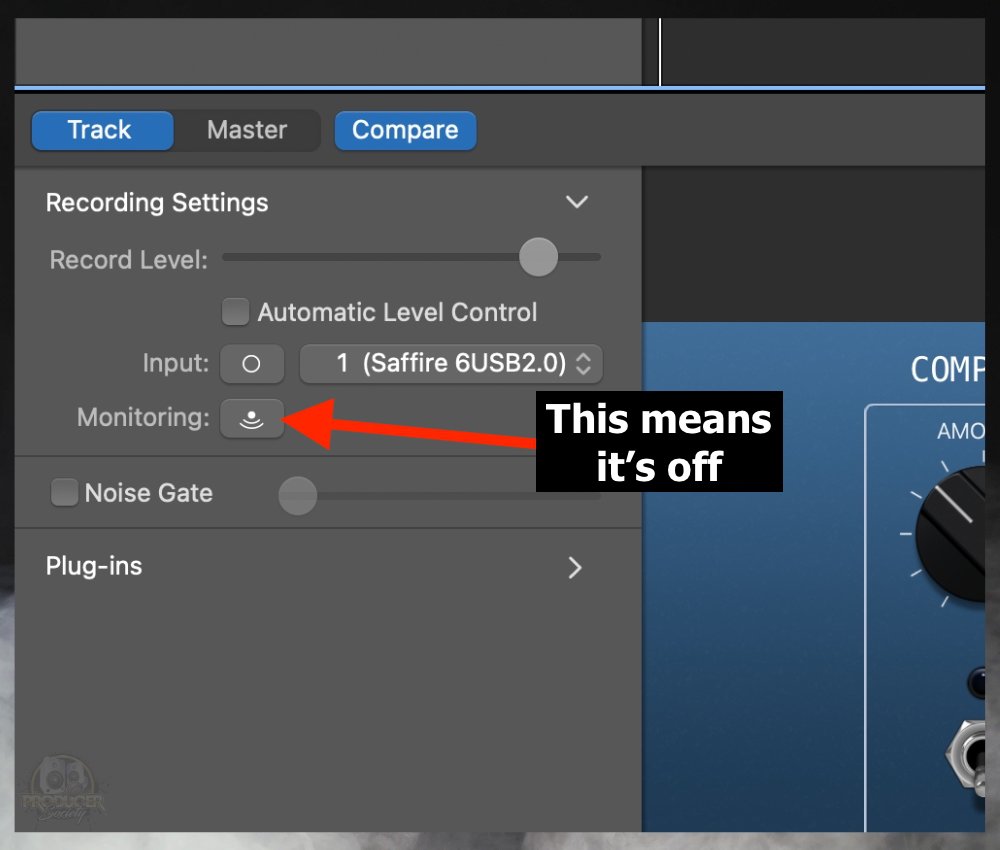
The reason for why this causes latency is because your DAW is using too much power by having all of the different monitors on.
As I explained earlier, latency is a problem when your computer is slow to convert a signal into the desired sound, whatever that sound may be, your guitar or microphone, etc.
12) Run Only 1 or 2 Software At Once
The reasoning for this is that if you’re running more than one software at a time, your computer is working too hard to process the signal, thus, there’s a delay in the transfer from your instrument, to the speaker.
13) Delete Massive Files Taking Up Space
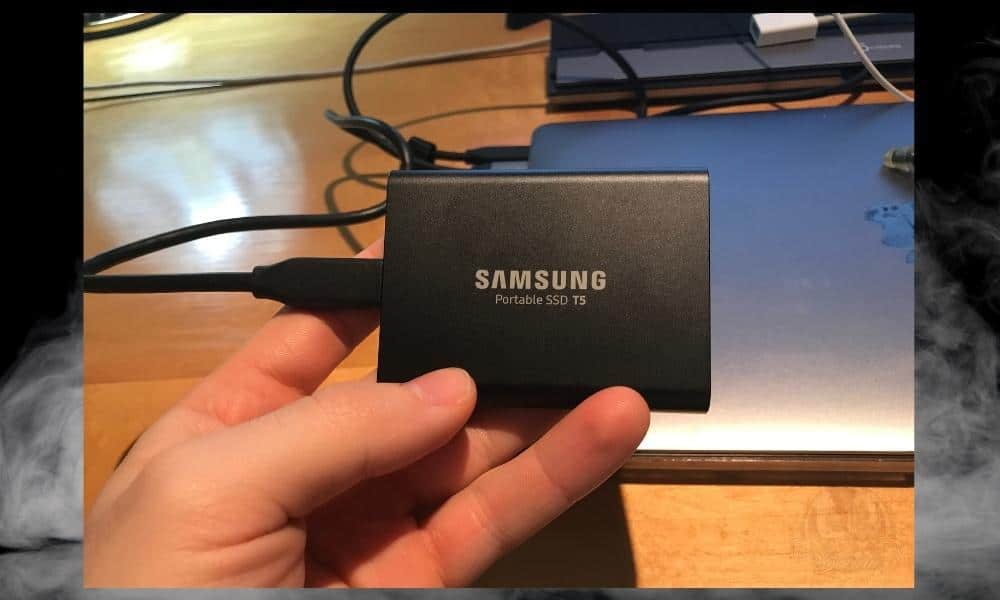
Another way to deal with latency is to delete large, old files that are taking up too much RAM on your computer, which is similar to how you would minimize crashing (my guide) as well.
I used to run the latest issue of GarageBand on my MacBook Pro from 2010, and due to the sheer amount of data I had on it – as well as the decreased strength of its processor and age of the computer – I had latency problems, and in many cases, GarageBand would crash altogether.
You can learn how to store your instruments, samples, and other sample libraries with my article. You’ll need an external SSD for this like the one I’ve linked to in the image above.
These days I’m using a 2017 MacBook Pro, although, I would recommend one like this instead because it has more storage space, faster processing speed, and is an all-around better computer.
A solid computer that can handle music production is how you eliminate problems like latency at the source.
14) Eliminate Problematic Plugins
Another possible issue is something with your plug-ins.
Plug-ins actually use quite a bit of power, especially mastering plug-ins or simpler ones like compressors and multi-pressors etc.
Try disabling some of your plug-ins connected to your instrument.
A) Click on your instrument or track header.
B) Bring up the bottom part of GarageBand where it says, “Recording Settings” and “Plug-Ins” beneath it.
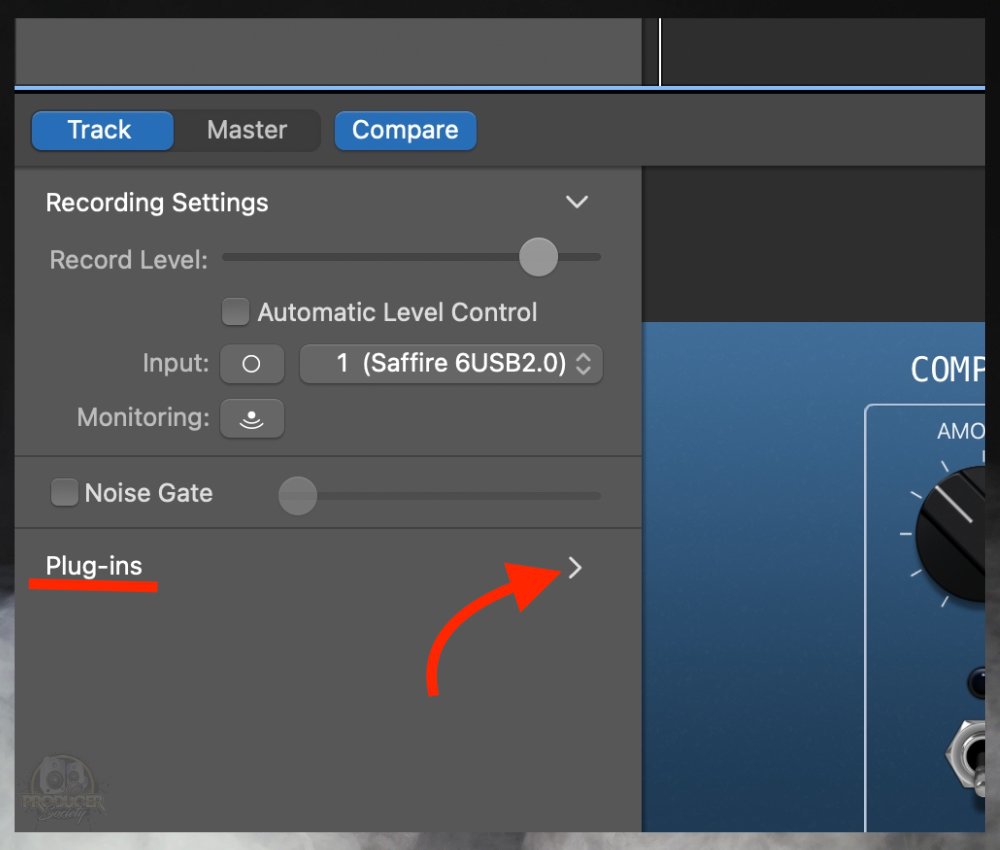
C) Click on the arrow on “Plug-Ins.”
D) It should drop down the menu where it lists all of your plug-ins.
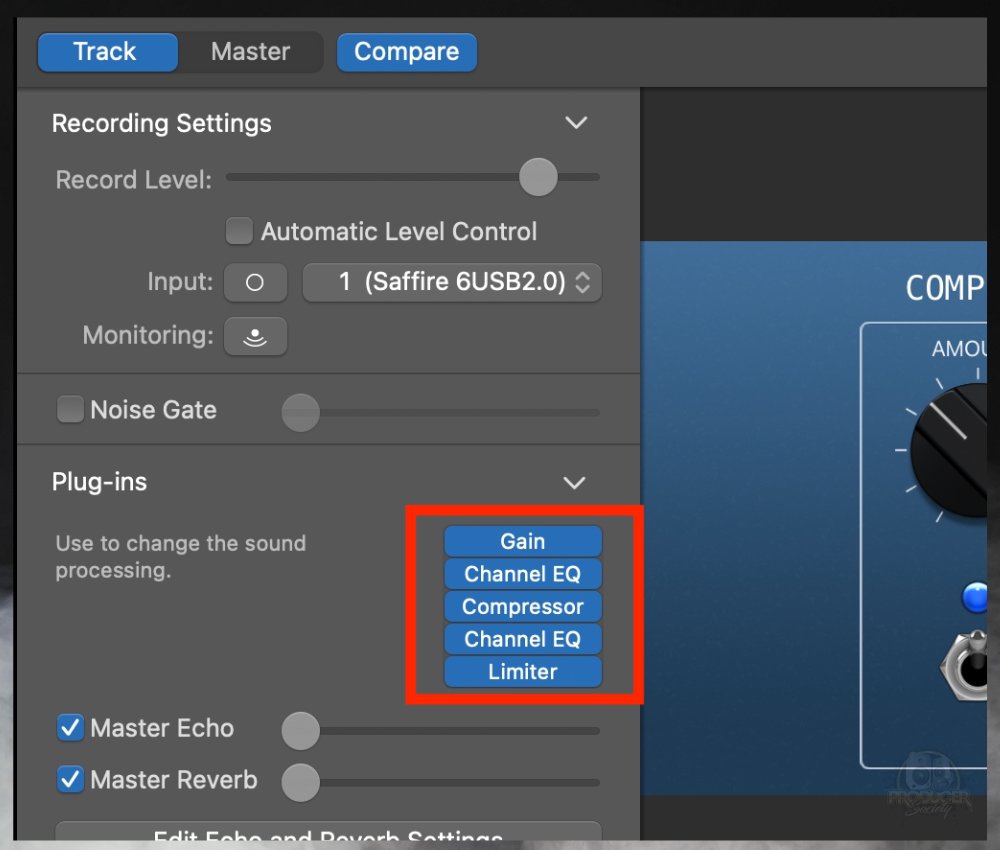
E) Click on one of them. In the latest issue of GarageBand, they’re coloured blue.
F) It’ll bring up the settings in the top-left corner.
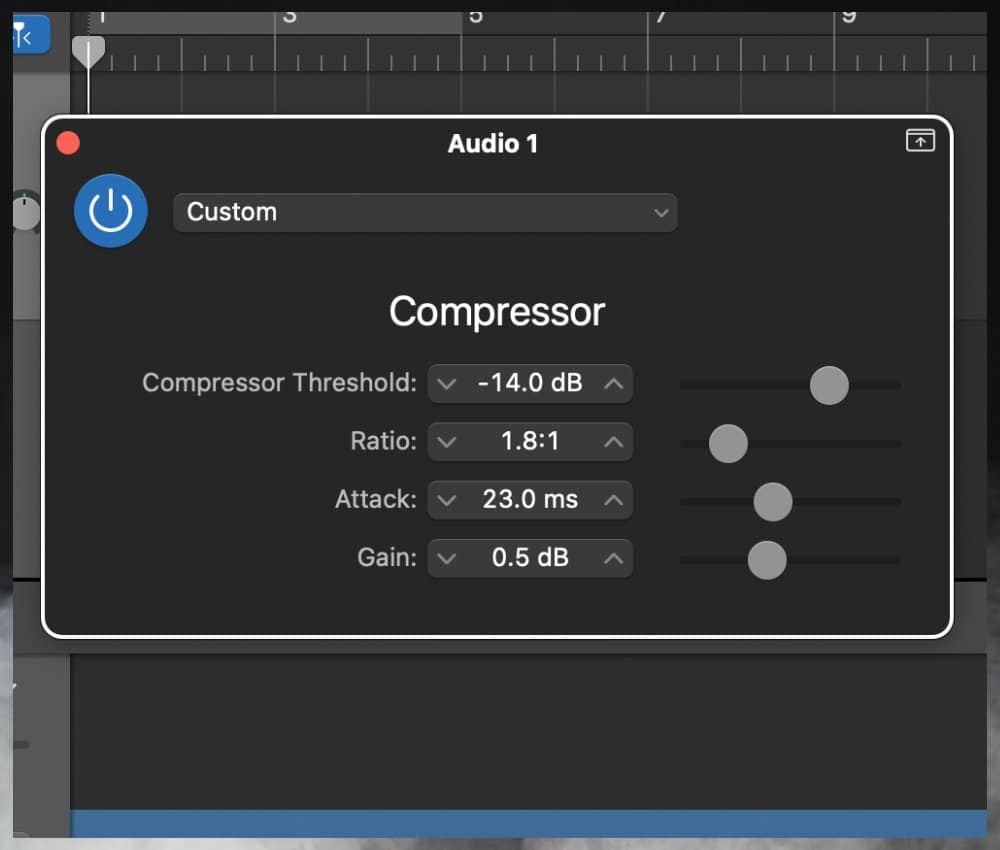
G) Click on the power button that looks like a circle with the top part cut out of it, and a completely straight vertical line running through the center.
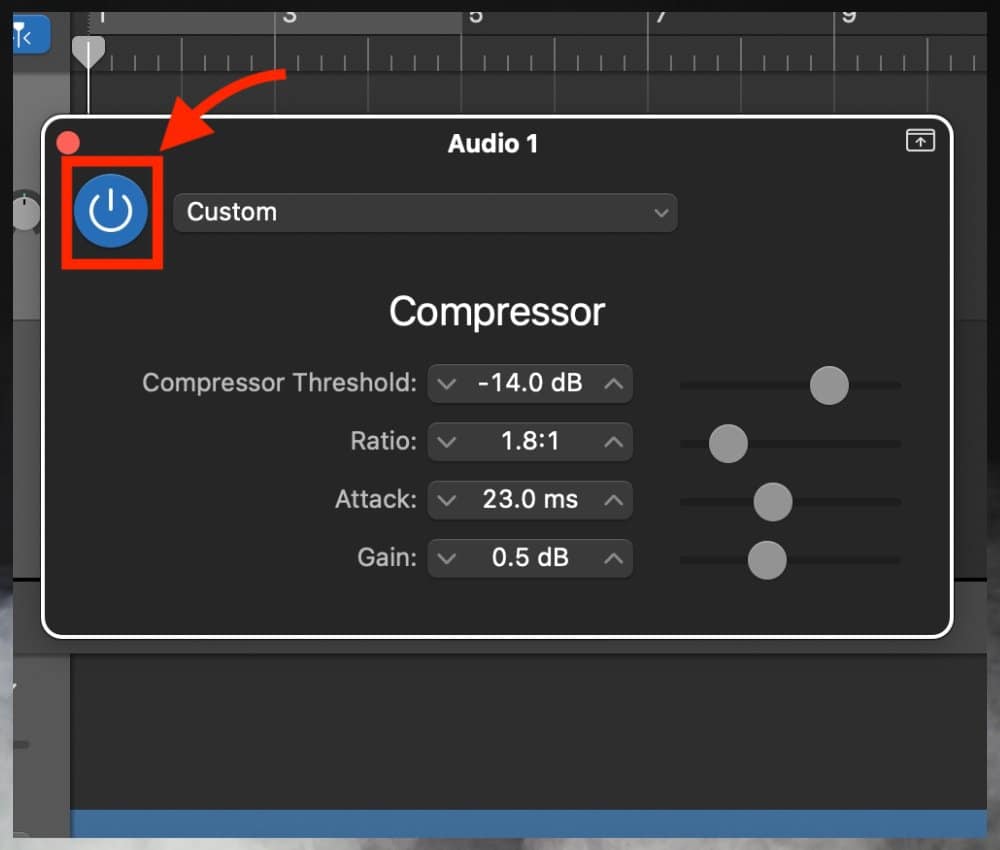
H) Now go through each plug-in, turning them off, one-by-one, to see if one of your plug-ins are causing the problem.
15) Add More RAM To Your Computer
| Specification | The Novice | The Intermediate | The Professional |
|---|---|---|---|
| RAM | 8GB | 16GB | 16GB (all you need, but 32GB is great) |
| Processor | Dual-Core Processor (i5 or i7) | Quad-Core Processor i5 or i7 | Quad-Core Processor i7 or i9 |
| Storage | 512 GB | 1TB | 5TB and Beyond |
| SSD or HDD | HDD | SSD | SSD |
| Recommended Computer | Don’t even bother with a MacBook Air. | MacBook Pro (my favorite one to recommend) | iMac Pro (if the MacBook isn’t enough for you) |
The table I’ve included above features some of my recommendations for people who are getting started with ,usic production and want to ensure they have enough processor speed, storage, and RAM to do it.
Related to the other solutions above, increasing your computer’s onboard RAM will make a difference. Add one gigabyte of RAM and that should help your computers processing system.
Increasing RAM should always increase your machine’s performance, however, I don’t think Apple makes this quite as inexpensive and efficient as they used to. Many people have complained about this.
16) Record Only One Track at a Time
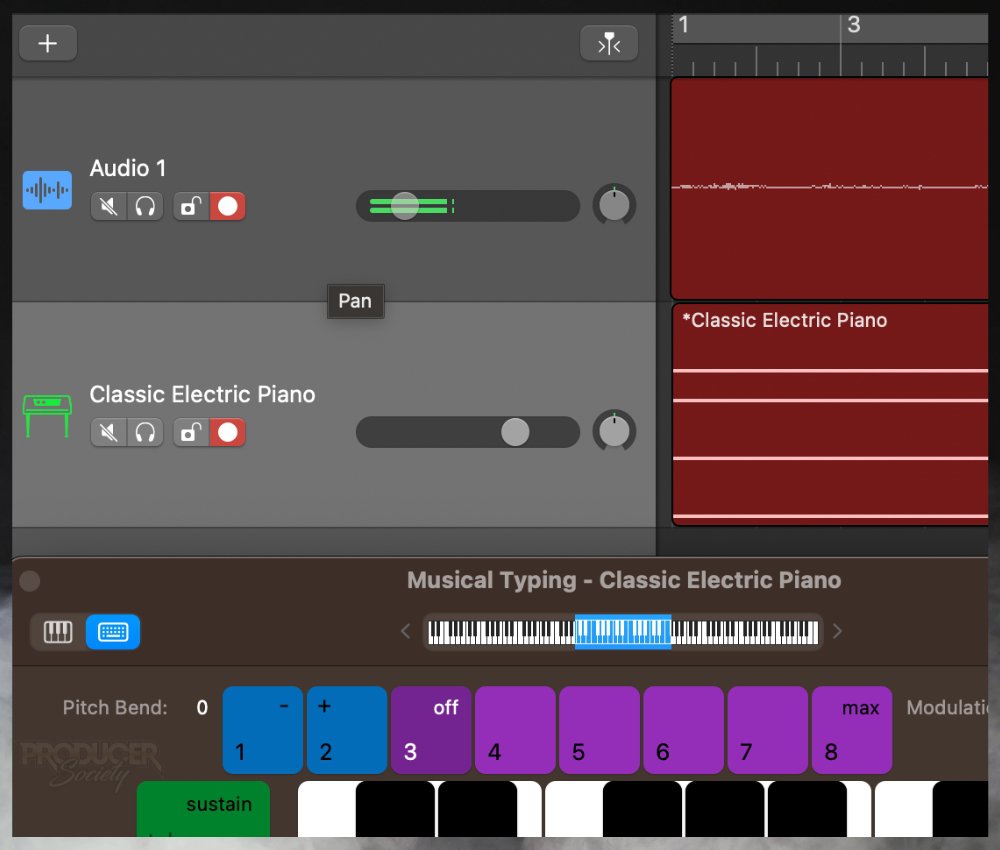
If you’ve having latency problems, you definitely don’t want to do something like this. If you are interested in learning how to set up record enable, check out my article where I explain how to use the MIDI Guitar.
17) Buy A New Cable
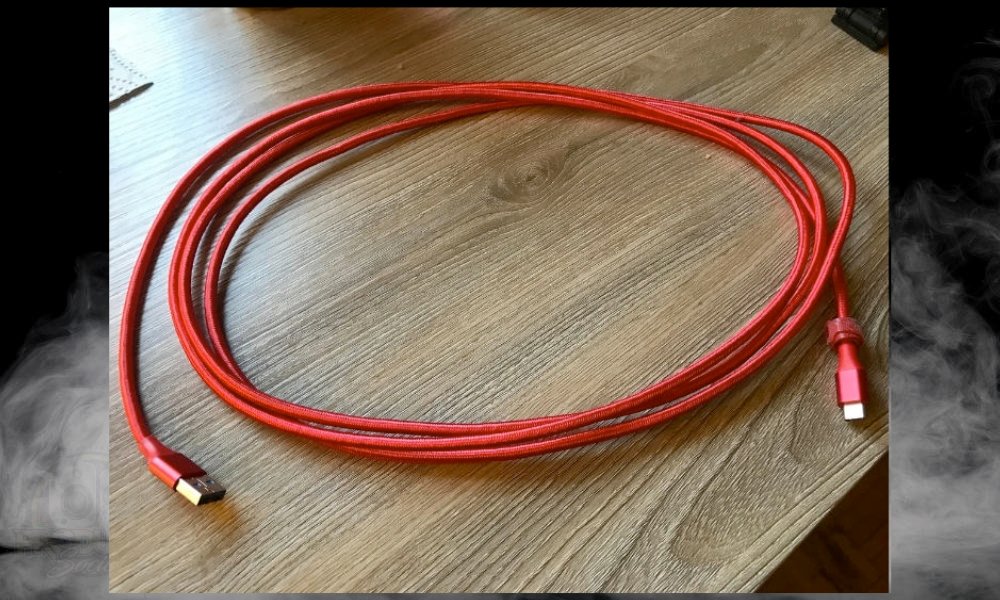
This solution has more to do with general connectivity problems, including crackling and popping, and less to do with latency, but it’s worth noting.
- Buying a new quality cable (If you need a USB-C to USB-C cable instead, there’s one on my product page).
In a book I read recently from an audio engineer, he explained that one of the things he wishes he would’ve known earlier was the way that cables are usually the root of a recording engineer’s problem.
Don’t forget about your instrument and XLR cables. I like to use Ernie Ball guitar cables and Digiflex XLR cables.
Sometimes, just buying a new cable will solve the problem, and save a person hours of their time troubleshooting all of the different causes of a problem, that turns out, is actually quite a bit simpler than they initially expected.
For instance, for a while, I was wondering why my guitar was crackling in my DAW through my audio-interface, but it turns out that all I had to do was change the 9-Volt battery in my guitar’s active (rather than passive) pick-ups.
18) Maybe It’s Time For A New Computer (Don’t Get Mad)
This solution is a bit of reach, but I’ll list it anyway. Maybe it’s time for a new computer.
If GarageBand is crashing a lot, you’re having other issues, or your system is almost 10 years old like mine was, maybe it’s time to invest in a new machine.
However, it should go without saying that this is an absolute last resort, and by no means should a person look to get a new computer before trying any of the solutions listed above.
Important Things to Note About GarageBand Latency
1) GarageBand Doesn’t Have Buffering and Sample Size Options
I’ve read other articles online that say you can change your buffering, sample size, and other advanced settings right in GarageBand, however, you cannot do this.
There might be a way to do it if you know how to adjust those settings in the macOS operating system, but this won’t be an easy thing to do.
2) Bluetooth Speakers & Headphones are Fine for Casual Playback, but not Monitoring
A Bluetooth speaker works just fine when you’re playing music directly from your computer from iTunes, YouTube, Spotify, or some other music platform. For monitoring though, it’s not ideal.
Keep in mind there are products like the iLoud Micro Monitors (on my Product Page) that have the best of both worlds, which means they have both Bluetooth and wired capability which is why I got them. Audio Technica’s ATH-M50xBT2 are another example (on the same page).
In the case where your computer is converting the analog signal from an instrument to a digital signal, it would be best to use the iLouds with the Bluetooth disconnected, because then there won’t be any latency.
Are there are any other ways of reducing latency in GarageBand? I’m curious to hear additional solutions that some of you may have. Let me know in the comments.
Other Articles You May Be Interested In
- How to Fix Out of Sync Audio on TikTok [And Eliminate Delay]
- The Best Bluetooth Headphones For Music Production
- Is the AKAI MPK Mini Series Bluetooth? [ANSWERED]


 Written By :
Thank You. Saved me a load of grief.
Anytime
this was amazing..solved my latency issue. But its odd, because I was connected to a bluetooth speaker but I connected via its aux input., However, when I went straight to headphones everything was perfect, including playback on bluetooth speaker connected via its aux input. Trying to monitor through that speaker was a nightmare. But why was that the issue when I was connected via its bluetooth main feature?
Thanks!!
Glad this article helped you out.