I took a couple of days to figure out the ins and outs of MIDI Guitar 2, and it’s not that hard to configure. Once you understand the process, MIDI Guitar 2 is easy to set up for GarageBand.
To use MIDI Guitar 2 for GarageBand
1) Connect your guitar with an audio interface
2) Open one audio track and one software instrument track
3) Use (Option + T) to Configure Track Header
4) Check the “Record Enable” box and enable recording on both tracks.
5) Ensure you’ve turned Monitoring on
How To Set Up MIDI Guitar 2 in GarageBand
1) Download MIDI Guitar 2 from the Jam Origin Website
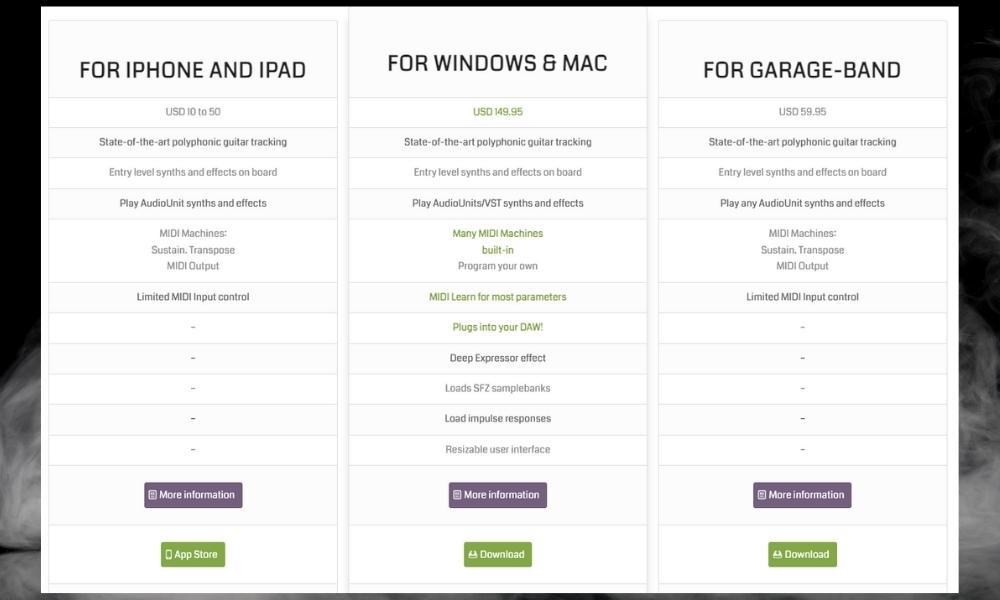
Head on over to the Jam Origin website to get your hands on the MIDI Guitar 2. Download both MIDI Guitar 2 and MIDI Guitar for GarageBand if you want to give both a shot.
MIDI Guitar 2 is better though. Just to clarify though, this is how you use your guitar as a MIDI controller, not create guitar sounds with a VST instrument.
2) Open A New GarageBand Project and Connect Your Guitar
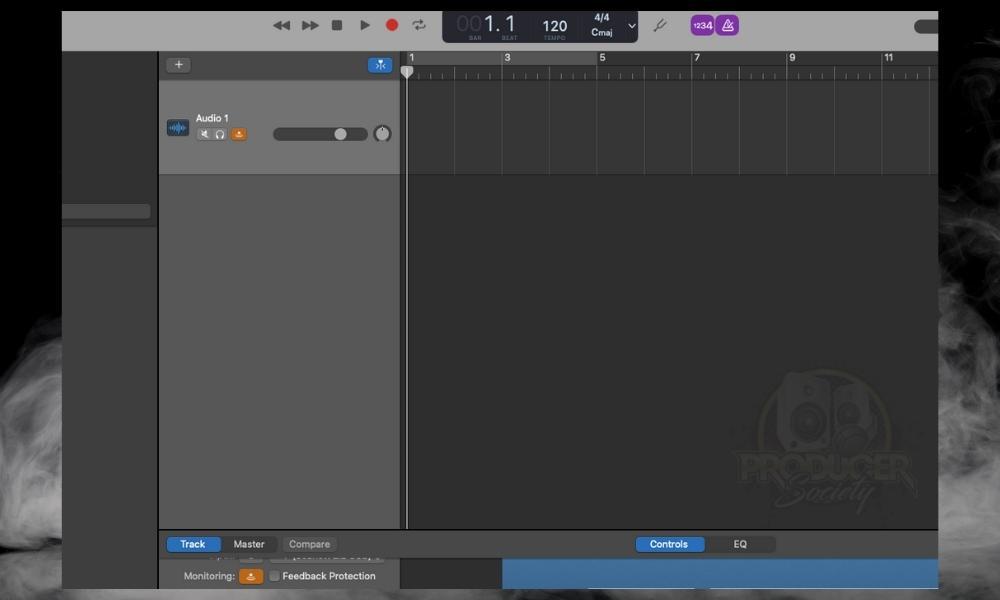
The next thing you want to do after you’ve downloaded everything is open up a new project like what you can see in the image above. It’s important that you use an audio track.
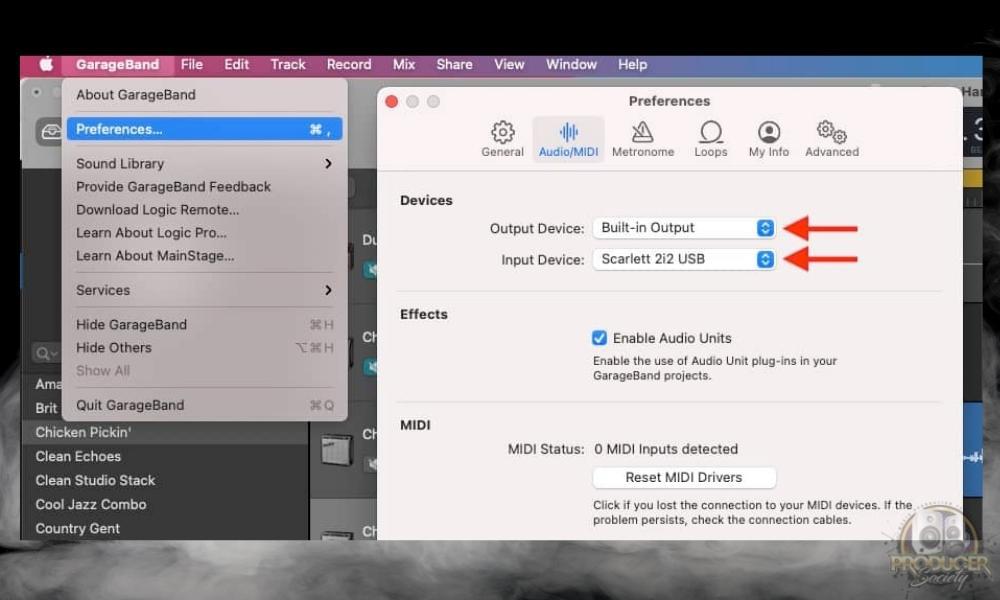
3) Configure Your Audio Interface and GarageBand’s Preferences
The video I just showed above will show you how to connect your guitar to GarageBand using an audio interface like the Scarlett 2i2.
It’s a fairly straightforward process that you get used to very quickly if you haven’t done it before. If you don’t want to take the time to watch the video though, here’s a nice little image excerpt that’ll help you.
4) Open MIDI Guitar 2 on the Guitar Track
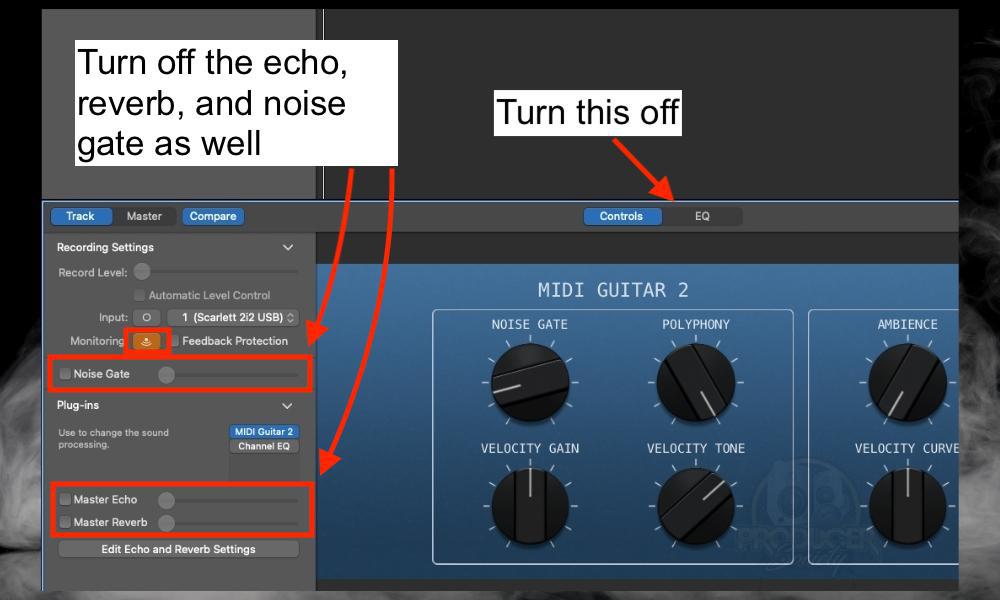
Apparently, it’s important that you turn anything off on the track that’s not necessary. Personally, I haven’t found much of a difference when turning some of this stuff off, however, it’s what Jam Origin recommends so that’s what I do.
Turn on Monitoring
The next thing you want to do is ensure you’ve turned on Monitoring. You won’t be able to use MIDI Guitar 2 without your guitar track’s monitoring option turned on.
Turn Off Master Echo, Master Reverb, the Channel EQ, Feedback Protection, and Any Other Effects
Turn off your Master Echo, Master Reverb, the default Channel EQ, and feedback protection. I would also click over to the EQ tab as well to make sure the EQ is really off. I used to recommend keeping the Noise Gate on, however, MIDI Guitar 2 has its own Noise Gate that you can use.
5) Open The VST You Want to Control With MIDI Guitar 2
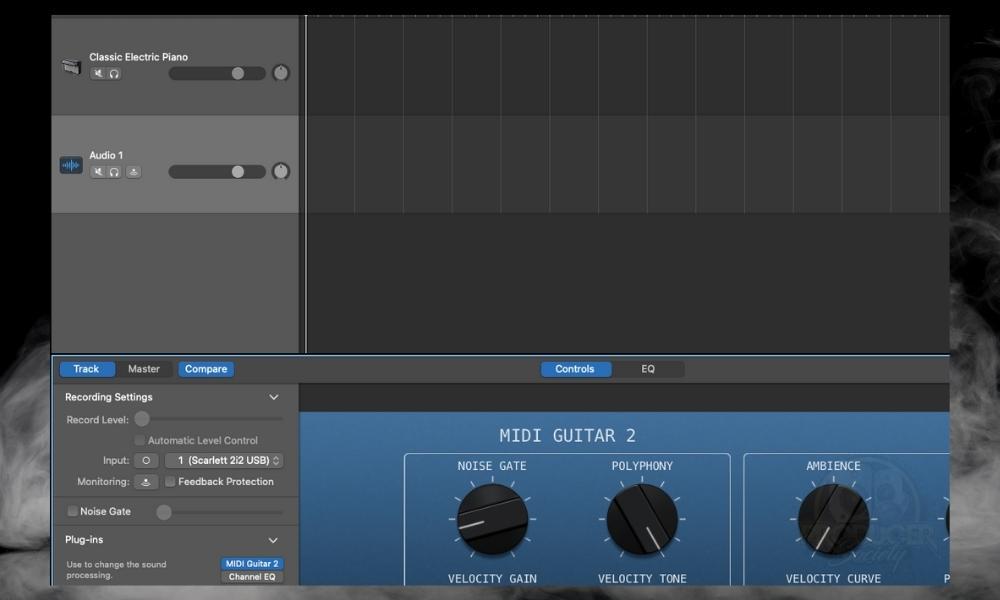
MIDI Guitar 2 works for any VST, at least according to what I’ve seen thus far. That means you can use it for Spitfire Audio Plugins, Kontakt 6 instruments, and all kinds of sounds that I love to use (check my plugins guide for more great ones).
6) Use (Option + T) to Configure Track Header and Record Enable
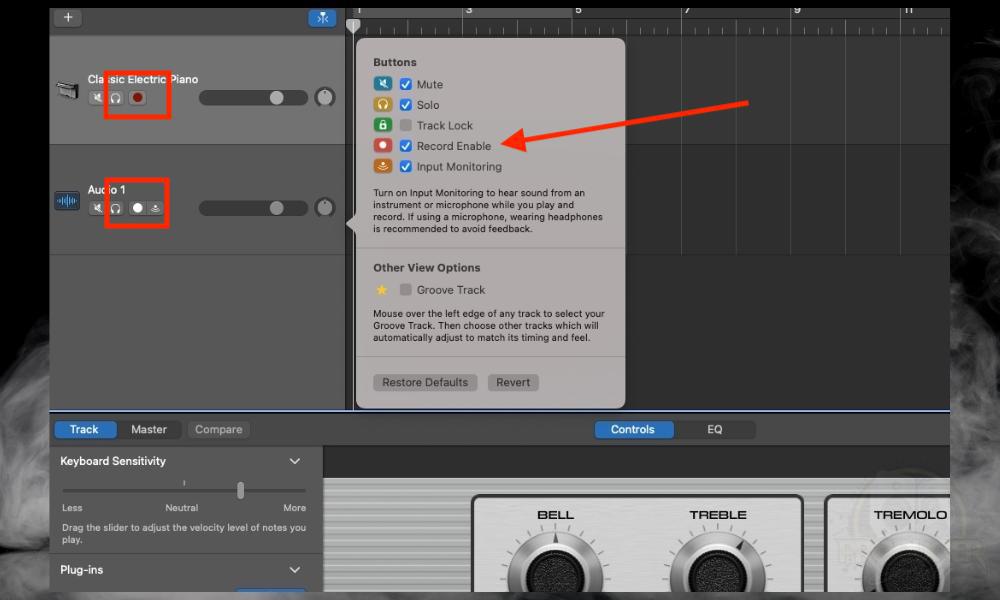
The next part of the process that really took me a hot minute to figure out was the Record Enable function. Not that setting it up is hard, but I just didn’t realize you needed to do this to get the MIDI Guitar 2 to work.
That’s why I initially used the MIDI Guitar for GarageBand because you can send MIDI into GarageBand from outside the DAW as a stand-alone plugin. Using it as a plugin though, however, is way better which is something I talked a bit more about down below.
7) Turn On the Record Enable For the Audio Track and Instrument Track
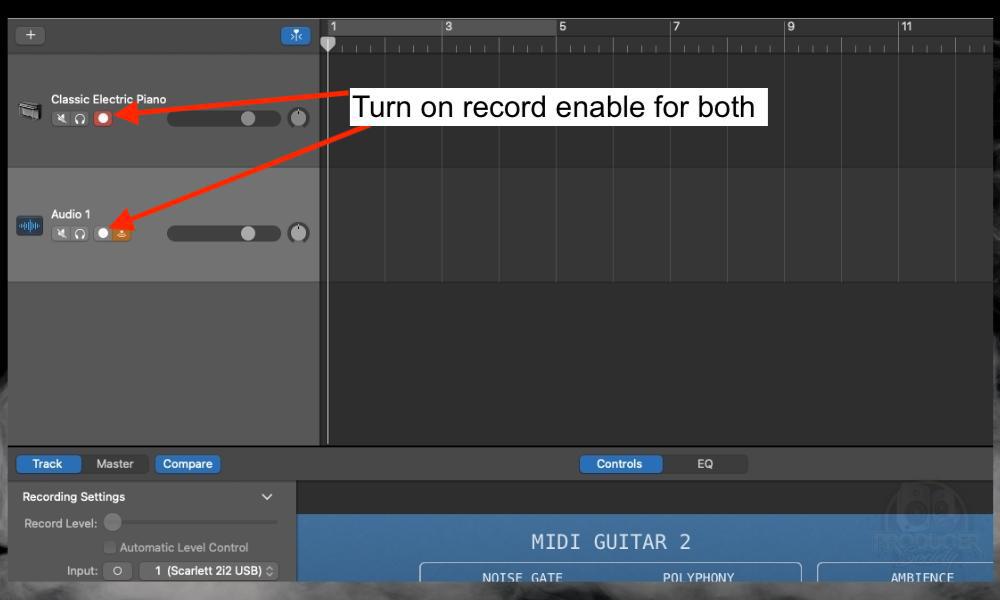
Turn on Record Enable for both tracks. You’ll know they’re all turned on because they’ll look something like this:
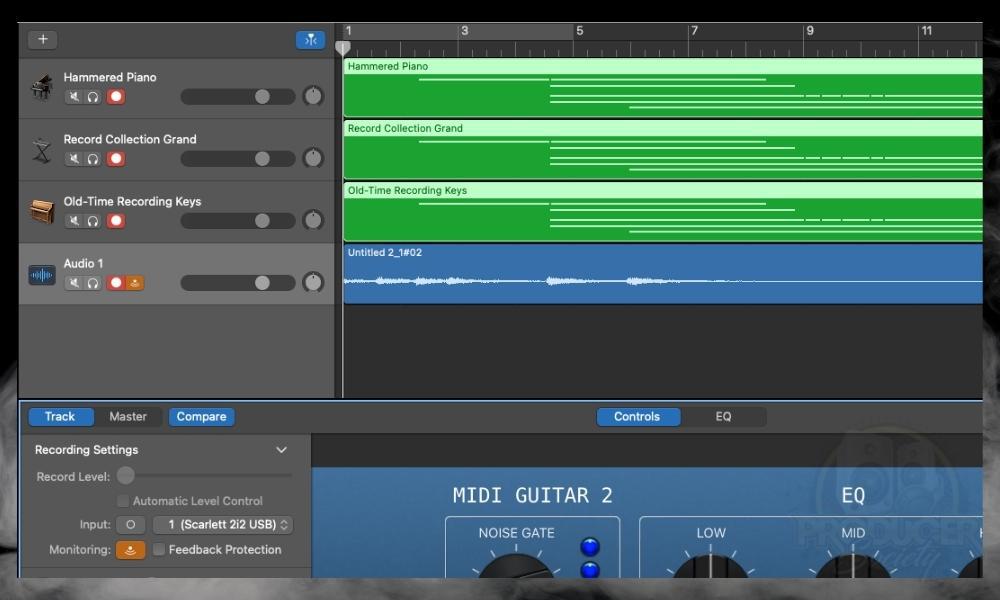
How to Use MIDI Guitar for GarageBand
One thing I’ll say right off the bat about MID Guitar for GarageBand is that while it does work, it doesn’t work nearly as well as MIDI Guitar 2 when you use it as a plugin.
As a matter of fact, I had reservations about using MIDI Guitar for GarageBand until I finally figured out how to use MIDI Guitar 2. I thought MIDI Guitar for GarageBand was the extent of the software’s power. However, MIDI Guitar 2 is really taking it to the next level, as it works very well.
You can set it up so that there is hardly any latency at all (more on latency in my guide by the way), and it’ll actually function as a totally legitimate MIDI controller. It’s amazing and I love it.
That said, if you don’t want to pay the price for the full version, MIDI Guitar for GarageBand is a nice introduction to the software because it’s very easy to set up and use. So here’s how to do it.
1) Download MIDI Guitar for GarageBand from Jam Origin

2) Open GarageBand and MIDI Guitar for GarageBand
This is pretty self-explanatory.
3) Select The Instrument You Want to Control
Again, open up your instrument of choice and remember that you can use MIDI Guitar for almost anything that can trigger samples in the sample library. You can even use it to play around with samplers and other tools.
4) Select “External MIDI Output” In the Center Console of MIDI Guitar for GarageBand

Tips for Optimizing MIDI Guitar 2 and MIDI Guitar for GarageBand
Before we begin, understand that all of these tips are hardly even like tips – I would say they are essential tactics for getting the most out of MIDI Guitar 2. The first one we’ll talk about is how tuning your guitar, which is honestly pretty important.
1) Make Sure You’ve Tuned Your Guitar
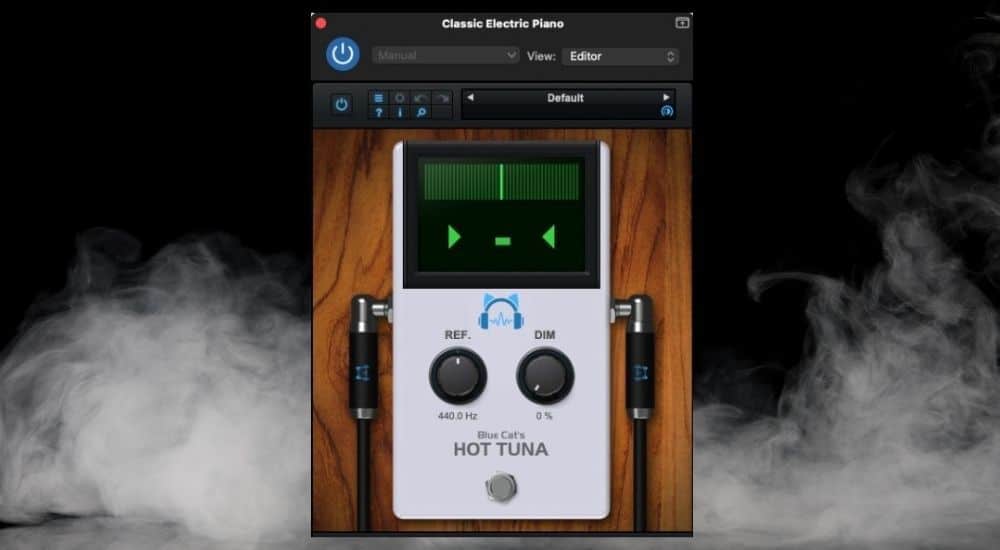
You already know how to tune your guitar. So I won’t lecture on that, but what I will tell you is that I recommend either the Snark clip-on Tuner or Blue Cat Audio’s Hot Tuna. A combination of both is usually the secret for me because sometimes I leave my Snark on a different guitar that’s across the room.

The Hot Tuna steps in for those situations where I don’t want to get out of my recording position and grab another tuner. You can get it for a great price on Plugin Boutique. One thing I should mention is that you can adjust the tuning of MIDI Guitar 2 so it matches de-tuned and alternate tunings, as well.
2) Turn On “Bends: Range 4” and “Legato: 5ms”
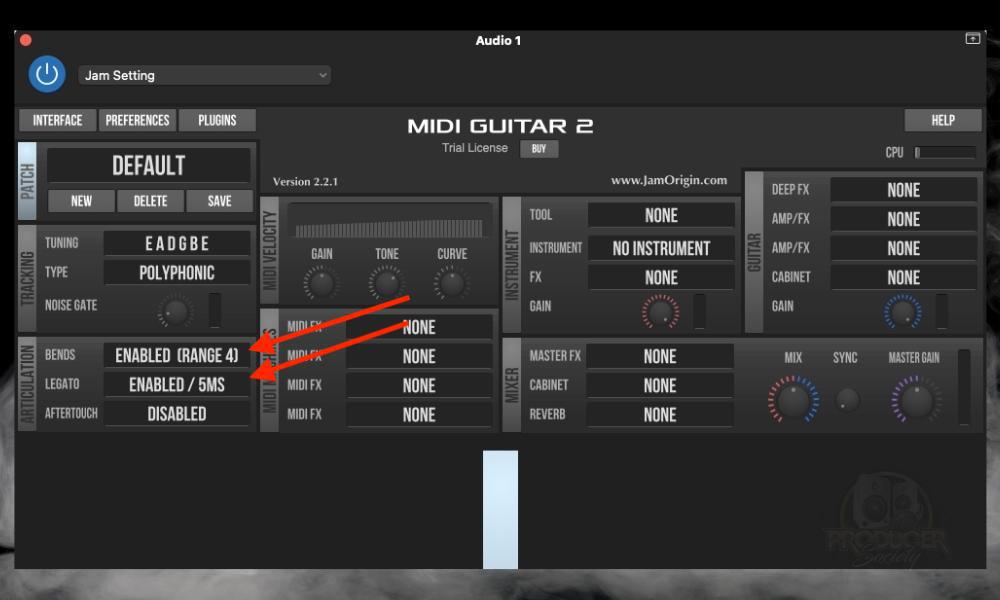
Some of the reviews I’ve read online on the MIDI Guitar 2 say that you can’t do bends or anything like that, but they’re wrong. The bending function works surprisingly well considering what people have derisively said on the internet.
MIDI Guitar 2 is more than capable of picking up on the bends that you can to the strings. Vibrato is a different story because it doesn’t pick up on it at all as far as I know, but it does pick up on bends, and quite effectively too.
3) Turn Up the Audio Interface Gain As Hot As It Can Go Without Clipping
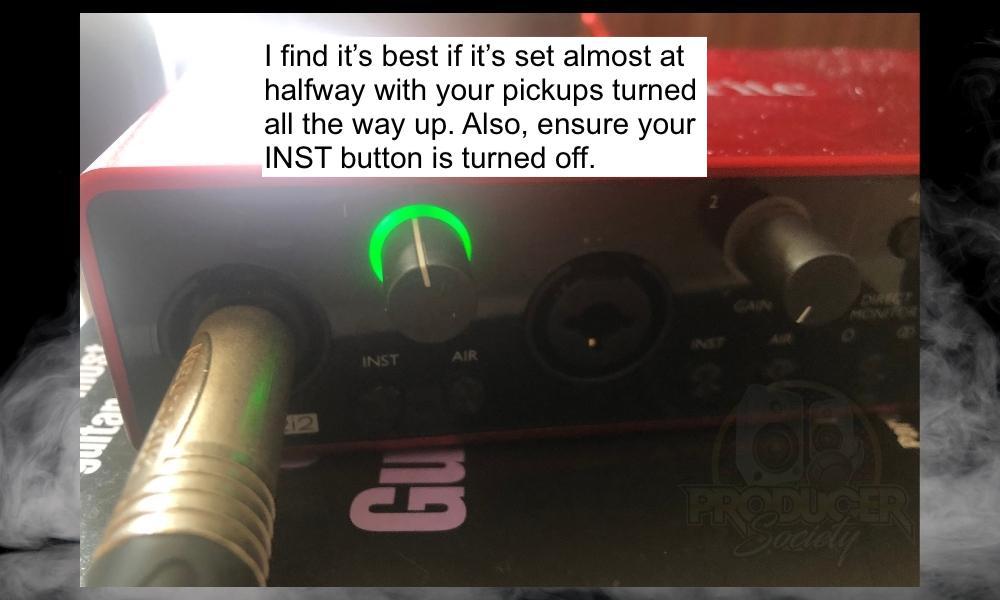
Turn Your Pickups All The Way Up
If you have to, turn the gain down on the audio interface a bit to compensate for any clipping that you run into. I find this is the best way to go. You want the signal from the guitar as audible as possible so the audio interface gets all of it.
Understand That Some Guitars Have Hotter Pickups

For instance, if I use my blessed ESP Eclipse II (also on zZounds), it has active EMG 81/60 pickups I believe which output a much, much hotter signal. For that reason, I would probably have to drop down the gain on the Scarlett by just a bit.
Try Using the Bridge Instead of the Neck Pickup
Try your bridge pickup instead of your neck pickup if you’re struggling to get the control over the MIDI you’re looking for (more on MIDI in my guide, by the way).
4) Use the Plugin Version Instead of the Stand-Alone Version

I already said this before, but make sure you’re using the plugin version of MIDI Guitar 2 instead of the stand-alone version. It’s much better.
5) Use MIDI Guitar 2 to Control Many Tracks at Once
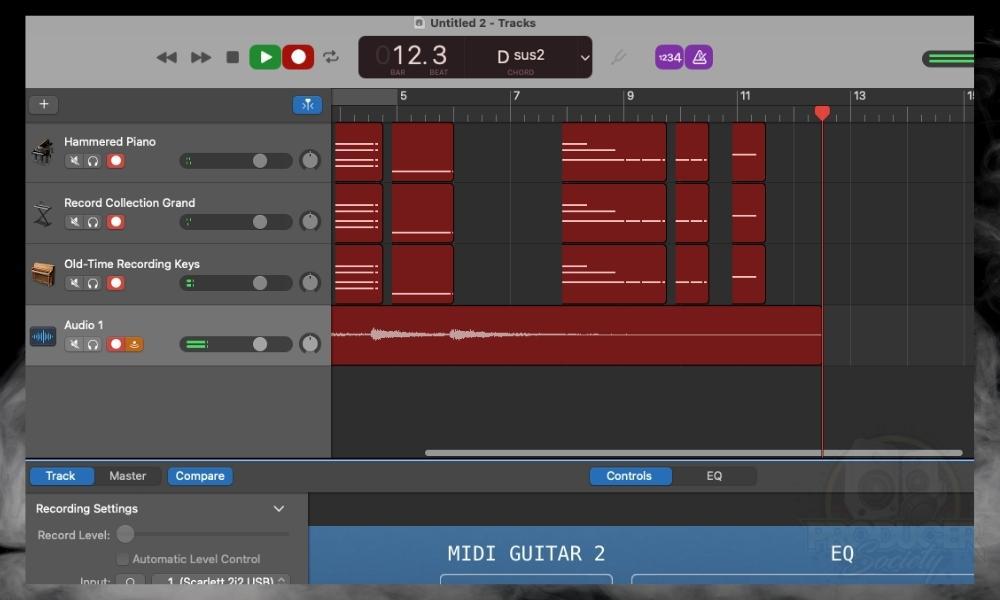
Use MIDI Guitar 2 for recording many different sounds at once. I haven’t tested how many it can control simultaneously, but I imagine if your computer can take it, the MIDI Guitar 2 can probably do it. This brings me to my next point.
6) Ensure Your Computer is Powerful Enough

When it comes to your computer, the more powerful you go the better. That said, computers are getting quite powerful these days, so a laptop should be able to take care of most music producers’ needs.
I’ve heard great things about the new MacBook Pros with the M1 chips in them which you can get on Amazon. IAmAMusicMogul did a YouTube video on them that’s worth checking out if you’re interested.
Important Things to Note About MIDI Guitar 2 for GarageBand
1) MIDI Guitar 2 is a Controller and Not A VST
Surprisingly, people get confused sometimes about what this thing actually is. MIDI Guitar 2 is a controller, like a MIDI Keyboard, and not a guitar amp simulator. You use it as a way to send MIDI information into a DAW for controlling other sample libraries and sounds.

 Written By :