To make your guitars sound better in Garageband, set up a channel EQ and a compressor in the guitar track’s plug-ins, and then use one of the presets, like “Crunch Guitar” for the compressor and “Clean Up Guitar” for the channel EQ, in addition to panning them left and right around -30 and +30.
Making guitar recordings sounds better in GarageBand is fairly simple at the start of the mixing process. The vast majority of the improvements can be made just by using a few dynamics processors as well as effects plug-ins, however, a big part of making them sound good lies in how you’ve recorded them, to begin with.
It can’t be understated that a lot of these tactics will work great for improving your sound, but nothing will make a bigger difference than using a better amp simulator to begin with like Blue Cat Audio’s Axe Pack from Plugin Boutique (my personal favorite).
Improving The Sound of Guitars Recorded in Garageband
There are a lot of things one can do to improve guitar recordings in Garageband, but I find the brunt of the work is done by adding a compressor and a Channel EQ.
1) Adding the Compressor
While the compressor is often cited as one of the most overused dynamics processors, there’s a good reason for it: the compressor seems to almost always make things sound a lot better.
More importantly, the presets that come stock in GarageBand and Logic Pro X are quite good. They’re definitely worth experimenting with if you haven’t done so already.
Best Presets:
- Acoustic Guitar
- Crunch Guitar
- Guitar Electric
Essentially, what you want to do is the following:
a) After you’ve recorded your guitars, go down into the Smart Controls of the instrument track region.
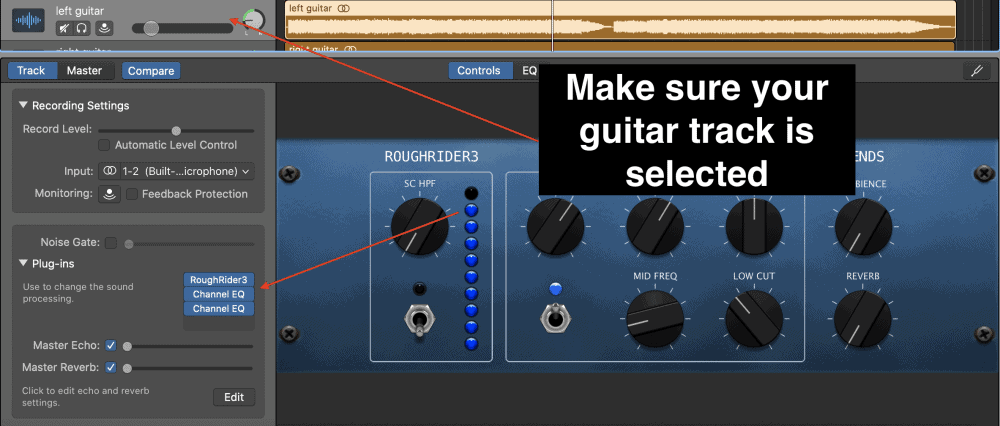
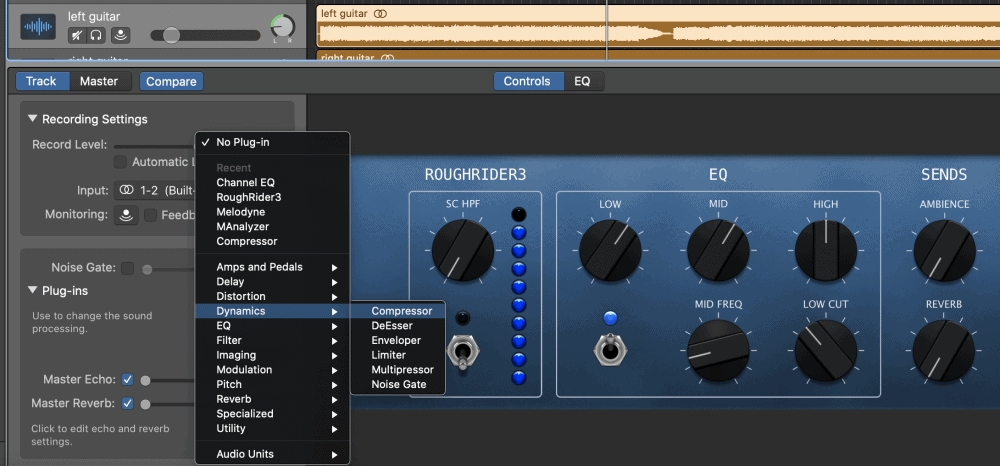
b) You’ll notice there is a list of plug-ins, and in this list, you can pick and choose which ones that you want to use. Click on the blue button to bring up one of the compressors in the “Dynamics” sub-heading.
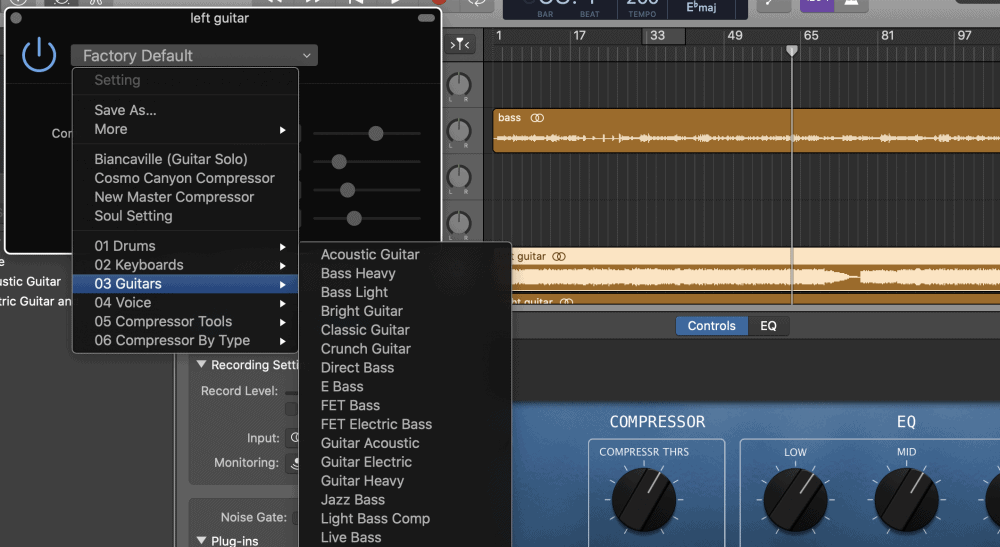
c) After you’ve brought up the compressor, you can go into the presets by clicking on its drop-down menu.
From here, you can see all of the available presets for the guitar, whether it’s for acoustic or electric. Personally, I find the presets, “Acoustic Guitar,” “Crunch Guitar,” and “Guitar Electric” to be among the best.
It’s not uncommon for me to adjust the compressor a little bit as well, which I tend to do for nearly all of the dynamics processors, including the channel EQ.
Typically, I’ll make minor changes to the Ratio as well as the Gain, which has the effect of bringing down the loud peaks and increasing the quieter parts, while simultaneously increasing the total volume of the output signal.
Garageband’s Compressor Has Four Main parameters:
Threshold: The threshold adjusts the point at which the compressor starts working in dB. Increasing the threshold means you’re going in the opposite direction, meaning, towards +0dB rather than towards -50dB. This is one of the primary parameters to play with when using a compressor, whether it’s a guitar or a kick drum.
Typically, what I’ll do when adjusting the threshold is just crank it all the way to the top, to around 0dB, but then back down again to -60dB. Find the point where the signal either starts to compress or stops compressing, that way you have an idea of how loud the signal is.
Attack: The attack adjusts how long it takes for the compressor to latch on to the guitar’s signal. A fast attack means the time is much shorter in milliseconds, for instance, an attack of 20ms is fast, whereas an attack of 200ms is slow.
A fast attack, ie, 20ms to 40ms, is a good choice for faster guitar parts. This is going to create more power especially in the case of fast palm-muted notes.
The compressor’s attack is important when it comes to guitars. I find a useful way of thinking about it is to consider just how fast or slow the guitar part is.
For example, if there are many notes in the guitar part and they’re all played relatively fast with no space between, a faster attack will be much better, however, a slower guitar part will need a slower attack.
Ratio: The ratio adjusts by how much the compressor is bringing the loud parts down and the quiet parts up. For instance, a compressor ratio of 2:1 means that for every time the signal goes above the threshold by 2dB, it’s brought down to 1dB outside of the threshold. A common compressor ratio for a guitar part is between 3:1 and 5:1.
A compressor ratio of 5:1 means that for every time it exceeds the threshold by 5dB, it’s being brought down to 1dB above the threshold. 2:1 is a low ratio, 5:1 is a medium ratio, and 10:1 is high, often called limiting. I can’t think of a reason why you would increase a compressor ratio above 5:1.
Anything above 5:1 would probably be too much, except for when you’re using parallel compression and the compressed signal is quiet.
Gain: The gain is how loud the signal is after it has been compressed. It’s also called the “make-up gain,” because compression tends to reduce the volume due to the loud peaks being brought down and the quiet parts being increased to a more balanced level. You then increase the gain to increase the total volume of the processed signal. I’ll usually increase the gain on the compressor preset that way I can hear what I’ve done more.
If you’re still confused about what these controls mean, I recommend checking out my article where I explored everything in detail.
You’ll find that after adding one of these presets to your guitar recording, the signal will tend to sound more balanced and complete, so to speak. Experiment with the compressor presets. Better yet, just throw up a preset and don’t even touch the controls if you’re still wrapping your head around what they do.
2) Adding the Channel EQ
The channel EQ is the next plug-in you want to add after the compressor in the signal chain, and it’s another big one in terms of how you can make your instruments sound a lot better.
The presets are equally as important for the EQ. Using the Channel EQ is the same process as the compressor, at least in terms of setting up the presets, however, if you want to do it without them, I would read my guide first.
a) Go down into the Smart Controls of your guitar’s software instrument track.

b) Click on one of the blue icons, and select Channel EQ from the list inside the EQ sub-heading.
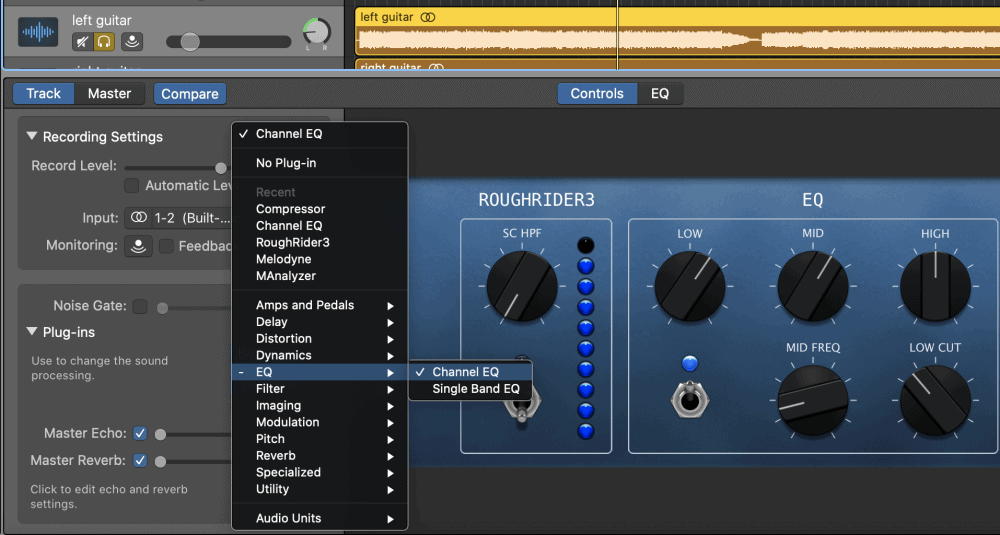
c) Choose channel EQ which will bring up the processor as well as the spectrum analyzer.
d) At this stage, you want to select the drop-down menu, and here, you can see there are options like “Guitar,” “Vocals,” “Drums,” and so on. Select “Guitar,” and you’ll be able to see all of the available presets.
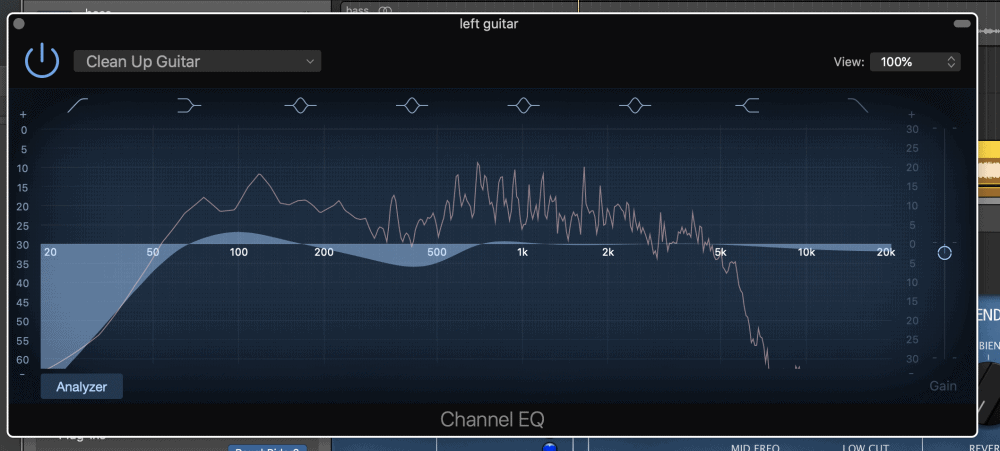
I find that the “Clean Up Guitar” is one of the best presets to use for both electric and acoustic guitar, but I’ll typically adjust it a tiny bit because the boosts and cuts tend to be a bit much.
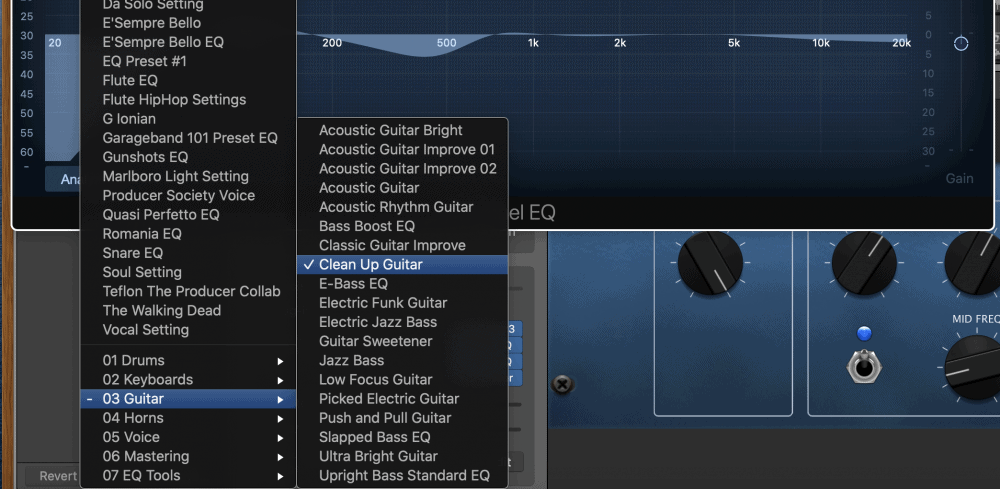
For instance, I’ll change the 2000kkHz boost by attenuating it a little bit. And I’ll also attenuate the high frequencies the smallest amount, while also decreasing the level of attenuation on the mid-range frequencies.
I find this is a good practice for getting everything to sound good.
Additionally, one trick I’ve been using lately is I’ll use the presets for inspiration when I’m messing around with Fab Filter’s Pro-Q EQ, which is a far superior EQ plugin than what Garageband has to offer.
It allows you to isolate/solo certain frequency ranges, just to name one special feature, but let’s move on to the next part: panning.
3) Panning the Guitars
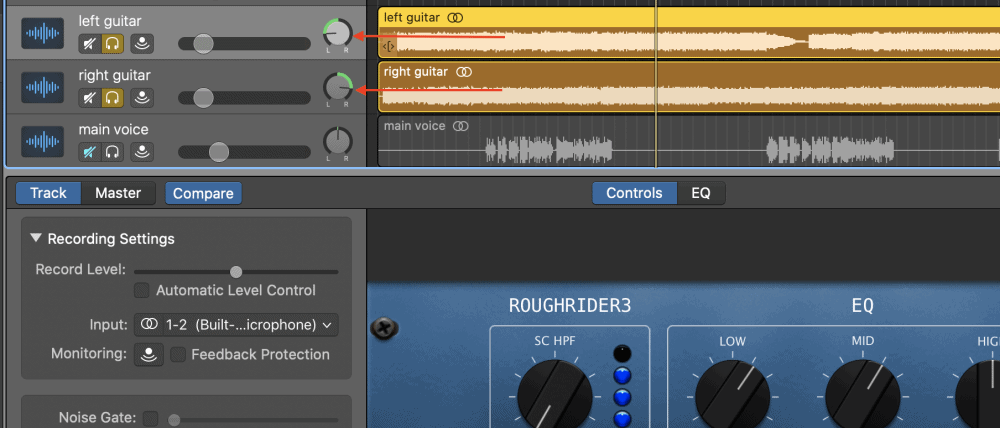
This is another great thing to do to the guitars, especially if you’ve recorded more than one. It’s important to note, however, that it’s best not to just duplicate the track and pan the other one in the opposite direction.
The reason is that this will just result in phase cancelation, which means the guitar may disappear when played in mono (my guide on mono-mixing here), and only the volume will go up.
Setting up panning is really the easiest part of the process because it’s as simple as moving the dial left or right, depending on which direction you want the signal to come from.
A best practice is to pan the guitars between (-40) – (-30) to (+30) – (+40). But it really depends on what effect you’re going for. This guideline – and the one I’ve included here – is meant primarily for electric guitars, but it can also be applied to the acoustic guitar as well.
Panning the guitars is going to have the effect of decreasing the volume, on account of the fact the instruments are being spread further apart from each other in the stereo image (the term that describes the way the instruments sound in terms of their positioning).
4) Adding Parallel Compression
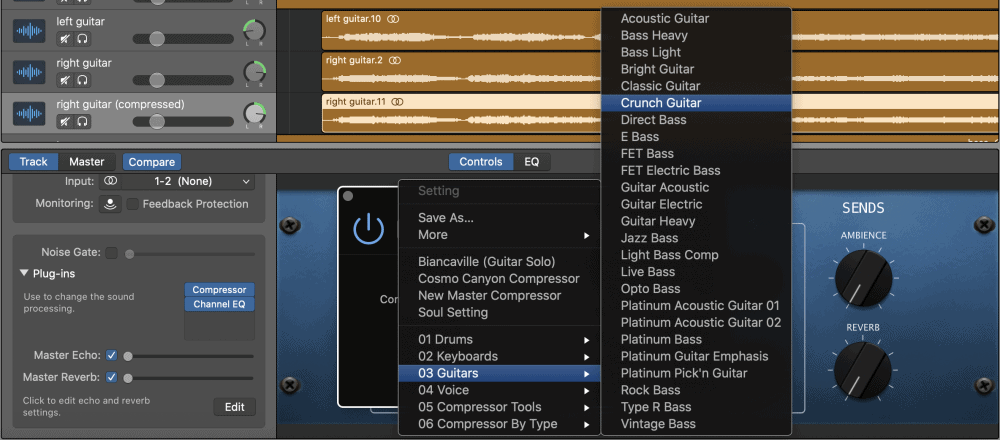
Another thing you can do is imitate a parallel compression effect, which is done by duplicating the track and including a compressor on the one but not the other, in fact, I already have an entire guide on how to do this. You keep the channel EQ and all of the other effects the same, but you just keep a compressor turned on one of them and not the other.
I find this has the effect of not only increasing the total volume but it also makes the guitars stand out a little more and they cut through the mix better.
It sounds like they have been “beefed up,” so to speak. It’s important to emphasize that by doing this, you’ll increase the total volume.

How I combat this is just by turning down the volume of the compressed guitar signal by a bit. It usually lags behind the non-compressed signal by just 3 to 4dB.
You can go ahead and give this a try. For a brief period I stopped using this technique on the mixes I did for a client, and he noticed right away that the guitars didn’t cut through the mix as well. This might be because of the total volume on the tracks, but regardless, parallel compression tends to sound very good.
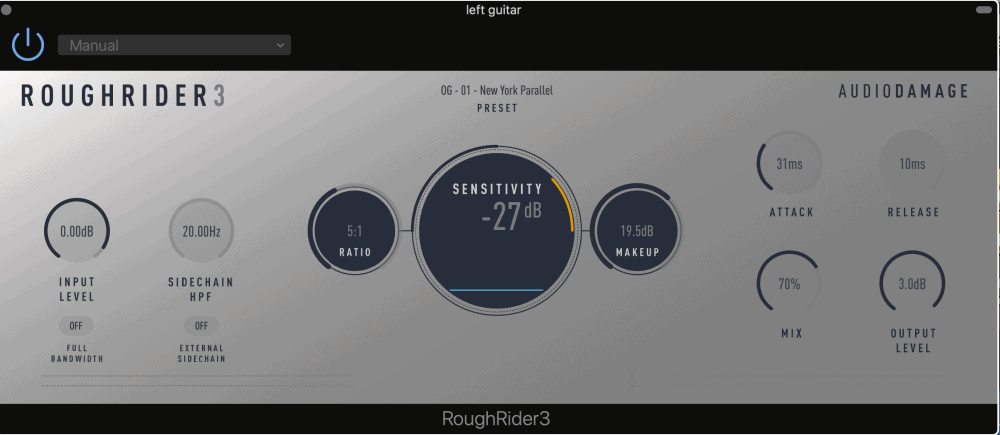
Additionally, you can set up parallel compression with Audio Damage’s Rough Rider 3, which I explored in the article that I already linked above. What this does is that it gives you the option to mix unprocessed and processed signal in one plug-in, that way you don’t have to duplicate any tracks.
Truthfully, this is probably the best way to add parallel compression to your tracks, simply because it doesn’t require any duplication. In the previous sub-section, I explained it wasn’t wise to duplicate the same track, however, parallel compression was the one exception I would always make to the rule.
5) Removing Extraneous Guitar Sounds Like Amps Turning On, String Noise, Etc.
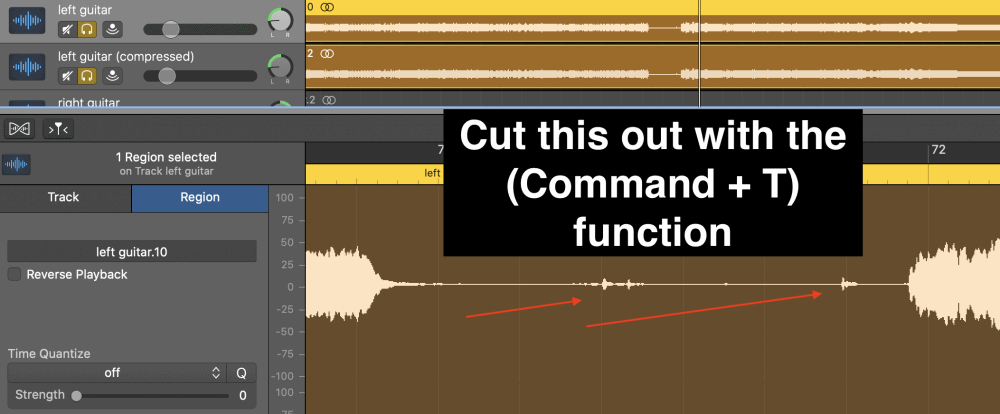
Another thing you can do, which is related to the following step on this list, is to actually just go into the track region of the recording and manually edit out certain parts of the recording. For instance, you can usually see what these look like in the wave file in the Smart Controls of the recording.
Typically, they look like a small line and bubble right before the actual guitar playing really begins. It’s common for me to remove these individual sounds before the guitar starts playing, not only at the start of guitar sections but also at the ending (more editing tricks in my guide).
There may be some cases where it would be best to use things like automation to attenuate or eliminate undesirable sounds.
A great example is finger squeaks, the sounds produced by the guitarist’s fingers sliding across the strings.
It’s usually best to reduce the sound of finger squeaks, rather than eliminate them entirely because you want the recording to sound natural, which I’ve shown you how to do before.
Improperly fretted notes, open string noise, and other common guitarist problems can be controlled in a more specific and nuanced way with Melodyne, which brings me to my next point: Celemony’s Melodyne 5.
6) Using Melodyne to Clean Up Mistakes
Melodyne has proven itself as being one of the most useful tools I’ve discovered thus far. Through what’s called Polyphonic detection, Melodyne can actually pick up on the individual notes of the guitar recording, including the separation of the notes in the chords.
In other words, you can strum the notes of the chord and Melodyne will be able to pick up on each one for editing. This is great for cleaning up little mistakes because Melodyne will pick up on the errors and map them out in its interface.
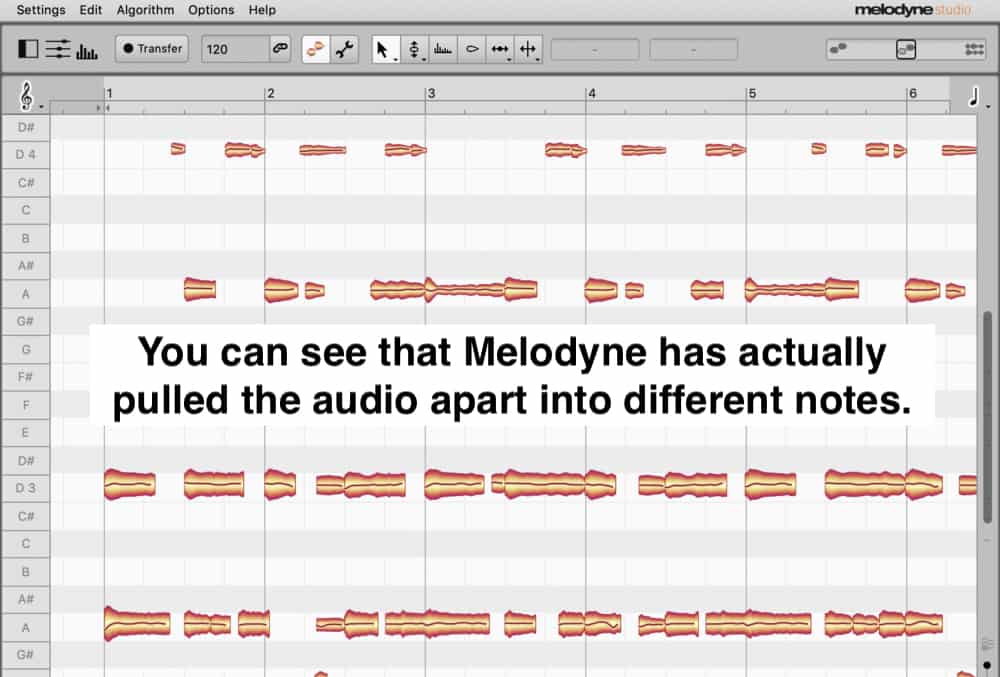
This is especially useful for parts of the recording where the player might’ve accidentally hit another open string. Once you’ve identified the note that is a mistake, you can just go ahead and delete it straight out of the recording.
You can also use the same tactic for things like vocal breaths and other pesky noises. Melodyne, which I’ve already written about it extensively, is easily one of the best tools you can buy for GarageBand, and I highly recommend picking up a copy of the Editor version from Plug-in Boutique.
Important Things to Note
Adding Effects
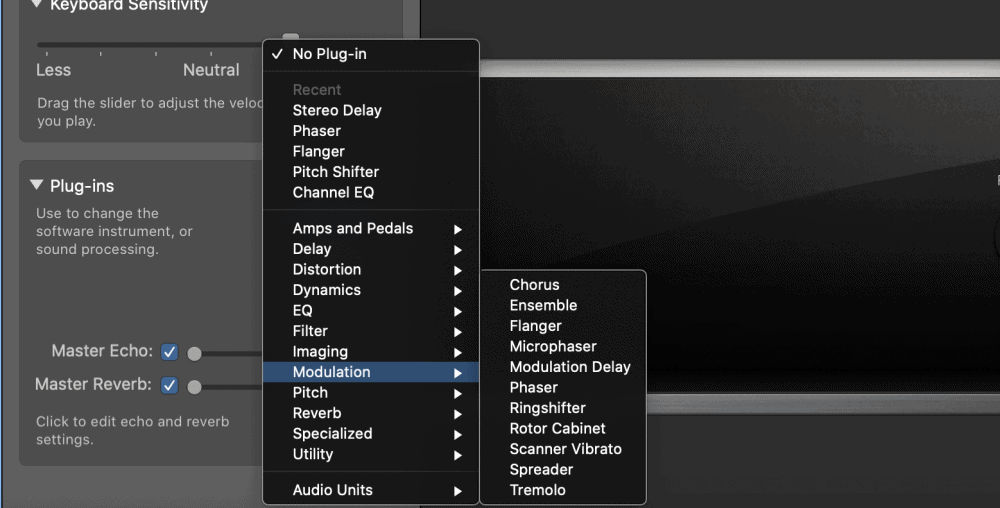
In addition to adjusting the sound of the recording through things like dynamics processing, you can also add effects. The best effect to add to a guitar recording is reverb and delay.
These two effects are fantastic for adding a bit of ambiance, changing the position of the sound in the stereo image, and just making it sound a lot better overall.
Use a Noise Gate When Recording
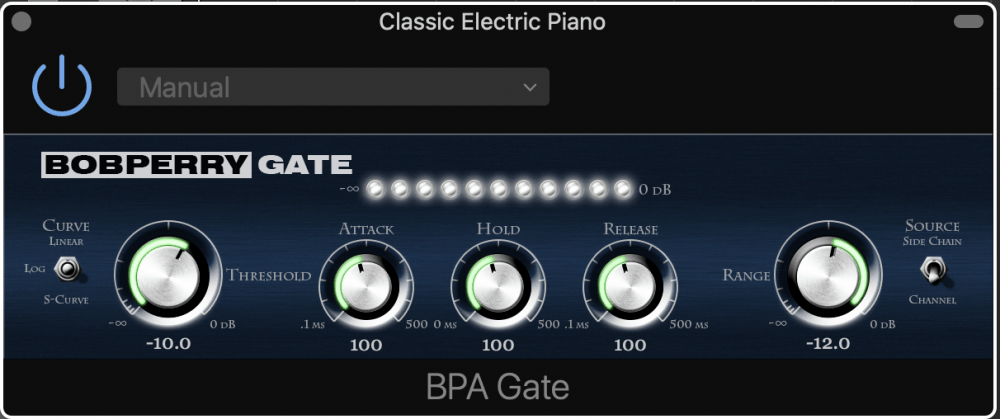
How you actually record the guitars matters a lot as well, including whether or not you used a noise gate, which I’ve already explained before. You can either use a noise gate hooked up directly to your rig, or you can use a noise gate in the processing phase.
Chances are, if you play guitar, you know that distortion tends to be quite noisy, especially in between sections where there is nothing playing. This will eliminate the sound of amp hiss and other issues.
Use Garageband’s Amp Designer
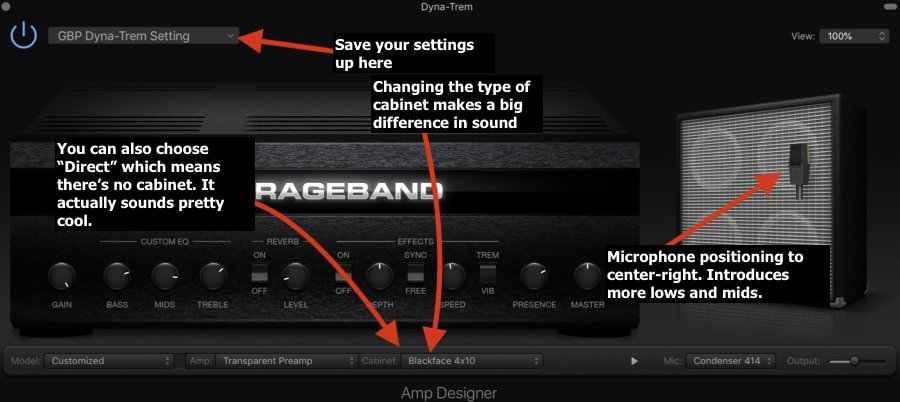
Garageband also has a very useful Amp Designer, which acts as an amplifier simulator. In this sub-section of the interface, you can adjust things like what type of amp, cab, and microphone you’re using, including the dynamic, condenser, and ribbon microphones.
You can even choose to record direct, which means there is no amp or cab at all.
Personally, I rarely use the Amp Designer because I enjoy using an Amp Modeler such as the Line 6 POD system, which, admittedly, is quite old but I still like using it a lot. With that said, there are many useful features of the Amp Designer that you may want to look into in my guide.
Use Great Amp Simulators
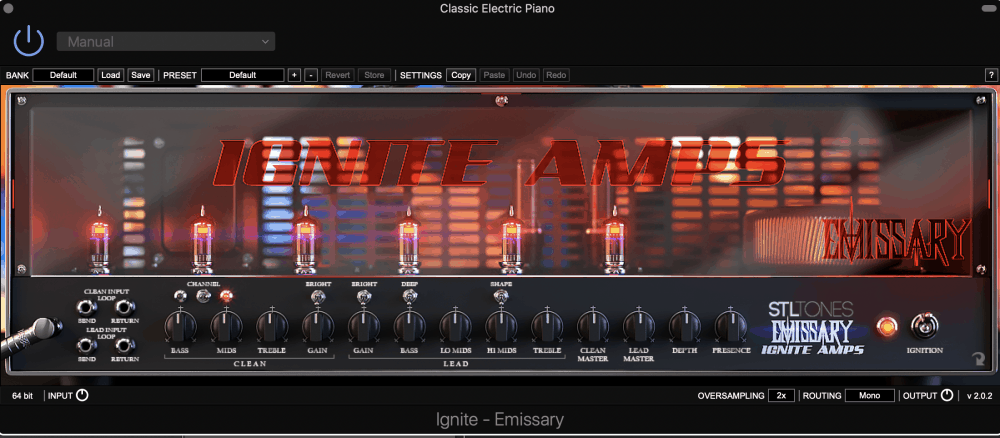
There are also a lot of amp simulators on the market that you can try out, such as the Ignite Emissary, or Blue Cat Audio’s Destructor, which is a really popular amp plug-in for guitar players in many genres, including metal.
Another popular one is Guitar Rig, although, some say Native Instruments hasn’t updated it in a while. Amplitube is another common one as well.
Buy an Amp Modeler Like the POD HD500x
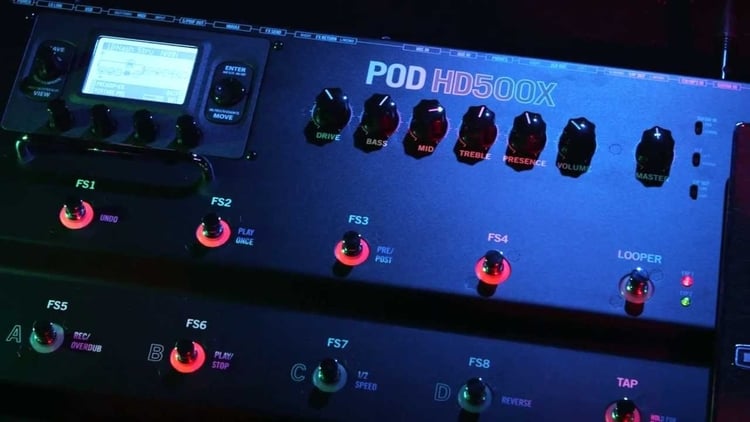
I’ve been using a Line 6 Pod which is over a decade old now, but it was pretty much the main tool that I used for recording guitar parts in Garageband. There are a lot better options on the market now, including the Line 6 Pod HD500x, Axe FX III, Kemper, and more.
I would recommend getting something cheaper for your first amp modeler, although, these days, I’m privy to Blue Cat Audio’s Axiom which is an amp simulator.
I either use Blue Cat’s Axiom or I use my Hughes and Kettner Switchblade 100W mic’d up with a Shure SM57 (on my Product Page) and plugged into a Scarlett 2i2 (from the same place). This is a great way to immediately get better guitar sounds in DAWs like Garageband and others.
While there are a lot of things you can do to improve the sound of your guitars in digital work stations, a solid amp simulator or modeler is going to make your guitars a lot better straight out of the gate, and you won’t even need to use so many plug-ins and processors after the fact.
Also, having an understanding of how common melodies are actually made, either with a piano or a guitar, will also help you make songs that sound better right from the foundation.
No amp simulator will fix a bad melody – which is just one reason why I recommend getting PianoForAll – because having an understanding of how the piano works is essential for music production.
Other Articles You May Be Interested In
YouTube Video Tutorial
Conclusion
I hope this article was helpful to you. To wrap things up, the easiest and most efficient way to improve the sound of your guitars in Garageband is to use a compressor preset and a channel EQ preset, in addition to panning them left and right.


 Written By :