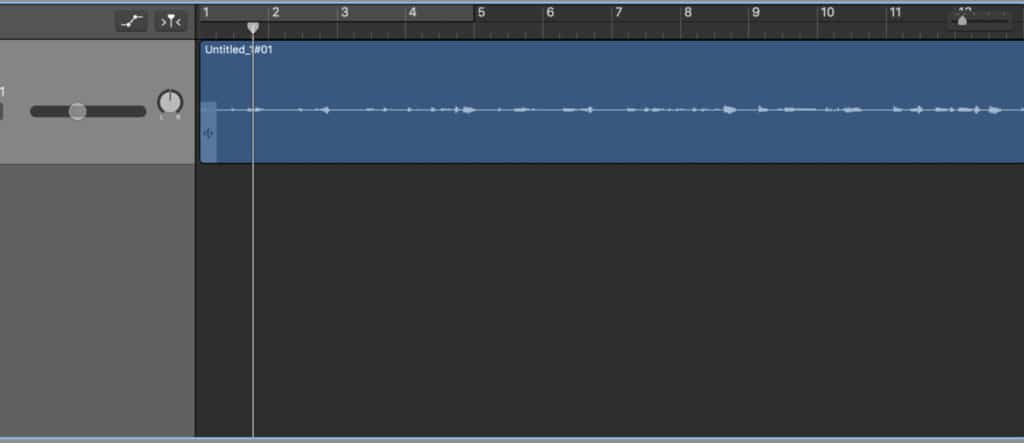
After much practice and research online, I managed to figure out a very solid way to at least attenuate finger squeak sounds, if not eliminate them.
To eliminate finger squeaks in acoustic guitar recordings
1) find the finger squeak in the recording
2) bring up your DAW’s automation interface
3) pull down the volume by approximately 4dB – 10dB with the automation tool
4) use an EQ plug-in to attenuate any other offending frequencies.
Finger squeaks, as most guitar players know, occur during note and chord changes, especially during points in your playing where you have to quickly change from one note or chord to the next.
It’s typically quite difficult to avoid, and to a certain degree, it’s part of what makes the recording sound natural. For instance, if you ever use a guitar plug-in or VST plug-in, you’ll notice the finger squeaks are sometimes completely absent and it’s very weird without them.
The squeaks are commonly what gives the playing its natural sound, moreover, you can actually learn how to use them to give your playing more character.
However, there are points where the finger squeaking is simply too much to bear, and it has to be attenuated during the mixing phase. The best way to go about this is actually with Melodyne 5 (on my Product Page), but it can be done with the regular controls in Garageband and other DAWs as well. Here are the four essential steps.
1) Isolate the offending part of the recording
At this stage, you’ve got your guitar track loaded into the DAW, however, you’ve noticed that the finger squeaks are too much, to the point where it takes away from the integrity and quality of the track.

Listen to the guitar track on its own by using the “Solo” option in the DAW, and set up little automation points during each point of the offending track. Pin-point the exact part of the recording that needs to be attenuated using the zoom function.
2) Hit the ‘A’ key on Your Keyboard to Bring Up the Automation Interface.
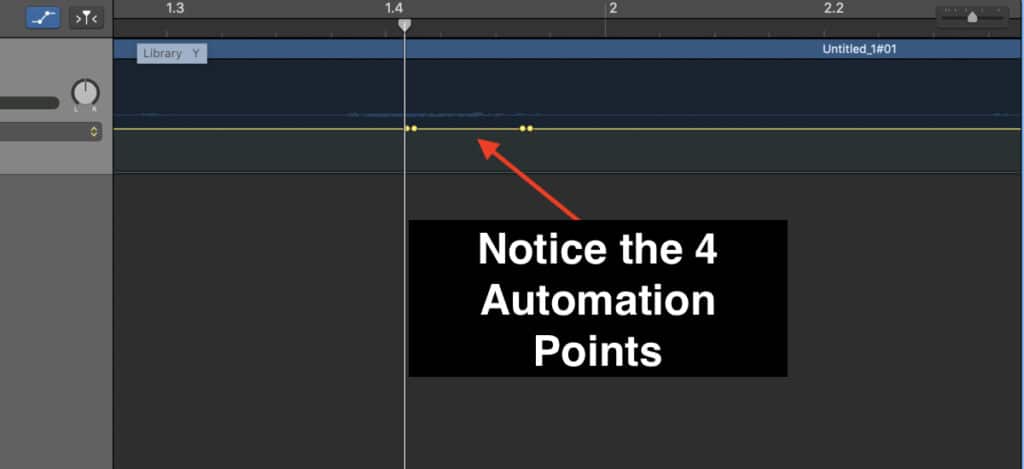
And then mark the points where the squeak needs to be reduced with the little yellow dots.
You’re going to need to set up several automation points, around four of them for each offending phrase.

The two automation points on the outside provide the jumping-off point and ensure the automation will occur only in a specified space, whereas the two additional automation points within that space will be the point where the volume and Channel EQ are actually pulled down.
Once the automation points are carefully set up, you can figure out how much you want to pull the volume down.
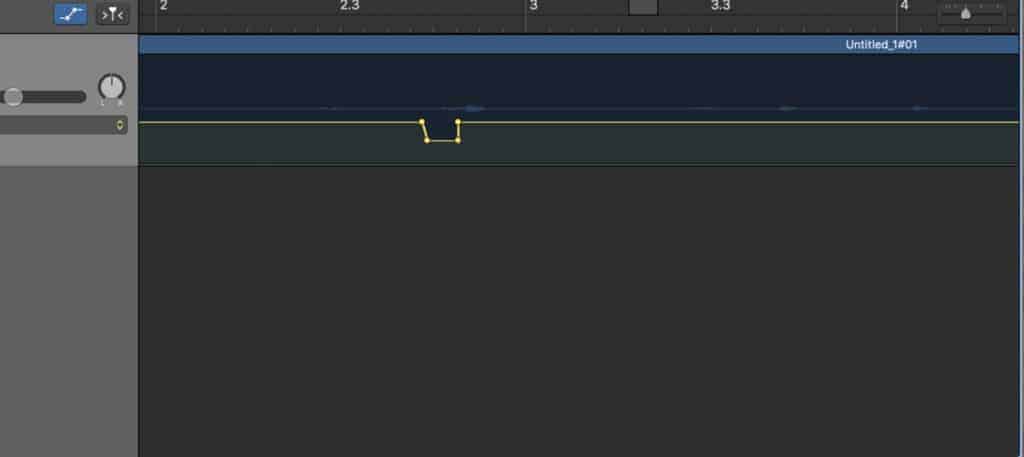
3) Pull down the yellow line by approximately 4 to 10dB
In my experience, it really depends on how bad the finger squeaking actually is.
For instance, in one part of the track that I used for the demonstration shown in the YouTube video below, there was a point where the volume needed to be brought down by 7dB and another point where it went even further.

In the image below, you can see we took it even one step further and isolated the loudest part of the squeak with 4 more automation points.

It’s worth mentioning here that you don’t want to pull down the volume so much to the point where it sounds weird and unnatural.
For instance, you want the volume to be brought down abruptly, and to a point where the listener won’t notice the small decrease in volume at a specific point in the track.
Pull down the volume too much, and you end up with a gap in the audio file, which isn’t going to sound good. It’s going to sound bad. Experiment with how much the volume needs to be decreased, and determine for yourself where that point is.
Now we’re going to move on to the next stage.
4) Use the Channel EQ: Peak 3 (or 4) Frequency Automation
Use the above control in the EQ automation to pull down mid-high frequencies at the offending part. This is a bit tricky because Garageband’s interface for automating EQ and other dynamics plug-ins can be a bit of a challenge.
In fact, I would be lying to you if I told you that I had mastered the automation controls in Garageband, because there are a lot of them and it can be quite challenging, however, my EQ automation tutorial does cover a significant amount of ground.
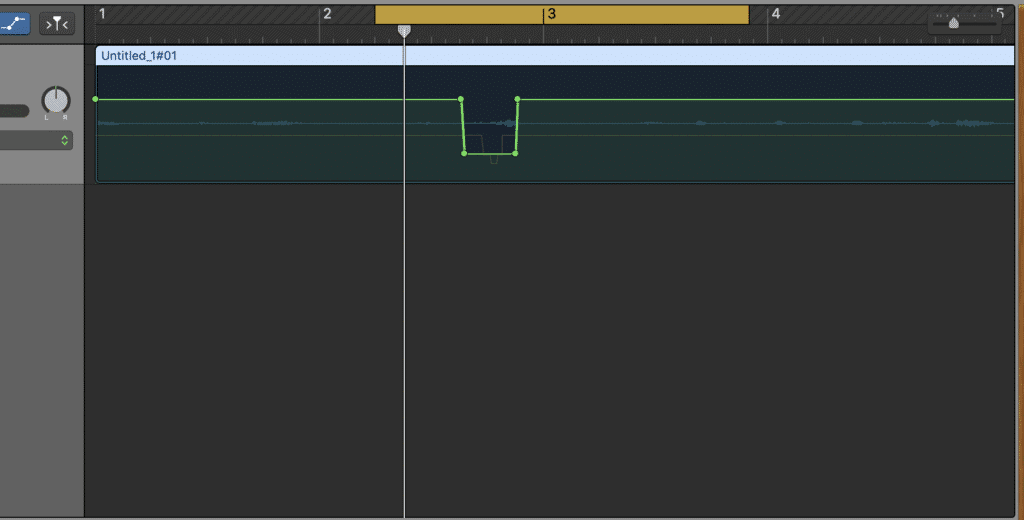
However, lucky for you, I pinpointed the automation control to use, so you don’t have to worry so much about finding the right one, as I had to do. Now that you have this point set up, essentially, you just want to follow the above steps as well, except for the Channel EQ automation instead.
You don’t have to drop the EQ down to the same degree demonstrated in the following picture. The image shown below is probably an EQ dip of around 15dB which is likely too much. Experiment with what sounds best.

5) Repeat this process at every offending part
Now, you just want to go through each part of the track and repeat the process as much as you need to until all of the squeaks have either been reduced or eliminated altogether.
Truthfully, it’s unlikely you’ll be able to get rid of them completely without compromising the integrity of the music. You might just have to settle for attenuating the finger squeaks, rather than removing them entirely.
Additional Tactics For Finger Squeaks and Other Things To Consider
It’s actually possible to eliminate finger squeaks with a compressor or a limiter as well.
For this, you would have to figure out the point in dB at which the finger squeaks are coming to, and you would use either a compressor or a limiter to quickly latch on to that sound, to decrease or eliminate it.
Additionally, the one processor – among many (my guide) – that’s commonly used for vocal recordings, the “de-esser,” can also be used for eliminating finger squeaks. Figuring out how to use this is a little bit more work, but with some practice, you could probably figure it out.
We’ll explore the use of the de-esser in another tutorial at some point in the future, however, the one that comes stock in Garageband isn’t great.
Remember, finger squeaks are part of what gives the guitar track its natural human quality. Similar to drumming, if every part of the kit is perfectly quantized, it’s going to rob the song of its human quality, so use it as much as you have to, but be wary of what you’re doing.
YouTube Video Tutorial
Conclusion
An ounce of prevention is worth a pound of cure. By that, I mean it may be easier to just work on your technique as well, and figure out how to play the song while at the same time reducing the amount of offending sounds and noises.
Of course, this article isn’t about the techniques necessary to do that, but it’s something to consider.
I hope this short tutorial helped you today. Make sure to share this on social media with your friends, it would really help me out.

 Written By :