 Written By :
 The meat and potatoes of mixing a beat include setting up the automation; adding dynamics processors; setting the VU meters, panning, adding effects, and then putting it through the mastering phase. This commonly includes an additional compressor, a channel EQ, and a limiter on the master channel. Here’s a quick TLDR:
To mix a beat in Garageband:
1) Drop all VU meters to -15dB
2) Adjust each VU meter so it sounds good without clipping or passing +0dB
3) Use Compressor, EQ, and effects presets
4) Add Automation and Panning
5) Export the Track as a .aif file.
6) Drag it into a new project for mastering
1) Drop the VU meters of each individual track down to -15dB
In terms of numbers, I would say that it took me around 80 beats until I finally figured out how to get everything to sound at least as good as the competition.
Other than using a much better 808 plugin like Initial Audio’s 808 Synth, this is one of the most important things that I wished I would’ve known about earlier because it would’ve saved me a lot of time and energy. The sub-title is self-explanatory.
What you have to do is drag and drop each software instrument track down to about -15dB.

The idea behind this is you’re setting up the music in such a way where you now have plenty of room to decide where instruments fit into the mix, without clipping or distortion.
Moreover, this is going to give you plenty of space to allocate each instrument in the mix.
Another way this will help you is in the mastering phase.
When I first started mixing beats in Garageband, I would have parts of the track exceeding +0.0dB and I’d wonder why it sounded bad. You always want to make sure that your tracks aren’t exceeding this level, because +0.0dB is the point of distortion.
It’s the digital floor of the DAW, in other words, it’s the ceiling you shouldn’t pass.
If you don’t adjust your VU meters in this way, and you don’t keep them as low as possible, you’ll find that when you re-insert the track back into the workspace, some of the tracks will cause clipping, particularly at the loudest part.
Some of the biggest offending instruments are typically parts of the drum-kit, for instance, the kick, snare, clap, or the cymbals, like the ride, crash, or hi-hat.
It’s important to pay attention to how your automation is adjusted as well because if you increase the sound of the music at certain points of the track, you’ll find that some of these offending instruments will exceed the acceptable threshold.
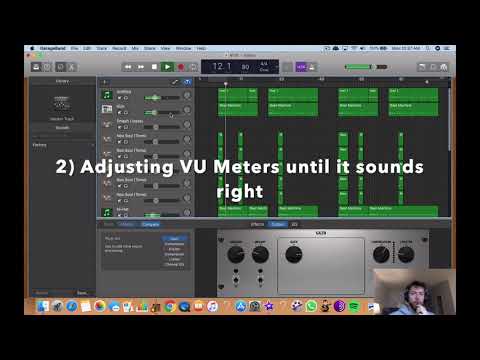
2) Drag the VU meters of each track to the desired level, without causing clipping, and definitely without exceeding +0.0dB.
At this stage, it’s really up to the producer to decide where each VU meter needs to be set at in dB. I can’t do it for you. Just adjust the volume of each track so it sounds good to your ears.
For the most part, I just want each instrument to sound good with the other, without overpowering anything.
The loudest instruments, obviously, should be adjusted so they’re at the lowest end of the VU meter, for example, -15dB, while the others can go up to around -5dB if need be.
Remember, you want each instrument to sound clear and distinguished, without being overbearing or annoying.
Also, the VU meters should never be going into the red on any part of the track. During the loudest part, they can hover in the yellow.

3) Set up your dynamics processors on each track, including the Compressor, Channel EQ, and the Noise Gate
For this part, the three most important plug-ins you can set up on the instrument tracks are the Compressor, Channel EQ, the Noise Gate, and perhaps, a Limiter.
Obviously, there are other processors you could add to the instrument tracks, however, these are the necessary ones that make all the difference in terms of how your music will sound in the final product.
How you set-up these plug-ins really depends on the instrument itself, as well as the purpose of it. For instance, if you’ve recorded some guitar parts for the beat, it would definitely be a wise decision to add a compressor on to it, depending on whether or not it’s distorted.
As a general rule, you want the order of the plug-ins to be Noise-Gate > Compressor > EQ > Effect > Limiter.
Compressor
I typically use Garageband’s pre-sets as a start-off point in terms of how I adjust the parameters of the plug-in. For example, if you’re using a compressor for an acoustic guitar, the Acoustic Guitar pre-set is going to make a world of difference.

It’s not uncommon for me to increase the gain, jacking up the ratio just a little bit, and also the threshold. For the most part, I’ll change these three settings of compressor the most, with the gain being the primary culprit.
As I explained in my article on compression, increasing the gain of the compressor is going to be what makes the output signal much louder. The ratio is adjusting the strength of the compression, and the threshold adjusts how much of the signal is actually adjusted by the plug-in.
Another great trick for the use of the compressor is parallel compression (my guide as well).
In case you don’t want to click the link, parallel compression, in this context, just means your copying the desired instrument into a new software instrument track, with the one having compression on it and the other one going without it.
Channel EQ
The same principle for the compressor applies to the Channel EQ plug-in as well. What instrument you’re making changes to is ultimately going to be the primary factor of how you adjust the EQ, and what frequencies you’re increasing or attenuating.
When it comes to EQ, however, I find that attenuating (decreasing) the mid-range frequencies, especially at 200Hz, is almost always a must, due to the fact most instruments have at least part of its frequency range in this area.

Moreover, you may need to adjust the sub-bass EQ and high-range EQ. Like I just mentioned, what instrument you’re changing, for the most part, is going to determine how you go about this.
When it comes to the guitar, I almost always attenuate some of the mid-frequencies by a little bit, set up a high-pass so the lower frequencies are eliminated, and then I boost the high frequencies from 1000kHz to 10,000 kHz, with the sparkle increased at 10,000kHz (my guide on EQing guitars).
Use the pre-sets as your guiding light in the darkness. The pre-sets are meant to give you an idea of how parameters are adjusted for particular functions, and they’re honestly quite good.
For instance, the vocal pre-sets often go along with the industry standards of what some of the more authoritative sources will tell you to do.
Like the vocals. When it comes to the vocals, you’ll want to scoop the lower frequencies and attenuate the mid-range by a little bit, but boost the highs. This is for a male vocalist with a lower voice.
The low frequencies of a woman’s voice, on the other hand, don’t need to be attenuated so much due to the higher pitch of the female singing voice. The fundamental difference in EQ between the male and female singer is the attenuation of lower frequencies.
For the male, you scoop them out like I talked about in my other tutorial.
For the woman, you leave them as they are, or attenuate them even less, depending on how high her voice is.
Some additional tips for the EQ are to eliminate some of the “sss” sounds of the instrument tracks, for instance, a common culprit is the higher frequencies of the hi-hat or another cymbal.
Commonly, I’ll decrease some of the higher range frequencies of the instruments that exist primarily in the aforementioned ranges, between 5000kHz and 10,000 kHz.
Like I said above, use the Channel EQ pre-sets to guide you in your decision. One of the great things about Garageband and Logic Pro X is the pre-sets. They have a pre-set for nearly every single instrument. They aren’t to be followed 100%, but they’re an excellent place to start.
Noise Gate
The Noise Gate is a lot simpler for a number of reasons, mostly due to the lack of sophistication, although, it depends on what type of noise gate you’re actually using.
If you’re using the Bob Perry Noise Gate plug-in, there are more sophisticated parameters. Assuming you’re using the regular noise-gate plug-in, however, you can only adjust by dB and that’s it.
What I commonly do is adjust the Noise Gate so it eliminates as much extraneous noise as possible, without decreasing the amount of sustain of the instrument, and without making it sound choppy. Experiment with what you think sounds best.
I find the range between -65dB and -40dB to be the most appropriate.
4) Add the desired and necessary effects, such as distortion, delay, reverb, ambiance, flangers, phasers, etc.
I would say that the most commonly applied effects plug-ins, at least in my world, are the reverb, ambiance, distortion, and the delay. In some cases, I may find it necessary to throw in a flanger or a phaser in there.
The reverb and ambiance plug-ins are going to make the music actually sound good, for the most part. They make all the sounds and instruments mesh together. They add a “juicy” quality to the music, that actually gives it that feeling.
The distortion is another effect that I use on many different instruments and for different reasons. For instance, I may add just a tiny bit of drive/distortion to the kick, snare, the boutique 808, or even a bit more crunch on the guitar, depending on what kind of guitar it is.
For the most part, however, I add distortion to the aforementioned instruments the most, the kick, snare, and the boutique 808.
For this, I would recommend the FuzzPlus3 plug-in, which is great for adding a subtle amount of drive to whatever instrument calls for it. It’s great for the boutique 808, among other instruments, because it has specific parameters that allow for solid customization.
Delay is another effect I commonly use. I almost always use delay, for instance, on the vocal track as well as the piano and guitars.
The delay, when used sparingly, can “thicken up” the sound, so to speak, bringing it forward in the mix, and giving it more of a professional sound.
The delay is also instrumental in the Haas trick which I’ve talked about before. Delay can be used as more than just a thickening agent. It can also be used as a straight-up effect.
5) Add Automation to the tracks that need it, whether it’s just volume automation or Channel EQ automation
Automation, a topic I’ve explored at length, is great for adjusting the dynamic range of a track.
Through the use of volume automation, you can increase or decrease the intensity of particular parts of the track, depending on what your goals are with the music.
For instance, you may want to slightly increase the master channel volume by 1-2dB right before a chorus to build intensity. Conversely, you could do the exact opposite as well, say for example, if you wanted a particular instrument to be a bit softer in a specific section of the song.
Bringing up the automation function in Garageband is as simple as just hitting ‘A’ on your keyboard.
Another important point to mention is that the automation controls will act responsively to the number of plug-ins you have set-up in the Smart Controls.
In other words, if you have 7-8 different plug-ins running on an individual track, you’ll notice that you now have the option to automate those plug-ins through the automation function.
You can see what I’m talking about in the image below:

With all that said, I also think it’s worth mentioning that automation can be time-consuming, especially if you’re not careful.
For instance, you have to pay careful attention to by how much you’re increasing or decreasing the volume because you don’t want to cause clipping or distortion.
In some cases, you may not even notice that you’ve increased the volume up to the point of distortion until after you’ve inserted the track into a new project file for DAW-mastering purposes.
If you do find yourself in this situation, you’ll have to go back to the original mix and re-adjust all of the parameters and settings you made. Tread carefully with automation and be mindful of what you’re doing.
6) Pan each instrument track to where it needs to be.
While I would like to say that panning is one of the most important parts of mixing (in fact, I did say it in my panning guide), you can’t really say that because everything works together cohesively, and you need one aspect of the process to work together with the other.
When one thing is missing, it’s not going to sound right, regardless of what it is.
Panning is just the process of directing the sound of the instrument to the appropriate place. In other words, you’re adjusting the sound’s location in the mix.
You can see what my panning technique looks like below:

For the sake of convenience, I’ll briefly offer a guideline in this article to save you time.
Another important thing to mention is that, in the following guide, you want to make sure that two instruments aren’t in exactly the same position. For example, if you want the clap and the hi-hat to the left, you want the clap to be slightly more left than the hi-hat or vice versa.
Moreover, a good practice is creating room in the mix for the rapper. So, when panning the melodic instruments of the song, have them panned to the right and left a little bit, that way there is room for the artist to sing or rap.
Kick – In the middle or near-middle
Snare – Slightly to the right or the left
Hi-Hats – Panned to either left or right
Cymbals – Panned to the left or right, but not in the same position as the hi-hat.
Claps – Also panned to the left or right.
Boutique 808s or Bass – Panned to Center
Melodic Instruments – Panned slightly to the left, and slightly to the right.
7) Export the Track as a .aif file, and then drag and drop it into a new project file.
At this stage, you’re done everything.
You’ve set up the effects, dynamics processors; you’ve panned the instruments to the right place in the mix, you’ve made sure all of the VU meters are where they should be; you’ve ensured nothing is clipping, and you’ve also made sure that no plug-ins are running on the master channel.
What you do now is export the track as a .aif file, send it to your desktop, and then open a new project file and re-insert the track into a new project (use my guide for reference if you’re having difficulty).
8) Add a Channel EQ, a Compressor, and a Limiter to the Master Channel of the track, and increase the Master Volume to +2.5dB.
What you can do now is add the finishing touches to the track, including the Channel EQ, Compressor, Limiter, as well as the Master Volume (Fab Filter has the best mastering plugins).
I would add the plug-ins in the following order, Noise Gate > Compressor > Channel EQ > Limiter, from top to bottom.
For the EQ, you just want to eliminate any undesirable sounds in the mix or increase the number of highs in it. For instance, you may find that the sub-bass frequencies need attenuation just by a little bit, in addition to a bit of the mid-range.
Moreover, you could drop the high-frequencies in the 10,000kHz range by just a little bit to eliminate the “ess” sound that some of the other instruments might be causing.
For the channel EQ, I might use settings like what’s shown in the image below:

For the compressor, I would say that the Platinum Analog Tape is arguably one of the best to use. It’s a personal favorite of mine.

For the Limiter, you could just increase the gain of the track by +2.0dB and then adjust the output level to -0.1dB. This is going to set a ceiling for the song and also increase the gain of it by a little bit.

At this point, now everything is finished, and you can go ahead and increase the master channel volume by the desired amount. For this stage, try and think of a volume that you think is consistent with some of your favorite music, and then always keep this volume in mind.
For instance, I typically increase the volume by +2.0dB – +2.5dB. This is a good range that will be competitive with the other music out there, however, another great thing to do is to use a metering plugin like the YouLean Metering Tool. This will take the mystery out of the process and you’ll know exactly how loud something is without guessing.
You may find yourself wanting to increase the volume as much as possible, but it’s best to be careful. The human ear always thinks that louder is better when it comes to music.
But if you increase the volume of the track by too much, you’ll end up with a song that’s too loud to the point where streaming platforms will decrease the volume anyway.
Some people also call this the “loudness war,” because many engineers nowadays want their music as loud as possible, that way it seems like more of a banger than the other music out there.
Other Important Tactics
- Mix in Mono
Mixing in Mono is going to centralize all of the sounds into one channel. It’s useful because it will show you how your music will sound in a mono-stereo system, which, to many engineers, is a crucial part of the process (my guide).
Once you switch the track back to Stereo, by turning the ‘Convert to Mono’ option off in the Gain plug-in, you’ll notice how much better it sounds. As a general rule, it’s a great practice to mix in mono.
- Mix with Low Volume
As I explained in my 24 tips to mixing tutorial, mixing in low-volume is a great practice, in my opinion, not only because you won’t do as much damage to your hearing, but also because of the way the human ear is structured and how it responds to sound.
YouTube Video
Conclusion
I hope this was helpful to you. Do me a favor and share this on your social media. That would help me out a lot.