 Written By :
 If you want to export your songs out of Garageband without normalizing all of the tracks, you’re in luck, because it’s actually a pretty simple process that requires only a few clicks. Here’s what you do:
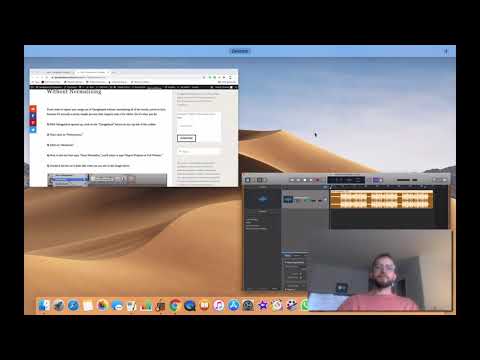
1) With Garageband opened up, click on the “Garageband” button on the top left of the toolbar.
2) Then click on “Preferences.”
3) Click on “Advanced.”
4) Next to the box that says, “Auto-Normalize,” you’ll notice it says “Export Projects at Full Volume.”
5) Uncheck the box so it looks like what you can see in the image below:

I’ve never had the “Auto-Normalize” function turned on since I first learned how to use Garageband and all of its features (which are listed in my guide), not to say that it’s not useful, but it hasn’t been for me thus far.
I think the option might be there just so that when beginners to the program want to export tracks, they’re guaranteed a way of exporting their music and other audio files without clipping or distortion.
I believe the purpose of it is to provide a simple way of “optimizing” the export that way you don’t have to think so much about what you’re actually doing.
Chances are, if you’ve arrived at this article, you’re probably wondering how to get your Garageband exports to sound louder and higher quality as well.
In addition to turning off the auto-normalize function, there are other things you can do to increase the total volume as well, many of which I’ve listed in my guide on why your songs are often too quiet.
Garageband has a weird way of doing things sometimes, including for adding silent space at the beginning of recordings (my guide), but we’ll unpack the normalization feature today.
More on Auto-Normalization And Other Tips
As I just mentioned, having the auto-normalize function turned off in Garageband’s ‘Preferences’ is going to be what allows you to export your tracks at the desired volume.
However, because you’ve eliminated the setting which acts as a fail-safe, you have to pay closer attention to your music, including the VU meters, the number of plug-ins and so on, otherwise, you’re going to have distorted and clipping tracks.
An additional tip for normalizing audio in Garageband is to avoid setting your VU meters above +0.0dBFS. “dBFS” means: Below Digital Full-Scale.
+0dBFS is the point in decibels, where if you were to go any higher, it would be too much for the software. It’s basically the ceiling, it’s the limit.
It’s kind of like the standard unit of measurement that we use to describe the limit that you can’t go past when making digital recordings.
We’ll talk more about dBFS in a second.
In the digital world, anything above ‘0dB’ is considered clipping.
For this reason, it’s important to make sure that you leave a lot of “headroom” in your mixes.
For instance, if you’ve mixed your music and some of the tracks are going above the 0dBFS maximum, there will likely be some problems when the final tracks are cut to mp3, CD, or vinyl.
By headroom, I’m suggesting that when you’re mixing tracks before you’ve even started the process, you should drop down all of the VU meters to at least -3.0dB or perhaps even a little bit more, like up to -6.0dB.
You can see what “Headroom” looks like in the image that I’ve provided below:

You might be kind of confused as to why it matters that a track exceeds 0dB in the DAW.
Truthfully, “0dB” on its own doesn’t actually mean anything, because there has to some kind of reference point for it to mean something.
In other words, a decibel is a ratio that is comparing one signal to the other.
If you’ve stated that your signal is 0dB, without providing some kind of reference point, you’re just saying that the signal is equal to something, but not really communicating what that “something” actually is.
Without the reference point, “0dB” is essentially meaningless.
For instance, when looking at the Garageband interface, there are other symbols which provide a larger context for what the dB is actually measuring and comparing to.
From what I understand, “+5dB” means that we’re 5 times whatever 0dB is, and if we’re at “+3dB,” we’re 3 times whatever “0dB” is, and so on and so forth.
“-3.0dB” means we’re half of what “0dB” is and “-6.0dB” means we’re 1/4 of what “0dB” is.
Audio software – DAWs and Garageband included – are typically different in terms of how much signal and power they can actually handle without clipping and distortion.
This is one reason why streaming platforms have introduced LU (loudness units), and why plugins like the YouLean Loudness Metering Tool use this new measurement as a way of accurately judging just how loud something is.
This limit of what the DAW can actually take is called dB Full-Scale, or more commonly referred to as dBFS.
Like I mentioned above, the dBFS scale is kind of like a system of comparison or a standard by which people are measuring something.
For example, a speaker system like this iLoud MTM system (one of my favorites) might be able to generate 50 W without blowing a speaker, while another one might be able to go to 200W.
For that reason, it makes sense to have a full-scale system that way we can communicate how much fits between each system.
If this is confusing, I’ll try to explain it simply.
If Person A’s speaker system has a maximum of 50 W, and Person B has a speaker system that can put out 200 W, each person has a different idea of what their dBFS (their audio ceiling) is.
For Person A – (This person has a maximum of 50W) – an output of 50W equals = 0dBFS.
For Person B – (This person has a maximum of 200W) – an output of 50W equals = -6.0dBFS
If Person A turns up their wattage to 200W, the meter will say that it’s +6dBFS, which means that it’s going above what it can handle and it’s going to blow.
The reason behind this system of measurement is that it provides a standard for people to compare to because trying to remember the maximum amount of watts for each system would be a pain to recall.
If you’re anything like me, then all of this stuff might take a little while to sink in, so we’re going to try and explain it again another way.
As I mentioned above, decibels on their own don’t actually really mean anything, they’re just ratios, and they’re comparing two different signals to each other.
In the case of digital sound processing, “0dB” is considered to be 100%.
10% would mean “-10dB” and “+10dB” would mean we’re at 1000%, which is far beyond what that system can handle, whatever system it is that you’re using.
Garageband, for example, communicates how much it can handle with the same meters.
The VU meters and the Master Volume Fader are telling you how much it can handle with not only the “Red” clipping signal but also with the numerical values on each of the VU meters.
Now, let’s use the example of human hearing.
If “0dB” is the quietest sound a person can possibly hear, that means that, obviously, “-10dB” is so quiet that we can’t hear it, because – think about it – “0dB” is the quietest sound we can hear, so, therefore, anything below that is too quiet for a person to hear.
On the other hand, if 0dB is the quietest thing we can hear, then that means that 20dB is 100 times as loud as the quietest thing we can hear.
As another example, if “0dB” is the volume of a jet airplane taking off, then the quietest sounds that a human can hear would be “-118dB” and “-98dB” would be way louder than “-118dB.”
A jet-airplane taking off would be near the very top of this chart.

Essentially, decibels are just a system of ratios that we use to compare different sounds.
YouTube Video
Conclusion
To wrap it up, remember that once you turn your auto-normalize function off, you have to keep a little bit of headroom on all your VU meters. Don’t go above +0dB.
This is going to ensure that you don’t have any unnecessary clipping or distortion in your music, which is obviously what we want.