Garageband is arguably one of the more popular DAWs on the market, especially for the price: free. Despite what a lot of nay-sayers have to say, Garageband has many functions that are extremely useful for the regular musician, regardless of what genre or instrument you play.
Garageband has dozens of useful features which you can use for:
1) Creating musical projects from scratch
2) Recording and correcting vocals & other instruments
3) Sampling
4) Editing and Transposing music, whether in MIDI or Audio form
5) Implementing a database of royalty-free loops
6) Downloading third-party plug-ins
7) Sharing projects between Apple users
8) Easily transfering projects from your iOS device to your Mac OS device
9) Shaping dynamics with dynamics processors like compression, EQ, and limiters.
And this is just a short list. While Garageband might not be quite as good as a more serious DAW, it has a tremendous amount of capabilities for free software. Interestingly, Apple has lost a lot of money maintaining and updating Garageband over the years, but I imagine they’re aware that it’s just another selling point for the brand.
1) Create Musical Projects From Scratch
What I mean by this is that you can use the plethora of available presets, instruments, plug-ins, and other VSTs to create your own music without owning a single instrument.
The software comes with a variety of VSTs, also known as virtual studio technology, ranging from synths, drum machines, drum kits, flutes, violins, cellos, guitars, acoustic guitars, bass guitars, arpeggiators, vibraphones, and mellotrons, pianos, and so on and so forth.
However, all of these VSTs will be triggered by the use of a MIDI keyboard which is based on the piano (one reason why I couldn’t recommend PianoForAll enough for learning).
Many of the software instruments are great to use, however, some are definitely better than others. Each VST typically comes with its very own set of parameters for customization.
So you aren’t limited to just one type of sound, moreover, premium instruments can also be added to the pre-existing library.
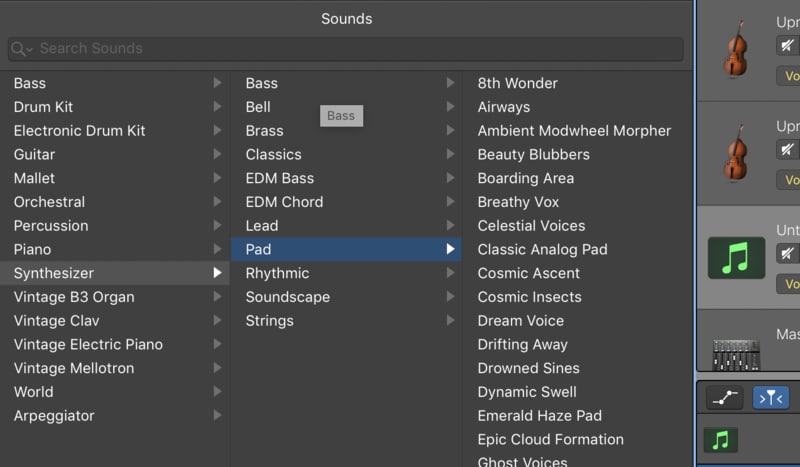
Many of the VSTs also have multiple settings inside them, for instance, an arpeggiator might have a variety of synth types within it, including presets and helpful functions like reverb, delay, glide, and so on.
How you intend on going about making music is up to you, but part of what makes it such a great software to use is the fact you’re aren’t that limited in terms of what can be done. For instance, if you don’t own a single instrument, you can still figure out how to make music on your own.
Obviously, it’s great to have actual instruments, but it’s not 100% necessary, which brings me to my next point.
2) Record Vocals and Other Instruments such as Guitar
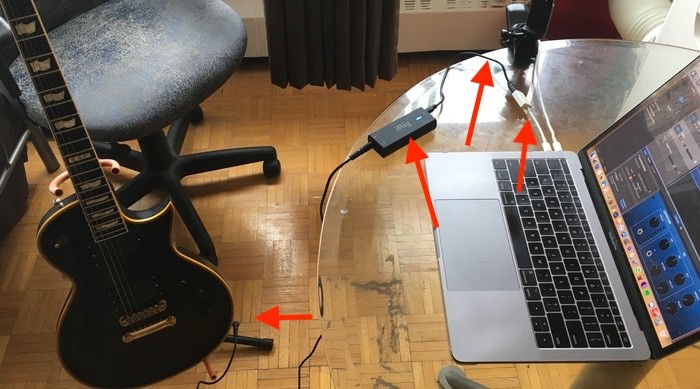
If you have access to an external microphone like my personal favorite, the Samson Q2U on my Product Page, it’s very possible to record high-quality vocals using Garageband.
Truthfully, it’s possible to track vocals even without a proper microphone. All you would have to do is click on the Red Record button and start speaking into your computer.
Additionally, you have the option of recording literally any other instrument you want if you have a microphone, it really doesn’t matter, whether it’s a cello, violin, a flute, you name it.
3) Create and use Samples for Hip-Hop and other Genres
A lot of people out there aren’t aware of how great Garageband can be for hip-hop producers. For instance, there is a common misconception that you can’t use a sampler in Garageband, but you actually can, and it’s called the AUSampler.
Essentially, sampling just means you’re grabbing a selected portion of an audio file, whether it’s another song, a movie, an audio recording, and you chop it out and load it into the sampler, which can then be adjusted at various tempos and key signatures.
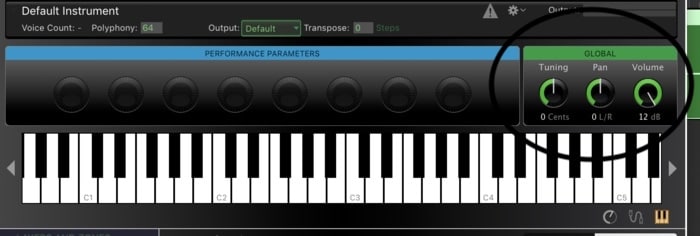
As I explain in my sampling guide, you can also adjust the tuning, the panning, and the volume, right in the AUSampler.
Without question, sampling is done primarily in hip-hop and rap music production, with Kanye West being one of the most famous examples of sampling.
4) Edit and Transpose music, whether in MIDI or Audio format
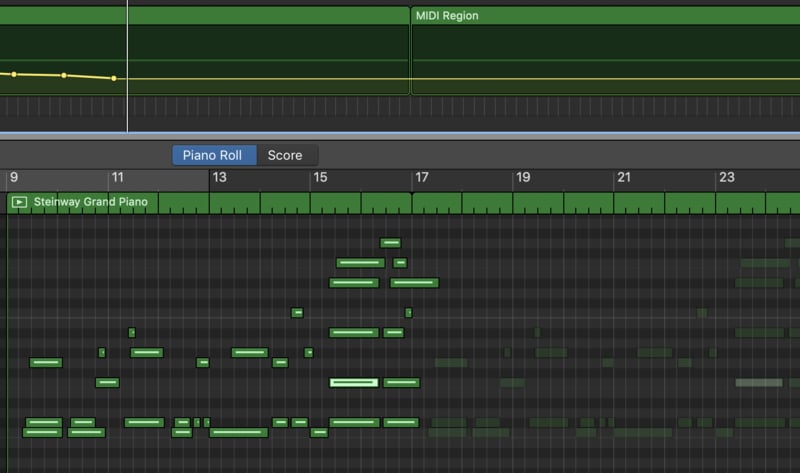
Using the Piano Roll and the Workspace, Garageband users can conveniently edit music in post-production (my guide). Furthermore, it’s entirely possible to change the velocity of each MIDI note, the position of the note in the song, as well as the pitch, duration, etc.
It’s definitely worth mentioning that the same thing can be done for Audio format as well, with a few exceptions. As I recently wrote about in my article on why Garageband is very easy to use, it actually comes with a series of Commands that make it convenient and quick.
For instance, there is the (Command + Z) function, which allows you to eliminate mistakes or go back to where you were before, in case you added something by accident, or deleted something by accident and think that it’s gone.
As long as you don’t open a new file, Garageband has the ability to remember exactly what you had just done.
Furthermore, it’s also possible to copy and paste Drummer Tracks, which are in a file format colored yellow, into a new software instrument track for MIDI Files. As I explored in my drum editing guide, Garageband will actually convert the drummer track into a MIDI File and allow for more customization and changes
For example, if you wanted to add in a few more snare drums, or maybe even change the style of snare drum entirely, you could if you wanted too. Regarding transposition, it’s fairly simple to transpose music you’ve created in Garageband using either the Transposition track or through a pitch-altering plug-in.
5) Has a database of royalty-free loops
For the most part, Garageband’s database of royalty-free loops is something that I avoided in the beginning when I first started making music with Garageband.
The reason for that was I wanted to figure out how to create my own melodies, without relying on an external library of sounds.
It also helped that I already had been playing guitar for fifteen years, so it was pretty easy for me to make melodies right away without much trying. However, after perusing through the list of melodies and rhythmic pre-sets, I realized the loops it comes with are actually pretty amazing. A lot can be done with them.
For instance, in my one song that I made during the summer, “Cosmo Canyon,” which you can hear in the YouTube video below, I used the drummer track for the introduction to the song.
In the same song, I used a string section loop as well. The rest of the song is my own creation, however.
As I’ve mentioned before in my loops tutorial, Apple Loops are divided up into three main categories, Instrument, Descriptor, and Genre. Within each one of these categories, there are other subcategories as well, including sub-genres, different types of instruments, and so on and so forth.
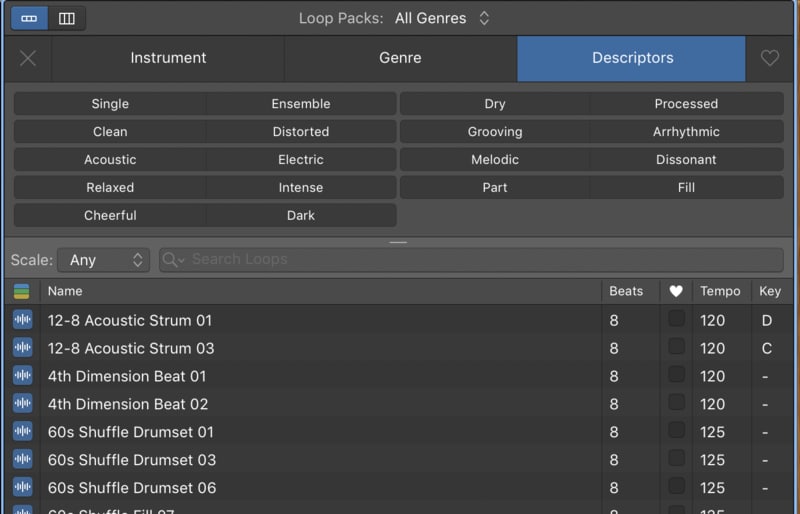
Additionally, it’s worth mentioning that each loop is color-coded according to its format, and is also identified by its tempo and key signature.
6) Download third-party plug-ins
If you ever peruse the beat-making side of Instagram, you’ll countless memes about plug-ins, and for good reason: plug-ins are amazing and fun to search for, download, and then try out.
Just the other day, in fact, I discovered a brand new 808 plug-in that I’m obsessed with. It’s Initial Audio’s 808 Studio II Synth, which is great.
Most DAWs have the capability to download third-party plug-ins, and Garageband does as well, despite what some people in the industry think.
To download and install plug-ins, use my guide. There is also a list of plug-ins as well near the ending of the article. Downloading plug-ins is as simple as dragging the components file into the Library > Audio.

Truthfully, there aren’t many limitations to Garageband on account of the fact you can download third-party plug-ins. If the stock compressor isn’t good enough for you, you can always move on to a much better one, free or not.
7) Create custom drum patterns and drum kits
Like other DAWs, Garageband has the ability to separate each part of the stock or plug-in drum kits and turn them into its own software instrument track for better mixing and panning.
For instance, you can have the Kick from the Beat Machine plug-in, but the hi-hat and snare from the Drum Pro Trap Plug-in.
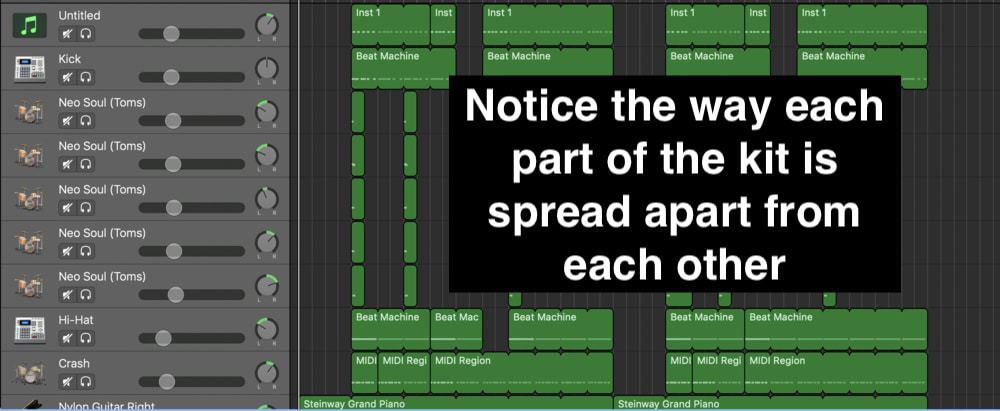
It’s up to you what kind of instruments you want to use, and the user isn’t limited by what kind of instrument they can create. In other words, you can make your very own custom drum kit using all kinds of sounds and settings.
8) Use the Automated Drummer Track
The automated drummer track is fantastic for almost everything, including for compositional purposes, making your own backing tracks, or just getting a song started.
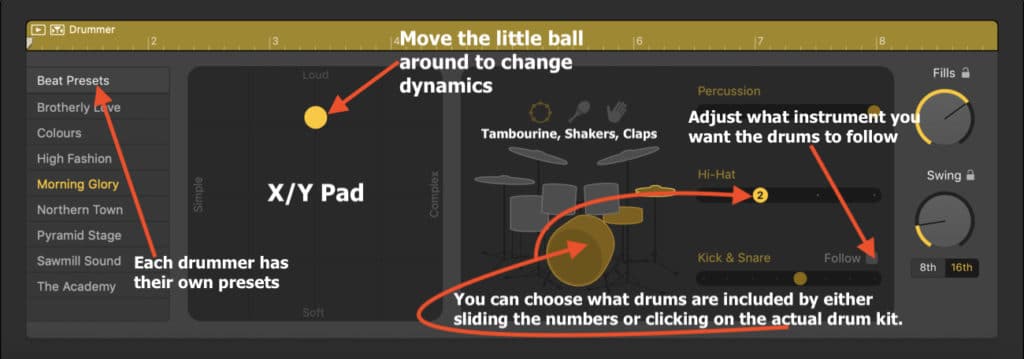
Additionally, one of my favorite parts of the drummer track is that you can actually convert the drummer track audio file into a MIDI one, for the sake of customization and also analyzing.
In other words, if you’re struggling to figure out how to make your own drum beats, for instance, creating drum fills with the toms and snare, you can actually use the drummer track as a tutorial.
If you copy and paste the drummer track audio file into a MIDI software instrument track, you’ll notice it turns the file into a MIDI file.
This allows you to actually see how the drummer track is created. That way you can see how the toms actually look in the piano roll and then go on to re-create those sounds on your own, without using the drummer track.
In other words, it’s like you have an in-built teacher for learning how to program drums which I explained in my drummer track tutorial as well.
9) Export files to popular streaming/sharing platforms
Another handy feature of Garageband is it comes with an option where you can export the files directly to your streaming platform of choice, for instance, to SoundCloud, iTunes, or YouTube.
It’s very easy to use and is done in just a few seconds. I especially like the one for iTunes and Soundcloud, because Garageband does it in such a way where the track is named perfectly and everything.

In the case of Soundcloud uploads, it also allows you to determine whether people can download your music from your page or not. It’s very convenient.
10) Time Quantize
As I’ve mentioned before, the time quantizer is something I first skipped for whatever reason. It’s the feature where you can snap all of your midi and audio notes to the grid without doing much work.
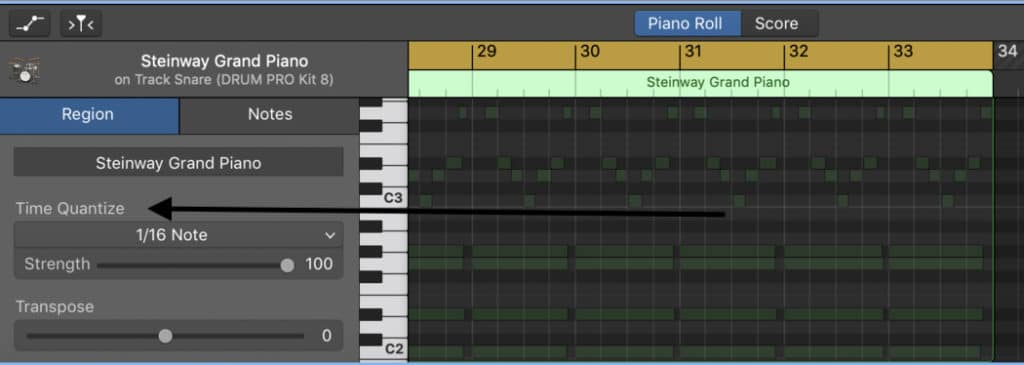
Garageband’s time quantizer has two different parameters, the strength of the quantizer in numbers, and then the type of note it relates to. There are other functions which I’ve explained more in detail in my quantization guide, but the most changes are made with the “Strength” slider and the type of note.
It’s worth mentioning that the time quantizer is one of those things that many people hate and many people love. Some argue the quantization of music is what robs it of its soul. I know Rick Beato – arguably the best music YouTuber on the internet – would make that case.
11) Use the musical score (standard notation), editor
This is perhaps one of the least often mentioned features of Garageband’s awesome interface. I love the score editor. Just the other day, I used it to figure out how to play my very own composition on the guitar.
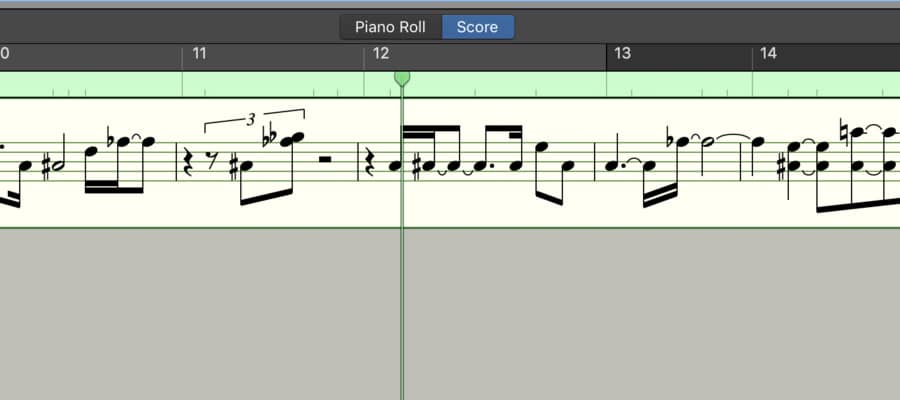
I created it using a MIDI keyboard, and when I got my hands on an actual nylon string guitar, I just checked out the score editor and I had the sheet music right there in front of me.
One of the reasons the score editor isn’t mentioned often is many music producers don’t know how to read music. If you do know how to read music, the score editor is an incredibly useful feature that you’ll really enjoy using especially if you’ve already read my guide on it and you know what it’s capable of.
12) Adjust the tempo, time signature, and key signature
You can also adjust the tempo, time signature, and key signature using the controls in the top-center of the interface.
It’s worth mentioning that it’s probably not a bad idea to set these right from the beginning before you’ve created your music because it can change the MIDI and Audio notes sometimes if you do it after the fact.

In other words, if you’re in the key of A Minor, and you select the Key of D Minor instead, Garageband will actually transpose all of the notes to the new key signature, and thus change the music. However, using the Command + Z function, you can undo these changes.
You can read more about using these features in this article here.
13) Adjust transposition
Garageband also comes with a transposition track, where you can adjust the pitch of certain notes by the desired number of semi-tones or whole-tones.

The Transposition track is something I admittedly don’t use very often because I just write the music the way it needs to be right from the beginning.
However, other users might find a better purpose for it.
14) Use auto-tune and pitch correction software
Garageband comes with a very simple version of pitch-correction software, often called auto-tune, and it honestly works pretty well as I explained in my pitch-correction guide.
A lot of people have the misconception in their mind, however, that pitch-correction is a software program that allows producers to make a bad performance sound great. But this isn’t the case.
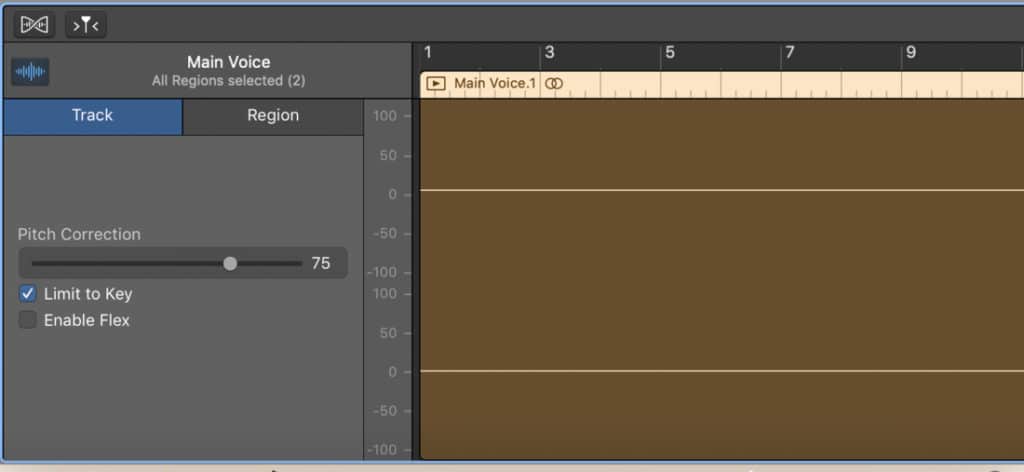
The truth about auto-tune and pitch correction is that it makes a great performance even better.
There are three parameters of the pitch-correction software, including the strength of the pitch correction, the key signature, as well as the “Follow Key Signature” option which will actually apply the changes.
It doesn’t have as many features as the critically acclaimed Melodyne 5 from Plugin Boutique, but it’ll work fine for people who are just starting out.
15) It also has a note-pad for making notes as you create music
This is a feature I almost never use, but it’s one that others might find useful.
In the top-right hand side of Garageband’s interface, there is a notepad icon where you can bring up an in-built notepad for writing notes or noting other important information.
Now that I think about it, this could actually be quite useful. For instance, you could write common chord progressions for a guideline, or notes of the scale, or the notes of particular chords and how they sound.
You could also use it for reminding yourself the following day what has to be done with the song.
16) Use standard dynamics, effects, and other audio processing units like compressors, channel eq, limiters, and multipressors, many of which come with presets.
As I mentioned above, Garageband comes with a plethora of plug-ins, many of which function quite well.
For instance, it comes with a compressor, channel eq, limiter, multipressor, exciter, distortion, stereo spreader, direction mixer, filters like fuzz-gates and noise gates, delays, reverbs, phasers, and other effects.
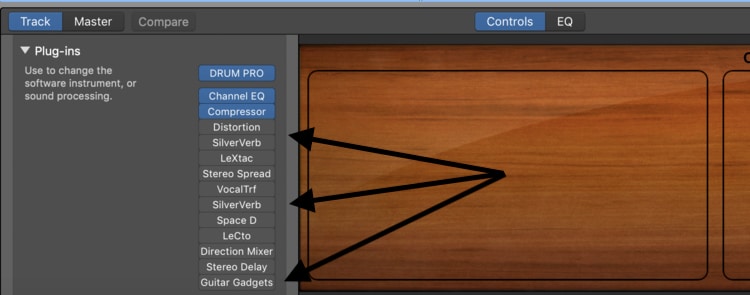
It also comes with a list of AU plug-ins that are more sophisticated in their parameters.
Many of these also come with a spectrum analyzer or a waveform analyzer that many people, including myself, like to use.
17) Has a library of amp modelers and effect units for bass and guitar players, in addition to a huge variety of presets.
Garageband’s Amp Designer (my tutorial) is another great thing about the software, similar to the drummer track.
The Amp Designer, essentially, is a library of pre-sets, amp models, guitar pedals, and speaker cabinets that are meant to simulate something more serious like Blue Cat’s Axe Pack from Plugin Boutique, except you don’t have to pay for the actual simulators.

One of the great features of the Amp Designer is the ability to change the microphone position on the amp. It works pretty well, to be honest.
I would say my favorite aspect of the amp designer is the presets, which are innumerable. Each amp comes with a large collection of its own presets catered to it specifically. There are many of them.
18) Automation functions for volume and any plug-in you want.
And finally, Garageband comes with automation. Using my guide, you automate the volume, compressor functions, the Channel EQ, fade-ins, and fade-outs, phasers, flangers, and so on and so forth.
This is useful for a number of things, including changing the dynamics, and more commonly, the volume at particular sections of the song. For instance, when mixing tracks for my client, I’ll often increase the chorus volume by 1dB just to add a bit of intensity to the choruses.

Additionally, you can even automate things like EQ sweeps, kind of like what we hear a lot in EDM music and even metal in some cases. For instance, some engineers will scoop out the lows and highs at the beginning of the song as an introductory effect to the rest of the song.
A lot can be done with automation, so it’s worth looking into.
YouTube Video Tutorial
Conclusion
That’s all for this article. As you can see, there are a lot of things you can do with Garageband. The software isn’t quite as limited as people often say it is.
I hope this was helpful to you, and if it was, make sure to drop it on Facebook, Twitter, Pinterest, or wherever to share it with your friends. I’d appreciate that a lot.

 Written By :