GarageBand has improved upon their sample libraries and drum kits a lot over the last few years. But let’s be real, we’re all looking for new sounds at times to boost creativity. I’ll show you how to add drum kits in 2 ways.
To add drum kits to GarageBand iOS, drag and drop all of your individual audio files (ideally as .wav), into the “GarageBand File Transfer” folder. Open the App and then the Sampler. Click “Bark” > Import > and then Files. Choose your sample, click the blue download button, and then press Record.
How to Add Drum Kits with the GarageBand Sampler
It’s important to note that it’s best for you to have the “Files” Application which you can download for free from the App Store. Every iOS user should have this app.
As a demonstration, I’ll show you the process for adding a specific drum kit – Marshall Beats’ Supreme Cigarettes Drum Kit – which you can download here. The same rule applies for other kits.
1) Download the Drum Kit from the Link
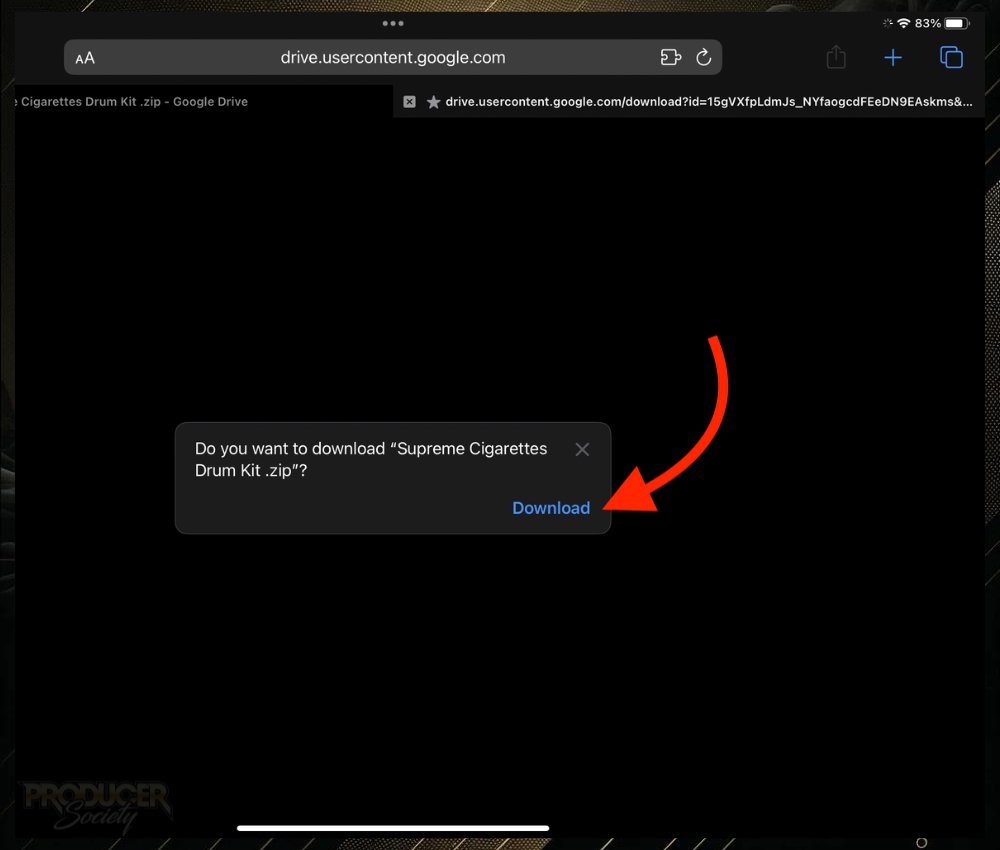
I usually move it to “On My iPad” shortly after because I hate when things get moved to the iCloud by mistake.
After I know where it is for sure, I’ll get ready to send it to a folder especially made for music production files and audio samples.
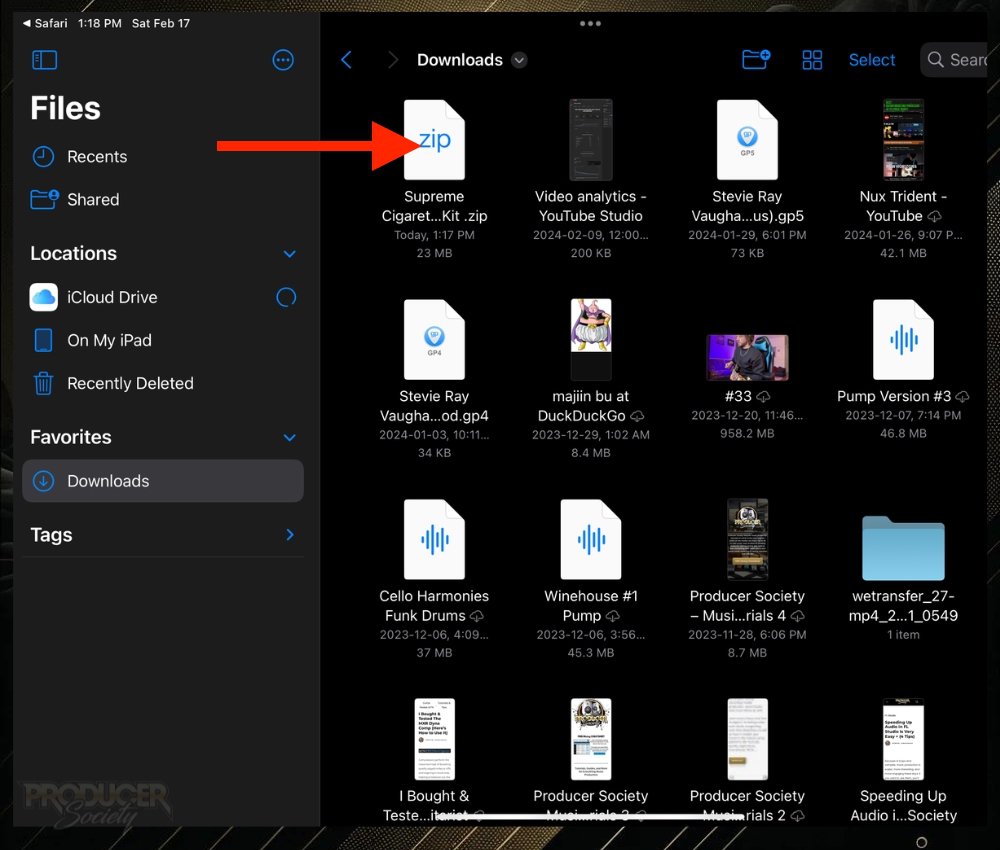
2) Drag the File to “On my iPad”
A) Select the File and Move It To Your Music Production Folder
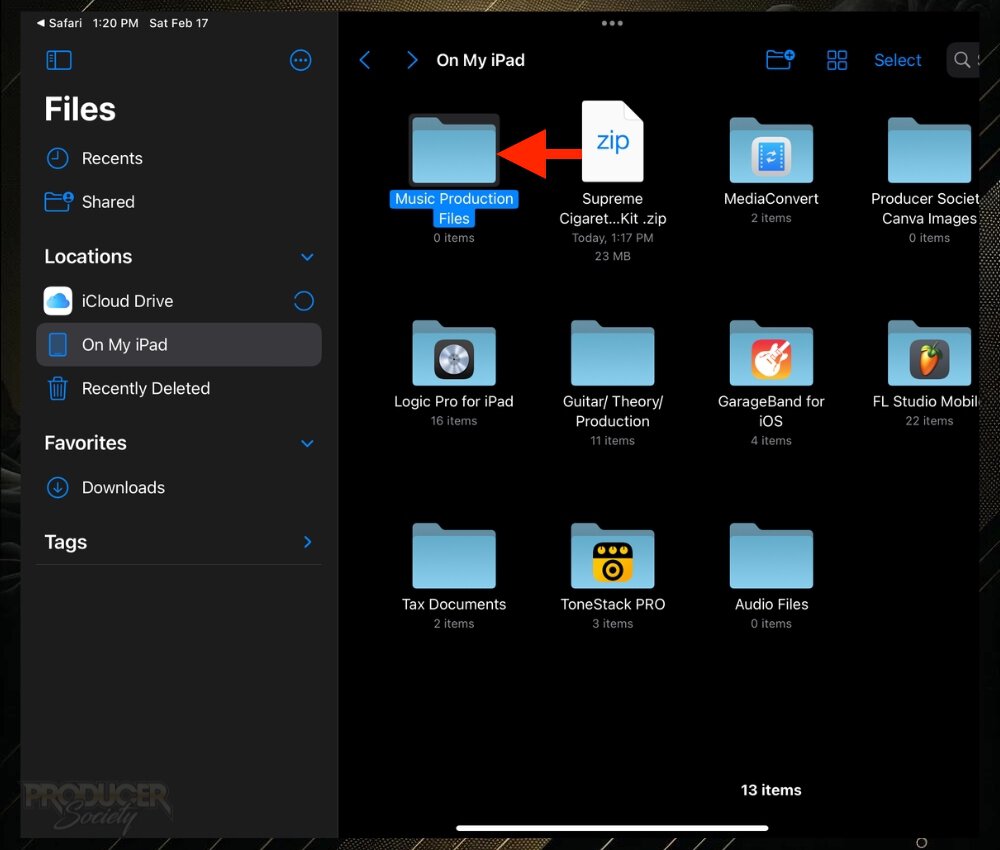
You could simply drag the compressed file directly to your “GarageBand File Transfer” folder to expedite the process.
However, I think it’s prudent to have a separate folder where all of your music production samples and files are stored.
B) Unzip the File
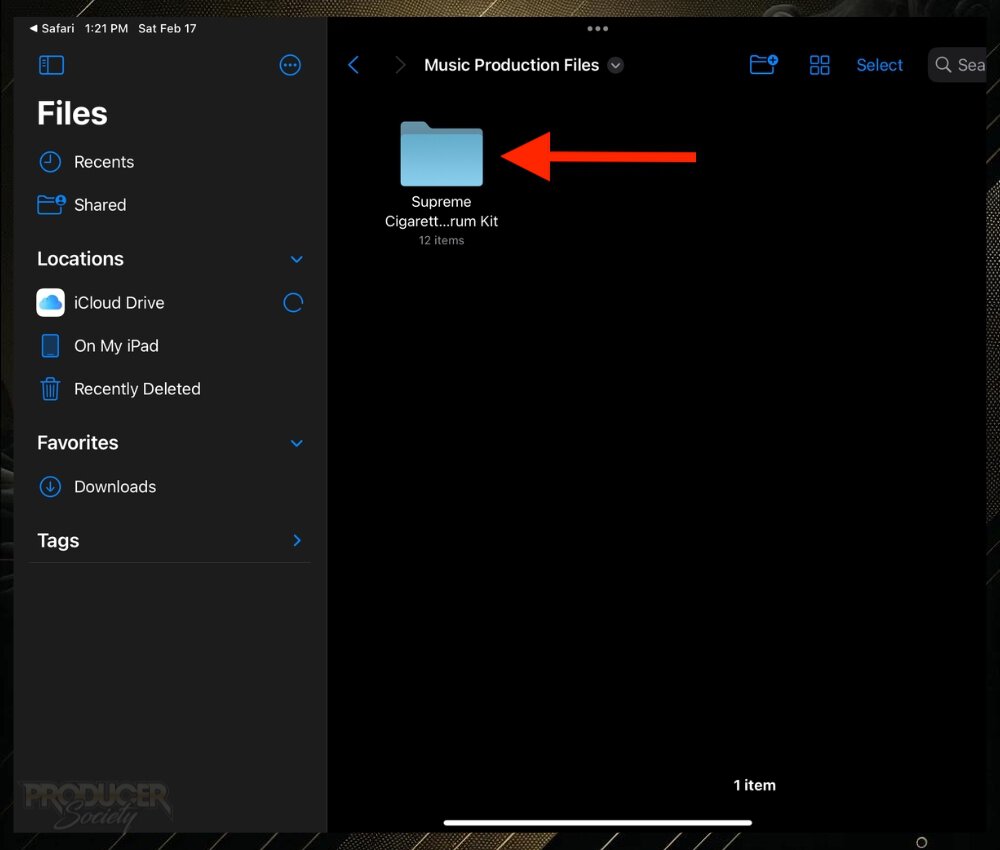
C) Open the Drum Kit Folder
If you try to get it to import an entire folder, GarageBand won’t accept it. The 3rd party sampler I like allows for this though, which I’ll show you how to use in a minute.
D) Go Into the Folders and Choose Part of the Kit, ie, 808
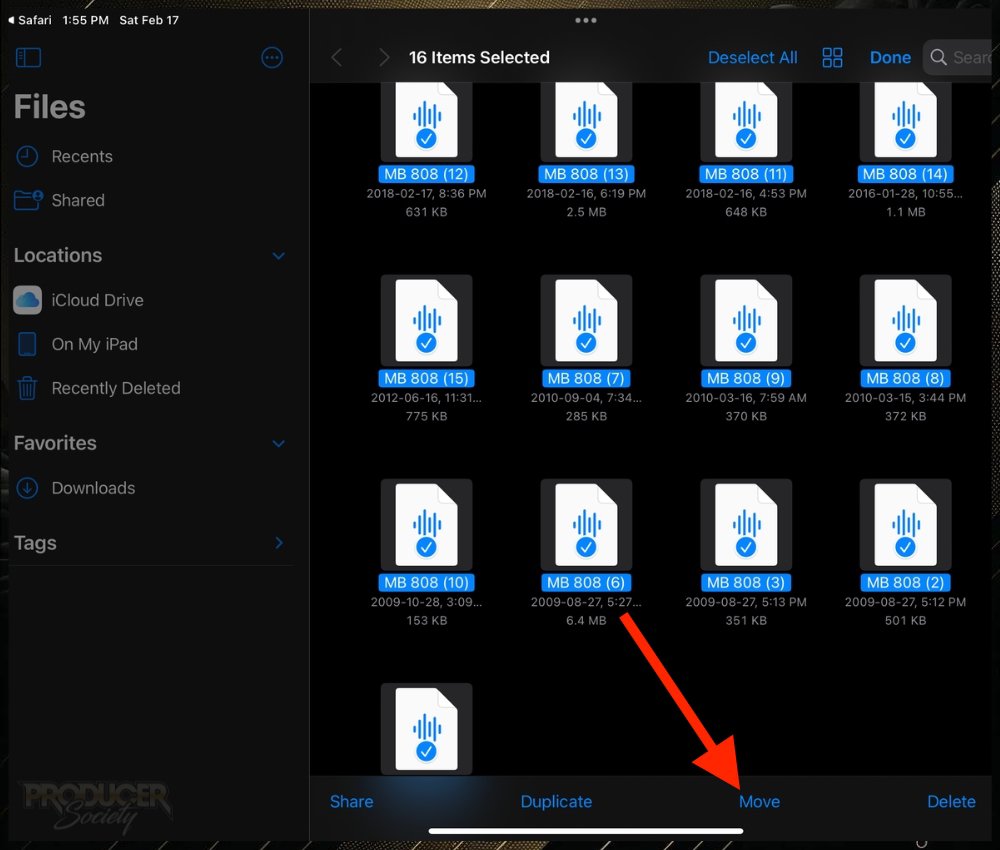
And why the “GarageBand File Transfer” folder? The iOS operating system, particularly GarageBand, just seems to like it this way.
After you’ve highlighted/selected every audio file in one folder, click the “Move” icon on the bottom right as shown above.
E) Select All of Them and Drag Them Into “GarageBand for iOS” > “GarageBand File Transfer”
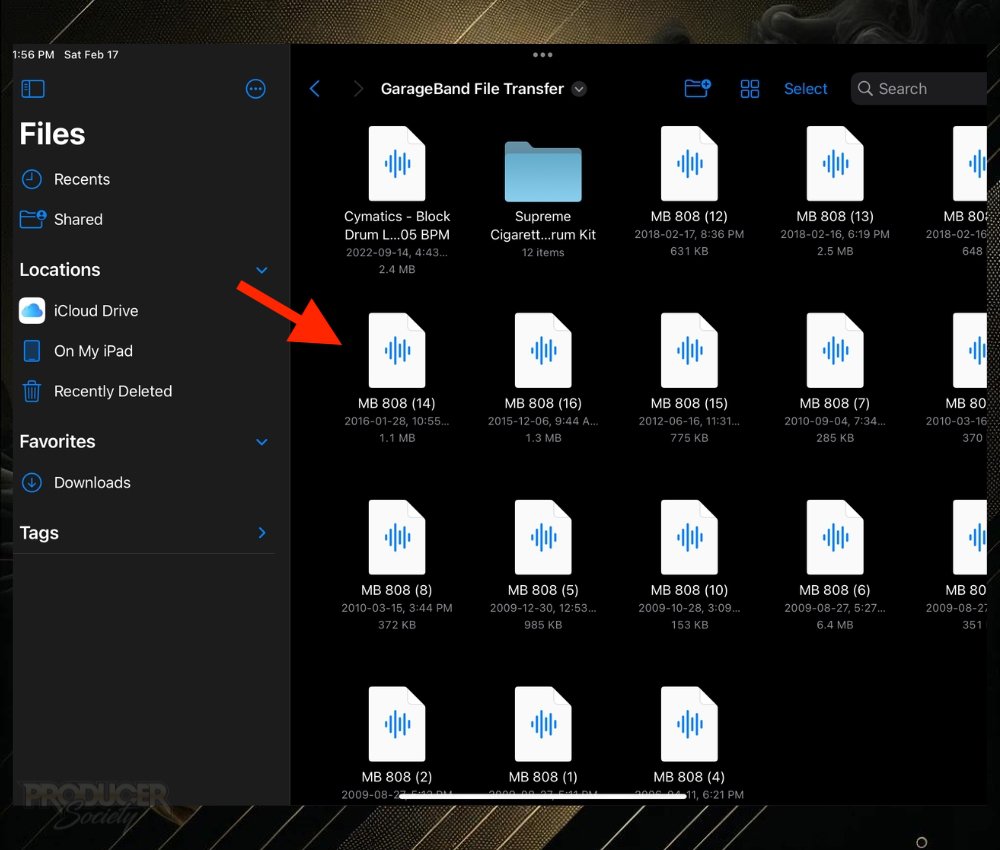
After you’ve done it with one part of the kit, go back and do it to the next part of the kit. For instance, the Hi-Hats or Snares.
3) Open GarageBand and then Navigate to the Sampler
A) Click on “Bark” or the Current Sample Title
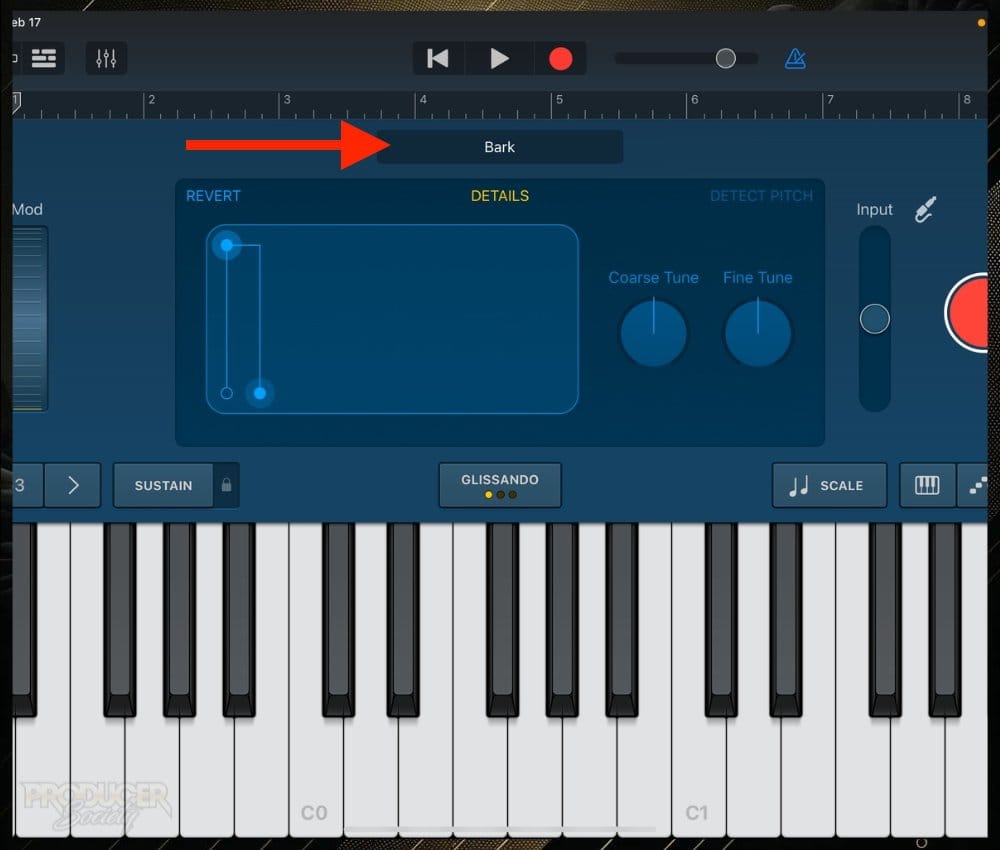
This wasn’t the most intuitive thing for me when I first began, as I described in my other iOS sampling tutorial.
B) Select “Import”
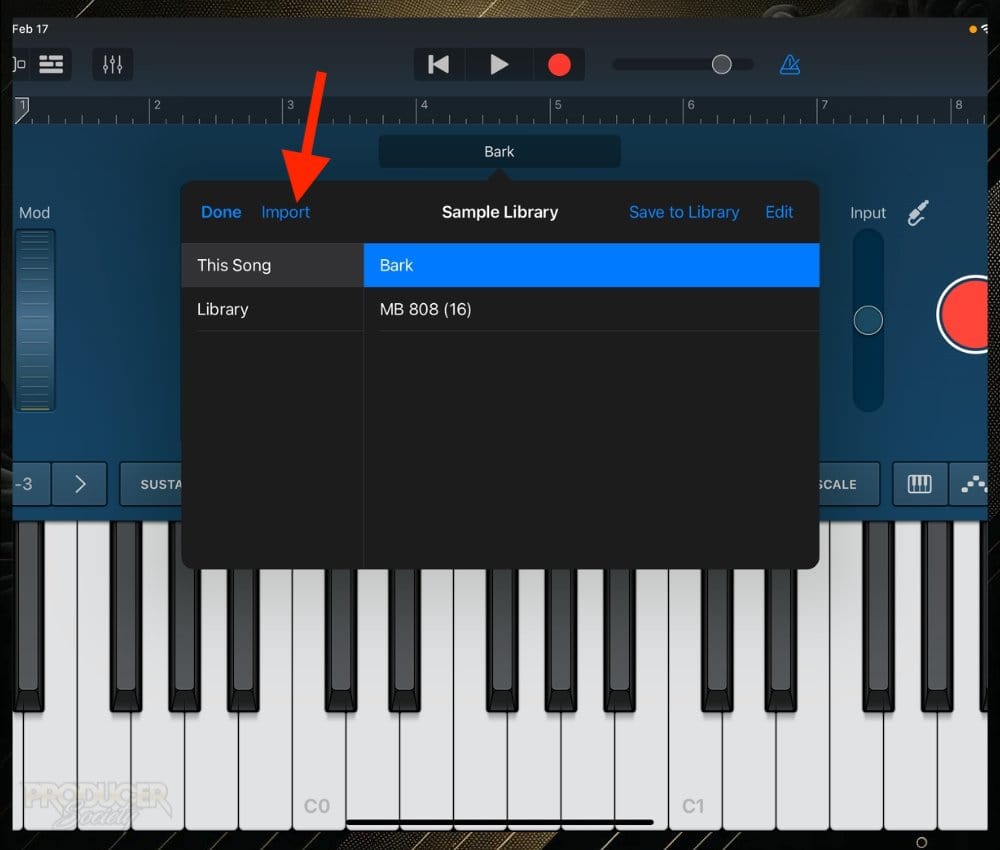
C) Choose “Files” > You Can Preview the Samples Before Importing
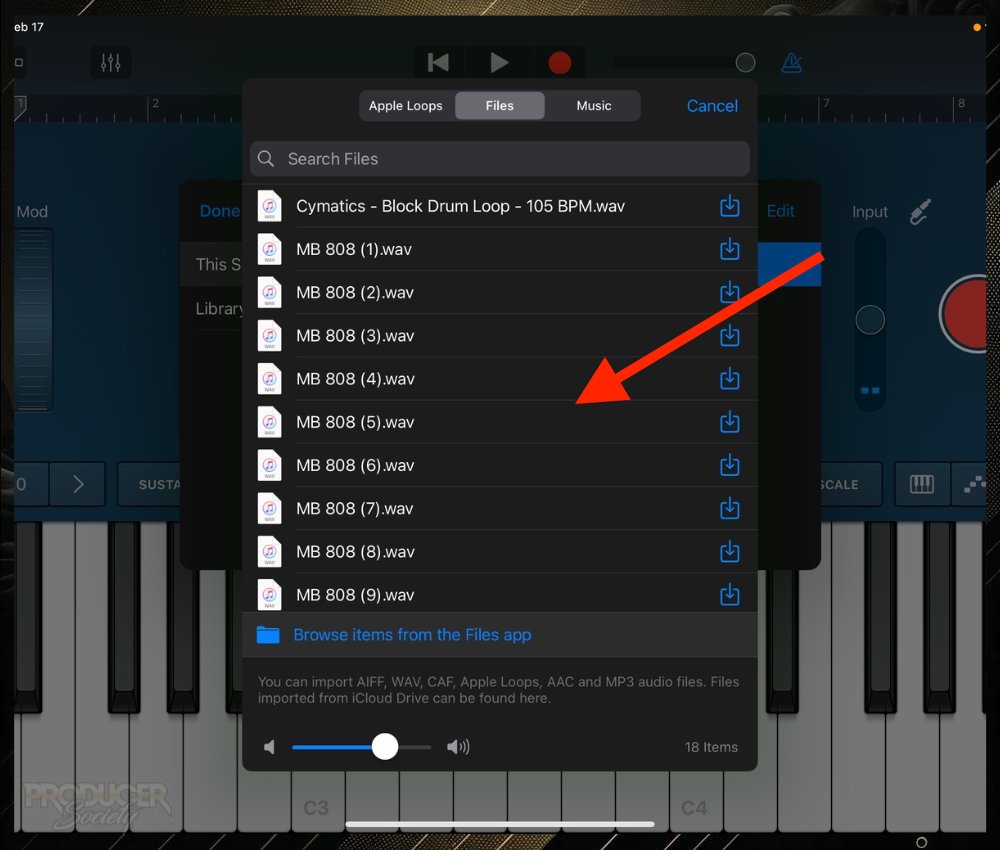
For whatever reason, some of them will say they’re “32-bit format” and cannot be used. Just ignore this prompt and load them in anyway.
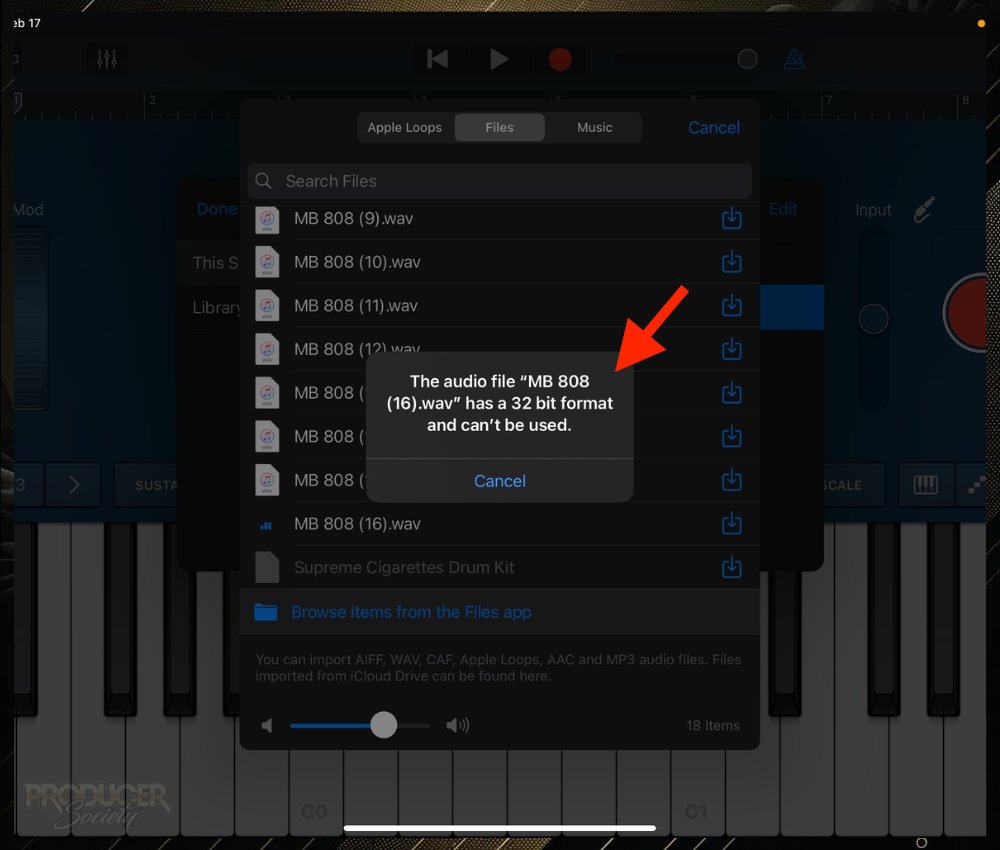
.wav files are always the most reilable. Try to ensure your drum kits are in that format.
4) Click the Sample and then Test the Keyboard
Now that your new drum kit sounds have been added to GarageBand, you can now use them on the sampler by following the steps below.
You could choose “Save to Library” for all of them, but frankly, I think this is a time-consuming and unnecessary practice.
It makes more sense to me to simply hold them in the “GarageBand File Transfer” folder and then import the files whenever you want them on an “as-needed” basis.
5) Press Record & You Can Begin Recording Your Sample
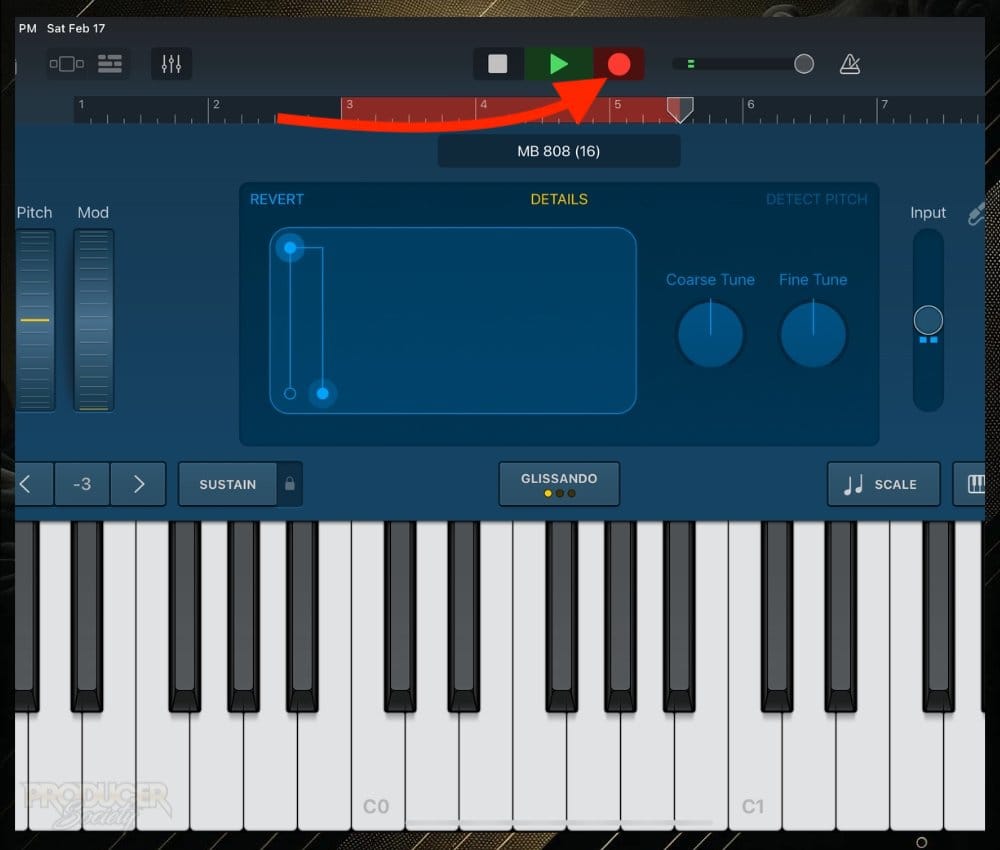
What’s annoying about the sample is that only one sound can be recorded per track. So you’ll have to load and record every single drum kit sound you want on a separate track. This video is a good demo of that.
How to Use Sitala to Add Drum Kits in GarageBand iOS
Personally, I hate the GarageBand Sampler and I much prefer using the Sitala Sampler for a couple of reasons.
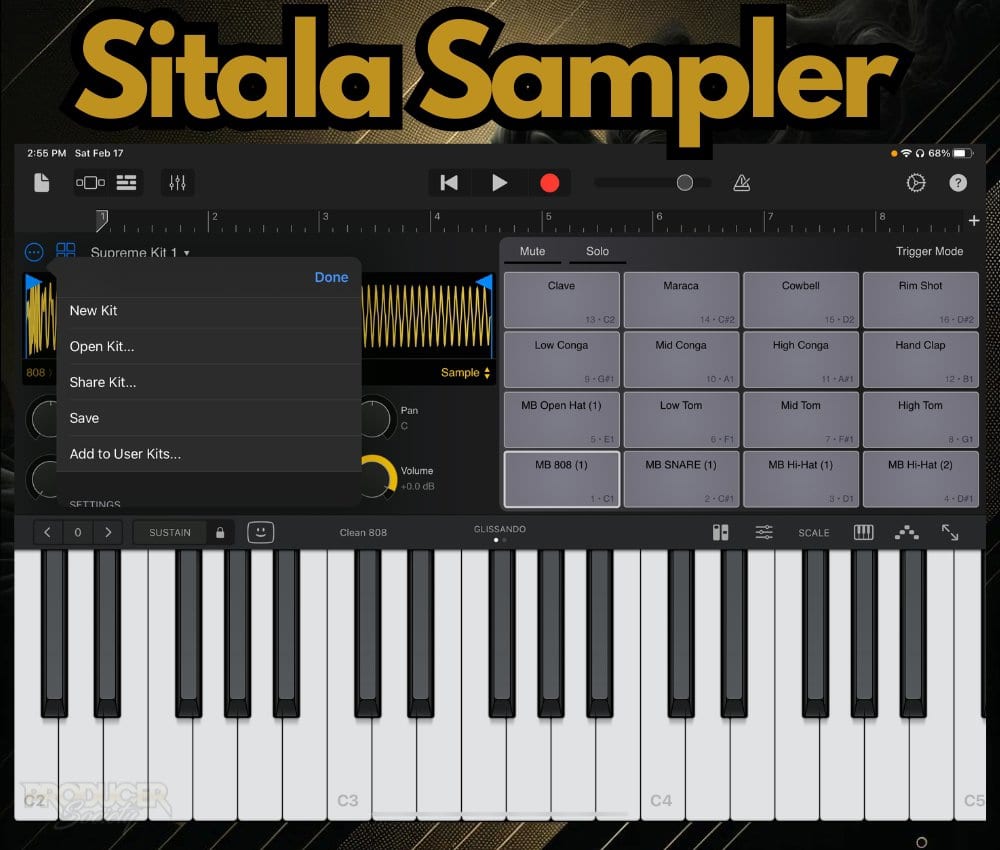
What makes the Sitala sampler special in GarageBand’s case is that you can create and then save your own drum kit to use for later.
Sure, you can do it without Sitala, but not nearly as efficiently. I start the demo for the Sitala at 04:00 in my video.
You won’t have to load each part of the kit onto a separate track like when using the stock GarageBand sampler.
It works similar to the stock Drums (as shown in the following image):
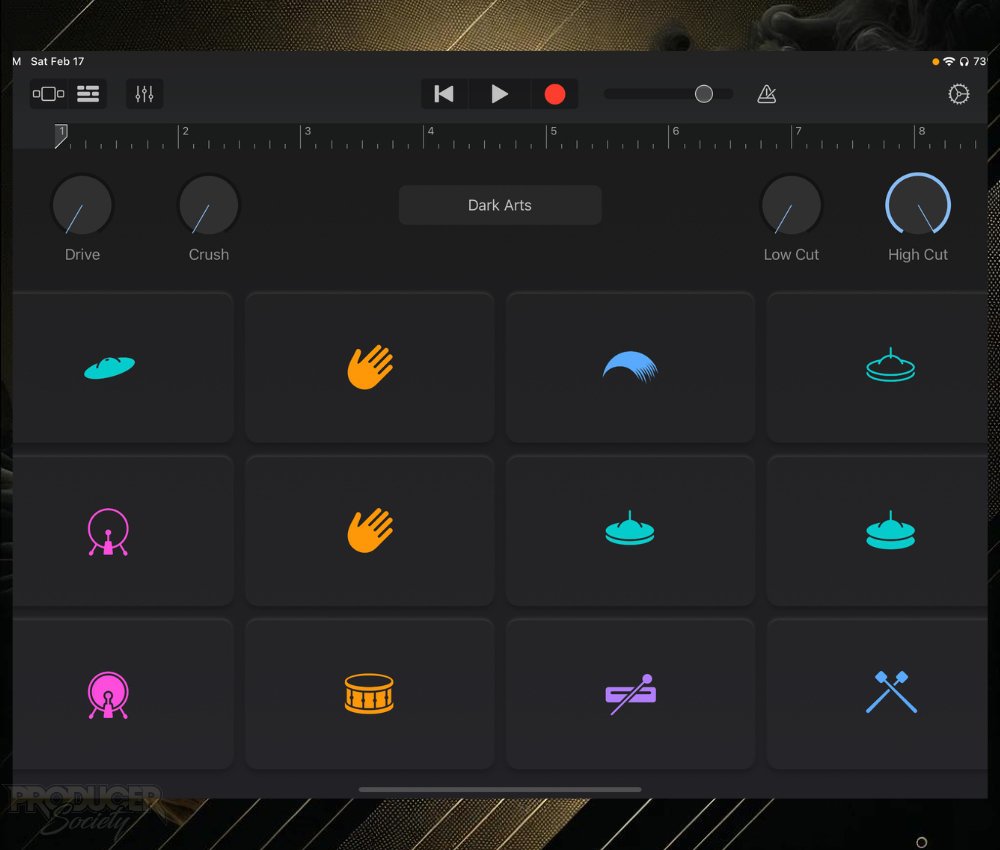
To add drum kits using Sitala, follow the steps listed below:
1) Download And Install Sitala On Your Device
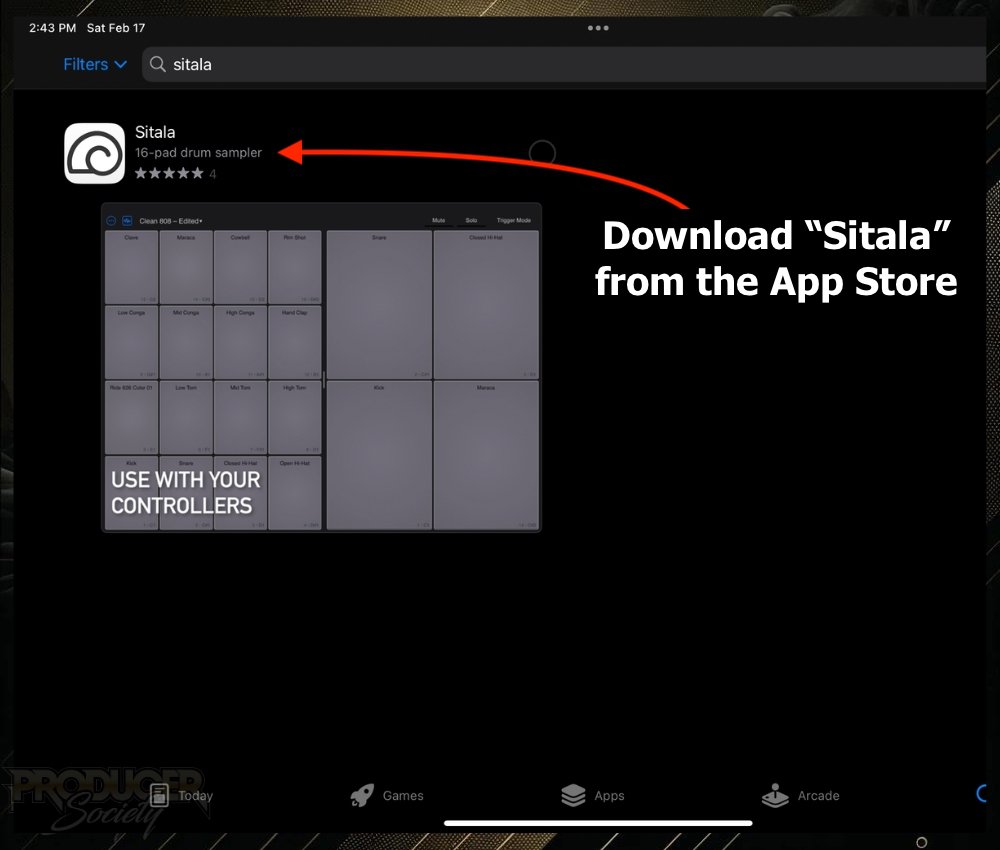
2) Launch GarageBand iOS
As you normally would.
3) Swipe Left Until You Get To “External”
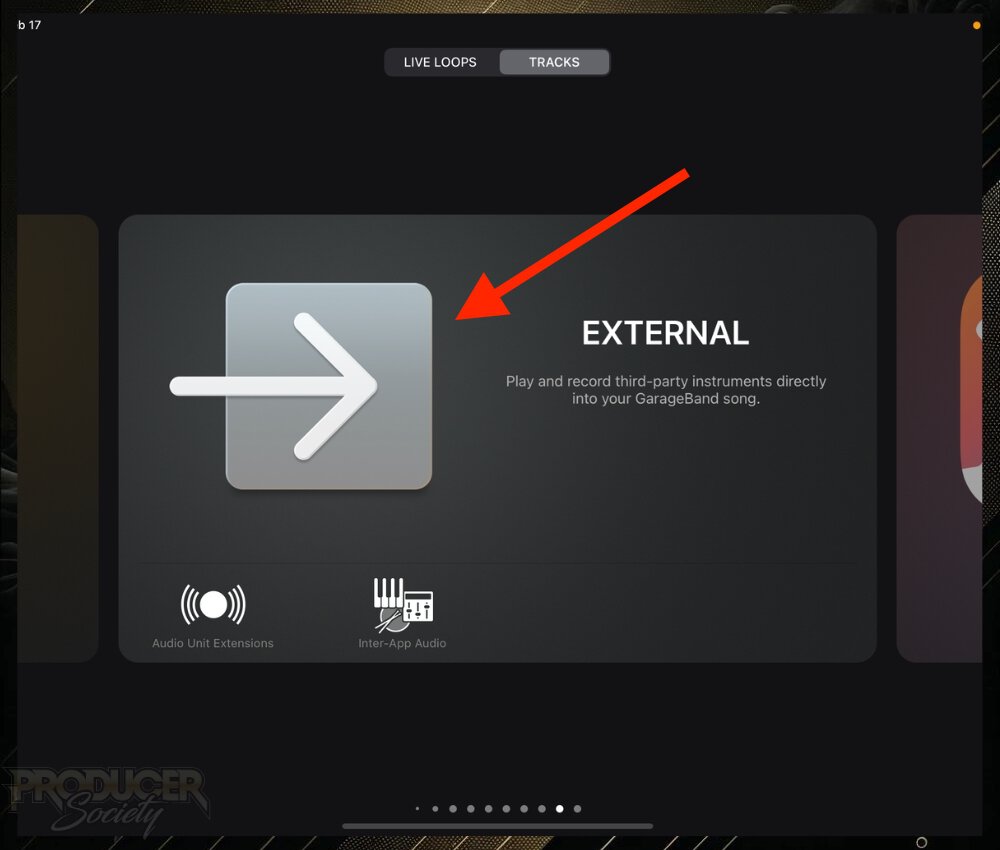
4) You Should Now See Sitala Listed Here
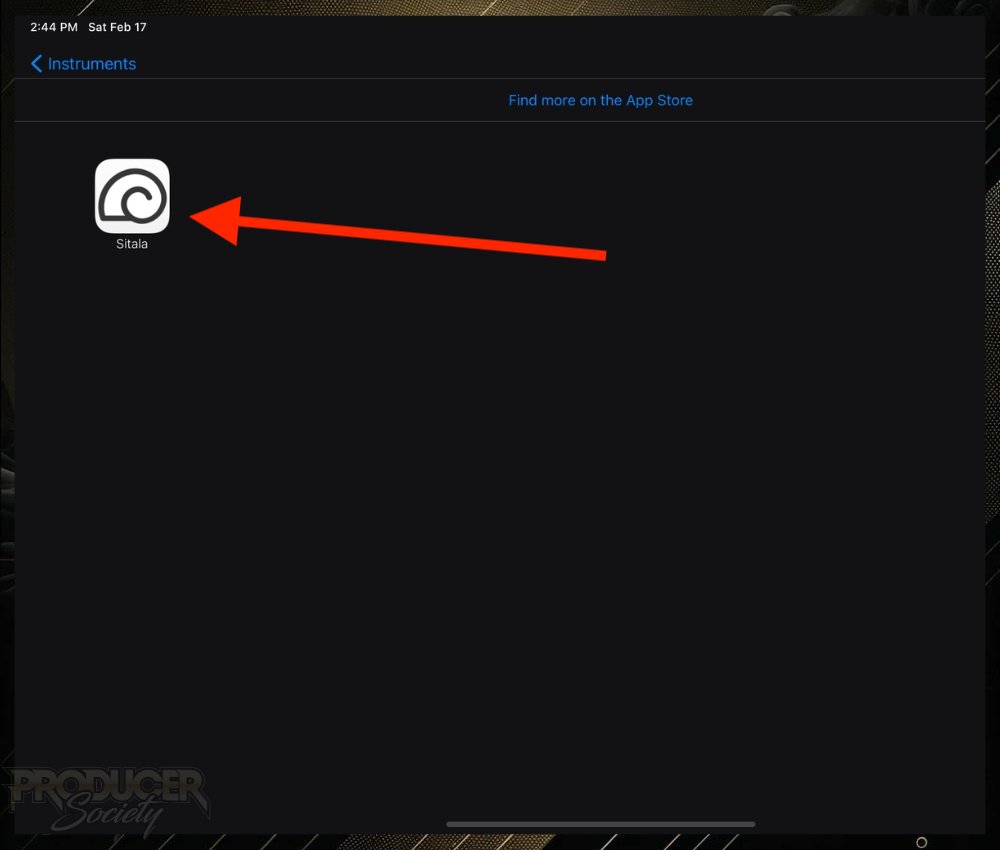
5) Launch Sitala And It Will Load With 16 Ready-To-Play Pads
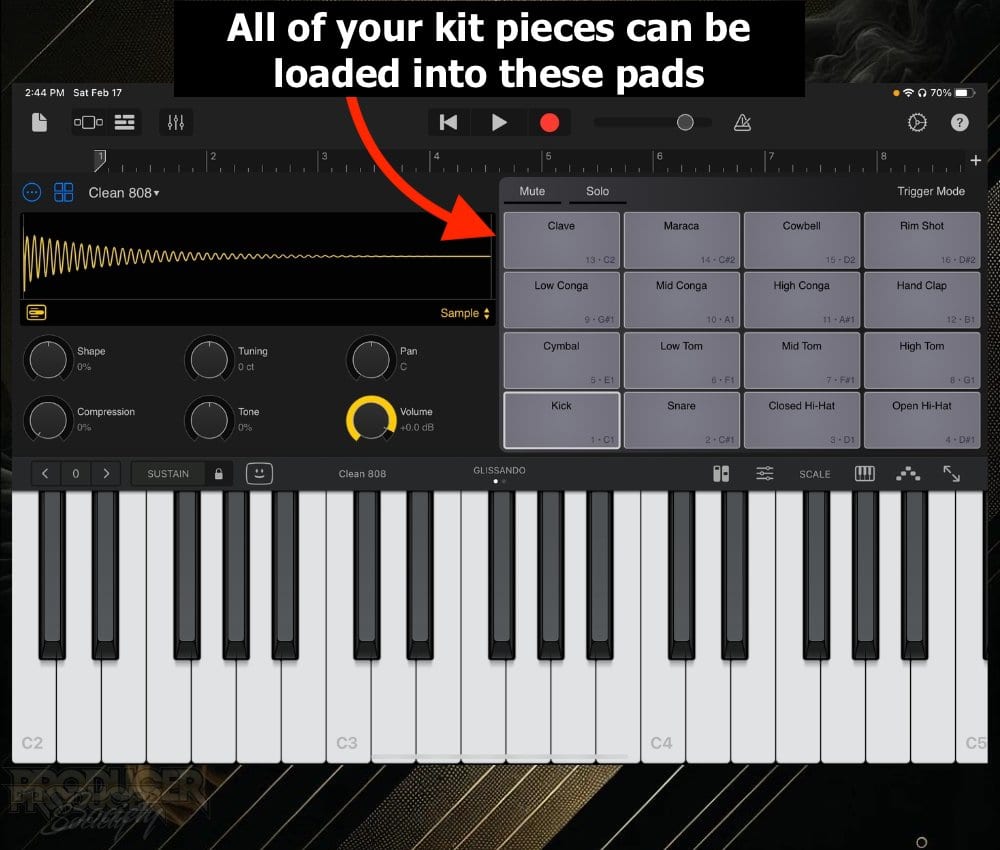
I love this thing. It works great.
6) To Load Your Custom Kit Tone, Click On A Pad
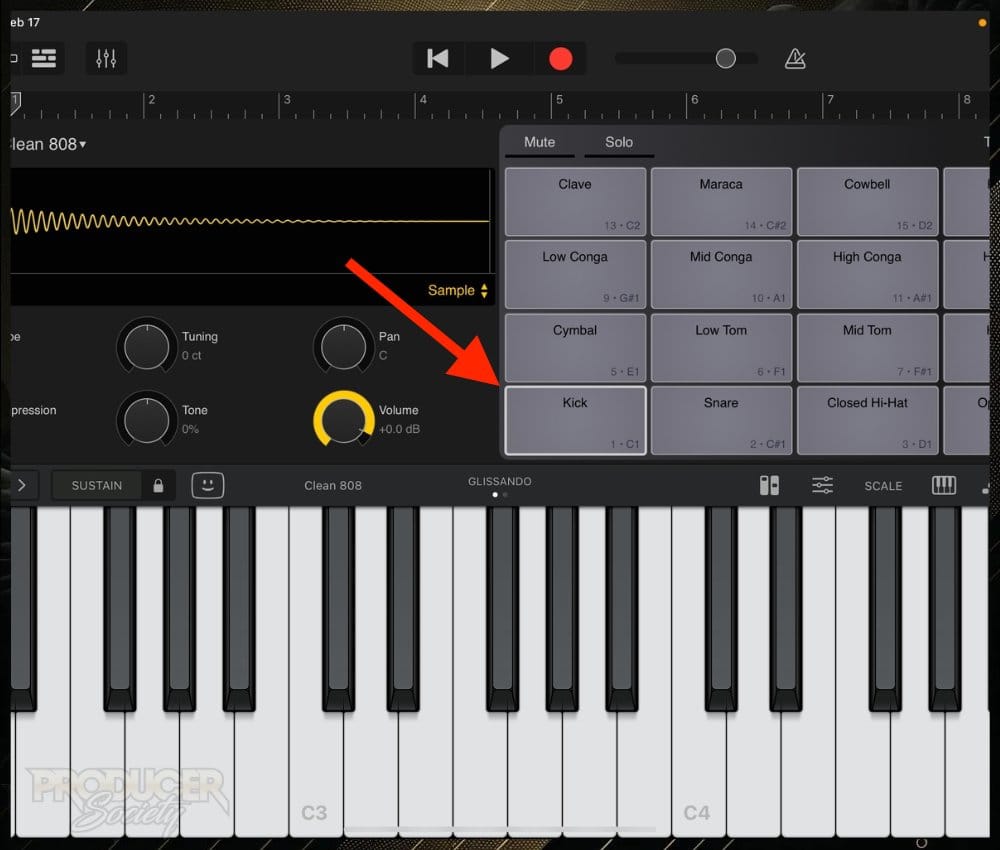
7) Click the Box Icon on the Bottom-Left of the Sample View Screen
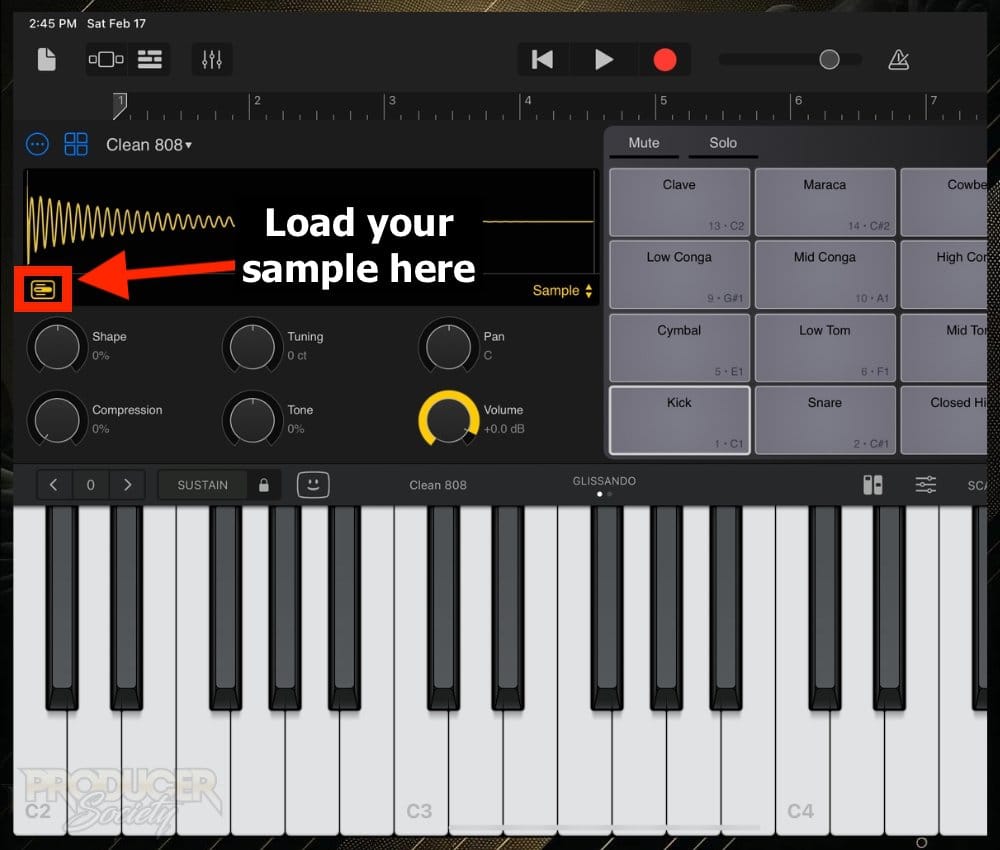
And what’s so perfect about the Sitala is that it allows you to pull samples from whatever folder is on your device. You don’t need to do all of this nonsense with the “GarageBand File Transfer” folders.
It just works the way it’s supposed to.
8) Click Your Music Production/Sample Folder
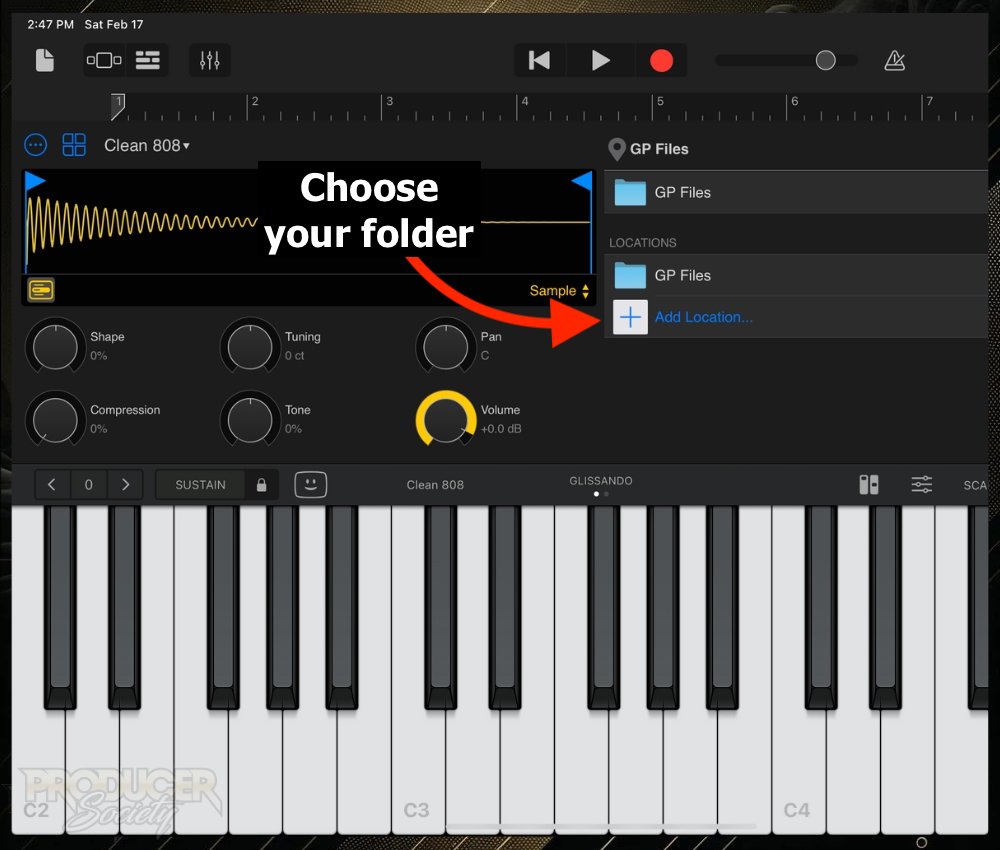
9) A Sample Browser Will Open in Sitala’s Directory
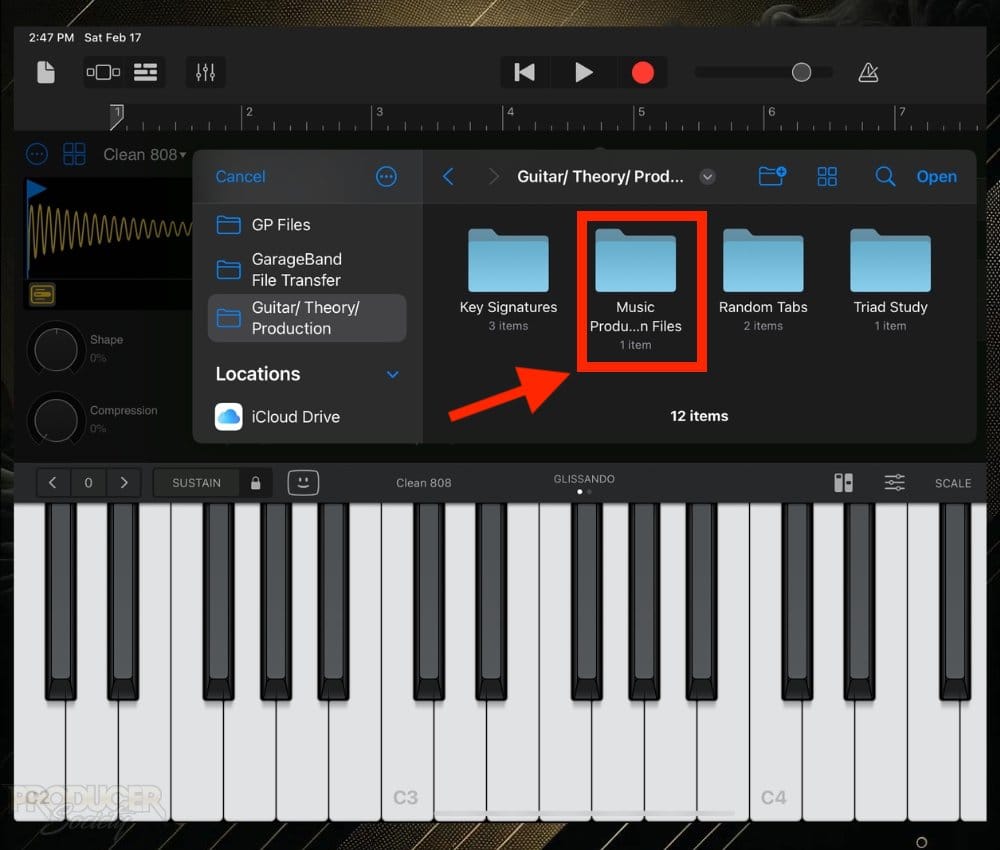
i) Select the Folder Where Your Samples Are
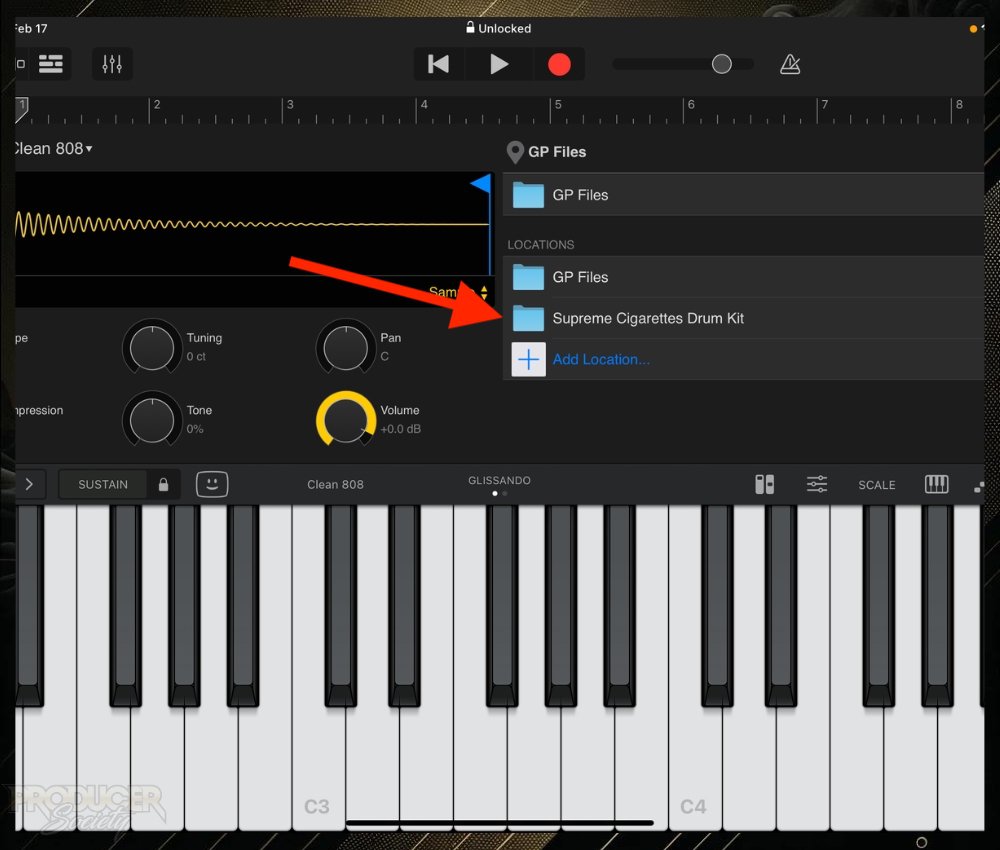
ii) Choose Your Drum Piece
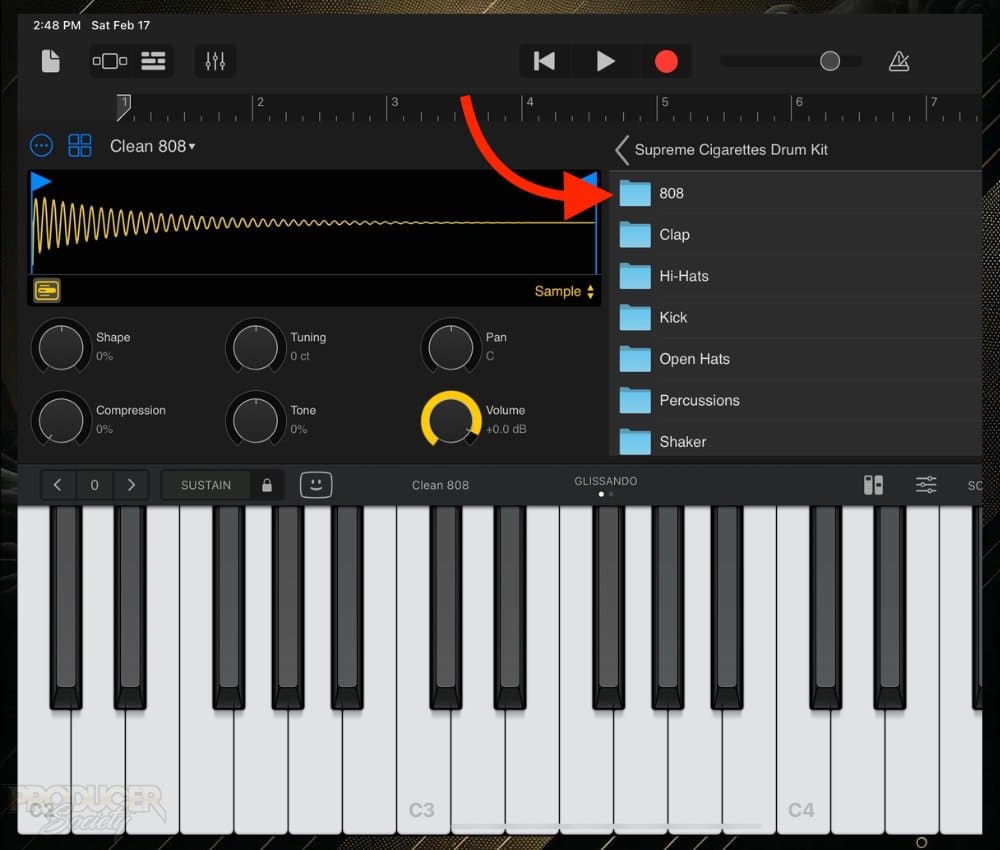
iii) Select the Specific Sample
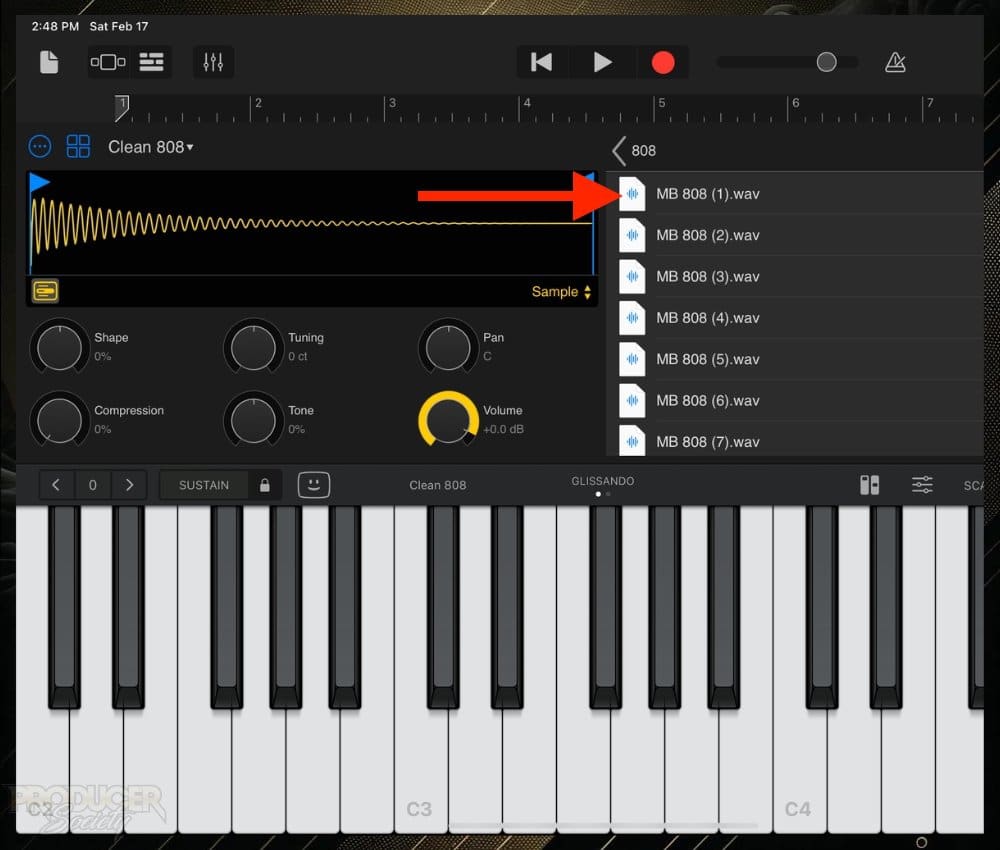
And then it’s loaded.
10) Repeat the Process for Each Part of the Kit
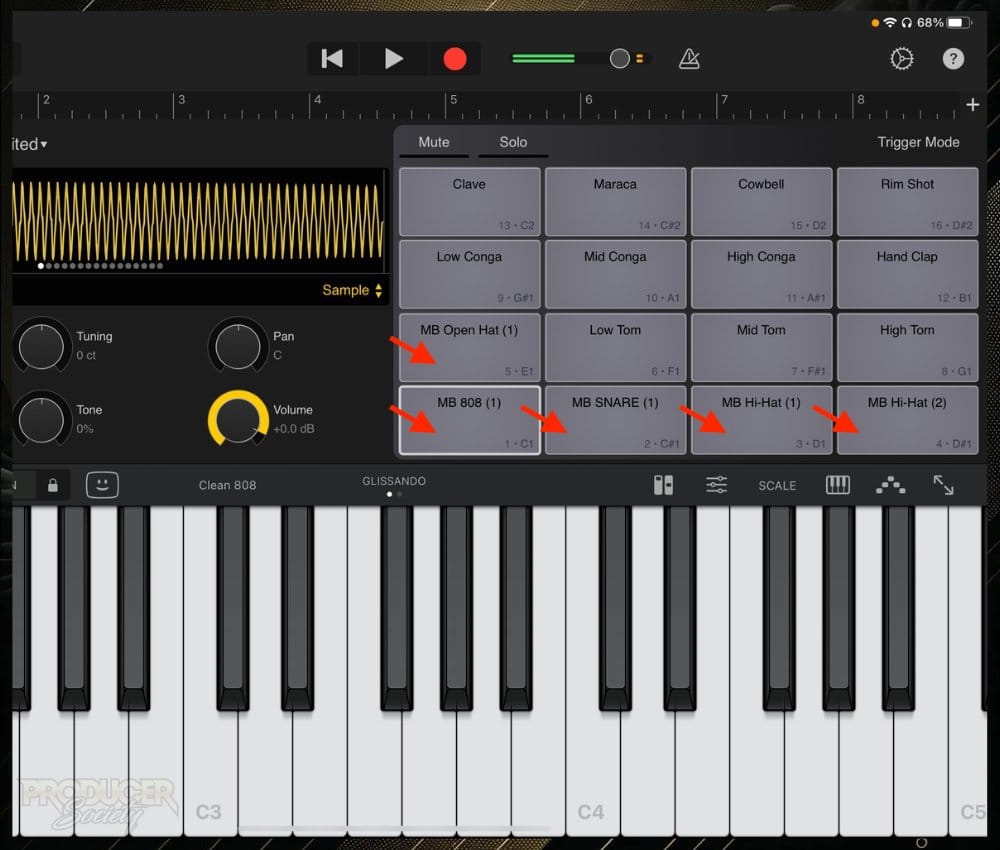
It’s great too because you also have 16 options, ie, a fully-featured drum kit with basically nothing missing. Low toms, mid toms, floor toms, several hi-hats. You have enough space for it all.
11) Click the Three Dots & Then Choose “Save” & Give It A Name
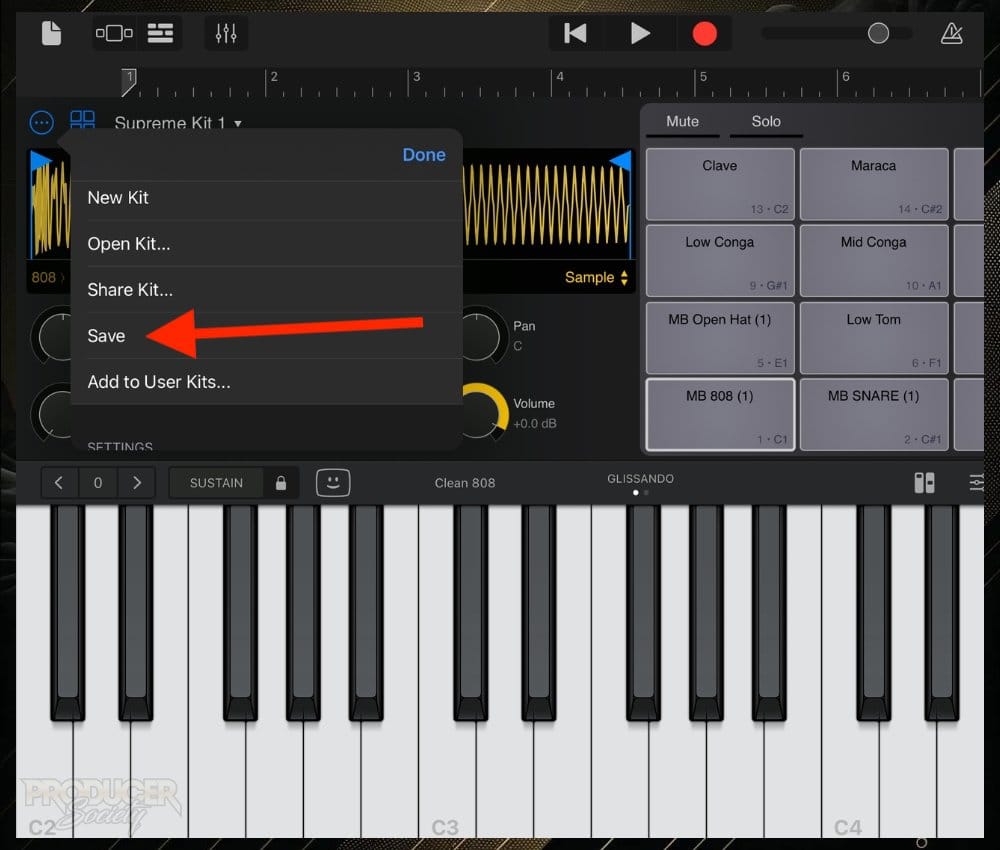
Essentially, you’ll have the ability to create and then save a kit which’ll act like a preset. When you want to use the same kit, you can just open it for next time.
The Sitala gets a 10/10 from me so far.
It’s worth mentioning that you get a few presets to try out after buying the plugin. And they’re really good.
They are the following:
1) Clean 808
2) Future Retro Pop
3) Hip-Hop Ultra
With all that said and out of the way, there’s a chance you got lost in the setup somewhere along the way. Here are 3 super common troubleshooting solutions. The biggest problem is usually the “greyed out audio” issue.
3 Troubleshooting Tips for Importing Drum Kits in GarageBand
There are 3 reasons why you’re running into the “greyed out” audio file problem. I’ve discussed this before albeit in a different context.
1) Your Files Are in the iCloud Drive
You’ll recall earlier that I said it’s best to make sure your audio samples are stored locally. Maybe some people can get away with having samples on in their iCloud, but I prefer to just store them on my device.
You could download them from the Cloud and then store them on your device temporarily, however, I have 1TB on my iPad so I just store them locally. I bought the upgraded 1TB 16GB iPad for a reason.
2) The File Format Isn’t .wav (WAVE)
Another issue is that you’re trying to use a file format that GarageBand, for whatever reason, doesn’t play nicely with. I prefer .wav because they’re the most reliable and versatile.
There are cases where GarageBand acts weird toward MP3s, and simply changing the file extension to .wav will make GarageBand accept them. I’ve discussed this in another article.
3) Trying To Import A Folder Instead of A Collection of Files
Finally, you want to import a collection of audio files, taken out of the folder, rather than the folder itself. GarageBand doesn’t like to play with folders. It’s one of the reasons why I like Sitala so much.
Thoughts or questions? Let me know what you think about adding drum kits to GarageBand iOS in the comments below.
Other Articles You May Be Interested In
- How to Make Drums Sound Good in Garageband (ALL the Tips)
- How to Make Drums Louder in Garageband [ANSWERED]
- How to EQ Drums in Garageband (An Illustrated Guide)
- How to Mix Drums in Garageband – (A FULL Guide)
- How To Create Drums in GarageBand
- How to Import Audio Into GarageBand (iOS/macOS) (SIMPLE)
- How to Add Drum Kits in FL Studio [ANSWERED]


 Written By :