 Written By :

You really don’t have to get too fancy when it comes to something like this. The simplest way of doing things is usually the best. Let’s just get right to it.
To master a song in Garageband:
1) Export your song as an AIFF
2) Import it into Garageband
3) Set up a Channel EQ, Compressor, and Limiter
4) Choose the “Pop” preset for the EQ, “Platinum Analog Tape,” for the Compressor, and then set the Limiter’s “Gain” to +2.0 and the “Output Level” to -0.1
The brief summary above is a quick and dirty way of going about it, however, for this walk-through, I’ll use a song that I created recently that includes a lot of MIDI instruments in addition to a guitar recording to fully show how I go about doing it.
Truthfully, if you’re reading this guide, chances are you’re not a professional mastering and recording engineer. You may have to go somewhere else for more advanced tactics, for instance, Bobby Owsinski has a great book on mastering.
What You Need To Know First
When you’re just starting out, there are just a few basic questions in need of answering, and each of the three links below take you to articles and tutorials that I’ve written specifically for the subject.
For instance, what is compression and how do we use it? How do I adjust EQ so it actually sounds good? What’s the point of a limiter?
How do I export my music to SoundCloud and YouTube so it’s 1) actually listenable, and 2) as loud as my competition?
In fact, how do I upload my music to YouTube in general? You could even be in the stage where you’re trying to get accustomed to the MIDI keyboard and for that I’d recommend grabbing PianoForAll.
These are the kinds of question we want to answer at first. And this tutorial explores just a few of them.
In this guide, we’re primarily going to explore how to get a decent sounding mix uploaded to our favorite platforms and have it sound good.
The links above, however, we’ll answer some of the other questions.
Let’s start with the check-list
1) The first thing you want to consider is your VU meters on all of your track regions.

As I’ve mentioned in my mixing guide, you want to make sure your VU meters are going into the green for the majority of the track and only the yellow during the loudest parts of the song.
Your VU meters should never be clipping, whether we’re talking about the software instrument tracks, recorded instruments, loops, or other miscellaneous recordings.
If you’ve mastered a track where the VU meters are going into the red, you’ll notice the distorted sound in the final product.
2) The next thing you want to do is ensure your master volume slider on the top right-hand side is turned down to +0.
Although, it’s not a big deal if your master volume meter is going into the red.

I’m not entirely sure why the master volume doesn’t matter so much for this phase, but either way, I’ve noticed that if it’s going into the red a little bit, it doesn’t matter, but if it’s cranked, then it does.
3) There should also be no plug-ins running on your master channel. To check this, hit ‘B’ on your keyboard to bring up your Smart Controls, and then click on the “Master” option beside where it says “Track.”

Usually, by default, the Channel EQ plug-ins will be on, but there won’t be any boosts or cuts added to it. Just turn that bad boy off.
It’s ok if your individual track regions have plug-ins running on them, in fact, you can have even more of them if you want. It’s not a big deal.
4) By hitting the ‘A’ key on your keyboard, you can bring up the Automation track to see if there are any adjustments in volume you want to make.

The Automation channel is handy for setting up a volume increase or decrease depending on where you want changes in the mix.
**However, remember that you don’t want to increase the volume to a point in your mix where it’s clipping.
This is quite the annoying problem to have, because you’ll wonder why your song is clipping at certain points but not others.
Say, for example, you want the last part of your track to hit really hard, just hit the ‘A’ key, select the Yellow line to drop Automation points, and then adjust the volume according to an incline or a decline.
It’s fairly intuitive, so you should get it right away.
Mastering, like creating music, is an art form rather than a science, so, none of the following advice is meant to be like the only way of doing it. Everyone has a different way of making music.
Personally, I like to master a song as quickly as possible. Hopefully, I can have it finished in around 15 to 20 minutes, but sometimes, it takes even longer than that.
For this tutorial, we’ll run through how to master using just a few plug-ins, notably, the compressor, the Channel EQ, the multipressor, as well as the limiter.
How To Master Using My Step-By-Step Process
1) The first step in the mastering process is to check off all of the boxes that I outlined in my checklist above.
You’re ready to export the track as an AIFF file. An AIFF file was created specifically by Apple Computers back in the late 1980s, and it stands for an “Audio Interchange File Format.”
An AIFF file is an uncompressed file format. Therefore it’s very large and high quality compared to a regular mp3 file. An mp3 is quite small.
You can export a track in Mp3 format or a WAV if you want, but the AIFF file is going to give you the highest quality recording to work with, so I’d suggest using it.
2) Click on the “Share” button in the top of the toolbar and click on the button that says “Export To Disk.”
3) In the drop-down menu, click on the circle that says, “AIFF,” and then hit the “Export” button.

From here, I make sure I’ve exported the song to my desktop rather than in my files somewhere because I’ve noticed it kind of disappears into the wilderness otherwise.
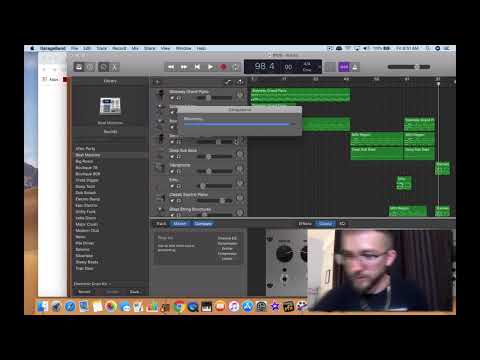
4) At this point, I’ll normally drag and drop the AIFF file from my desktop back into Garageband beneath all of my track regions.
In other words, I like to master it first using plug-ins and what not in the original file like you can see below.
The reasoning for this is that you can easily adjust the volume of other tracks without having to repeatedly open up your original file, and then go into the AIFF mastering file over and over again.
5) Mute all of the other tracks and play the recording to see if it’s clicking at any point in the song.

6) Once you’ve ensured that it’s not clipping, you can open a new project and drag and drop your AIFF file into the Workspace.
7) At this point, I typically only use three plug-ins, the Channel EQ, the Multipressor or the Compressor, and the Limiter.
To make your mix sound good, that’s truly all you really need to maximize the volume and ensure that it sounds as good as your competition, although, you should definitely invest in more premium plugins at some point in the future.
When I first started mastering my own tracks, I almost always used the default plugins, however, what really took everything to the next level was when I got FabFilter’s mastering bundle on my Product Page which includes a compressor, EQ, a limiter, and a multipressor.
I usually go in the order of Dynamics > Effects > Limiters.
Although, sometimes I’ll start with the multipressor/compressor first, then the limiter, and then finally the EQ at the end.
***It’s worth noting that the order of your plug-ins matters quite a bit.
In this case, I used the Channel EQ first, the multipressor, and then the limiter.
Experiment with the order of the plug-ins to see what you like.
8) All of the following steps are really up to you, but for the sake of this tutorial, I’ll just assume you want to increase the volume, reduce distortion and clipping, and upload it to whatever platform of your choice.
a) Go into the Channel EQ settings, and then drop the EQ around 35 Hz by +3.0 – + 4.0 dB. Typically, we want to increase/decrease the EQ by a maximum of + 4.0dB.
I also drop the highest frequency, 20,000 Hz, at the end.

b) Then, you want to do what is called an EQ sweep. What that means, is you pull the EQ points all the way up and then literally sweep it across your screen to find where the undesirable sound is.
Once you’ve found it, you can drop back down to a small decrease of +2.0 dB or so.

c) I almost always increase the EQ from 425 Hz until 15000 kHz, but as I said above, by around +1.0- +2.0 dB. The reason why is I like to add a bit of “brightness.”
d) I’ll also increase the frequencies at 115 Hz by around 4.0dB, but then I’ll reduce the “width” of the increase.
You do that by, first, clicking the point once or twice, and then going into the Q setting and hitting your down/up arrow on your keyboard.
It’s a bit annoying at first, but you’ll eventually get on to adjusting the Q without constantly exiting out of the Channel EQ plug-in.
9) The next thing I move on to usually is the Multipressor or Compressor.
Now, the Multipressor with Garageband comes with a series of presets, rather than individually adjustable knobs, so it hardly takes any time at all.
You can experiment with the ones you want the most, but what I like to do is just slap on the Final Hip Hop Compressor.
I feel like this gives the track an added punchiness without destroying the dynamics of my song. It sounds pretty good.

You can also increase the compression of the track instead.
Compression is alright to use, but frankly, what I don’t like about it is that it tends to squeeze all the good parts of the song right out of my mix unless of course, I turn down the ratio.
In my opinion, compression is best used on individual channels, for instance, like I’ve explained in my guitar-compression article, I often use it on my guitar recordings to boost the quieter sounds that didn’t shine through on account of my imperfect playing.
10) The last parameter to adjust in the mastering process is the limiter.
Garageband’s limiter, like the multipressor, only has a couple of different parameters. In the case of the limiter, it has the “Gain” and the “Output Level” (more on the limiter in my guide).
Of course, the “Gain” will turn up the strength of the signal on the entire track, whereas the output level is the part of the limiter that controls just how much limiting is taking place.
It’s kind of like the compressor’s ratio option.
From what I understand, the point of distortion is usually around +0.0dB so the least amount of limiting possible is -1.0dB.
That’s literally one dB below distortion, so I don’t have to worry about over-limiting my music.
I’ll turn the gain up to around (+2.0 dB) – (+3.0 dB) and then the output level sits at (-1.0dB) or (-2.0dB).

In my experience, the limiter is more of an emergency control. It’s kind of like what I slap on at the end of the track just to ensure that no undesirable sounds are coming through my mix.
However, the limiter can also be used to shape dynamics, but I’ve never used it in that way, so I can’t help you there.
11) After you’ve finished mixing and mastering your song, you can just click on “Share” at the top of Garageband’s toolbar, and that will give you the option to upload it to iTunes, SoundCloud, as well as YouTube.
But let’s be honest, your mix isn’t going to be perfect on the first try. (Producers love to poke fun at this phenomenon using Instagram memes).
What I normally do at this stage is the following:
Due to the fact it usually takes a long time to upload your music to SoundCloud or YouTube, what I’ll do is I’ll quickly upload it to iTunes, and then listen to it from there, checking to see that there’s no distortion and everything sounds the way that I intended originally.
If it doesn’t sound good, then I delete the track from iTunes and do it all over again.
I think it’s important to note there are some things you want to avoid. For instance, if you don’t have enough bass, don’t bother cranking up the mids in the EQ stage just to hear more low-end.
You’re much better off to go into the original track that you made, turn up the bass, re-export it as an AIFF file back in the workspace, and then master it again.
But the good thing here is the fact you can save your original mastering file’s plug-ins settings, the EQ, Limiter, and Multipressor, and then simply drop your track back into it with the original settings and you don’t have to do everything over again.
Repeat until you’re happy with the final product.
YouTube Video
Other Articles You May Be Interested In
- The Last Reference Track Mixing Tutorial You’ll Ever Need
- How To Mix A Beat In GarageBand
- Mixing In Mono With GarageBand (How To & Why It’s Important)
- How To Mix Using Garageband
- How To Mix Vocals In Garageband
- 24 Basic (And Actually Useful) Mixing Tips For GarageBand
Conclusion
Anyway, I hope this was really helpful for you. Make sure to share this on social media if it was, or check out the list of my favorite products to use with Garageband.
that made me laugh . you made a simple thing really complicated
Glad you enjoyed it.