Getting a much louder project, regardless of DAW, is probably one of the most asked questions.
Usually, I find the answers to be too esoteric and philosophical. Turns out getting a loud project is easier than I thought.
The easiest way to make your GarageBand projects much louder is to load 3 to 4 limiters on the master track, and then set the Gain to +4dB and the Output Level on each to approximately -0.5dB.
Load the YouLean Loudness Metering Tool after and pay attention to the Integrated LUFS (-6dB to -10dB).
The Steps to A Much Louder GarageBand Project
1) Turn Off Any Mastering Or Other Plugins

It’s a good idea to run through the plugins and effects on your individual tracks as well to see if any are enabled that should be turned off. Now is your final chance before exporting, otherwise, you’ll have to do everything again.
2) Set Your Levels in Your Mix and Export As WAVE

Get your mix to sound good to your ears and ensure you’re not running into the red at any point of your project, including the loudest part.
To export your file, you have to first click Share, then Export Song to Disk, select Desktop, choose WAVE, and then finally hit “EXPORT.”
That’ll send it to your desktop where it’ll be easy to find. Its also a good idea to ensure you’ve selected “uncompressed 24-bit” in the “Quality” section.
3) Open A New Project and Import Your WAVE

Once it has been loaded into GarageBand, press Play and give it a listen once to ensure there are no problems you didn’t notice earlier.
4) Turn Off Channel and Master Plugins

For whatever reason, there is usually an enabled Channel EQ by default on the master track but without any adjustments made to it. They include an Echo in the Master Effects as well.
5) Load 3-4 Limiters on the Master Track

It’s probably more common to spread the load among 2 or maybe even 3 limiters. That said, using 4 of them and setting the gain a bit lower is what I prefer to do.
You can also reduce the number of limiters you use by increasing the “Gain” on each one. However, I prefer to split the load among more of them and have the increase in gain smaller.
6) Set the Gain to +4dB On Each & Output Level to -0.5dB
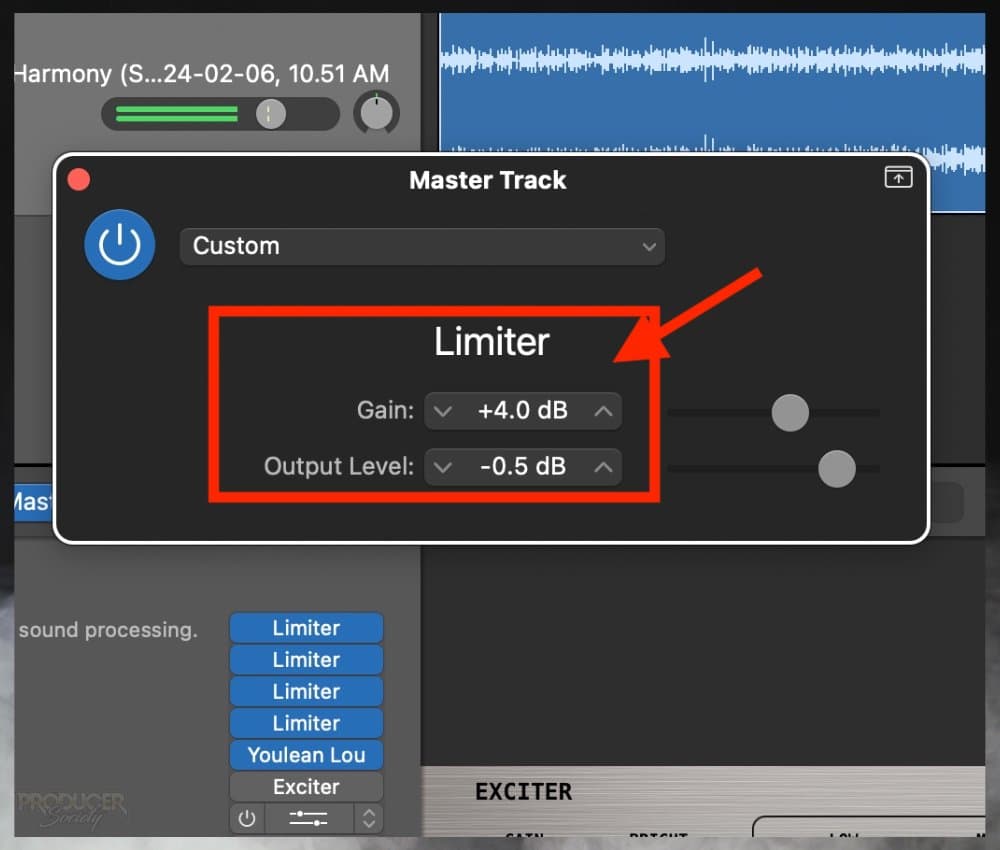
You want to make sure your master never exceeds 0.0dB. I believe the most common limit people set for themselves is -1.0dB.
Keep in mind that a higher output level (toward -0.1dB) gives more room for your track to be louder, and a lower output level (toward -1.0dB) leaves less room before squashing occurs. This could result in pumping and other unpleasant sounds.
However, because this is basically the final master, I set it to -0.5dB so I can get my project as loud as I can.
7) Enable the YouLean Loudness Meter Tool at the End of the Plugin Chain

You wouldn’t want to put the meter before the limiters, because then you won’t get the gain boosted reading.
8) Let the Whole Song Play and Look at Integrated LUFS

I might even do the dishes or some other household chore while the song is playing. Then I come back and have a look at it.
If you’re impatient, you can do as I said in the image’s annotation and drop the Playhead Arrow at different sections of your project. This will also give you an adequate reading. Don’t forget to include the loudest parts of the track as well.
It’s better to listen along with it though for many reasons, several of which I’ll mention next.
9) With Good Monitors, Listen for Pumping, Distortion, or Other Unpleasant Sounds
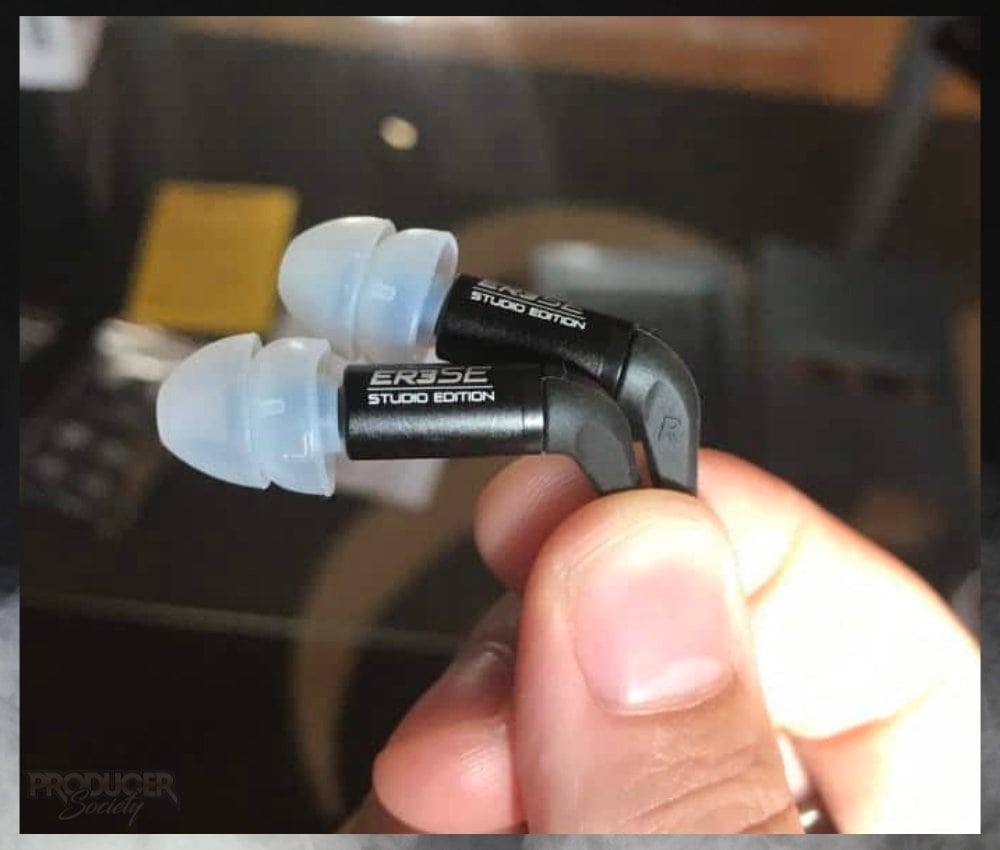
That said, I absolutely listen to the mix across several different platforms including:
1) AirPods
2) iLoud Micro Monitors
3) Google Home Speaker
*Many people prefer to use their car’s speaker system for the ultimate test.
I have so many pairs of headphones and speakers now that it would take all day to test my mix on all of them. I like to listen to my own music, so I’ll listen to my projects on speakers and headphones that I, myself, like to use.
10) Turn the YouLean Meter Tool Off & Export As A WAVE File

Then you can export your project. I don’t think it makes a difference though. To me, it just makes sense to turn it off because it doesn’t need to be there.
11) Load the File Into Music & Compare the Volume with Professional Tracks

Check for distortion, pumping, and crushed-sounding cymbals. Typically, the drums are what present the biggest problem, but not always. It’s up to you though.
Before we wrap this up, let me give you 5 quick tips. Some of these are tips that I’ve already mentioned in passing but I’m adding more detail and context.
5 Tips for A Louder Project in GarageBand
1) Make Sure Auto-Normalization is Turned Off
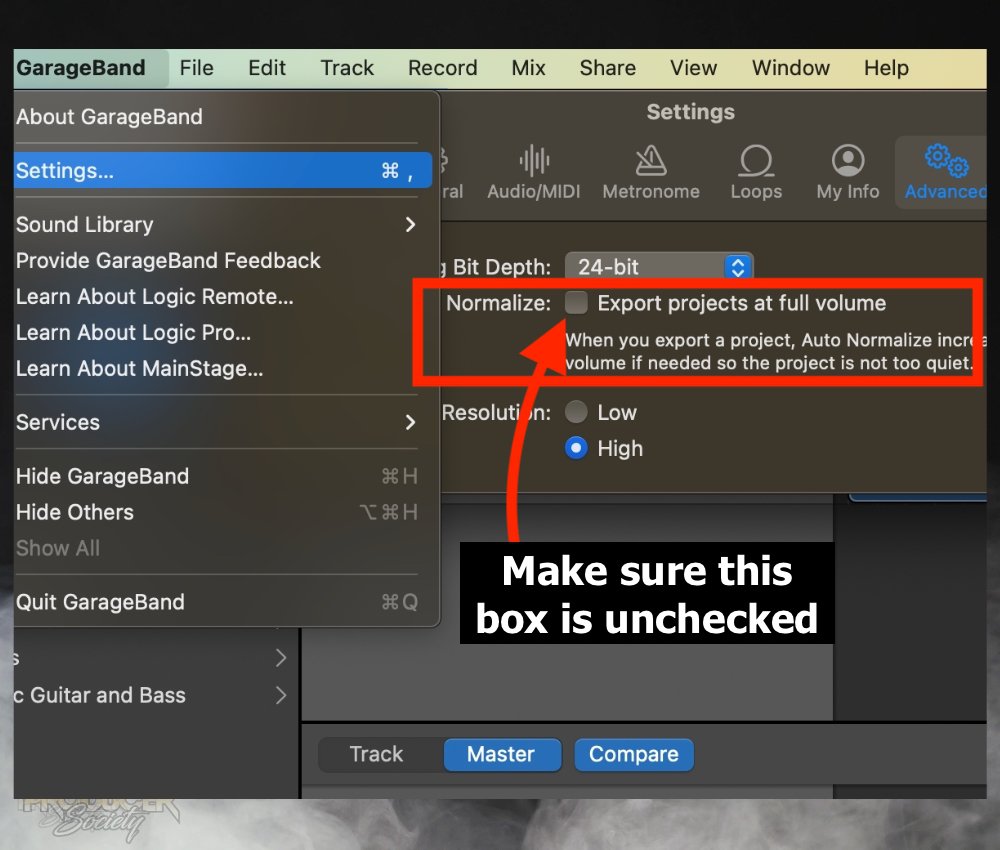
Auto-normalization basically exports it as loud as GarageBand thinks it should be. It’ll do an ok job, but it won’t be up to the standards that you’re looking for.
I’ve had this box de-selected since I started using the software in 2017 which I wrote in my articles years ago.
2) Watch the Low End In Your Mix
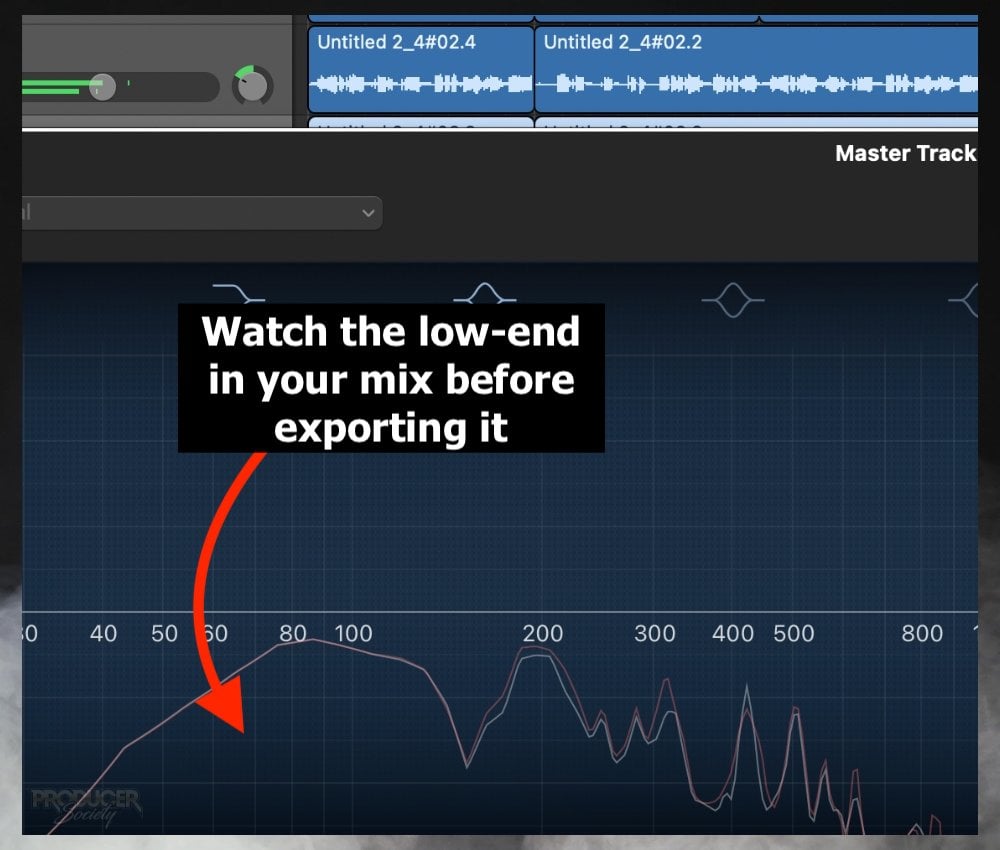
In my experience, the low-end of the mix is the busiest part. It’s the part that presents the most challenge when it comes time to finally master the project and get it to a competitive volume.
I’ve re-mixed tracks repeatedly, with each track successively seeing its bass frequencies lowered more and more each time. If you want a really loud song, I believe the key is to get the low-end figured out the most.
In other words, your instruments, sounds, and vocals should be EQ’d in such a way where everything fits together like pieces of a puzzle.
If your kick is really “boomy,” you might want to reduce the 80-120Hz on your 808 or bass guitar. I’ve talked about this before in my guide to Channel EQ.
3) Go Easy on Compression in the Mix
Another thing that I’ve found from experience is that too much compression in your mix will destroy your song when you go to master it.
Use compression only with purpose and only where necessary, otherwise, it’ll get in the way later.
People say that compression is the secret to getting your project loud because you attenuate the loud peaks and increase the quiet parts, however, that’s hard to do without crushing your track.
4) An Integrated LUFS of -23dB for the Mix Is Decent

Any fewer dB (toward -30dB) and you’ll need 6 limiters to get the gain to where it should be. But any more, and you don’t have enough headroom.
5) Use Option + Click to Duplicate Plugins
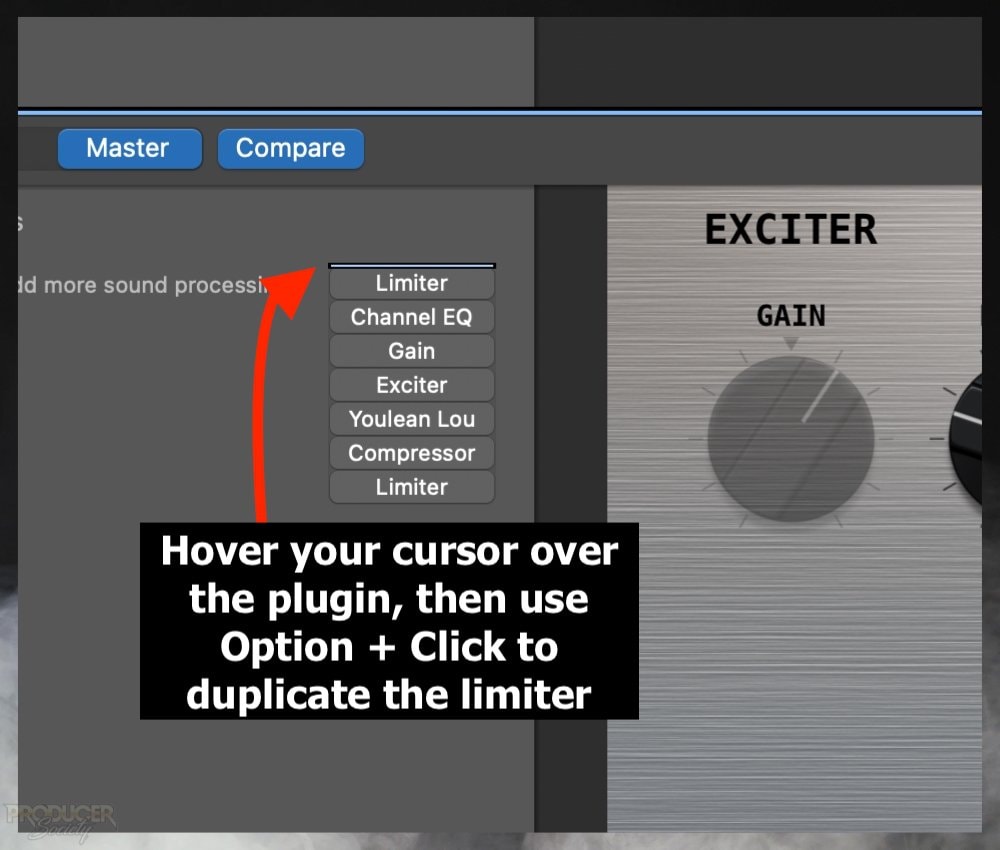
For more keyboard shortcuts, go to my other article.
If you have any tips, thoughts, or questions, don’t be afraid to let me know in the comments. I’m curious to hear what you guys have to say.
Other Articles You May Be Interested In
- Why Are Garageband Songs So Quiet?
- How to Master A Song In Garageband
- How Loud Should Vocals Be? [ANSWERED – With Examples]
- How to Make Drums Louder in Garageband [ANSWERED]
- Why Are My Songs So Quiet in FL Studio? +7 REAL Solutions


 Written By :
