It took me a hot minute to figure out how to loop in FL Studio Mobile, but I eventually got it.
To loop in FL Studio Mobile, click on the MIDI/audio clip with your finger just once until the two grey dots appear on both sides. Grab the grey dot on the right, then drag the clip until it’s as large or small as you want it to be, depending on how many times you would like for it to repeat.
But wait, there’s more to it. It’s super important that you ensure the beginning of your loop has zero dead space, at least if you want your loop to repeat in a seamless fashion. If there is any dead space at the beginning of the loop, of course, you’ll see that the dead space repeats as well, which isn’t what we really want.
How to Loop in FL Studio Mobile – [Step-By-Step]

1) Ensure There Is No Dead Space At The Beginning Of Your Loop

There are a couple of ways of ensuring there is no dead space or emptiness, whatever you want to call it, at the beginning of your loop. You can long-press on the clip, select ”Edit,” and then access the Piano Roll.
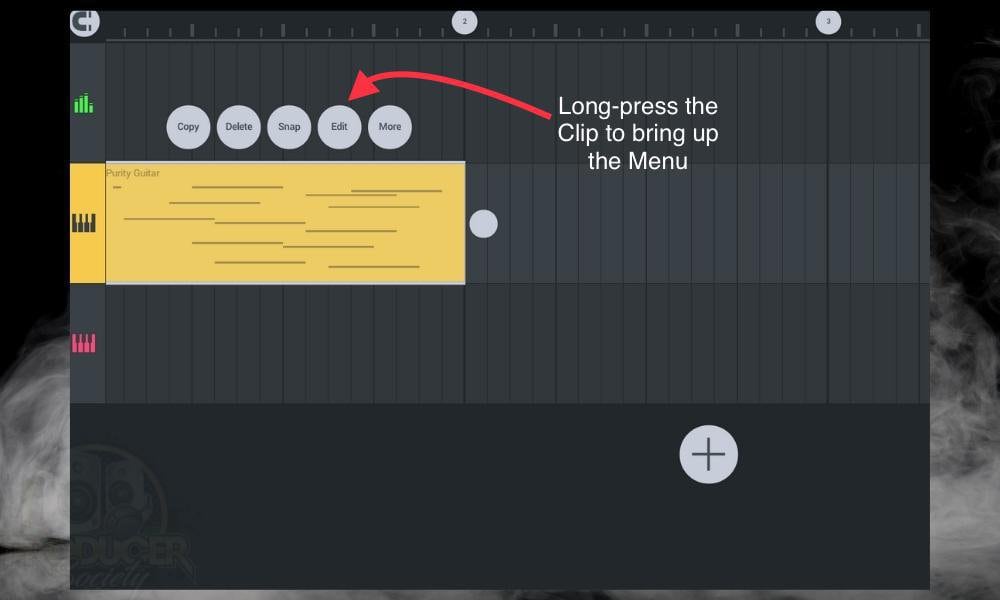
From there, you can long-press the Playlist and then drag a rectangular box around every single note and move them toward the beginning of the bar.

This will give you a seamless loop when you want to. The next thing you can do is select all the notes again and make them longer. Moving on from that, after you’ve ensured you have a perfect loop that’ll sound good when it’s repeated, you just have to tap on the clip.
2) Tap on the Audio or MIDI Clip Until The Exterior Grey Dots Appear

3) Pull on the Grey Dots to the Right to Extend the Clip

Another thing that’s worth mentioning is that you could also copy and paste the notes again to increase the length of the bar.
To do this, copy all of the notes by selecting all of them with the long-press rectangular box, as I showed you before. Long-press on the playlist where you want to paste the notes and a little circular shape will pop up with the word ”Paste” on it. Click on it.
This will extend the length of your loop, but I don’t really consider this as a fast loop, it’s just copying and pasting the notes to make it longer. Ultimately, looping in FL Studio Mobile is a lot like creating a loop in GarageBand iOS, it just takes a minute to figure out the minute differences.
One of the main differences between FL Studio Mobile and GarageBand iOS in this regard is that the former doesn’t automatically snap to the grid; you have to set it up that way. It’s also harder to find the beginning of the loop after having pressed on the ”Edit” button to access the Piano Roll.
Another difference I’d like to point out is how you can zoom in and out on the FL Studio Mobile playlist, either to make it wider or longer. As a matter of fact, I really appreciate that feature of FL Studio Mobile and consider it as a leg up on GarageBand iOS. Let’s dive into how to do that now.
How to Make Your Loop Longer in FL Studio Mobile
As I said, one great feature of FL Studio Mobile is the flexibility and versatility of the Playlist, which is the equivalent to the Workspace in GarageBand iOS.
You can zoom in on the Playlist or zoom out, and during this process, you can choose the length of your bars, phrases, your entire song, as well as your loop. This means your song would be 97 bars long if you wanted, 350, or just 10 bars.
In simple terms, the zoom in/out feature allows you to change the length of what you’re working on, which is something that all mobile DAWs should use, in my opinion.
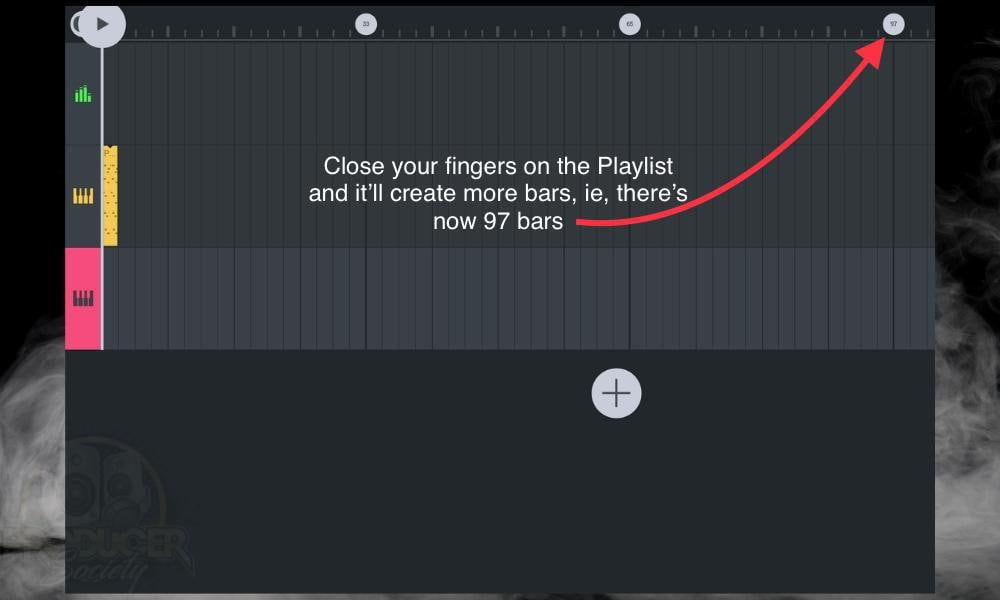
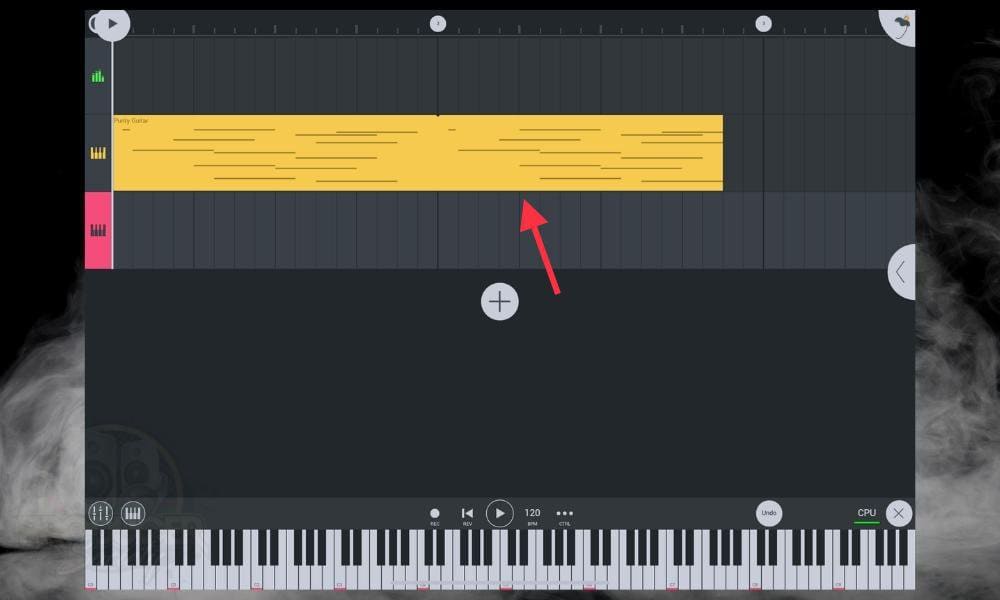
if you’re familiar with GarageBand iOS, you know that it doesn’t quite work this way. Instead, you have to type in the number of bars you’d like which is a bit of an inconvenience. GarageBand iOS is better at saving loops though, and I’ll show you how FL Studio Mobile does that now.
How to Save A Loop In FL Studio Mobile
In this case, the first thing you’ll probably have to do is eliminate the other Channels, or in other words, the other tracks.
I haven’t figured out how to export or save just one Channel in FL Studio Mobile, although, as I write, I’m thinking that you could probably just Solo the track and export it that way as I explained in my collaboration guide, but I digress.
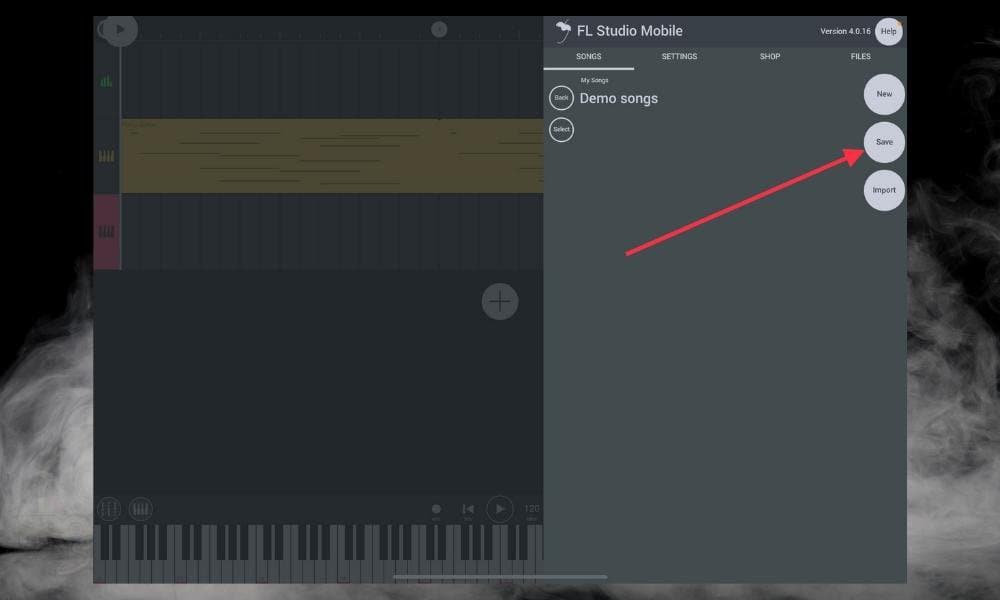
1) Press on the FL Studio Mobile Icon

2) Choose Save
3) Name Your File and Then Select Which File Type You’d Like To Use
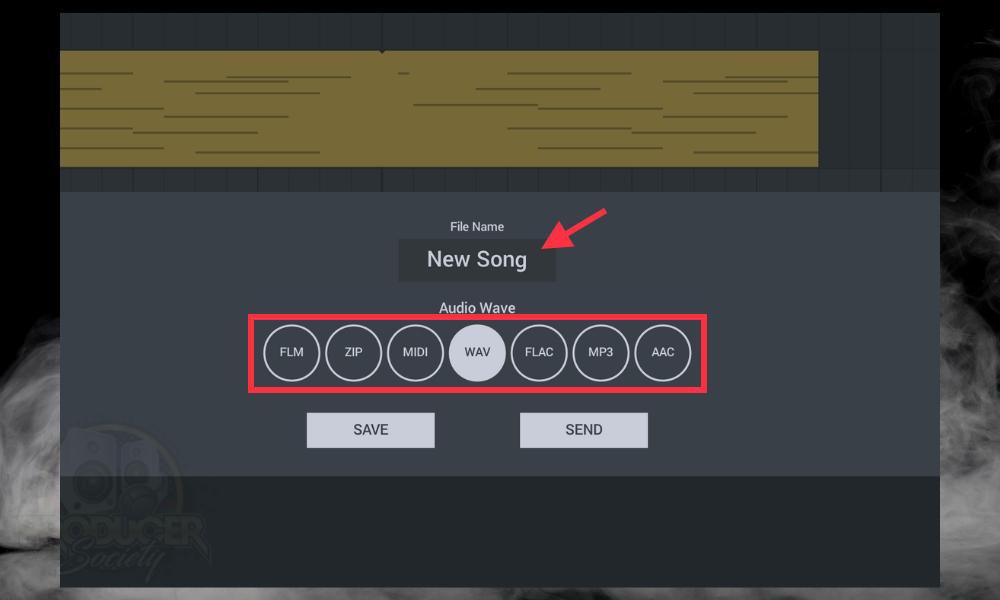
Once you’ve picked your file style, click ”Send.” Depending on what type of file you select, you’ll be given different options. If you want to save it as a project, choose ”FLM” which stands for FL Studio Mobile. All of the other files, except for MIDI, are audio formats, ie, MP3, FLAC, WAV, etc.
4) Choose Full Song, Selection, or Trim Silence, Then Send It To Your Files

Optional – You Can Also Choose the Quality, Normalization, or Split the Mixer Tracks

Similar to the desktop version of FL Studio, saving a project or a file gives you a few different options which is nice. One is that you can save the entire song if you want, just a selection, or you can choose to send your project to someone through email.
This is a lot like GarageBand iOS, but everything is set up just a bit different. Another thing is that you can actually choose MIDI and FLAC, unlike GarageBand iOS which has fewer options.
For instance, you can’t export MIDI out of GarageBand iOS like you can in FL Studio Mobile (nor can you with the macOS version as I explained in my guide on the subject), and the same thing goes for the desktop versions as well.
Other Articles You May Like
- How to Install Plugins in FL Studio Mobile [EASY]
- How to Connect A MIDI Keyboard to FL Studio Mobile [EASY]
- How to Record Guitar in FL Studio Mobile [Step-By-Step]
- How to Import A Song Into FL Studio Mobile [Dead Simple]
Gear Mentioned
1) 11” iPad Pro 2021 1TB (on my Product Page)

 Written By :