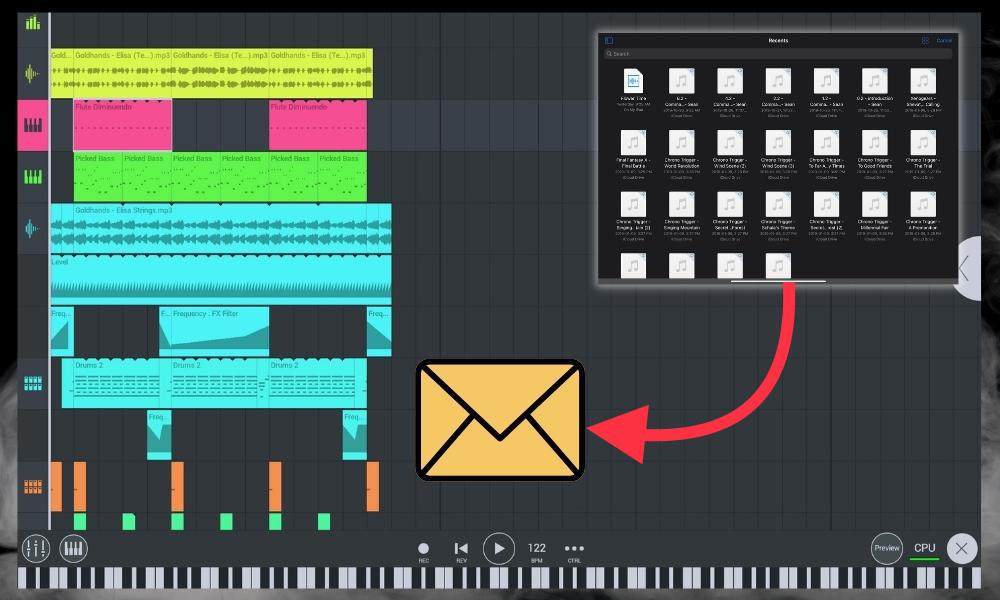
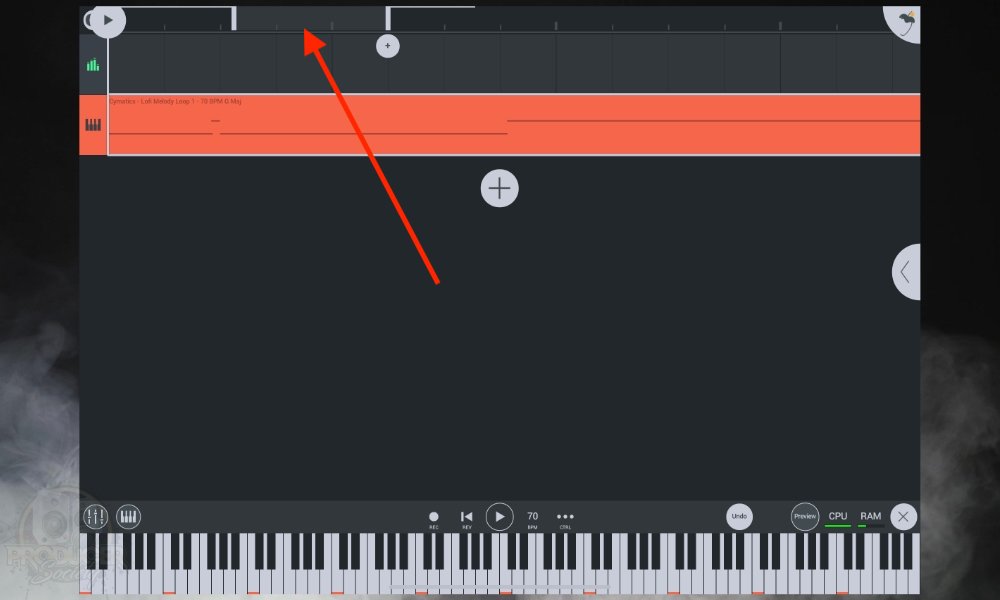
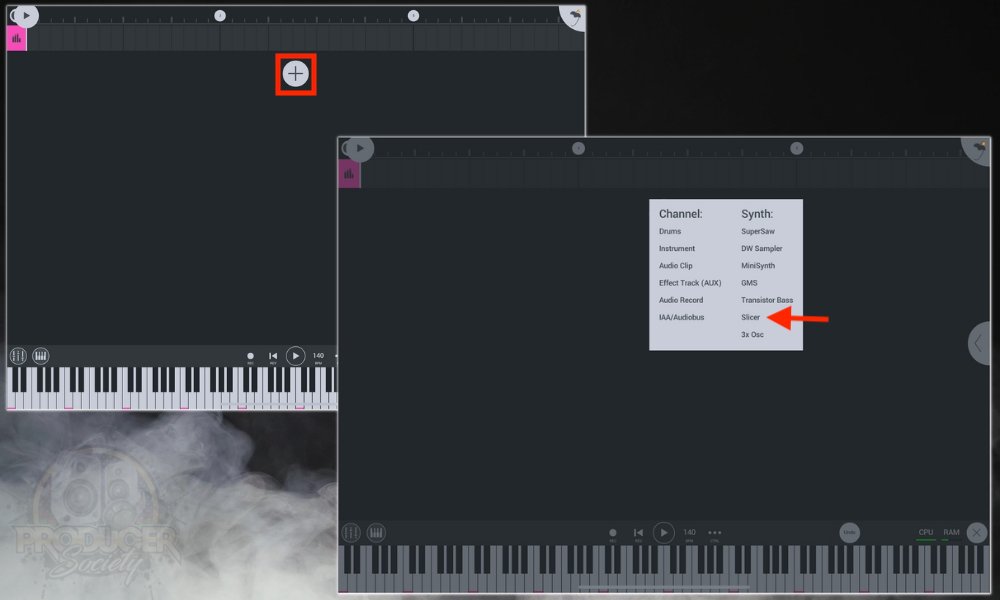
I learned how to sample in FL Studio Mobile over the last few days, so let me show you that now.
To sample in FL Studio Mobile
1) Drag and drop your samples into your “FL Studio Mobile” folder
2) With FL Studio Mobile open, press the “+” symbol
3) Choose “DW Sampler” then My Files
4) Select your sample
5) Press the REC button and then press a piano roll key to record
How to Add Samples and Audio to FL Studio Mobile [Direct Wave]

For this tutorial, I’m going to show you how to do it through the Files Application on my iPad Pro 11″ 2021 (on my Product Page), however, there is another way which I demonstrated in my article on this very subject.
The first way is to just hit the “+” button in a project and then choose AudioClip. From there, you just have to select the file and open it from the FL Studio Mobile interface.
This tutorial presupposes you’ve downloaded samples from another place on the internet. If you’re interested in finding some online, I recommend Cymatics.FM’s Lo-Fi Toolkit. It’s sick and I used cymbals and hi-hats from it all of the time. Anyway, let me show you how to use the DWSampler now.
1) Open Up Your Files App And Locate Your Samples and Audio Files
![Open Your Files App - How to Sample in FL Studio Mobile [Chop, Slice, & Reverse]](https://producersociety.com/wp-content/uploads/2022/12/Open-Your-Files-App-How-to-Sample-in-FL-Studio-Mobile-Chop-Slice-Reverse.jpg)
For me, I have everything stored in a folder called “Samples for Music Production,” and that’s where pretty much any samples are stored. As you can see in the image above, there is a “Select” option on the top-right of the interface which you need to press on.
2) Hit “Select,” Choose Your Desired Folder, And Then Hit “Move”
![2 - How to Sample in FL Studio Mobile [Chop, Slice, & Reverse]](https://producersociety.com/wp-content/uploads/2022/12/2-How-to-Sample-in-FL-Studio-Mobile-Chop-Slice-Reverse.jpg)
This will bring up another layer of folders in your directory for you to locate and transfer files around.
3) Go to “On My iPad” Then Choose the “FL Studio Mobile” Folder
![3 - How to Sample in FL Studio Mobile [Chop, Slice, & Reverse]](https://producersociety.com/wp-content/uploads/2022/12/3-How-to-Sample-in-FL-Studio-Mobile-Chop-Slice-Reverse.jpg)
I’ve pointed out the “On My iPad” option because you want files like this to be on your device’s local drive. You don’t want them in your iCloud Drive. Open the FL Studio Mobile folder and then you can see where you want to put things in it.
4) Choose the File Folder “My Samples” (Or Whichever Folder Makes the Most Sense)
![4 - How to Sample in FL Studio Mobile [Chop, Slice, & Reverse].jpg](https://producersociety.com/wp-content/uploads/2022/12/4-How-to-Sample-in-FL-Studio-Mobile-Chop-Slice-Reverse.jpg)
I would probably be a little more specific with the folders in the sense that the Lo-Fi Cymatics Toolkit comes with not only samples, but drum loops, one-shot drums, melodies, etc, and I would separate those folders and put them into each corresponding folder in the “FL Studio Mobile” directory.
But I digress. Choose the folder you want to use and then hit the “Move” button. It’ll take you to the inside of the file folder which is probably empty right now.
5) Hit “Move”
![5 - How to Sample in FL Studio Mobile [Chop, Slice, & Reverse].jpg](https://producersociety.com/wp-content/uploads/2022/12/5-How-to-Sample-in-FL-Studio-Mobile-Chop-Slice-Reverse.jpg)
So now you’ve officially moved the files to where you want them to be. Now let’s actually open up FL Studio Mobile, locate them, and use them in a project.
6) Open Up FL Studio Mobile, Open A New Track With The “+” Button
![6 - How to Sample in FL Studio Mobile [Chop, Slice, & Reverse]](https://producersociety.com/wp-content/uploads/2022/12/6-How-to-Sample-in-FL-Studio-Mobile-Chop-Slice-Reverse.jpg)
After that, you can choose the instrument type. You want the DW Sampler, although, there are others you could also use for different purposes.
7) Choose DW Sampler, Then “My Files” > “My Samples” And Your Samples Will Be There
![7 1/2 - How to Sample in FL Studio Mobile [Chop, Slice, & Reverse]](https://producersociety.com/wp-content/uploads/2022/12/7-12-How-to-Sample-in-FL-Studio-Mobile-Chop-Slice-Reverse.jpg)
It’ll take you to your file folder where everything is.
![7 - How to Sample in FL Studio Mobile [Chop, Slice, & Reverse]](https://producersociety.com/wp-content/uploads/2022/12/7-How-to-Sample-in-FL-Studio-Mobile-Chop-Slice-Reverse.jpg)
If you press on it, you’ll find that the Cymatics Toolkit will be there in all folders, ie, the Drum Loops, the Melodies, One-Shots, and the other tracks. In my opinion, FL Studio Mobile’s way of organizing files is pretty intuitive and I like using it.
How to Sample in FL Studio Mobile [With the DirectWave Sampler]
![DWSampler - How to Sample in FL Studio Mobile [Chop, Slice, & Reverse]](https://producersociety.com/wp-content/uploads/2022/12/DWSampler-How-to-Sample-in-FL-Studio-Mobile-Chop-Slice-Reverse.jpg)
There isn’t a whole lot to say about the Direct Wave Sampler in terms of importing audio and its basic functions because I’ve already shown you how to put audio into it. You can adjust the pitch by semi-tones, or get even more specific with the Fine Tune option.
Adjust the attack, decay, sustain, release, and slide/portamento timing. You can also change the filter, filter envelope, frequency envelope, as well as low-frequency oscillator. Once you’ve done that, you’re ready to rock.
Then hit the REC button and then start pressing the piano roll keys to begin recording. If you need more information on the basic parameters of this tool, head over to Image-Line’s website because they have a nice explanation there. This YouTube video does a decent job of showing some of the processes.
How to Adjust the Rhythm, Effects, and Other Effects Of Your Sample
For this section, I’ll show you how to change your sample and do all kinds of stuff with it with the PItcher. After you’ve changed the pitch and done whatever you want with it, you’ll save/render the file and then you can load it back into the DWSampler as you please.
1) Load Your Sample By Pressing “+” Then “Audio Clip”
![Loading A Sample - How to Sample in FL Studio Mobile [Chop, Slice, & Reverse]](https://producersociety.com/wp-content/uploads/2022/12/Loading-A-Sample-How-to-Sample-in-FL-Studio-Mobile-Chop-Slice-Reverse.jpg)
We have to first take the audio recording that we’ve downloaded elsewhere and put it into the interface. This is going to allow us to cut it up in any number of ways. You can get really specific with it too.
2) Cut Up The Sample According To What You Want


If you’ll recall what I said in this tutorial, the “Cut” feature doesn’t work intuitively so you’ll have to use one of the other two methods outlined in the linked article. I already went in-depth in that article so check it out if you need more information.

3) Adjust The Pitch, Effects, Dynamics, and Rhythm By Opening the Channel Rack
![Opening Channel Rack - How to Sample in FL Studio Mobile [Chop, Slice, & Reverse]](https://producersociety.com/wp-content/uploads/2022/12/Opening-Channel-Rack-How-to-Sample-in-FL-Studio-Mobile-Chop-Slice-Reverse.jpg)
Click on the tab as is shown in the image and then you can hit the giant “+” button. This will bring up a list of effects and tools you can use on your sample. For this one, I chose the Pitcher.
4) Click The FL Studio Mobile Icon To Save The File As WAVE
![Saving A Track - How to Sample in FL Studio Mobile [Chop, Slice, & Reverse]](https://producersociety.com/wp-content/uploads/2022/12/Saving-A-Track-How-to-Sample-in-FL-Studio-Mobile-Chop-Slice-Reverse.jpg)
![Render - How to Sample in FL Studio Mobile [Chop, Slice, & Reverse]](https://producersociety.com/wp-content/uploads/2022/12/Render-How-to-Sample-in-FL-Studio-Mobile-Chop-Slice-Reverse.jpg)
5) Open A New Track And Then Load The Completed Sample
![Loading The Saved Sample - How to Sample in FL Studio Mobile [Chop, Slice, & Reverse]](https://producersociety.com/wp-content/uploads/2022/12/Loading-The-Saved-Sample-How-to-Sample-in-FL-Studio-Mobile-Chop-Slice-Reverse.jpg)
How to Chop Samples in FL Studio Mobile [Using DirectWave]
As I said earlier, quite a lot can go into how you chop your samples up, so have a look at this article to learn more.
How to Reverse Samples in FL Studio Mobile [DirectWave]
![DWSampler [Reverse] - How to Sample in FL Studio Mobile [Chop, Slice, & Reverse]](https://producersociety.com/wp-content/uploads/2022/12/DWSampler-Reverse-How-to-Sample-in-FL-Studio-Mobile-Chop-Slice-Reverse.jpg)
And that’s all you really have to do to reverse playback an audio sample in FL Studio Mobile. I don’t believe it’s necessary to show you how to load up the DW Sampler and an audio file because I already showed you at the start of the article.
The nice thing about the DWSampler is that all of these functions are easy to get to. For instance, take notice of the “Pitch” parameter on the left side of the interface. This is where you can adjust the pitch which I’ll show you how to do now.
How To Change the Pitch of Samples in FL Studio Mobile [DirectWave]
![Down - How to Sample in FL Studio Mobile [Chop, Slice, & Reverse]](https://producersociety.com/wp-content/uploads/2022/12/Down-How-to-Sample-in-FL-Studio-Mobile-Chop-Slice-Reverse.jpg)
The pitch and fine-tuning parameters change the pitch by cents. The Pitch parameter changes the pitch by semitones – up 12 semitones or down semitones, which spans a total of 24. The Fine Tune moves in much smaller delineations of 100 cents.
It isn’t hard to use either of these parameters, however, it does take a second to figure out how to increase the pitch by spinning the wheel around with your finger.
How to Assign Samples To Keys in FL Studio Mobile [DirectWave Sampler]
Assigning samples to individual keys in FL Studio Mobile can be done in a number of ways, including with the Slicer. The slicer works great, but if you don’t want to use it for whatever reason, the DW Sampler can be used in a similar way.
It just takes a bit more time to do it. I’ll show you how to do it right now. It’s also a bit different from how you would do it in GarageBand as well as the desktop version of FL Studio.
1) Open Your Files Then Load The Desired Sample As An Audio Clip
![+ and Audio Clip - How to Sample in FL Studio Mobile [Chop, Slice, & Reverse]](https://producersociety.com/wp-content/uploads/2022/12/and-Audio-Clip-How-to-Sample-in-FL-Studio-Mobile-Chop-Slice-Reverse.jpg)
FL Studio Mobile will take you to your file directory and you can find it wherever you’ve stored them. It’s important to always name things well and ensure you’ve saved them in easy-to-find folders. Otherwise, you’ll find yourself losing stuff.
![My Files then the Samples - How to Sample in FL Studio Mobile [Chop, Slice, & Reverse]](https://producersociety.com/wp-content/uploads/2022/12/My-Files-then-the-Samples-How-to-Sample-in-FL-Studio-Mobile-Chop-Slice-Reverse.jpg)
2) Set the BPM to Match the Sample
![BPM - How to Sample in FL Studio Mobile [Chop, Slice, & Reverse]](https://producersociety.com/wp-content/uploads/2022/12/BPM-How-to-Sample-in-FL-Studio-Mobile-Chop-Slice-Reverse.jpg)
Even if you can’t figure out the key, you can use my article here or something like a BPM calculator.
3) Use the Selection Bar on the Ruler To “Insert Spaces” In the Sample [Cut]
![Selection Bar then Insert Space - How to Sample in FL Studio Mobile [Chop, Slice, & Reverse]](https://producersociety.com/wp-content/uploads/2022/12/Selection-Bar-then-Insert-Space-How-to-Sample-in-FL-Studio-Mobile-Chop-Slice-Reverse.jpg)
![Insert Spaces - How to Sample in FL Studio Mobile [Chop, Slice, & Reverse]](https://producersociety.com/wp-content/uploads/2022/12/Insert-Spaces-How-to-Sample-in-FL-Studio-Mobile-Chop-Slice-Reverse.jpg)
I recommend using the zoom feature so you can get precise with your chops.
4) Create New Audio Tracks for Each Individual Chop
![Audio Tracks - How to Sample in FL Studio Mobile [Chop, Slice, & Reverse]](https://producersociety.com/wp-content/uploads/2022/12/Audio-Tracks-How-to-Sample-in-FL-Studio-Mobile-Chop-Slice-Reverse.jpg)
Every time you click on Audio Clip, it’ll create a new track region. And then you can pull each clip to a track.
5) Drag And Drop the Chops to the First Bar Of Each Track
![Drag Audio Clips - How to Sample in FL Studio Mobile [Chop, Slice, & Reverse]](https://producersociety.com/wp-content/uploads/2022/12/Drag-Audio-Clips-How-to-Sample-in-FL-Studio-Mobile-Chop-Slice-Reverse.jpg)
It’s easier said than done because you have to press on the desired region just once and then hold it. It’ll light up a slight grey colour, letting you know you’ve selected it, and then you can drag it. Be careful not to hit it more than once because then it’ll elongate or shorten the region, which isn’t what we want to do.
6) Save the Samples as WAV > Choose Split Mixer Tracks > Normalize Level > High Quality > Trim Initial Silence
![Saving the samples - How to Sample in FL Studio Mobile [Chop, Slice, & Reverse]](https://producersociety.com/wp-content/uploads/2022/12/Saving-the-samples-How-to-Sample-in-FL-Studio-Mobile-Chop-Slice-Reverse.jpg)
![Rendering The File - How to Sample in FL Studio Mobile [Chop, Slice, & Reverse]](https://producersociety.com/wp-content/uploads/2022/12/Rendering-The-File-How-to-Sample-in-FL-Studio-Mobile-Chop-Slice-Reverse.jpg)
The last part is very important because it’ll render each track as its own file. Then it’ll be a whole lot easier to sample and assign them to individual keys.
7) Start A New Project And Open The Direct Wave Sampler > Choose Your Saved Sample
![New and DWSampler - How to Sample in FL Studio Mobile [Chop, Slice, & Reverse]](https://producersociety.com/wp-content/uploads/2022/12/New-and-DWSampler-How-to-Sample-in-FL-Studio-Mobile-Chop-Slice-Reverse.jpg)
![Choose Song and Clip - How to Sample in FL Studio Mobile [Chop, Slice, & Reverse]](https://producersociety.com/wp-content/uploads/2022/12/Choose-Song-and-Clip-How-to-Sample-in-FL-Studio-Mobile-Chop-Slice-Reverse.jpg)
This is what the Split Mixer Tracks option will do for you. Load your sample and then we can start assigning them to the appropriate keys of the piano roll.
8) Press on The DWSampler Settings And Choose Set Range
![Set Range - How to Sample in FL Studio Mobile [Chop, Slice, & Reverse]](https://producersociety.com/wp-content/uploads/2022/12/Set-Range-How-to-Sample-in-FL-Studio-Mobile-Chop-Slice-Reverse.jpg)
After you’ve chosen Set Range, it’ll light up the piano roll to a different colour and you can choose which key to set the sample to. Press the key twice.
9) Add The Sample to C3 or C4
![C4 - How to Sample in FL Studio Mobile [Chop, Slice, & Reverse]](https://producersociety.com/wp-content/uploads/2022/12/C4-How-to-Sample-in-FL-Studio-Mobile-Chop-Slice-Reverse.jpg)
Once you’ve done that, load up a new DW Sampler and you can choose the second sample. To get a new DWSampler, click the giant “+” button.
10) Open Another Direct Wave Sampler and Load A Sample
![Choose the 2nd File - How to Sample in FL Studio Mobile [Chop, Slice, & Reverse]](https://producersociety.com/wp-content/uploads/2022/12/Choose-the-2nd-File-How-to-Sample-in-FL-Studio-Mobile-Chop-Slice-Reverse.jpg)
11) Set the Range Again And Choose C# This Time
![Set Range and Choose C# - How to Sample in FL Studio Mobile [Chop, Slice, & Reverse]](https://producersociety.com/wp-content/uploads/2022/12/Set-Range-and-Choose-C-How-to-Sample-in-FL-Studio-Mobile-Chop-Slice-Reverse.jpg)
Press C# this time. It’s the black key next to the C note. If you aren’t already familiar with the structure of the piano, get PianoForAll from their site. It’s a program that teaches you everything about the piano.
12) Drop the Pitch On Each Sample After By 1 Semitone Relative To the Last
![Dropping The Pitch - How to Sample in FL Studio Mobile [Chop, Slice, & Reverse]](https://producersociety.com/wp-content/uploads/2022/12/Dropping-The-Pitch-How-to-Sample-in-FL-Studio-Mobile-Chop-Slice-Reverse.jpg)
13) Repeat the Process Until You’ve Loaded Every Sample
![Adding Another DWSAmpler - How to Sample in FL Studio Mobile [Chop, Slice, & Reverse]](https://producersociety.com/wp-content/uploads/2022/12/Adding-Another-DWSAmpler-How-to-Sample-in-FL-Studio-Mobile-Chop-Slice-Reverse.jpg)
It’s pretty time-consuming, but you can get hyper-specific with how you change up your samples and do all kinds of stuff you wouldn’t otherwise be able to do with just the Slicer. But the Slicer is still a great tool and I’ll show you how to do it now.
How To Chop Samples in FL Studio Mobile [Using Slicer]
Using Slicer is super easy if you’re trying to divide up either a drum kit or even a melody for that matter. Image-Line says on its website that the Slicer is best for drums, but it does a great job with melodic samples as well.
The most impressive aspect of using it is its intelligence and the fact it’s automatic. Anyway, let me show you the basics of how to use it now. For a more advanced tutorial, check this YouTube video.
1) Press the “+” Button And Then Choose “Slicer”

2) Go Into Your Files And Select A Drum Kit Or Sample
![Load A File - How to Sample in FL Studio Mobile [Chop, Slice, & Reverse]](https://producersociety.com/wp-content/uploads/2022/12/Load-A-File-How-to-Sample-in-FL-Studio-Mobile-Chop-Slice-Reverse.jpg)
3) The Slicer Will Load And Then Separate Each Part Of the Piano Roll
![Load the Slicer - How to Sample in FL Studio Mobile [Chop, Slice, & Reverse]](https://producersociety.com/wp-content/uploads/2022/12/Load-the-Slicer-How-to-Sample-in-FL-Studio-Mobile-Chop-Slice-Reverse.jpg)
Other Articles You May Be Interested In
- How to Install Plugins in FL Studio Mobile [EASY]
- How to Set Up The AKAI MPK Mini With FL Studio [macOS/iOS]
- Making Triplets in FL Studio Mobile [A Step-By-Step Guide]
- How to Connect A MIDI Keyboard to FL Studio Mobile [EASY]
- How to Record Guitar in FL Studio Mobile [Step-By-Step]
Important Things to Note About Sampling in FL Studio Mobile
1) There Is More To Sampling With FL Studio Mobile
While FL Studio Mobile has its limitations, it can do a lot more than what I’ve outlined here. Expect to see additional tutorials on how to use it in the future.

 Written By :