It took me a moment recently to figure out that the “Cut” button in FL Studio Mobile was greyed out and inaccessible due to it needing to be looped at least once. Here’s how to fix that.
To cut audio clips and MIDI notes in FL Studio Mobile, press on the audio clip or MIDI note, then stretch or extend the clip so it loops at least once. If you try to cut the audio/MIDI otherwise, the option for “Cut” will be inaccessible or “greyed out.”
3 Ways of Cutting Audio Clips & MIDI Notes in FL Studio Mobile

What I’ve shown you how to do thus far is actually not the best way of cutting and trimming audio in FL Studio Mobile. The problem with the “Cut” feature is that it doesn’t seem to cut the audio clip or MIDI note in a way that’s intuitive.
As a matter of fact, it’ll just cut the region at the part where it begins to loop. Nevertheless, I’m going to show you how to get “Cut” to actually work (even though it won’t cut it where you want).
The second and third ways are really how it’s done though. The 2nd way is to use the selection box at the top of the interface where all the notches are. The third way is when you shorten the clip itself but then copy and paste the original after, essentially imitating the same result as if you had cut it.
1) How to Use The “Greyed-Out” Cut Feature
So here’s how to enable the “Cut” feature that you’ve probably struggled to use previously. The first thing we need to do is have a project open and an audio clip or MIDI region loaded. You can learn how to import audio into FL Studio Mobile using my other guide if you don’t already know.
A) Load Your Audio Clip or MIDI Note

With the way it has been loaded, you won’t be able to cut it using the “Cut” button. You must extend it first as I explained earlier. Here’s how to do that.
B) Press On the Clip/Note Once Then Drag the Grey Ball To The Right
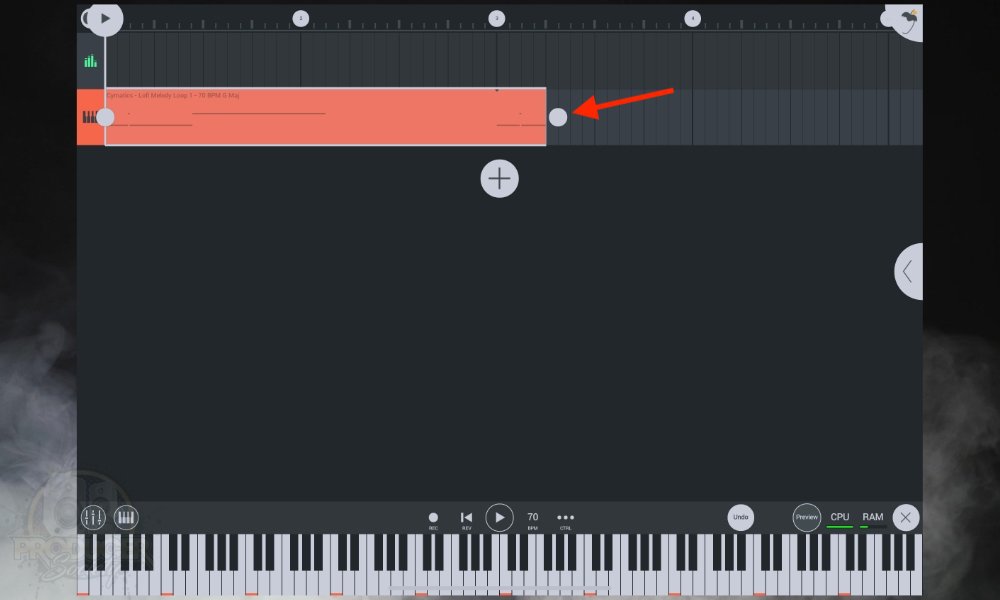
FL Studio Mobile’s way of extending and retracting files like this is awesome, and I wish GarageBand iOS had the same feature (in addition to the Zoom-In/Zoom-Out).
C) Pull On The Grey Ball Until The Note Or Clip Repeats Once

D) Clip on The Clip/Note Again Then Select” More”
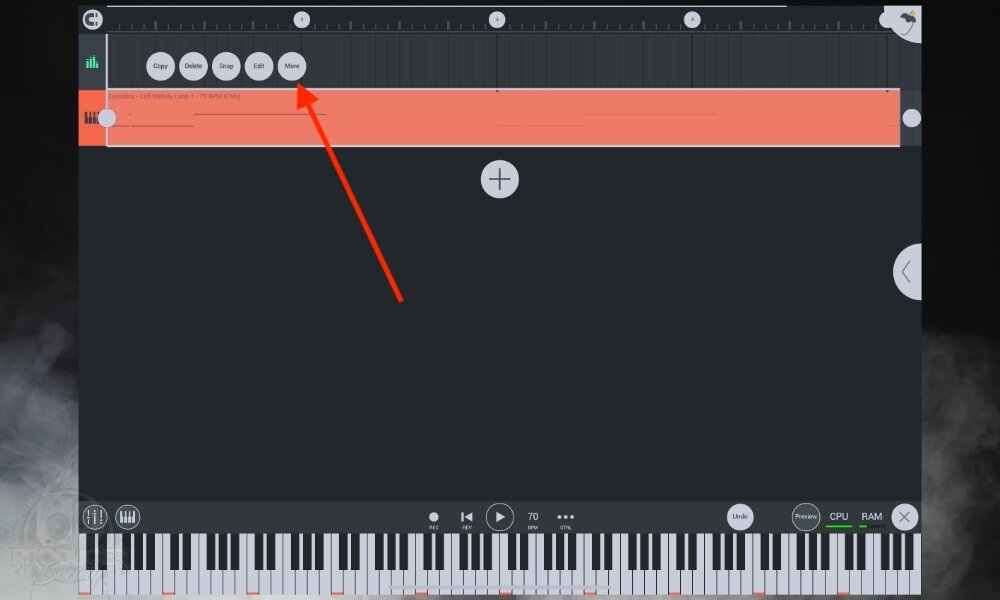
E) Press On “Cut” to Cut the Clip – It Should Be Selectable Now

As I explained earlier though, it won’t actually cut the region in the space where you want which is extremely annoying and counter-intuitive. There’s a possibility that there is a way of using “Cut” so it does so right where you want it, but I haven’t figured it out. Instead, I’ll have to show you the two other methods for filling in the gaps.
2) How to Cut And Edit Your Audio Using “Insert Space”
The next way of cutting up your audio, MIDI, and samples is to use the “Insert Space” method. This works pretty well and I’ve noticed that a lot of other users like utilizing this strategy.
A) Load Your Audio Clip or MIDI Note

B) Zoom In On The FL Studio Mobile Grid

Zooming in or out on the interface is as simple as opening/closing your fingers on your device’s screen. At least this is how I do it on my 11″ iPad Pro 2021 1TB (on my Product Page).
C) Press On The Notches of the Grid Then Select A Number of Grid Lines
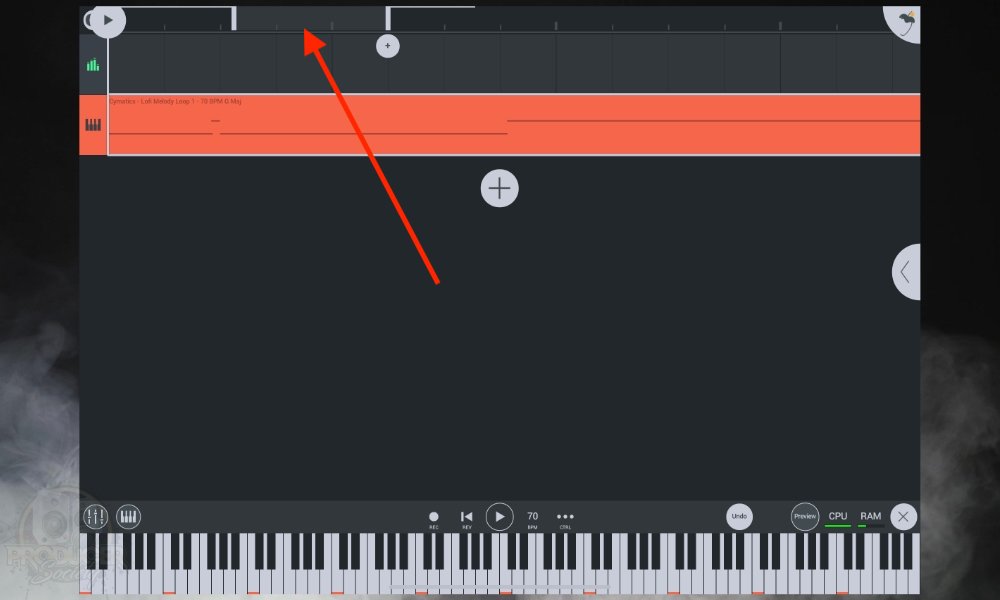
This allows you to select which part of the region you’d like to eliminate or edit. The more you zoom in on it, the more precise you can get – keep that in mind.
D) Press the “+” Button
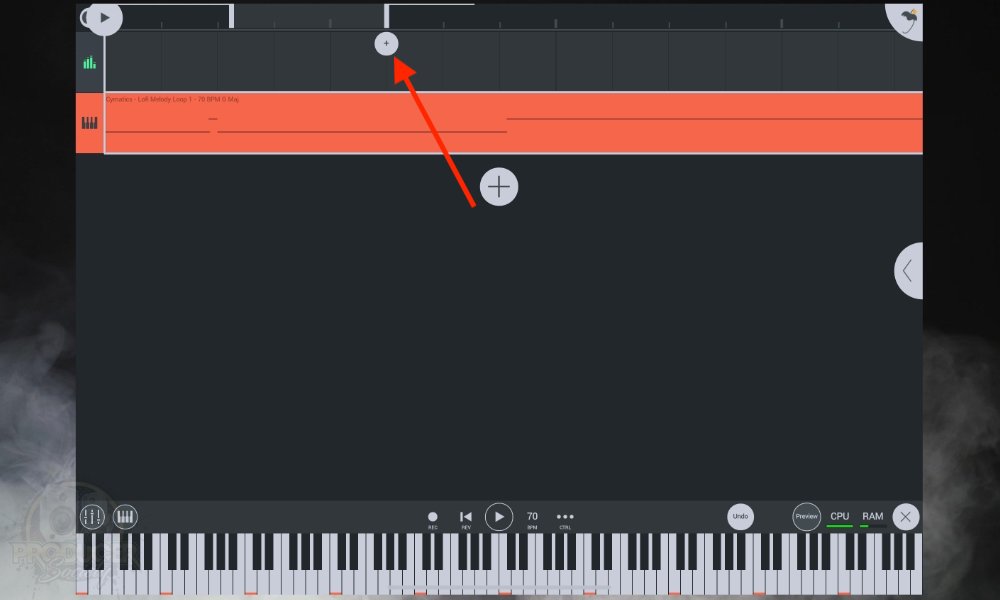
E) Then Choose “Insert Space”

You could also use “Delete Space” which seems to do the exact same thing.

Then you can drag and drop your region so that everything is combined together.
F) Repeat Until You’ve Effectively Chopped and Edited Your Sample

And there you go. Now I’ll show you the 3rd method for trimming and editing your audio/MIDI regions.
3) How to Cut/Trim Your Project By Shortening It And Then Copying/Pasting
The third way is probably my least favourite, but I can see how some people may like to use it. In simple terms, you copy your recording so that you have a full one available when you need it, and then you pull on it to the point where you want it to be. Paste a new region right after and voila.
A) Load Your Audio Clip or MIDI Note

B) Click On It And Then Copy It

This is an important step because you don’t want to totally get rid of the file.
C) Pull On The Grey Ball To Retract It All The Way To Your Desired Cut Point
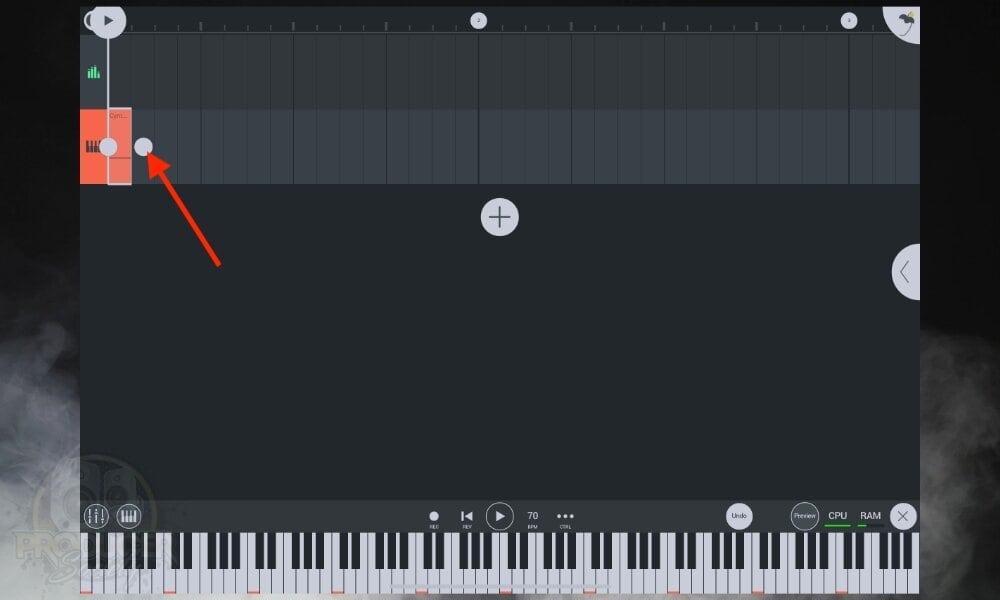
Again, it’s helpful to zoom in as much as possible so you can be as accurate as you can be.
D) Long-Press the Grid Then Choose “Paste”

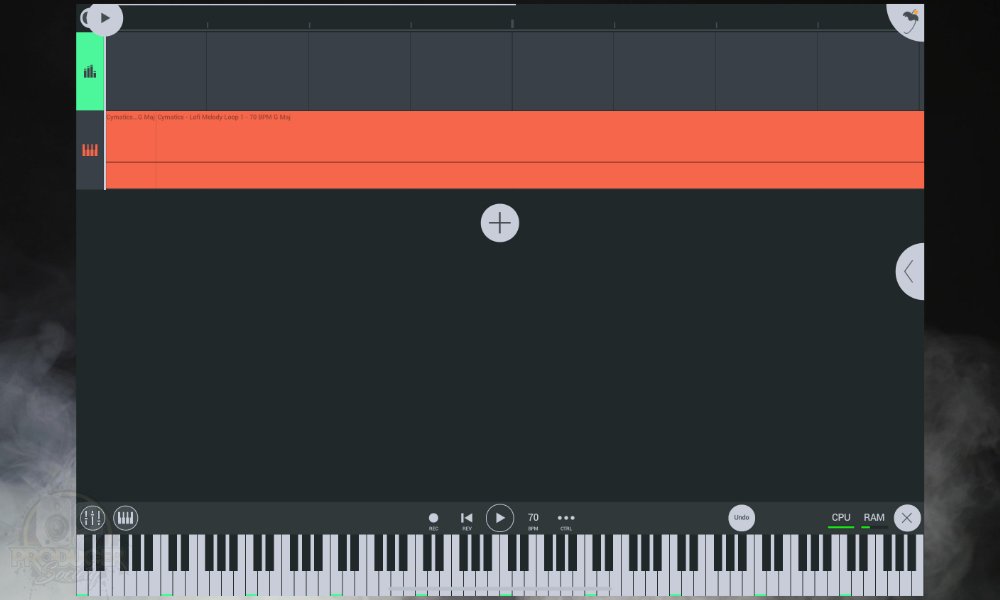
If you need to be more surgical, do as I said a moment ago and zoom in as much as possible.
E) Zoom In On The Grid To Get More Precise
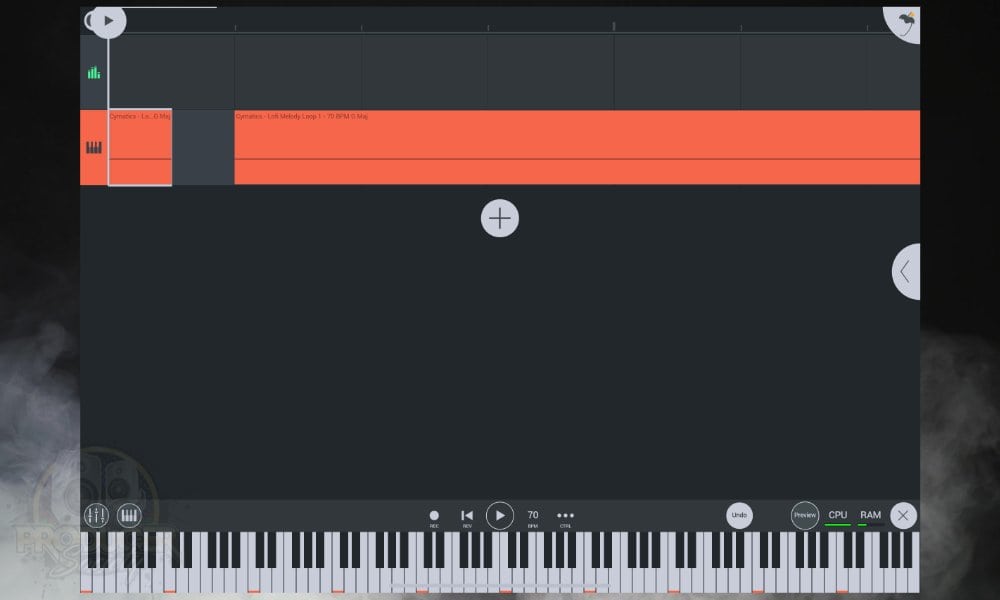
That’s all for cutting and editing your audio in FL Studio Mobile. In its current state, the DAW is pretty solid but there definitely could be some improvements from Image-Line with more updates.
One of the features a lot of users have been demanding is AUv3 compatibility, which is something I discussed in more detail in my article on installing plugins in FL Studio Mobile. For more information, I’d recommend checking out the official FL Studio Mobile manual.
Other Articles You May Be Interested In
- How to Sample in FL Studio Mobile [Chop, Slice, & Reverse]
- Making Triplets in FL Studio Mobile [A Step-By-Step Guide]
- How to Loop in FL Studio Mobile [3-Min Read]
- How to Import A Song Into FL Studio Mobile [Dead Simple]
- How to Connect A MIDI Keyboard to FL Studio Mobile [EASY]
Important Things to Note About Cutting in FL Studio Mobile
1) There Could Be A Better Way to Trim the Audio
Personally, I find it hard to believe that Image-Line has made cutting audio so cumbersome. It’s very possible there is a much better way of doing this without taking so much time and effort.

 Written By :