GarageBand is one of the best free tools available, and it’s one of – in fact, GarageBand and Logic might be the main reasons why I use Apple over other operating systems. It has many features that make it a real winner.
While not as good as GarageBand macOS, the iOS version is a feature-rich and mobile DAW. It has a number of tools that make it a worthy competitor to professional-level software and without costing you anything. The following list includes its primary functions and features.
An Overview of What GarageBand iOS Can Do
1) Instrument Libraries
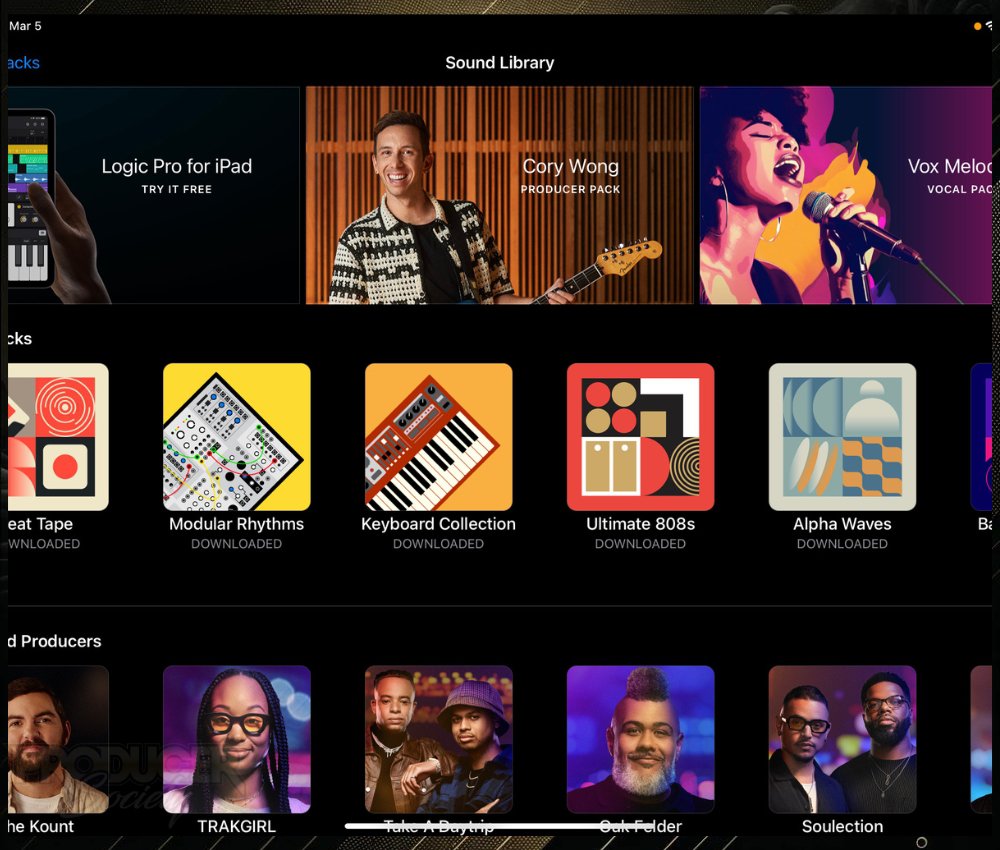
These include pulsating keyboards and guitars to classical orchestral instruments. There’s a sound for everyone.
Make sure you have your notifications turned on so you know when new sound packs and other cool stuff is released (and usually for Logic Pro for iPad, as well).
You’ll also want to make sure you’re connected to WIFI to download these sounds. And an iPad/iPhone that has at least 126GB of storage is probably what you’ll need.
I would recommend 126GB or more, because you’ll want additional space for your photos, videos, and other non-GarageBand related files.

Unfortunately, you can’t do this with individual instruments and sounds before loading them into the Tracks View like you can with Logic Pro for iPad.
2) Audio Recording

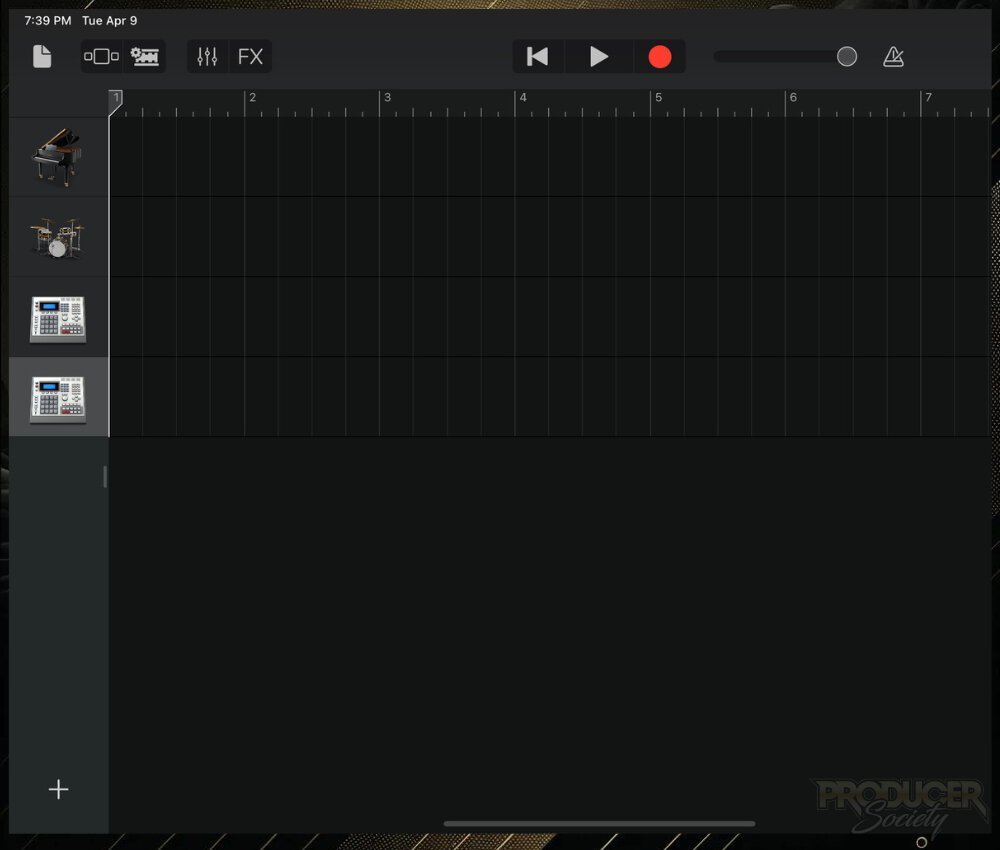
The Audio Recorder as shown here in the Sound Browser is for capturing sounds externally. This is what you’ll go to if you want to record vocals or your guitar with a microphone, for example.
Press the “Voice” button to be taken to the interface where you can begin trying out various vocal presets. They’re fun to play with. You don’t need a microphone to start using them.
3) Sound Recording & Editing Tools
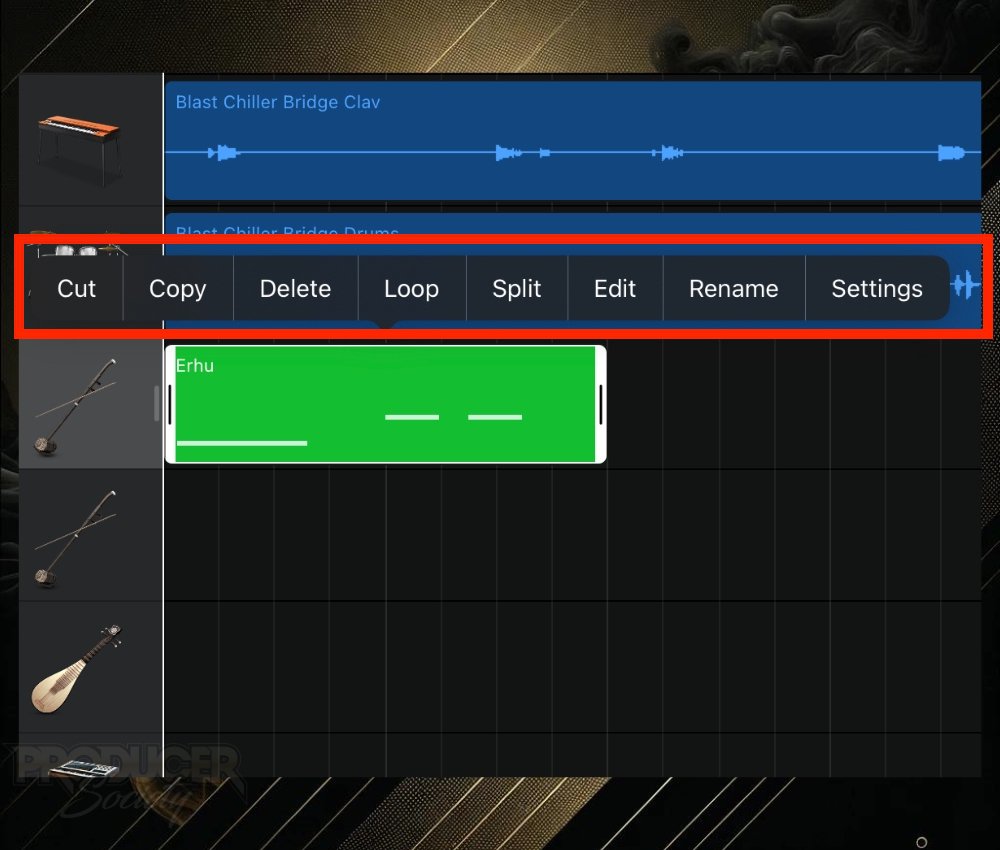
Once you’ve laid down your tracks, GarageBand’s intuitive editing tools allow you to tweak your audio clips. Whether adjusting timing, length, or applying effects, these tools are easy to use.
Long press the green MIDI region to bring up the Editor options. The “Split” tool is especially handy for precise edits, helping you eliminate errors effortlessly.
4) Recording External Instruments

As I said earlier, if you want to use a microphone, bass, or guitar, you’ll need to get your hands on an audio interface like the Scarlett 2i2. This will give you a number of recording options.
Connect your device with the included cable.
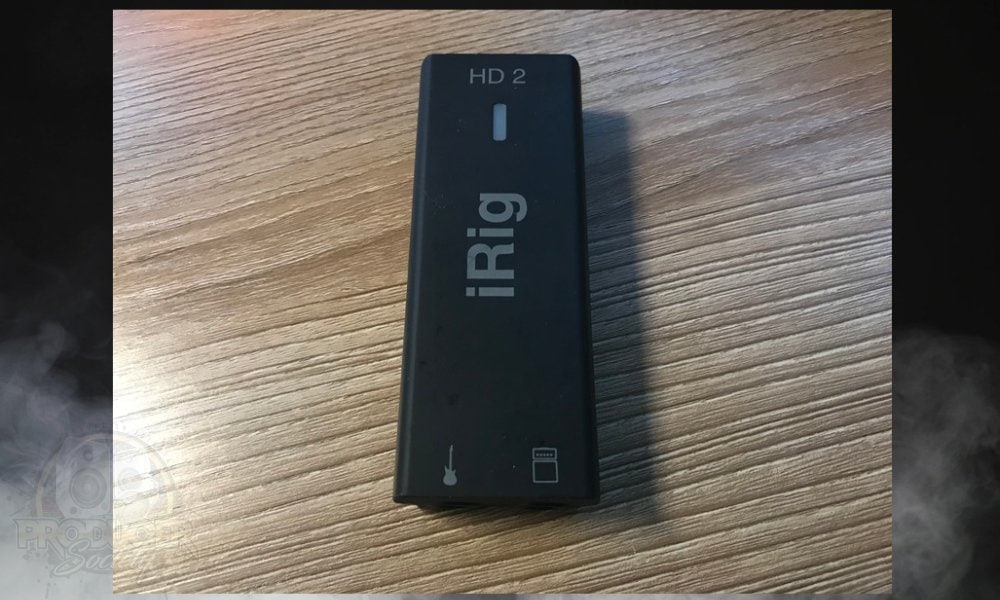
The audio interface should power on immediately because it’s “buss-powered” and GarageBand will recognize it (assuming you’re using something like the iRig HD2).
I’ve tried using the same micro-USB cables that came with vape pens, and despite being the same, they did not work.
5) MIDI Editing (in the Piano Roll)
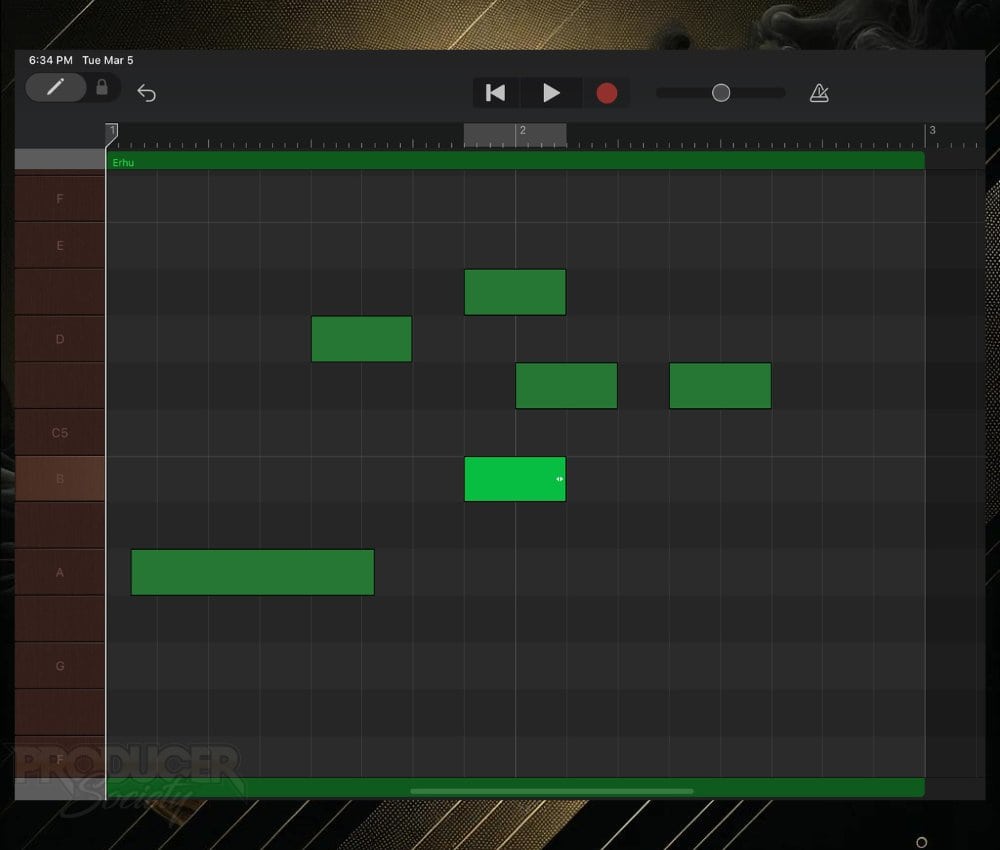
With MIDI editing, you can correct errors, alter rhythms, or explore new melodies. This is what I like to use if I don’t feel like playing my guitar or using a piano keyboard.
To draw and change notes in the Piano Roll, you’ll need to unlock the Piano Roll Editor by pressing on the Pen/Lock icon on the top-left corner of the Piano Roll.
The Piano Roll editor allows you to “draw” notes in the editor, which is how people put it.
6) Smart Instruments
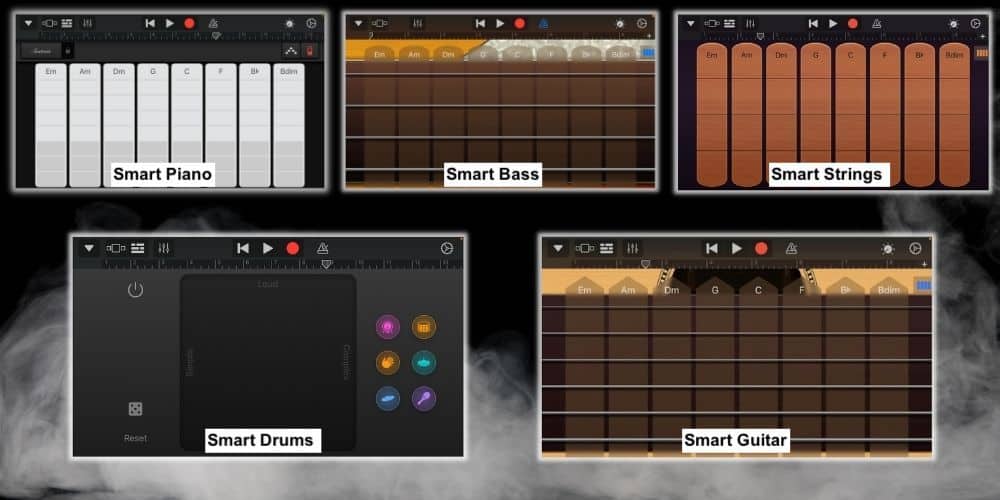
Smart Instruments are great because they’re mapped out according to key signatures and scales, and then they can be used automatically. However, in my opinion, they’re too “toy-like.”
The “Autoplay” function can generate complex musical patterns with just a tap.
This doesn’t mean you won’t find a use for them, though.
7) Beat Sequencer
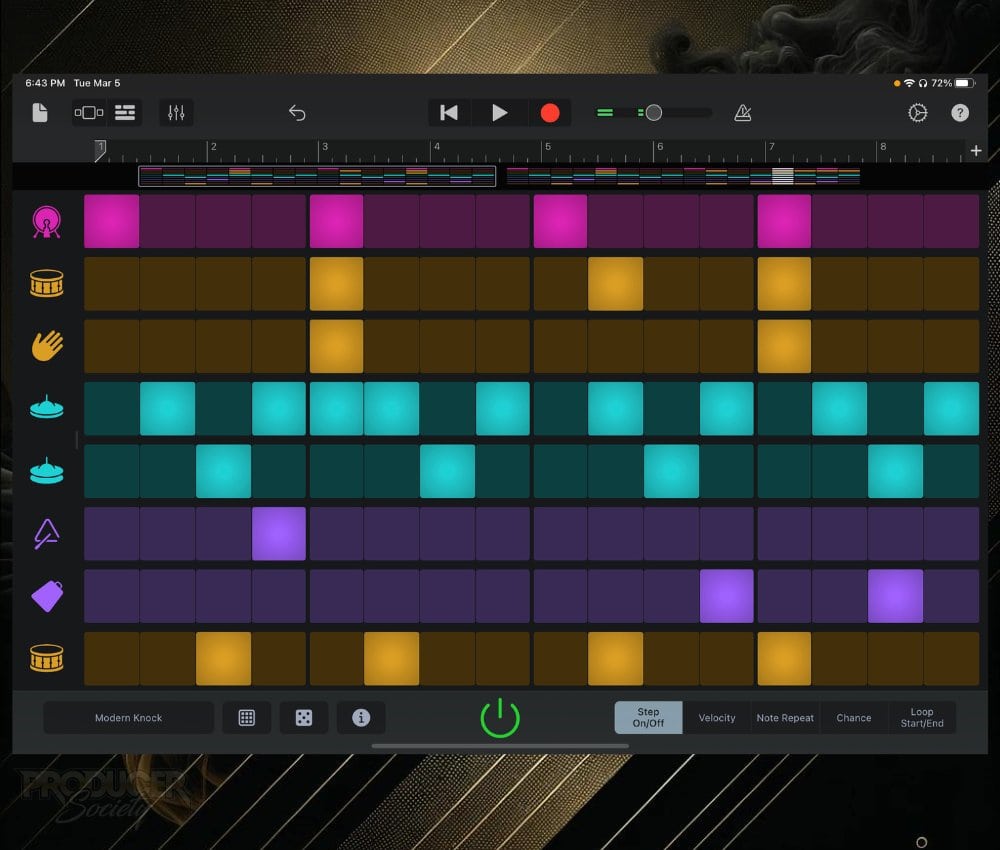
The Beat Sequencer is something I’ve grown to like over the years, because it allows you to draw in a drum pattern in a grid, and then it plays automatically.
In simple terms, it’s like you get an automatic drum machine that also gives you a visual understanding of how to change the way it sounds.
Click on the 3 buttons next to the green POWER button to choose commonly used patterns as well as the kind of drum you’re using. This is the secret to getting started with the Beat Sequencer.
8) Sampler

Refining your samples with the “Trim” and “Loop” functions ensures seamless playback.
Using .wav (or WAVE files) is the best way to avoid problems with loading audio files into the Sampler.
Additionally, an important tip is to avoid putting samples in your iCloud Drive at all costs, unless you plan on downloading them to your local files first before using them.
9) Live Loops
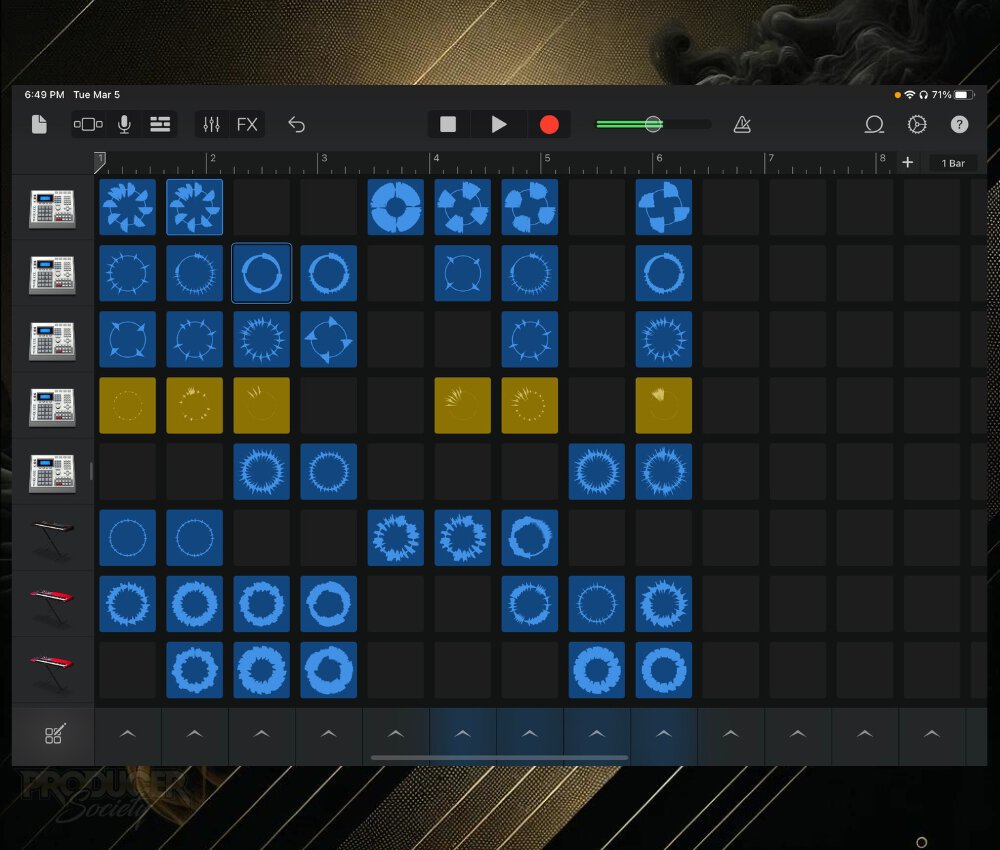
Starting with a pre-made grid can help you grasp how different loops interact, laying a foundation for your creations.
10) Apple Loops

Quick filter options allow you to find loops that match your project’s key and tempo effortlessly.
I wrote an article about this the other day, as a matter of fact.
Use the “Filter By..” option to find all kinds of sounds according to parameters that you set like Drum Kits, Guitars, Violin, or Sound Packs from some of your favourite producers like Cory Wong.
You should definitely check out the article I linked a moment ago, or take a quick look at the YouTube video I made on the same topic below:
11) Arpeggiator

In other words, you can play a note, and according to the parameters you’ve set, it’ll create a series of notes afterward that go along with the note you’ve used.
Adjusting its Note rate and Octage Range can personalize the arpeggiator’s output to your song’s mood and style.
12) Effects & Processing

The one problem with GarageBand, however, is that there is no loudness meter (the tool you use to judge how loud your projects are).
That said, problems like this can be solved by installing external plugins which we’ll go through in a minute.
13) Mixing & Mastering

Some of these tools include automation, visual EQ, preset mastering settings, and inter-app audio for more advanced plugin.
I recommend mixing with headphones to start because they can provide a more accurate representation of your music, without annoying your neighbours or costing you a ton of money.
14) Automation
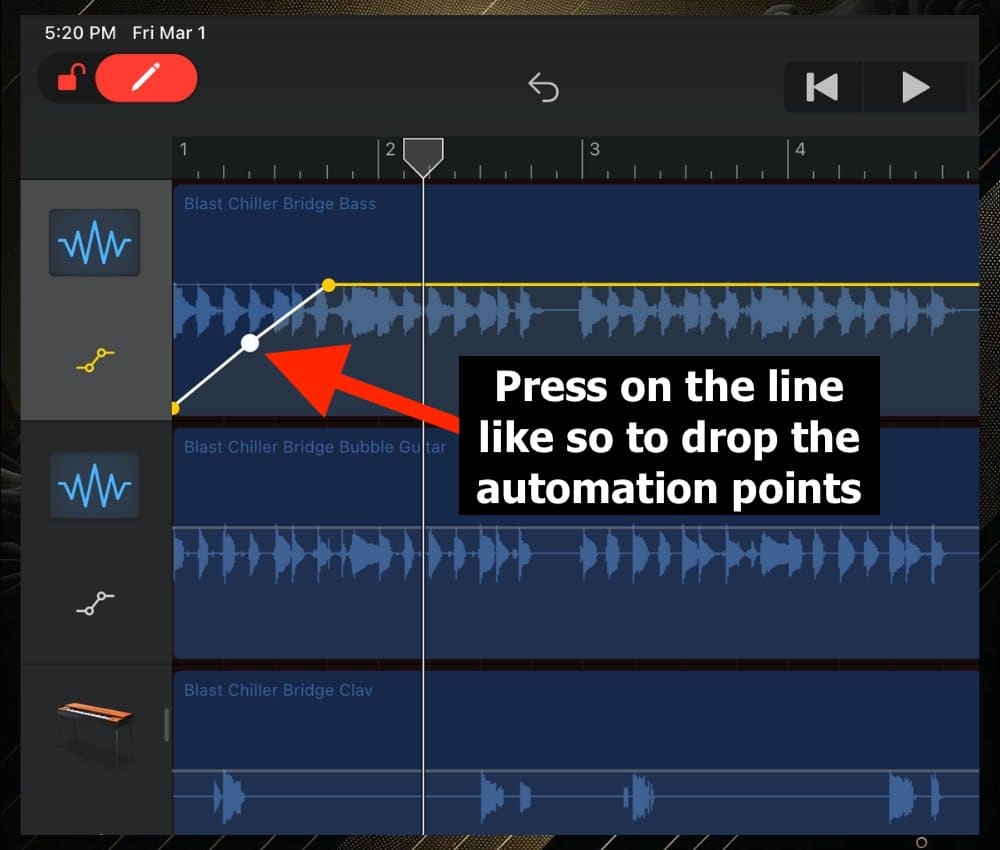
You can make volume, panning, effects, and other sound effects change according to an automatic setting that you’ve created.
Long-press on your instrument track icon to bring up the editing settings, and then choose Automation to begin. Unlock the pen/lock icon and then you can make changes.
Use automation curves for gradual changes, like fades, to create a more natural and engaging sound. I have an article on this as well.
15) Quantization

The benefit of this is you can very quickly clean up all kinds of timing issues with a click of a button.
Record something and then set your quantization to 100% and your notes to 1/16 to see how it works.
If your guitar playing isn’t great, quantization will align the notes to the grid. If your drummer was off that day, it’ll do the same thing. The same thing goes for mapping MIDI notes to a grid as well.
16) Pitch Correction
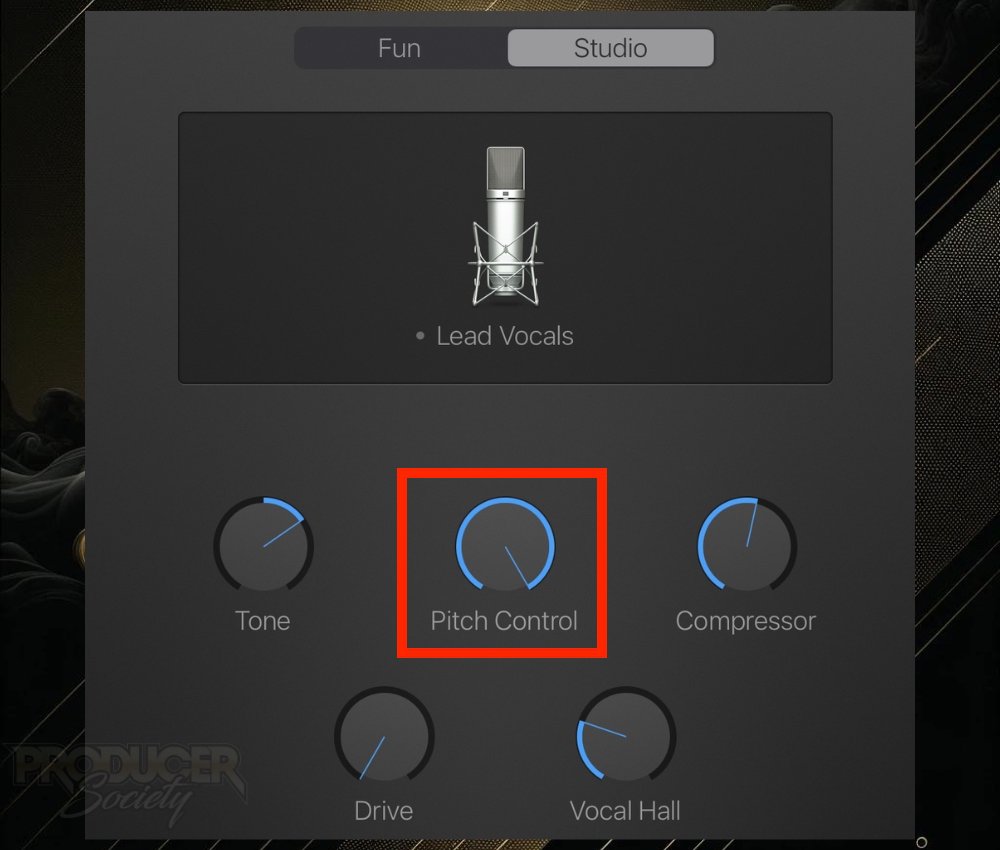
Think of someone like T-Pain or Travis Scott, just to name a handful. I showed how to make sounds like that in this article.
You first must know the key or scale of your recording. You can figure this out either by ear, or by using third-party tools like Antares Auto-Key for iOS.
18) Amp Designer

Before you do anything, understand that you need an audio interface like the iRig HD 2 if you want to record decent-sounding guitar.
After opening a GarageBand project, swipe left in the Sound Browser until you get to the AMP category.
A terrible audio interface isn’t going to cut it if you want high quality recordings.
19) Audio Unit Extensions (AUv3) and Inter-App Audio

If you don’t have the sounds and tools that you need, you can probably download a third-party app that’ll solve the problem for you.
That’s what I usually do. Many of them are free and easily accessible on the App Store. For instance, the one I just mentioned earlier was Auto-Key from Antares.
In case you don’t know, Inter-App Audio (IAA) allows apps to interact as audio sources or effects within a host app such as GarageBand.
However, it’s limited to 1 instance at a time & requires app switching. So it’s less integrated.
It won’t be installed as a plugin, but you can use them together as one, kind of like it is a plugin.
20) Exporting and Sharing
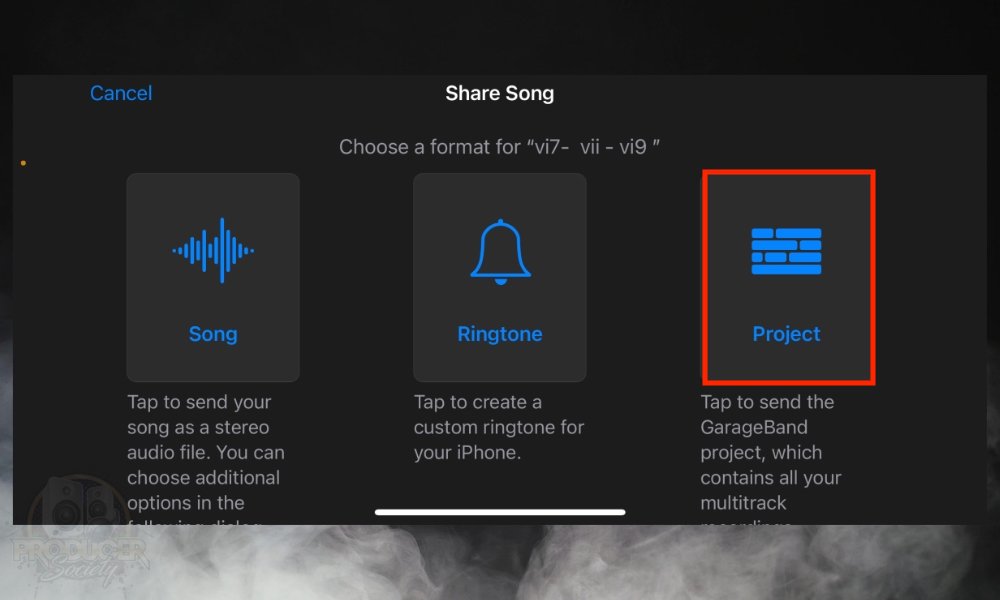
Exporting your project in multiple formats, like MP3 for sharing and WAV for high quality, ensures you have the right option for various platforms. Sharing between GarageBand iOS users is particularly useful.
21) Remix FX
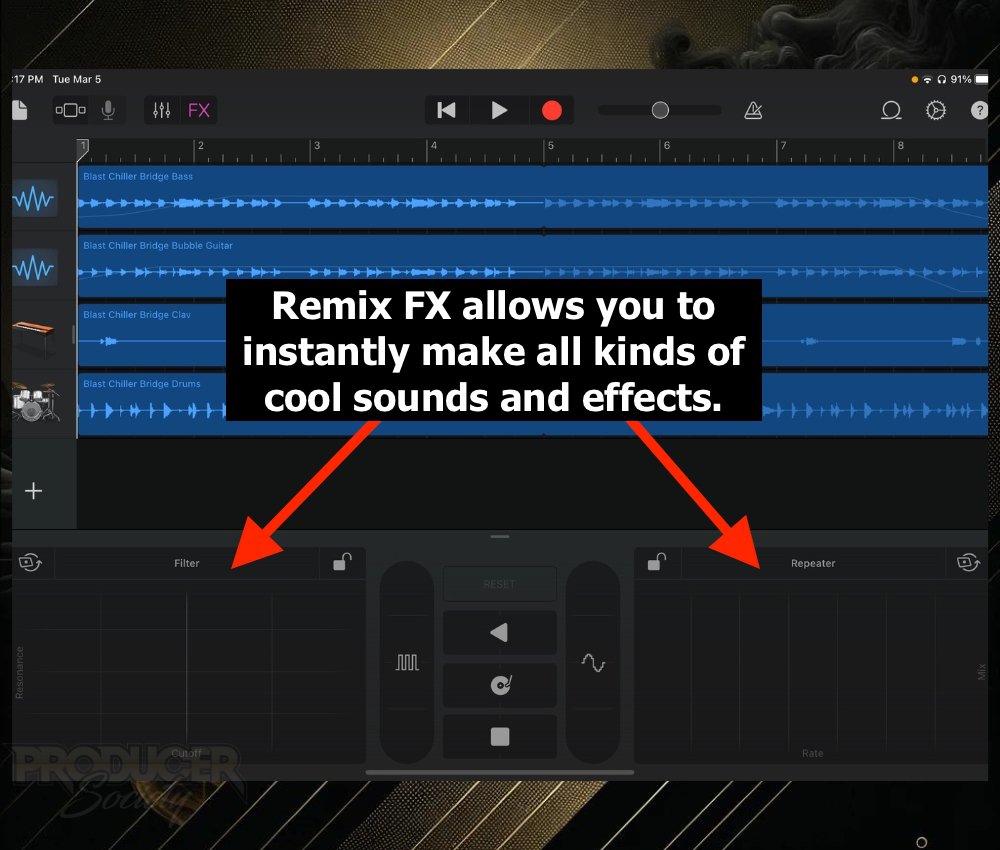
GarageBand’s Remix FX feature offers real-time audio effects to improve your tracks creatively.
Drag your finger along the left pad to use the filter sweep effect for a build-up or drop in any kind of music.
It’s available in Live Loops and Tracks view and it allows you to add filters, repeaters, and more with simple gestures. This feature works on both individual tracks and the full mix.
22) Accessibility Features

GarageBand’s inclusion of features like VoiceOver support makes music creation accessible to everyone – including people who are blind.
I’ll repeat again that you should NOT turn this on if you don’t need it. I did this one time by accident and it was very difficult to turn off.
23) Performance and Optimization Tips
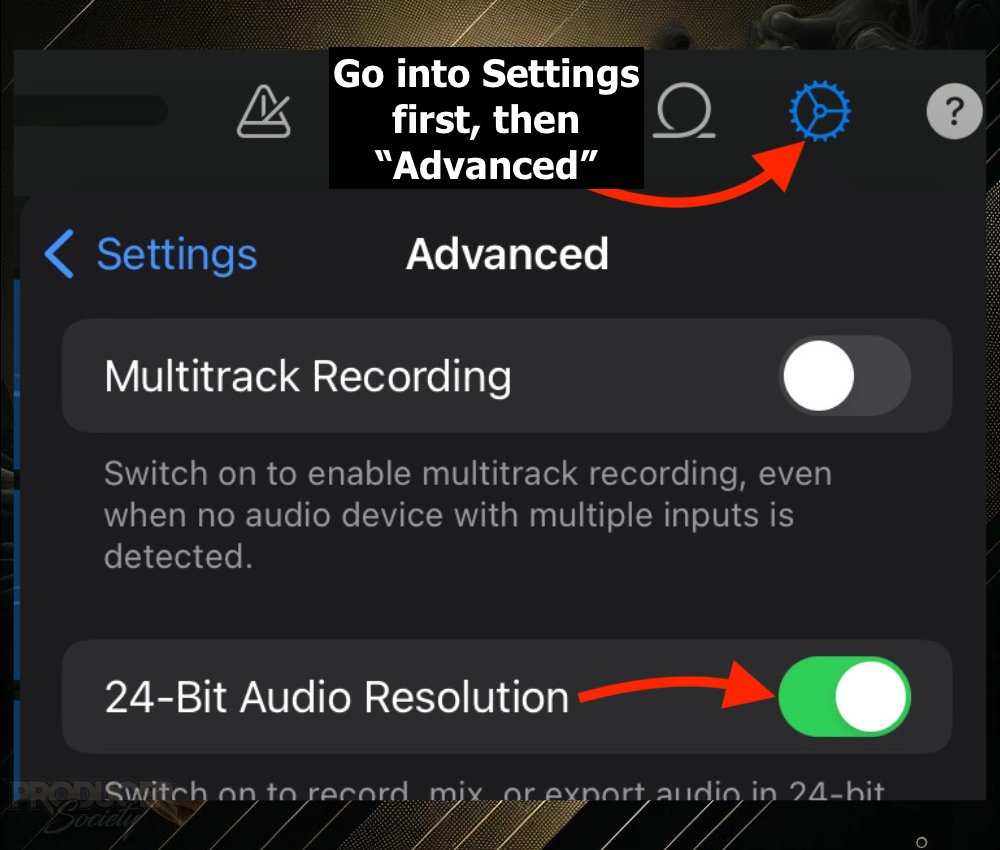
Make sure you set your GarageBand iOS to run at a 24-bit audio resolution. This will ensure that you’re recording the highest quality projects GarageBand is capable of.
Closing other apps and disabling Wi-Fi while using GarageBand can maximize performance, allowing you to focus on your music without distractions.
Do you know more about GarageBand iOS than I do and feel like I missed something? Let me know in the comments below and I’ll fill the article.
Other Articles You May Be Interested In
You want to know what gear you should get to start using GarageBand iOS? Check out the article linked below.
For more GarageBand iOS content, check out these articles:
- How to Make a Song in Garageband iOS (The Quick & Dirty Way)
- How to Connect A Microphone to GarageBand iOS [iPad/iPhone]
- How to Share GarageBand Projects For macOS/iOS (EASY)
- How to Use the Scarlett 2i2 With GarageBand [iOS/macOS]
- How to Set Up The AKAI MPK Mini With GarageBand [macOS/iOS]


 Written By :
