If you’re getting older, you’ll remember the beginning days of cell phones, what they were like, and all of their limitations that seem almost impossible to comprehend in today’s world.
Among the limitations of the cell phone hardware, including the inability to surf the internet and listen to your music at the same time, a lot of cell phone companies were actually charging people for their pre-made ring-tones.
Around that time, 2008 or 2009, I actually had downloaded the song from Protest The Hero – who was my favourite band at the time – “Sequoia Throne.” However, these days, that market isn’t quite what it used to be, simply because there’s just no reason for that when you can create your own ring-tones in a matter of seconds.
In this tutorial, I’ll show you how to make ring-tones using your iPhone using an in-depth process, however, I’ll give you a brief summary first.
To make ringtones in Garageband iOS
1) Click on the Loops icon in an empty workspace and choose File
2) Crop the recording so it’s 30-seconds or less
3) Go to My Songs
4) Click the Share Icon
5) select Ringtone
6) and then hit Export.
A lot of people think that you have to make the song in Garageband iOS in order to make it work, however, you can actually use Garageband to create the track on your computer like normal.
Then export it to your iTunes, sync your iTunes library with your phone, and then drop your file from iTunes directly into Garageband and then turn it into a thirty-second ring-tone from there. I’ll explain it again.
To make ringtones in Garageband Mac, hit Share on your Garageband Project File that’s 30 seconds or less. Select Project to Garageband for iOS, and then Select the project, click the Share icon, select Ringtone, and then hit Export.
In the section beneath the very first step-by-step process, I’ll run through how you can post ring-tones to your phone without using iTunes.
I’ve included pictures for nearly every step, simply because a lot of these buttons and features need illustrations to show what I’m really talking about. Additionally, I’ll present to you a short video as well. Without further ado…
How to Make a Ringtone With Garageband (Mac and iOS)
For this tutorial, you’ll need a couple of things:
1) iPhone – the iPhone Pro Max 11 is your best bet.
2) Computer with Garageband
3) Garageband downloaded on your iPhone
4) Your iTunes library synced with your computer.
5) A song created with Garageband exported into your iTunes library.
For this tutorial, you need to know how to do a couple of different things. You’ll need to know how to export songs from Garageband into iTunes, which is actually quite simple if you’re using my guide.
If you don’t want to run through that article, I’ll briefly explain how to export music into iTunes.
You basically just have to go into the toolbar settings under the tab, “Share,” click on the button, “Song to iTunes,” and then fill out all of the information so you can later find and access it easily.
Choose the name of the track, the artist, and so on and so forth.
Once you’re done, sync your iPhone with your iTunes library.
If you don’t want to use iTunes, just hit the option, “Project to iOS Garageband” from the “Share” menu and that’ll export the track to your desktop in a Garageband file.
From there, you can Airdrop it into your phone.
Now that you have your music in your iTunes library when you go to turn a song into a Garageband Ringtone, the music will be readily available.
Here’s the step-by-step process for converting a song, either your
1) Open up Garageband in your applications on your iPhone.
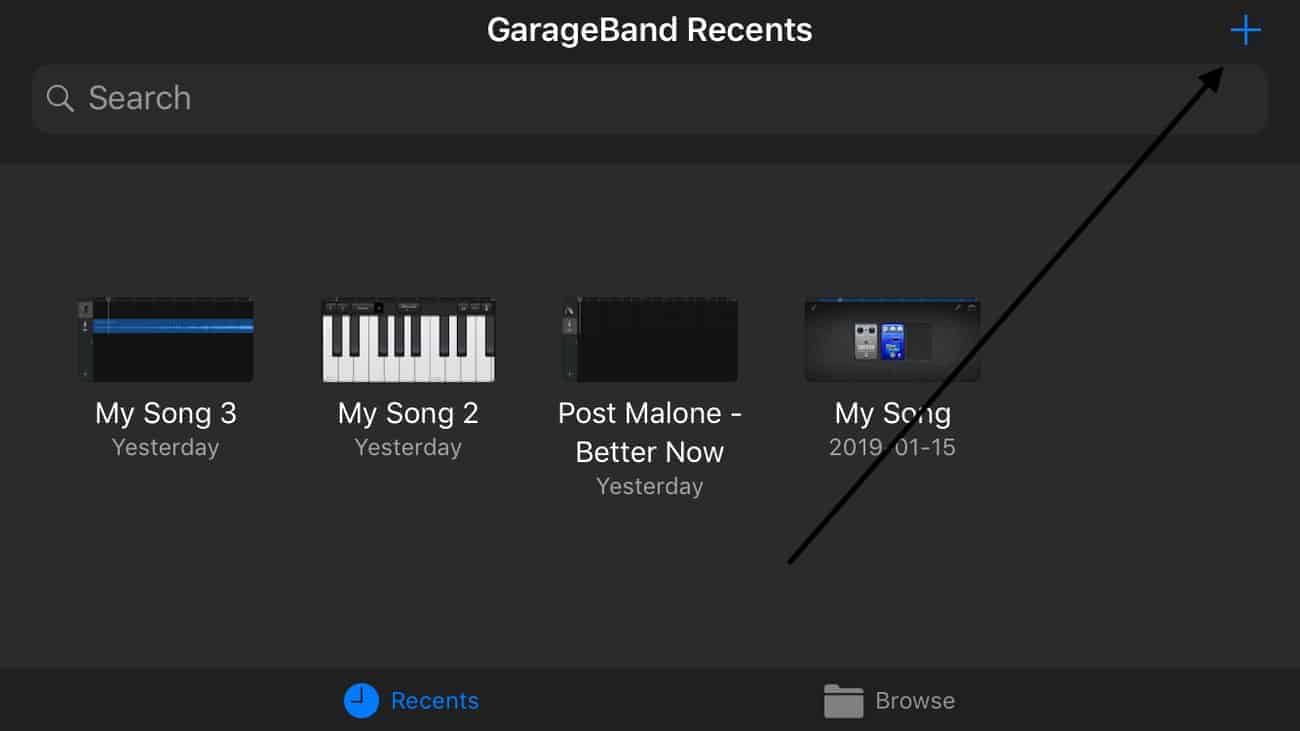
The first thing that happens is Garageband brings you to your most recent files.
2) Hit the “+” button in the top right-hand corner of Garageband and select the “Keyboard” option.
3) Once you’re looking at the keys of the piano, hit the button in the top left-hand corner, it’s the third one from the left, and it looks like a bunch of white rectangles. It’s beside the Arrow pointing downward.
You can see the button I’m talking about in the image below:

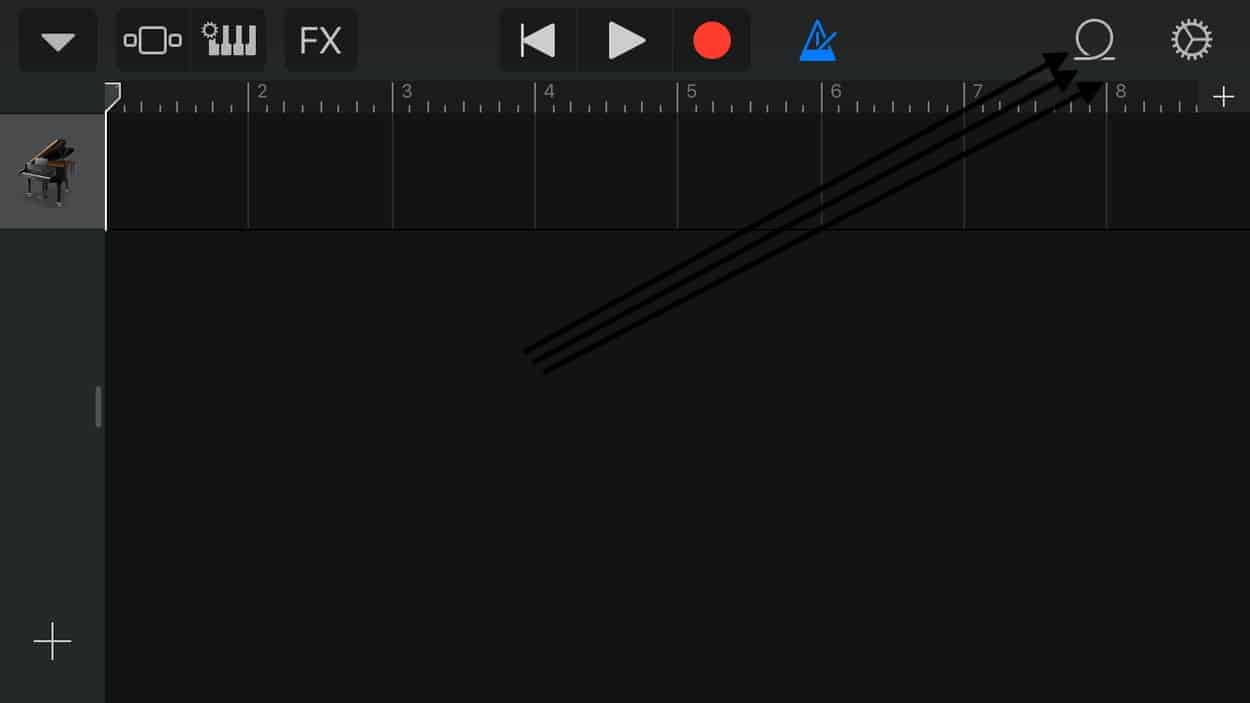
This will bring you to the workspace, where you can see what all of the recordings look like in audio/MIDI format.
4) From here, hit the “Loops” button on the top right-hand side of Garageband. It looks like a hose.
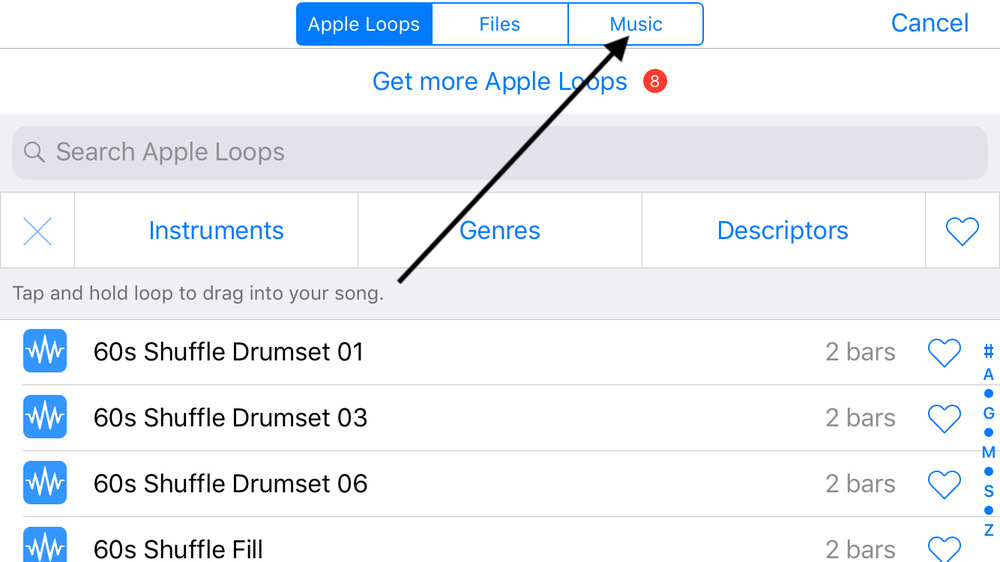
5) Then, go into the sub-category, “Music,” beside “Apple Loops” and “Files.”
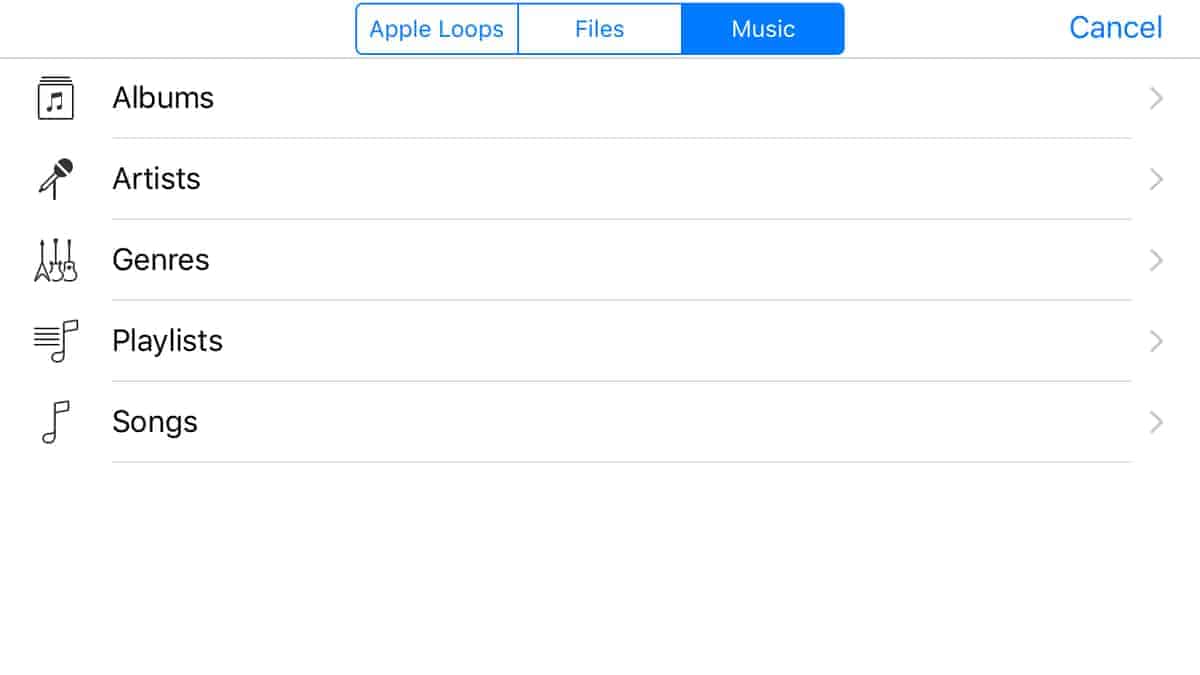
6) Assuming you’ve uploaded your music into your iTunes library and that library is synced with your phone, hit the “Artist” or “Songs” button and then go into the files and choose the song you want to make as your ring-tone.
7) Once you’ve selected the song, tap the screen, hold it, and then drag it (just drag it around even the slightest bit. It should bring up the workspace for you to drag and drop the file almost immediately) and then it’ll give you the option to drag the file into the workspace.
You’ll notice that it’s a blue file, which shows that it’s an audio recording, rather than a MIDI File, although it’s possible to export MIDI files too as I explored in my tutorial.
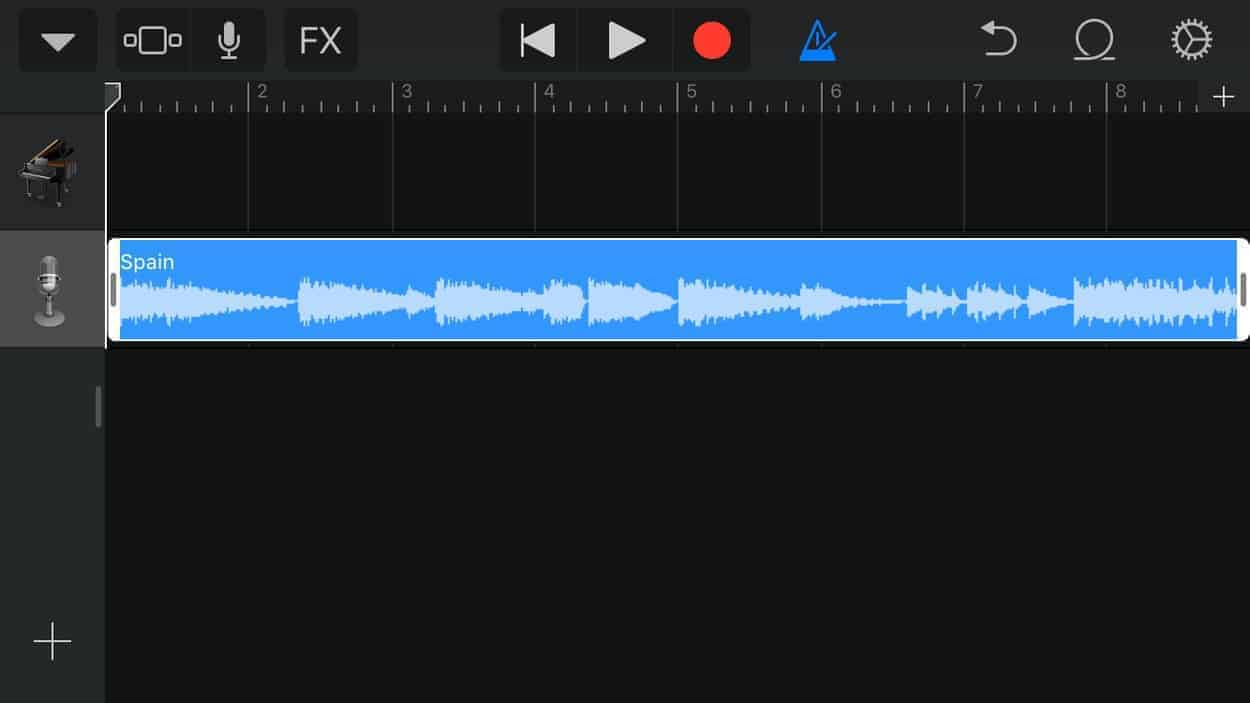
8) Select the portion of the song that you want to turn into a ringtone using the selectors on the left and right-hand side of the file.
It has to be less than thirty seconds for it to be a ringtone and no more than that.
If you don’t select how long the file is, or which part is the ringtone, it’ll do it for you, and obviously, we don’t want that, so make sure to specify which part you want.
9) Click on the drop-down menu on the top left-hand side of Garageband, and exit it out of the file.
10) Click on My Songs.
11) Tap the file and hold the tap, until the available options show up that say, Copy, Duplicate, Rename, Move, Delete, Share, Tags, and Info.
12) Hit the “Share” button.
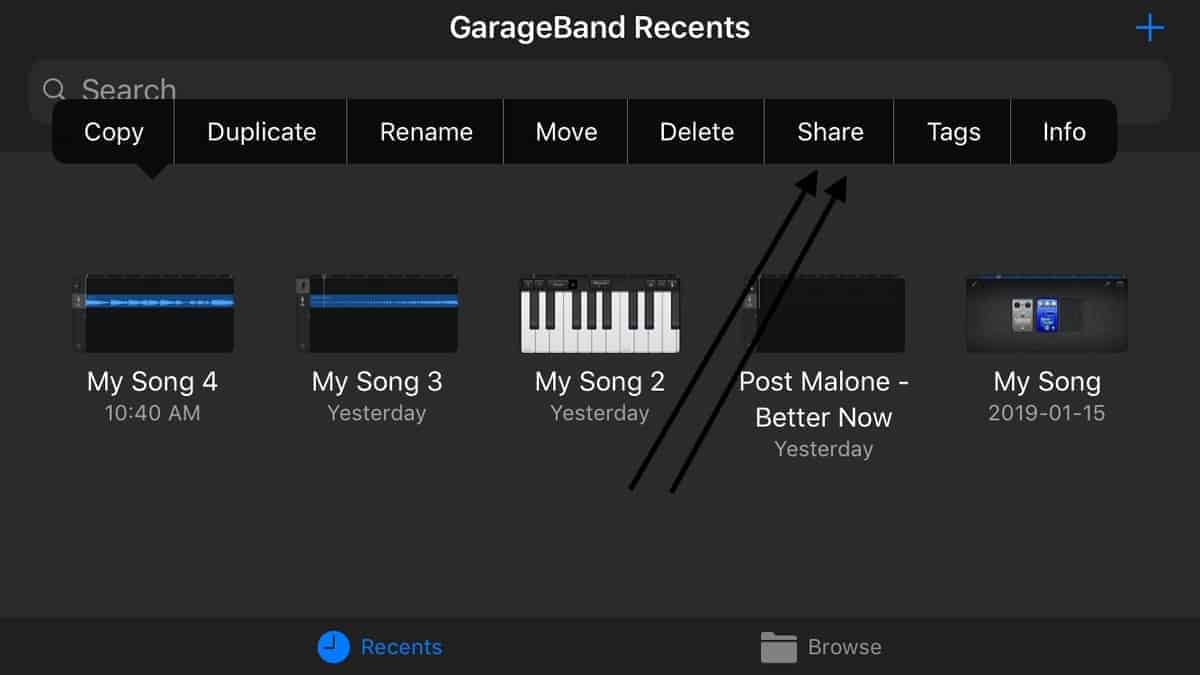
13) Then, you’ll have three options to choose from, Song, Ringtone, and Project. Obviously, you want to hit the “Ringtone” option, because that’s what this tutorial is about.

14) Choose the name of your ringtone.
15) Then hit the “Export” button, and voila! You’ve just created an official ringtone.
16) Assign it to a contact or a specific ringtone, or whatever you want to use it for.
Additionally, you’ll have the ring-tone among your other options when you go into your iPhone’s settings.
And voila! It’s as simple as that.
Another Option
Now, let’s say for whatever reason you don’t have iTunes or you don’t want to use it. There has to be a way for doing that, and yes there is.
How To Make A Ringtone Using Garageband Without Using iTunes
If you want to make a song using Garageband and then make it as your ringtone, you can basically do the exact same thing as I outlined above.
Except, rather than syncing your iTunes library with your phone, you can just Airdrop a file from your computer into your Garageband application on your phone. The same thing could be done using a DAW like Pro Tools as well – just make sure it’s not an FL Studio project file.
This is a good way of going about it too, and it’ll work fine. It may even be superior just because there aren’t as many steps involved.
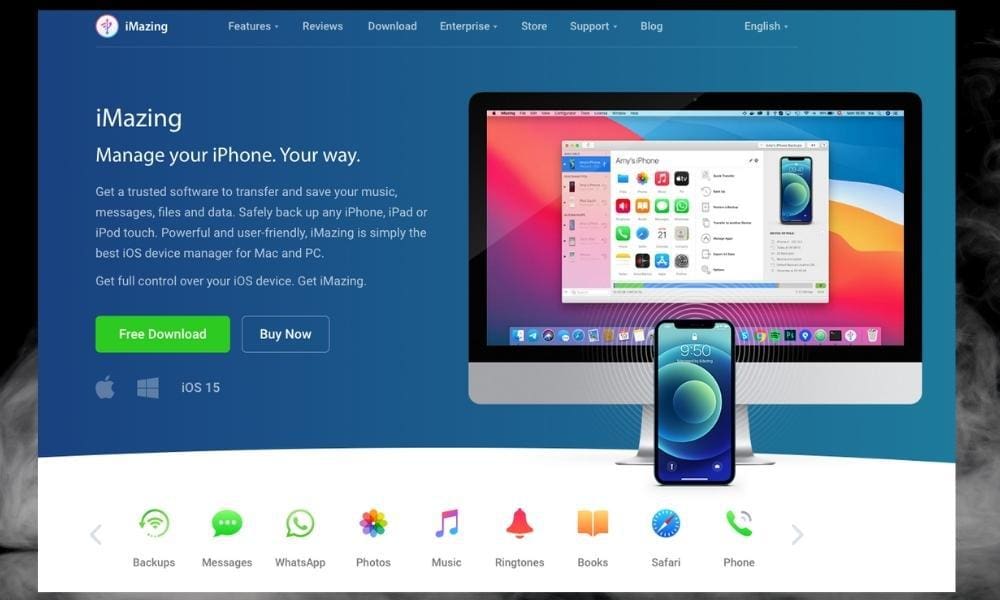
Here’s a step-by-step process in case you’re confused, also, I have a full article on how to do it except with the application iMazing which you can access for free.
1)After you’ve created your song using Garageband, export it to your desktop in a Garageband file.
Use the “Project to Garageband for iOS” option and put it on your desktop so it’s easy to find.
2) From here, you can just right-click on the file, and then AirDrop it directly into your iPhone’s Garageband application, and then voila! It’s right there on your phone.
After that step, you can just follow the same steps that I outlined above.
For the sake of clarification, I’ll briefly run through it again.
3) Once the file has been AirDropped into iOS Garageband, you can just do the long-tap click on the file, and then it’ll bring up all of the options.
4) Click on the button, “Share,” and then it’ll allow you to turn that file into a ringtone on your phone.
That’s all for now, I hope this managed to help you out.
How to Set Custom Ringtones Without GarageBand
Other Articles You May Be Interested In
- How to Set Ringtone in iPhone without iTunes [The EASY Way]
- How to Make A GarageBand Ringtone From A Video [Full Guide]
- How to Make A Spotify Song Your Ringtone on iPhone [SIMPLE]
- How to Make A Ringtone Without Garageband [Dead Simple]
- How to Make A YouTube Song Your Ringtone on iPhone [SIMPLE]
Cool Things to Mention
The great thing about this is that you can literally turn any audio file into a ringtone, no matter what it is. Get creative and see what sort of things you can come up with. I’m sure you need help creating melodies with the piano, so grab PianoForAll from their website, which is one of the simplest ways to learn.
Maybe you could even come up with some kind of business model where you make cool and unique ring-tones for people using interesting songs, recordings, and so on and so forth. Edit: And after doing some research on the topic, the result of which I was quite shocked about, I discovered the ring-tone industry is surprisingly alive and well.
According to a report from Gartner, the ring-tone industry is still worth approximately $2.1 billion. There are clearly people out there that are making bank from ring-tones, still.
I discovered sites that will make ringtones for you, but they also will take a cut of your profits, which is something you don’t want. With this tutorial, you can just make yourself, so there’s no need to associate with such companies.


 Written By :