To connect a microphone to GarageBand iOS, whether iPad or iPhone, you’ll need an audio interface like the iRig Pro I/O. Connect the iRig to your device with the USB-C or Thunderbolt to Mini-DIN cable, then the microphone with an XLR jack, and open up a vocal track in GarageBand iOS to record.
Necessary Equipment
- Audio Interface (iRig PRO I/O or Scarlett 2i2)
- Shure SM58 Microphone
- Digiflex XLR Cable
- iPad/iPhone
- ATH-M50xBT2 Headphones
And really, that’s all you have to do. There are some other tools you can use which will make recording a lot easier, including a microphone stand which holds your device and the iRig.
How to Connect An External Mic to GarageBand for iPad
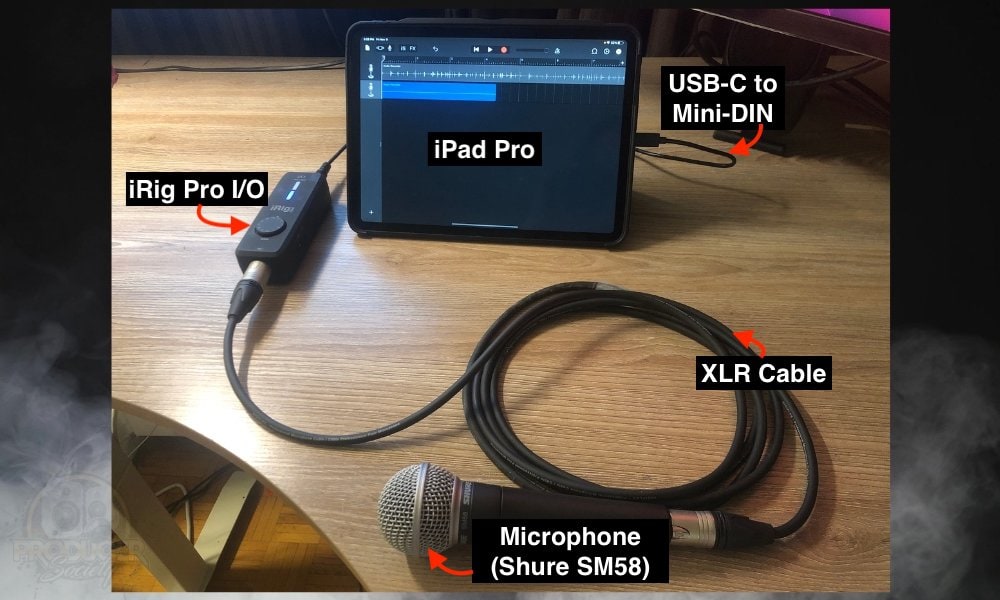
The image above does a great job of demonstrating how you connect an external microphone to an iPad. And it doesn’t have to be just for GarageBand iOS either. This same process will work for any DAW including FL Studio Mobile which is another decent DAW for iPad/iPhone.
Tip:
It’s important to note though that the iRig Pro I/O needs AA batteries. It does come with some batteries in the box as well as all the necessary cables. The iRig Pro I/O uses Mini-DIN which is an interesting choice considering these cables are hard to find, however, you can find them on IK Multimedia’s website if you need more.
1) Plug In The iRig Pro I/O to Your iPad
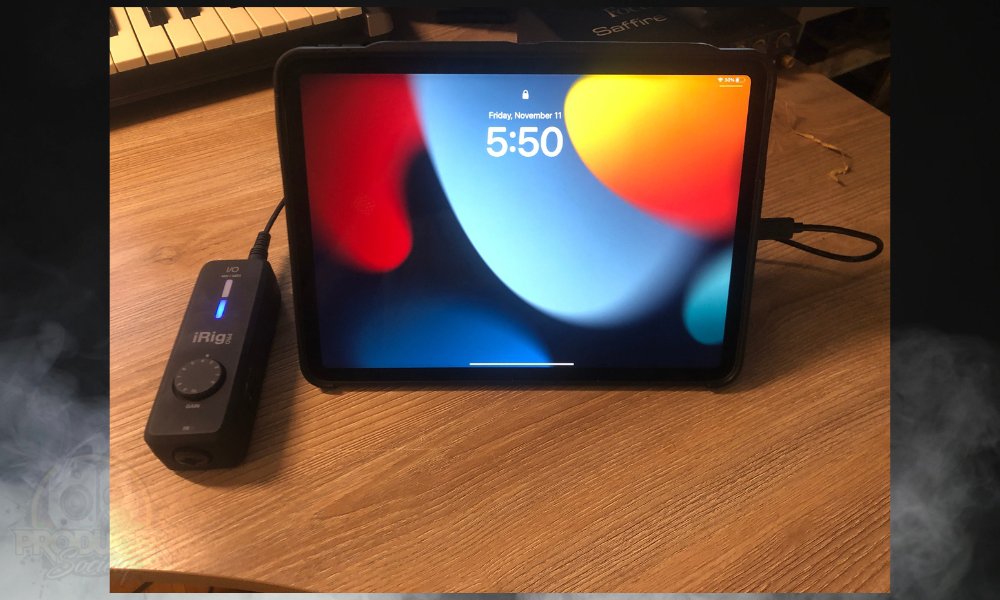
Just like it works with the iRig HD 2, the iRig Pro will let you know that it recognizes the device it has been connected to by lighting up blue. At first, it’ll be a light-blue colour, but when you open GarageBand, it’ll brighten considerably.
2) Open GarageBand and Navigate to Audio Recorder > Voice
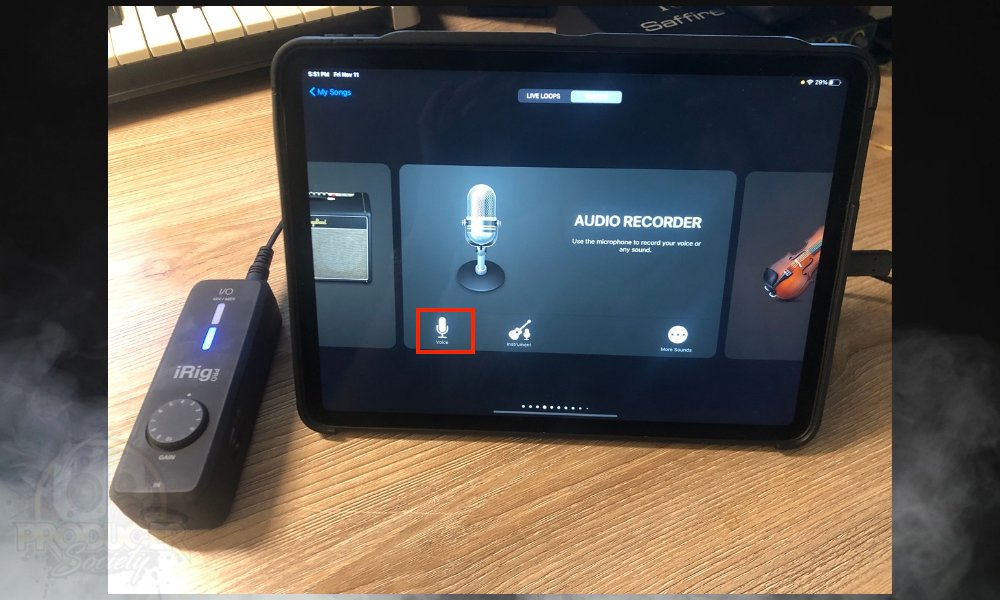
After you’ve opened GarageBand, navigate to the Audio Recorder page as you can see in the image above and then click on “Voice.” You do this just by swiping on the screen to the left or to the right until you reach the interface in question.
3) Connect The Microphone To The iRig Pro I/O With An XLR Cable
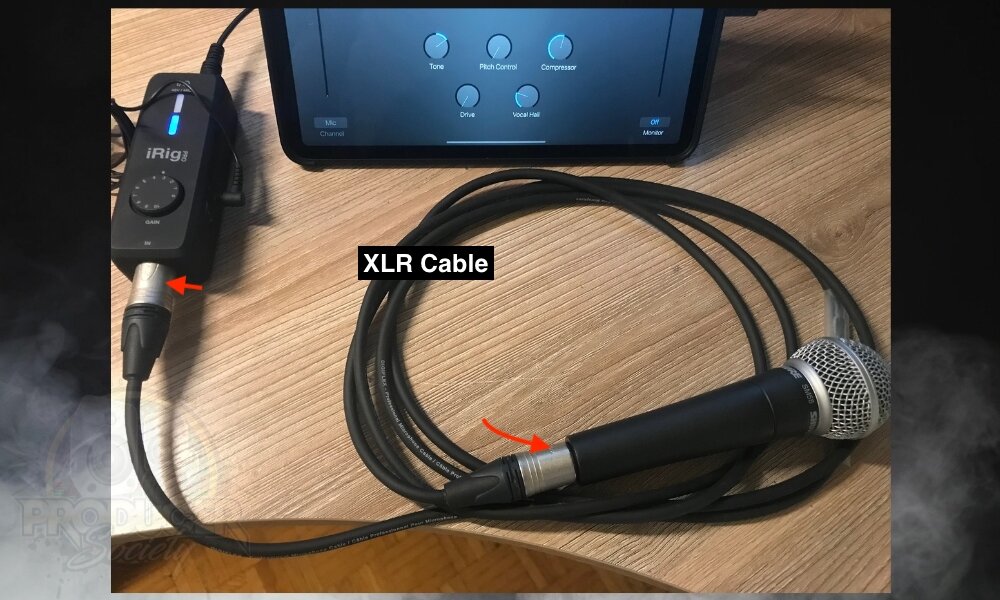
- Use the 48v switch if you’re using a mic that needs phantom power
On the left-hand side of the iRig Pro, there is a 48V switch that you can use if your mic is a condenser mic (I’ve written other guides on condenser mics, btw), or if it just needs more juice to work properly. Connect your microphone to the input on the iRig and it’ll work as expected.
4) Turn On Monitoring and Turn Off the Metronome
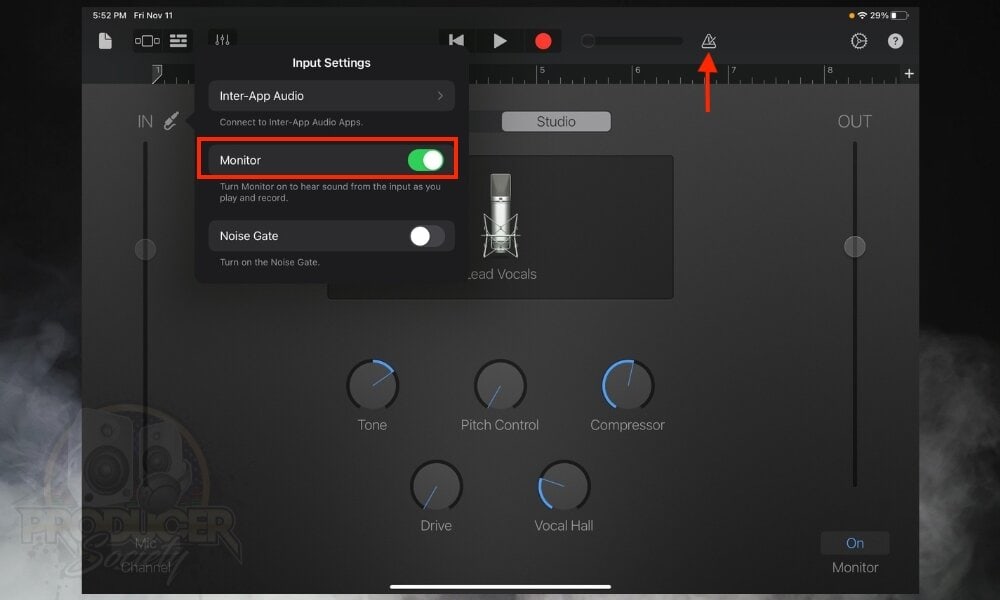
I imagine you want to hear yourself recording (I have a separate guide on monitoring issues if you’re having trouble), so turn on the monitoring. If you’re laying down a vocal track, you’ll probably want the metronome off as well, although, this could be up to personal taste.
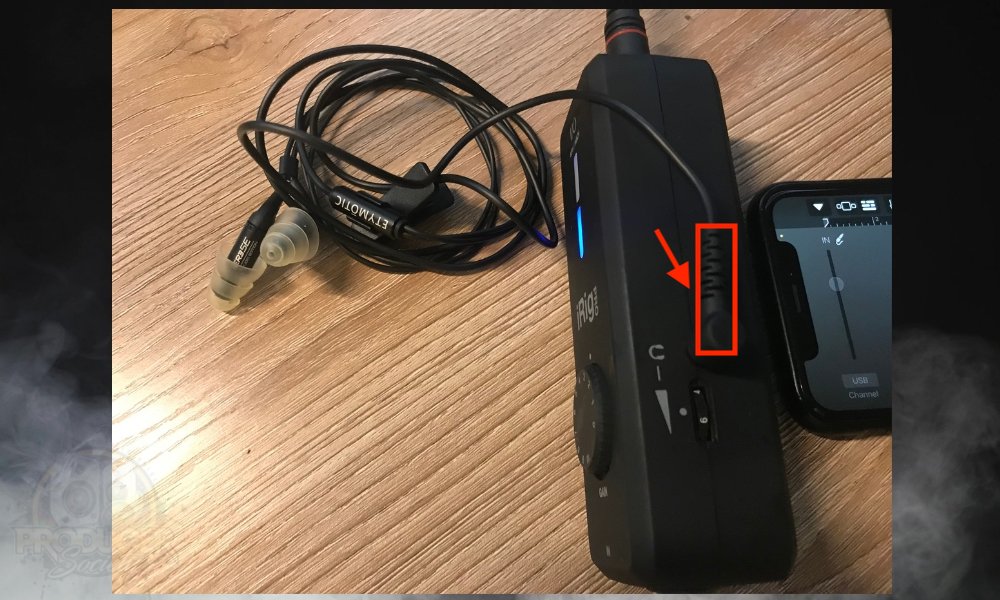
5) Connect Your Headphones to the iRig Pro I/O
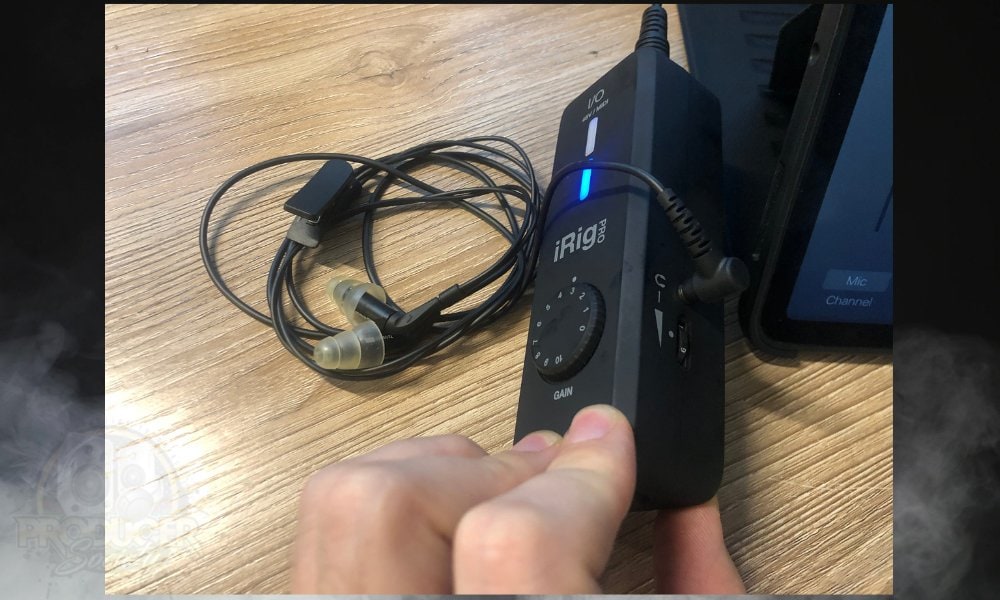
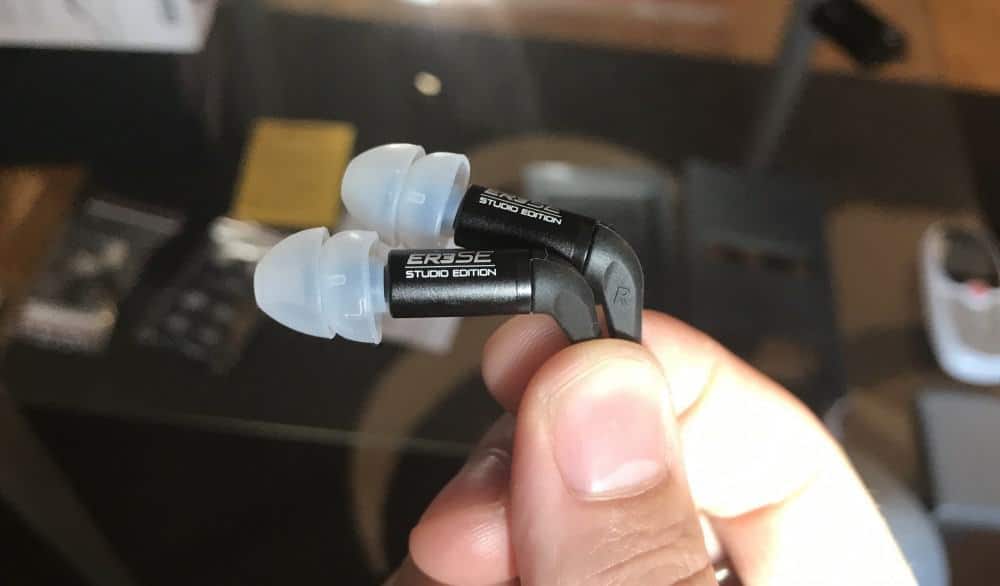
I have several pairs of headphones, but I like to use the Etymotic pair because I prefer earbuds and they’re also easier to carry with you. I imagine that if you’re using an iRig Pro and an iPad, you probably care about mobility and convenience as well, so earbuds may be the best bet for you.
However, get the upgraded ER4SRs (on my Product Page) instead. It’s important to note that Bluetooth headphones like AirPod Pros can be used but they won’t be as effective for reasons I’ve explained before.
6) Hit the Red Record Button to Begin Laying Down A Vocal Track
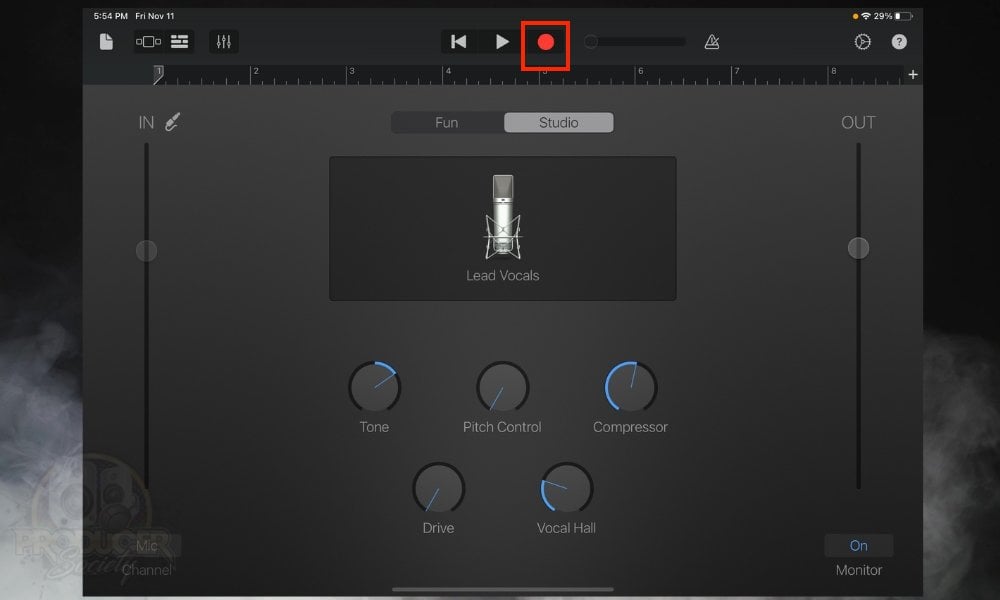
You can also choose between “Fun” and “Studio” settings. “Fun” is mostly effects-laden settings whereas Studio is for traditional vocal takes, ie, a bit of compression and EQ rather than something like Extreme Vocal Tuning. And that’s pretty much it for setting up a microphone with an iPad.
How to Connect An External Mic to GarageBand for iPhone
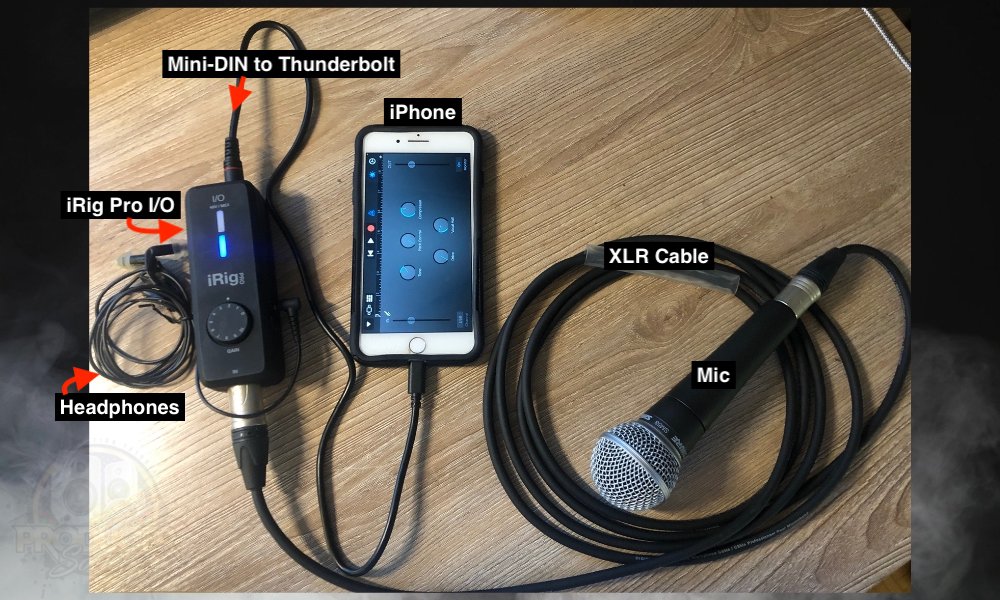
But what if you want to connect an external mic to your iPhone instead? It’s super simple as well and is almost identical to how it’s done for iPad.
1) Plug In The iRig Pro I/O to Your iPhone
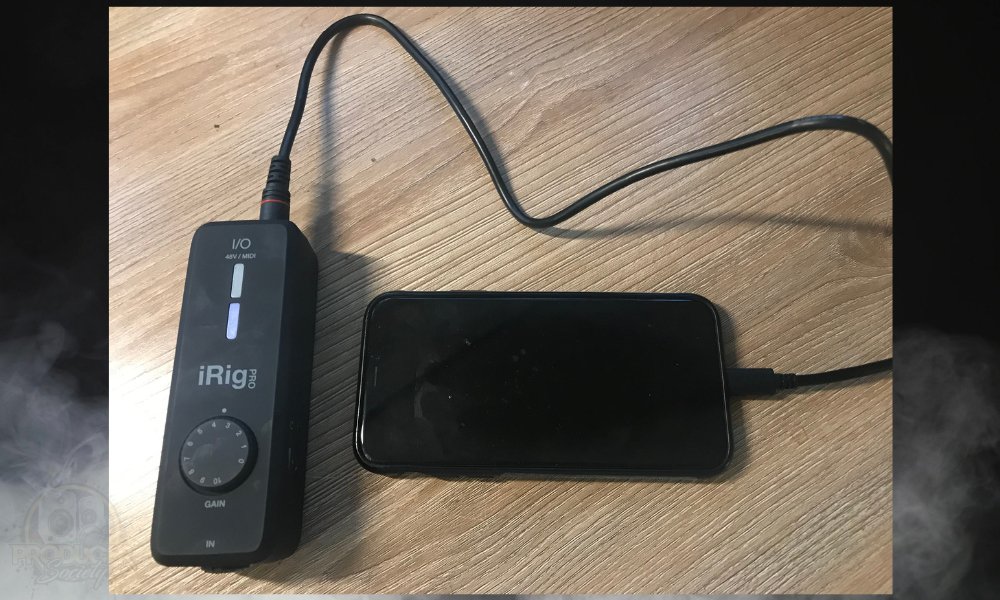
This is done just as it’s done with iPad, except you’ll need to use the Thunderbolt to Mini-DIN instead.
2) Open GarageBand and Navigate to Audio Recorder > Voice
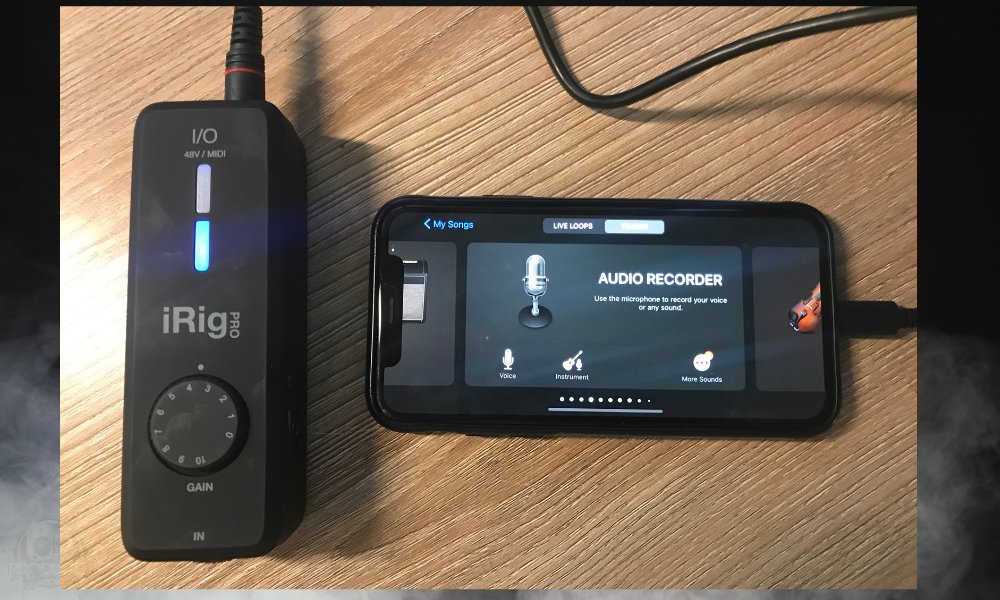
3) Connect Your Microphone With An XLR Cable
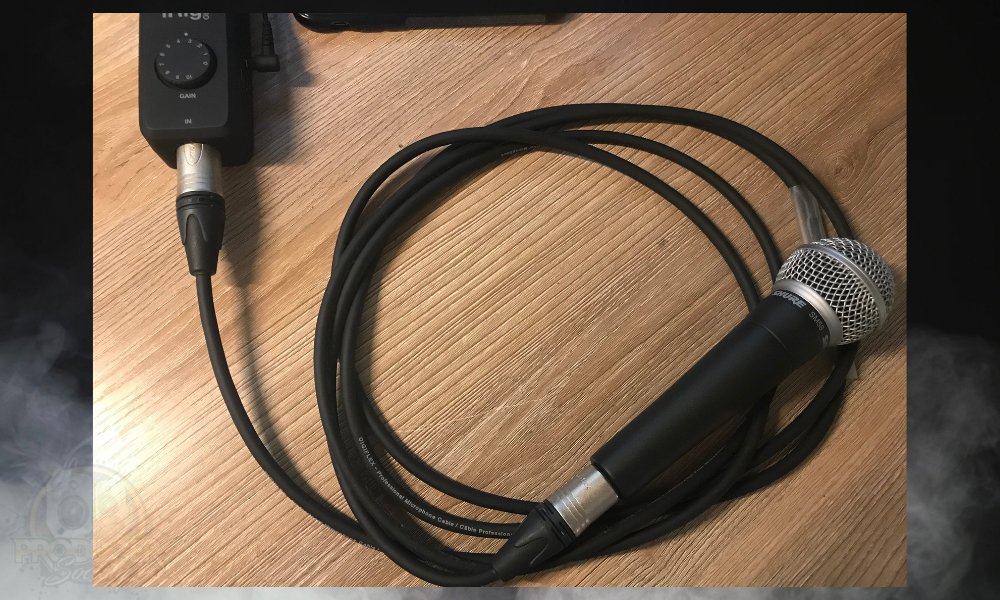
- Use the 48v switch if you need phantom power, ie, for a condenser microphone.
Because the iRig Pro uses batteries, you don’t have to worry about powering the condenser microphone with the iPhone battery. The batteries in the iRig Pro will take care of that instead.
4) Turn On Monitoring and Turn Off the Metronome
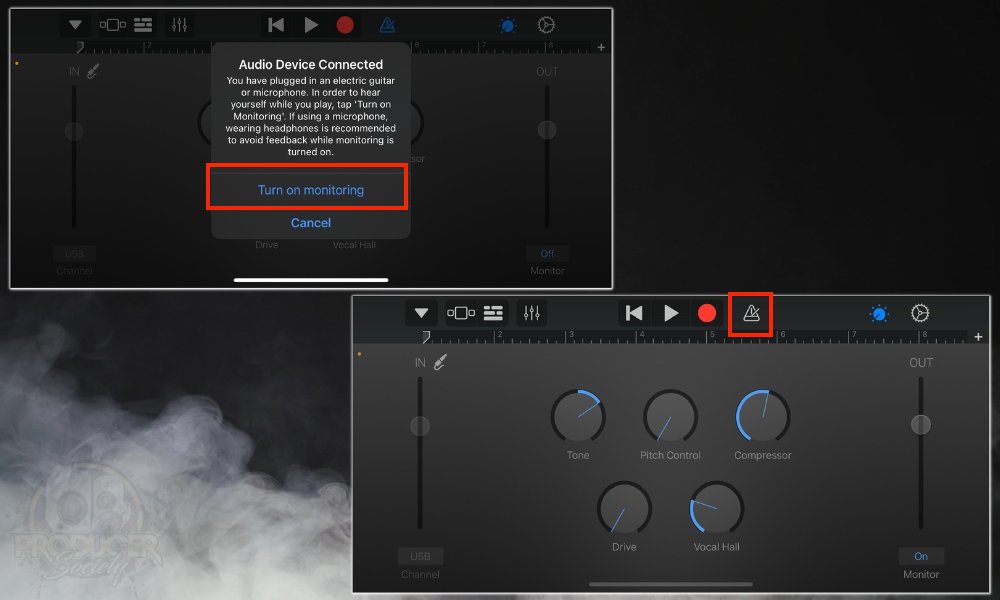
The difference between iPad and iPhone here is that your iPhone will warn you that you have to use headphones to avoid getting feedback among other issues.
5) Connect Your Headphones to the iRig Pro I/O
6) Hit the Red Record Button to Begin Laying Down A Vocal Track
![Record 1, 2, 3 ,4 iPhone - How to Connect External Mic to GarageBand iOS [iPadi/Phone]](https://producersociety.com/wp-content/uploads/2022/11/Record-1-2-3-4-iPhone-How-to-Connect-External-Mic-to-GarageBand-iOS-iPadiPhone.jpg)
The nice thing about using the iPhone instead of the iPad is that it’s much smaller. It takes portability and convenience to the next level, and you won’t suffer any quality issues, but I digress. Now that I’ve shown you how to set everything up, I think it’s worth our time to talk about the pieces of gear individually.
What Gear You Need To Connect An External Mic to GarageBand iOS
Obviously, we used more than one piece of equipment to make this happen. But thankfully, if you already have an iPad/iPhone, an XLR cable, and a microphone, all you really need is the iRig Pro because, as I said earlier, it comes with all of the necessary cables. Let’s talk about the iRig Pro first because it’s the most important thing.
1) iRig Pro I/O [Audio Interface]
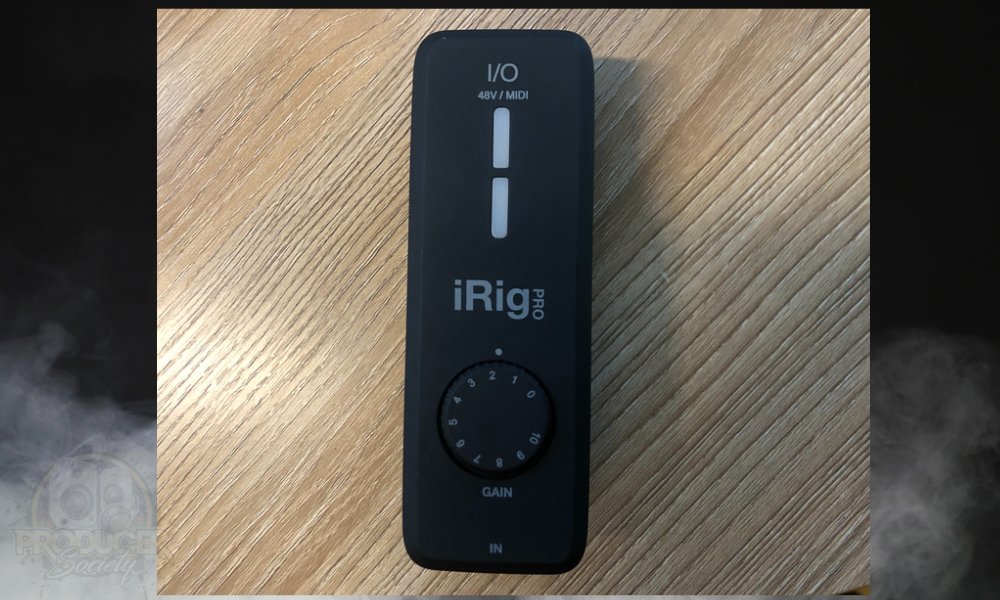
It comes with a few different things in the box, including software (although I don’t care about the plugins because they’re just limited renditions of programs like Amplitube 5).
- USB-C to Mini-DIN Cable
- Thunderbolt to Mini-DIN Cable
- USB to Mini-DIN
- 2 Female MIDI Adapters
- 2 AA Batteries
- Velcro Strip for Mic Stand Fastening
Some day, I’ll do a dedicated review on the iRig Pro I/O but a few things I’ve noticed about it thus far is that it’s about 2x the size of the iRig HD 2, the dials and switches are sturdier, and it’s a bit beefier.
I kinda wish I would’ve just got it instead of the iRig HD 2 all of those years ago (I have a review of the iRig HD 2 if you’re interested). It’s worth stating while we’re here that the iRig Pro I/O can be powered by a charger or a power bank if you have one. If you get sick of using batteries for it, you have that option.
2) Microphone (Shure SM58)
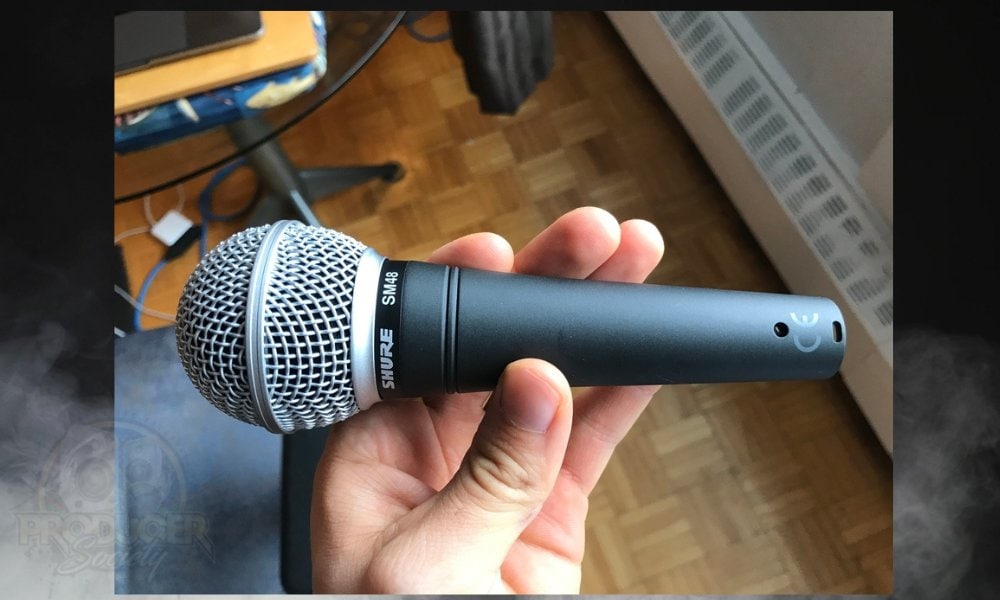
There are probably better mics on the market, but this one is an industry-standard.
Truthfully, all of the best mics are between $500 and $1000, and I imagine that the average person reading this article doesn’t want to spend that. If you are interested in a superior mic, the Electro-Voice RE-20 has a great reputation.
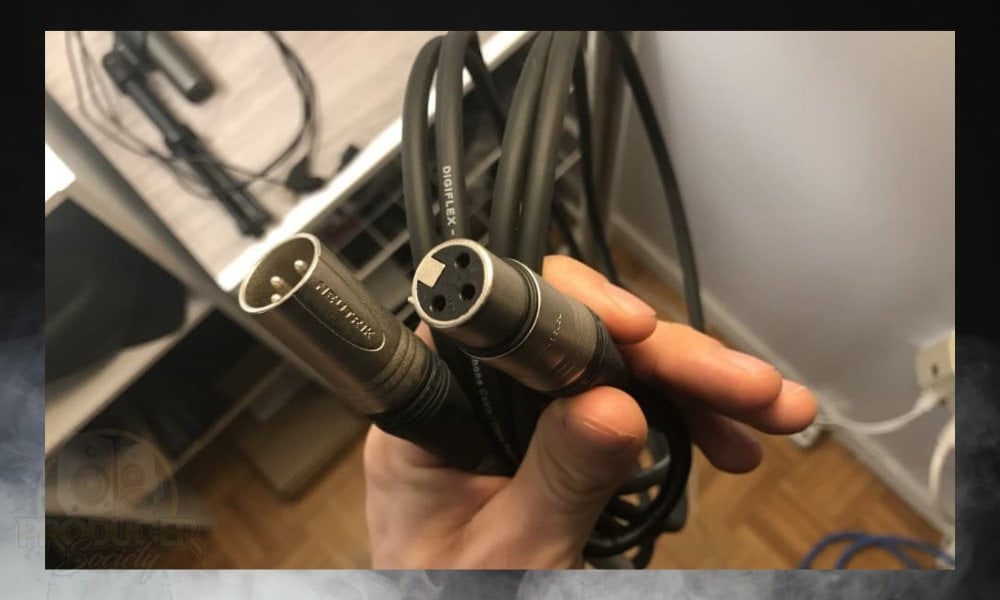
3) XLR Cable
4) Noise-Cancelling Headphones (Not Bluetooth)
If you’re not an earbuds kind of person, the ATH-M50xBT2 are awesome because they’re a mixture of casual listening and mixing headphones. If you’re on the train, use Bluetooth, but if you’re mixing, the wired connection will serve you better due to the maintenance of audio fidelity.
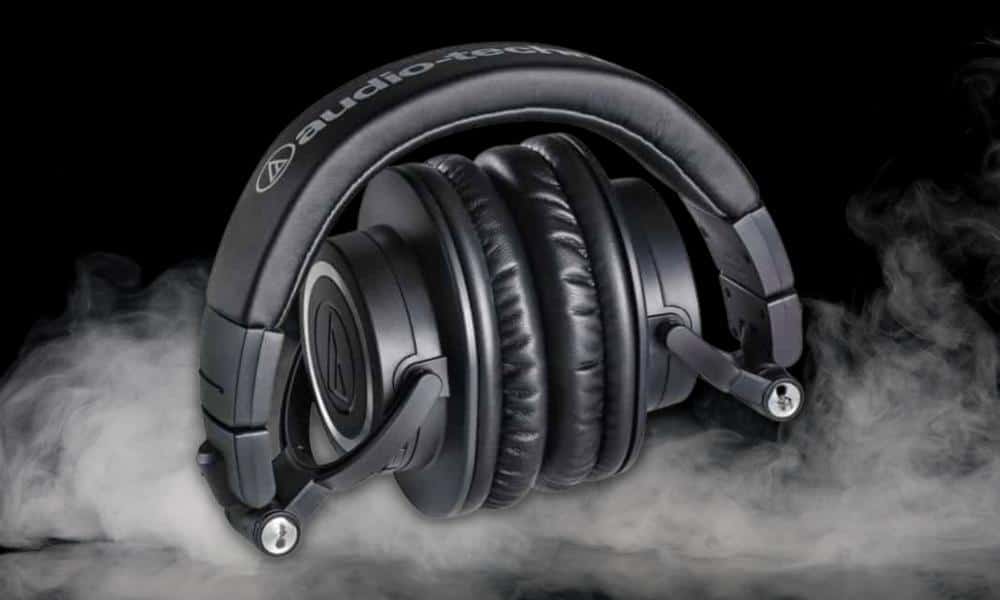
As a matter of fact, I spoke to someone about these headphones today when I was in line for a coffee and the guy told me loved them.
5) iPad and iPhone

And the last thing on the list is the actual iPad and iPhone if you don’t already have them. I bought the 11″ iPad Pro with the aforementioned specifications and I’m extremely happy that I did. It’s lightning fast and I never have to worry about storage space again.
It also has 16GB of RAM which is great. For the iPhone, I would recommend having anything newer than the 7 because iOS 16 doesn’t work on 7 and below.
4 Tips for Connecting External Mics to GarageBand iOS [iPhone/iPad]
Now that we’ve got the basic setup out of the way, I’m going to share a few tips for you that I think are important and will well help a lot.
1) Get A Hercules Mic and Hercules iPad/iPhone Stand to Hold Your Gear
If you get a Hercules or K&M mic stand and the accompanying iPhone/iPad holder for it, you can actually put your device on the mic stand along with the iRig Pro. The iRig Pro comes with a small piece of velcro that can be used to wrap around the mic stand.
This means you won’t have to carry the iPad or the audio interface if you intend on taking the iPad/iRig combination to another room. Explained another way, the iPad/iRig/Mic combination is something that you can take with you to another room, ie, your closet.
2) Take Your Mobile Vocal Recording Device Into Your Closet For Sound Isolation
So why would you want to take your mobile recording device, if we’ll call it that, into your closet? Your closet is a small, enclosed space, probably with a ton of clothing in it so the sound waves won’t reverberate and sound terrible in the recording.
This is the closest thing you’ll get to a high-quality recording booth without spending a dime. Because the iPad and the iRig are portable and the latter is bus-powered, there’s no reason why you can’t take the mic stand anywhere you want. It’s really a great idea.
Unfortunately, I’ve yet to purchase the mic stand and iPad holder combination yet, but both are currently sitting in my Amazon shopping cart. For me, the ability to take everything into a separate room is a big convenience.
3) Don’t Use Bluetooth Headphones (Except for ATH-M50xBT2)
You also don’t want to use Bluetooth headphones for vocal recording because there will be a small delay. Maybe you can get away with it, but in my experience, Bluetooth just isn’t there yet, and you’re much better off having headphones plugged into the iRig.
As I said earlier though, the ATH-M50xBT2 is a nice compromise if you want to switch between a casual and mixing pair of headphones.
4) Non-Bus-Powered Audio Interfaces Work Best for iPhone
If you read my article on connecting the Scarlett 2i2 to iPhone, you’ll recall that I said that the Scarlett 2i2 is too much for the iPhone. You’ll get a prompt that says the accessory uses too much power. One way to get around this is to use a multiport camera adapter (for whatever reason).
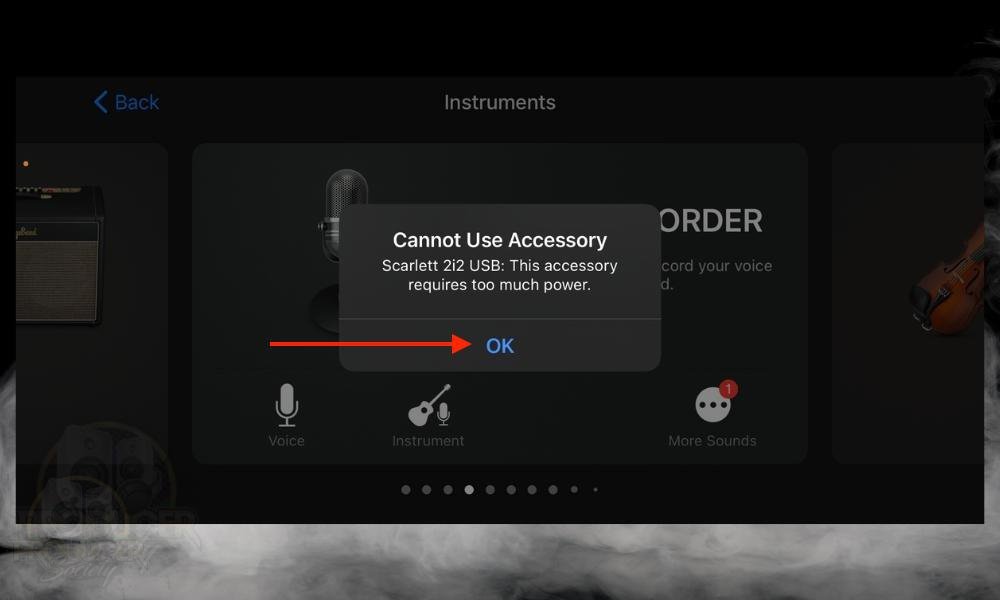
Anyway, I mention this because I feel it’s just another reason why the iRig Pro I/O is great for iPad and iPhone. You eliminate the need for other adapters and tools to get a simple microphone or guitar to work. It’s really great.
Other Articles You May Be Interested In
- How To Plug Your Guitar Into GarageBand
- How to Use the Scarlett 2i2 With GarageBand [iOS/macOS]
- How to Use the Scarlett 2i2 With A Microphone [EXPLAINED]
- The Definitive Guide to Audio Interfaces for Garageband
- How to Connect a Dynamic Microphone to a Computer?
Gear Mentioned
1) iRig Pro I/O
2) Etymotic ER4SRs
3) Audio Technica ATH-M50xBT2
4) Lightning to USB Multiport Adapter
5) Shure SM58
6) Electro-Voice RE-20
7) Hercules Mic Stand
8) Hercules iPad Holder

 Written By :