To export the highest quality and most versatile file from FL Studio Mobile
1) click the FL Studio icon on the top-right of your project
2) choose “Save”
3) click “WAV”
4) Select “Send”
5) Choose “High-Quality,” and “Trim Silence”
6) Select “Render”
(Use “Split Mixer Tracks” to separate all tracks).
This is the quickest way to export the highest quality from FL Studio Mobile without sacrificing any versatility. Whenever you export a project, you want to do so in a way where your file can be used by third parties without losing any fidelity.
Most producers prefer to export their projects in .wav format – a 32-bit format – as well as with a 44,800Hz sample rate. This will allow you to render your project into MP3 and other file formats afterward. That said, a standard .wav file will work great (44,100Hz) for most people.
How to Export The Best Quality from FL Studio Mobile [Step-By-Step]
![How to Export The Best Quality from FL Studio Mobile [Step-By-Step]](https://producersociety.com/wp-content/uploads/2023/02/How-to-Export-Best-Quality-from-FL-Studio-Mobile-Featured-Image-.jpg)
As I explained earlier, FL Studio Mobile has fewer options than its desktop counterpart, FL Studio. You can do a lot with the desktop version, whether you’ve used the macOS or Windows version.
For instance, you can change sampling rates and you can even export as more than one format at once. One thing that’s important to mention though is that the higher the sampling rate, the more work it takes for your PC to export it.
Image-Line has a great guide that you can check out, by the way, and this YouTube video here is great for exporting your files from the desktop version if you’re interested. Moving on from that though, let me show you how to export from FL Studio Mobile in detail. We’ll start with the project interface.
1) With Your Project Open, Click the FL Studio Icon On The Top-Right
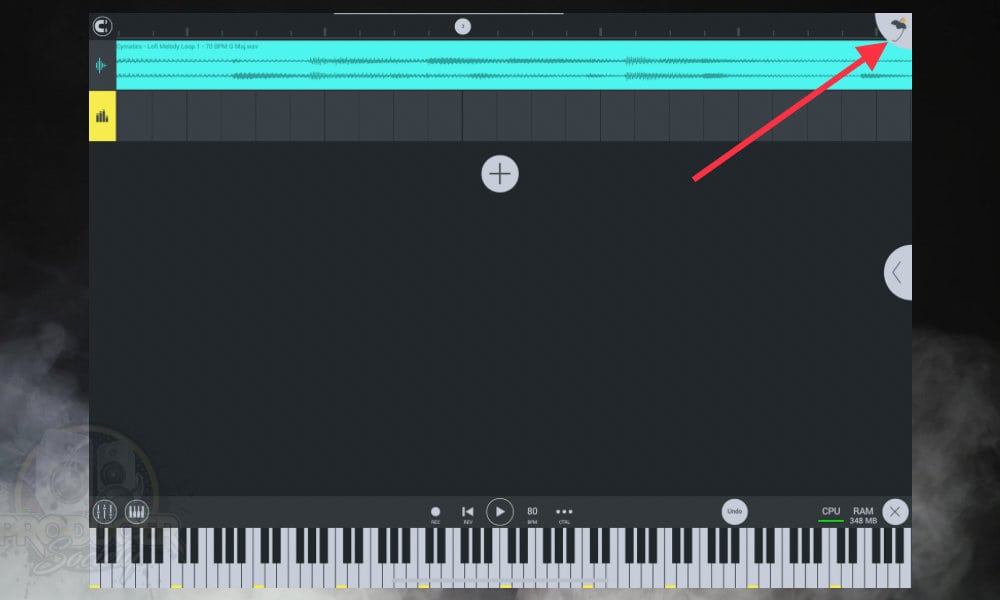
This is a good time to ensure that you’ve got everything set-up and it’s ready to go for exporting. For instance, ensure you’ve panned everything properly, nothing is isolated or muted, and certain plugins are turned on and off.
2) In The Menu, Click “Save”
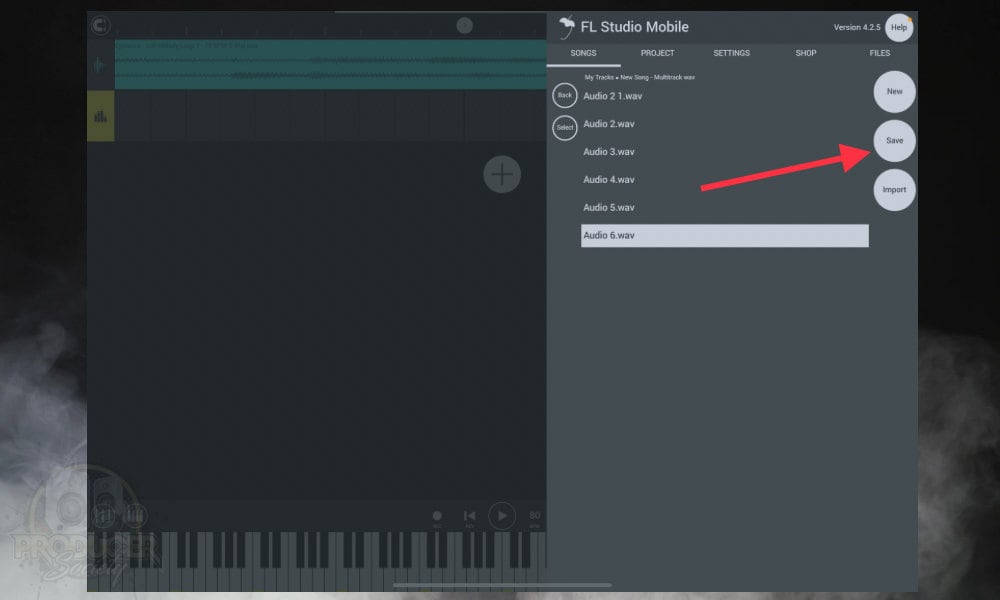
Exporting files from FL Studio Mobile is a bit confusing because clicking the “Save” button is how you do it, instead of hitting “Export” or a button with a similar name. It’s just a touch misleading, but that’s neither here nor there.
3) Choose The “WAV” Format and then Select “Send”
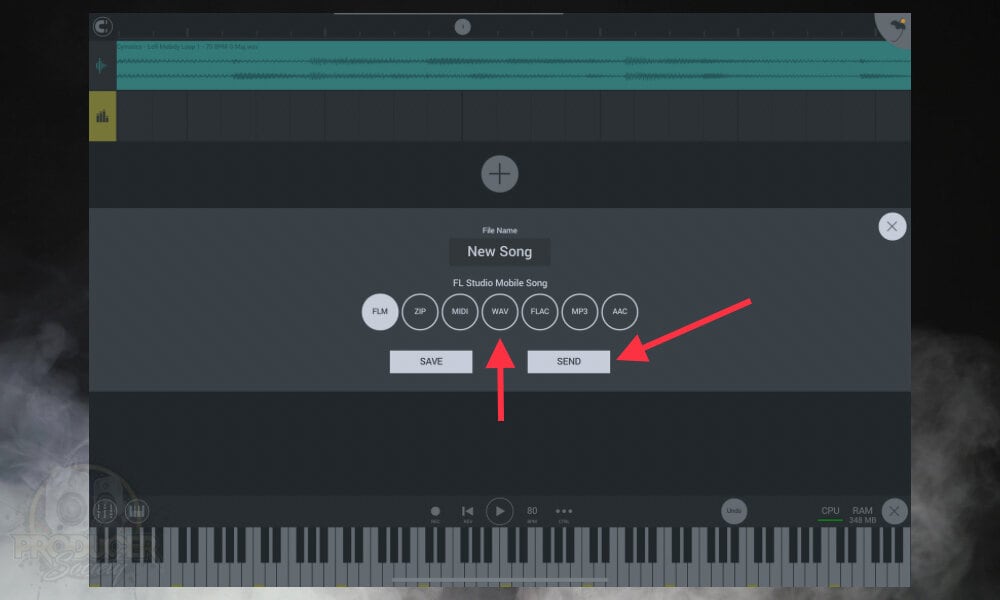
Once you’ve done that, you’ll be given a few more options including whether to trim the ending of the file or not.
For some reason, you can also choose “High-Quality,” rather than simply having that format selected and turned on all of the time. There must be a reason why they created this option that I’m just unaware of. Regardless, choose “High-Quality” and then you’re almost good to go.
4) Choose High-Quality and Trim Silence
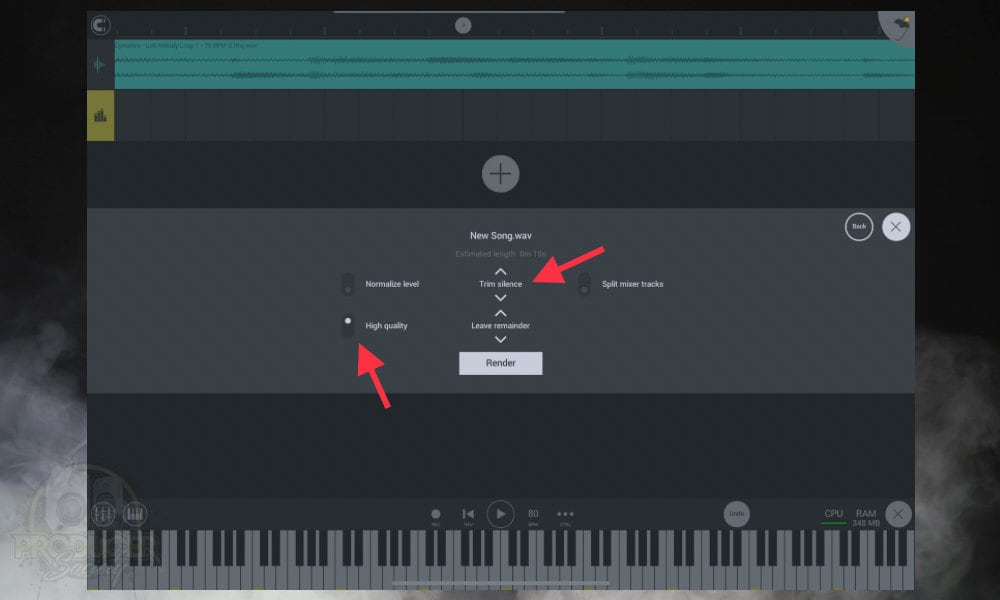
Trim Silence ensures that when you’ve exported your file, you get an audio file that doesn’t include dead spaces or empty regions at the end of it. In other words, it’ll cut off the end at the point where your file comes to an end and there’s nothing there.
Of course, if you want a bunch of dead space in your track where there isn’t any sound, you could have this option turned off.
5) Select “Render”
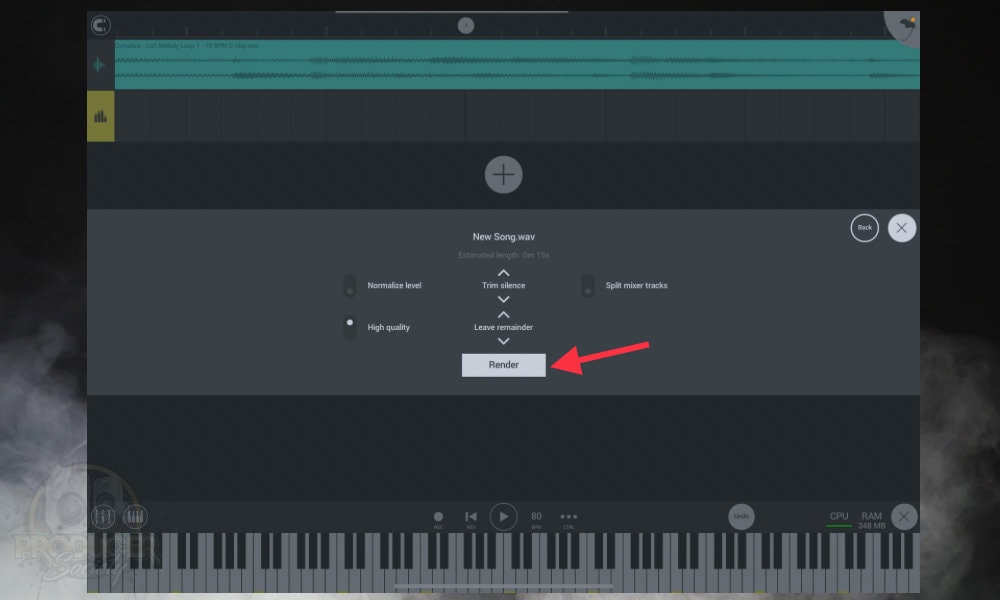
Make sure that you send the file to somewhere that’s easy to find it, otherwise, you’re going to be looking around in your directory and you won’t be able to find anything as easily as you’d like.
Optional: You Could Choose Split Mixer Tracks
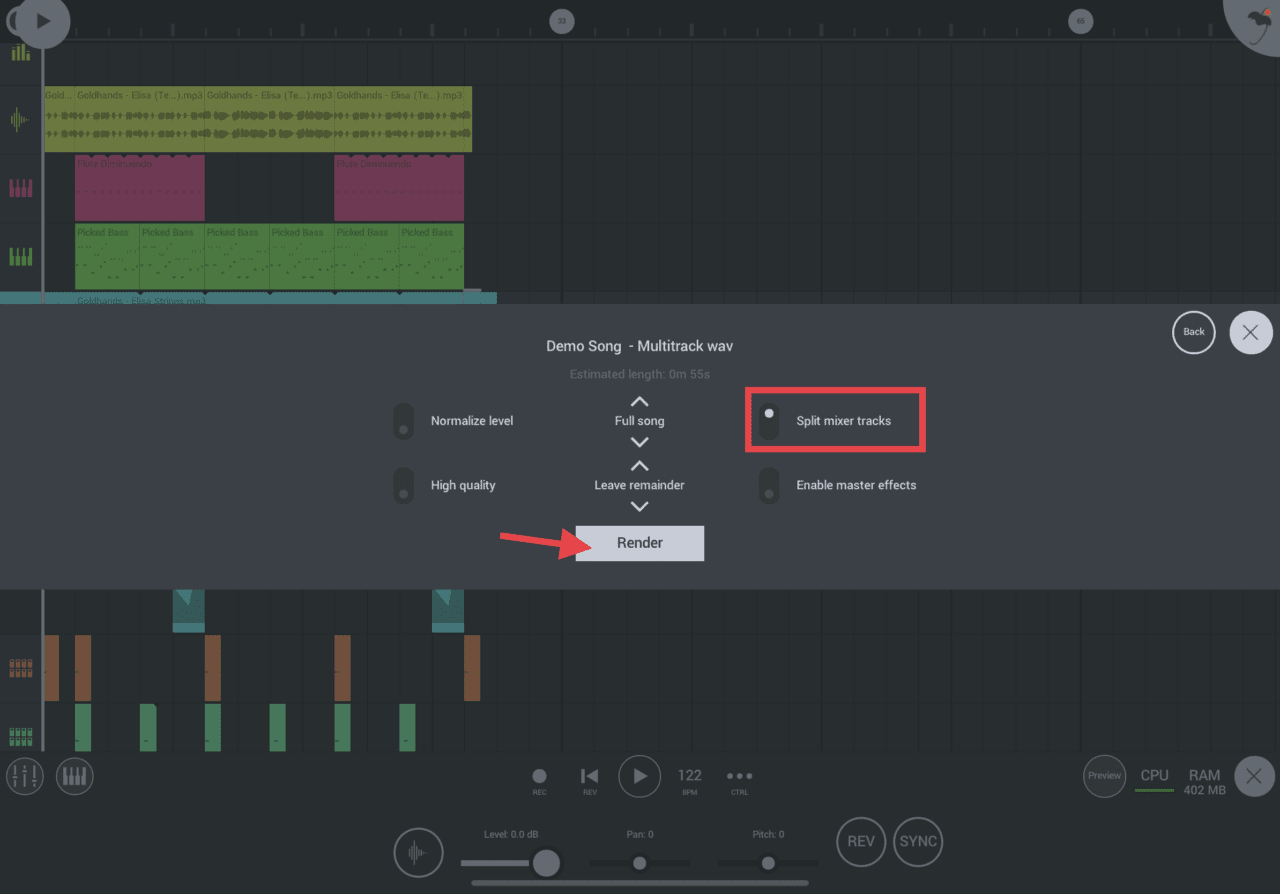
For instance, if you want to export all of your tracks from GarageBand for someone else to mix them, it can be quite a tedious process. I’m not sure why they haven’t incorporated this feature, but maybe they will someday.
Other Articles You May Be Interested In
- How to Import A Song Into FL Studio Mobile [Dead Simple]
- How to Install Plugins in FL Studio Mobile [EASY]
- How to Cut Audio Clips & MIDI Notes in FL Studio Mobile
- How to Sample in FL Studio Mobile [Chop, Slice, & Reverse]
- How to Connect A MIDI Keyboard to FL Studio Mobile [EASY]
Important Things to Note About Exporting From FL Studio Mobile
1) There Are Other High-Quality File Formats Available
You don’t necessarily need to use the .WAV format, I just find it’s the best for avoiding annoying problems and incompatibilities.
In my guide on why you can’t import mp3s, I explained that GarageBand sometimes will have an issue with mp3 files that are taken from YouTube to MP3 converters. Simply changing the file extension to .wav will be enough to get around the problem.

 Written By :