The Scarlett 2i2 is compatible with almost every operating system including Windows, macOS, Android and iOS. Here are the basics of setting it up with PC and Android:
To connect Scarlett 2i2 to Windows PC/Android
1) Get a USB-C to USB-A cable
2) Install the driver for the Scarlett 2i2 from the Focusrite website
3) Connect the Scarlett 2i2 to the PC/Android with the USB cable
4) Configure the PC/Android settings to the Scarlett 2i2
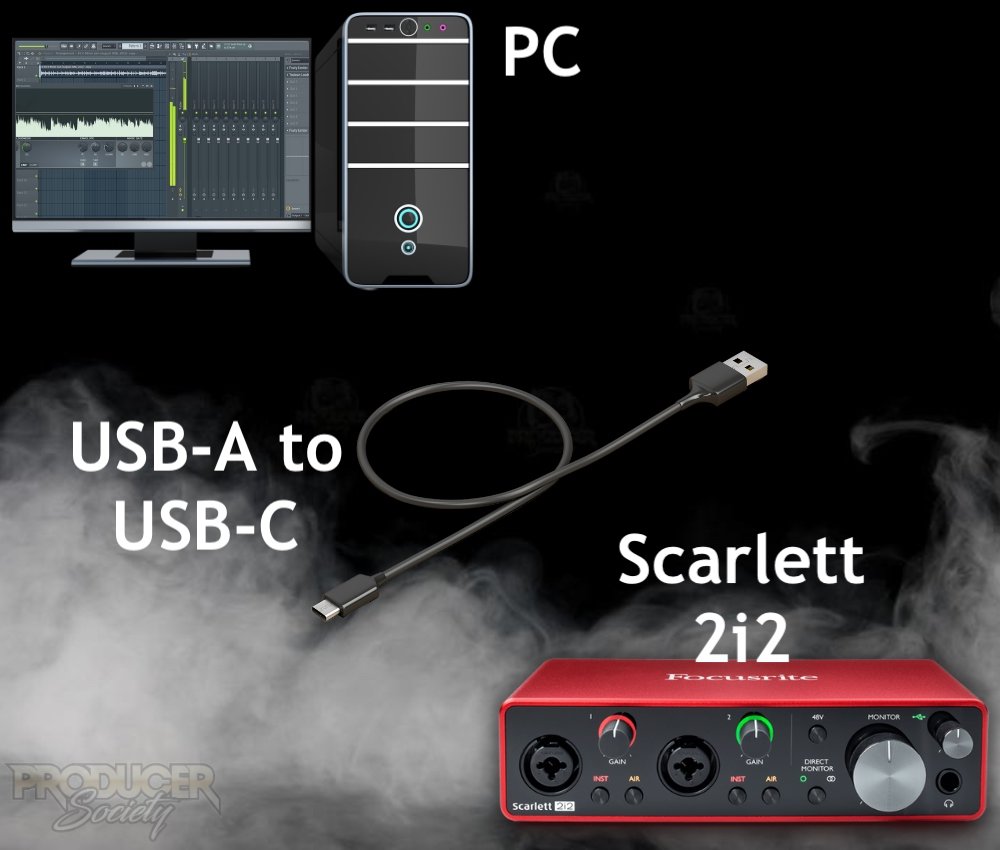
What You Need To Set Up A Scarlett 2i2 With A PC & Android Device
To connect the Scarlett 2i2 audio interface to a PC/Android, you’ll need the following;
1) The Focusrite Scarlett 2i2 Audio Interface

2) A Windows PC

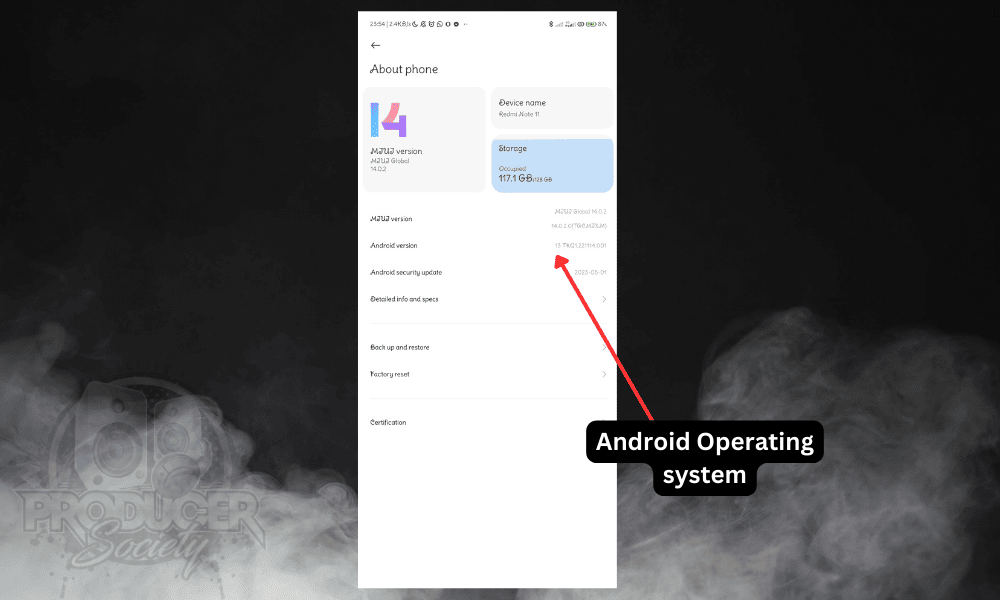
3) Android Phone (Running on Android 10 or above)
4) USB Type-C to USB-A cable
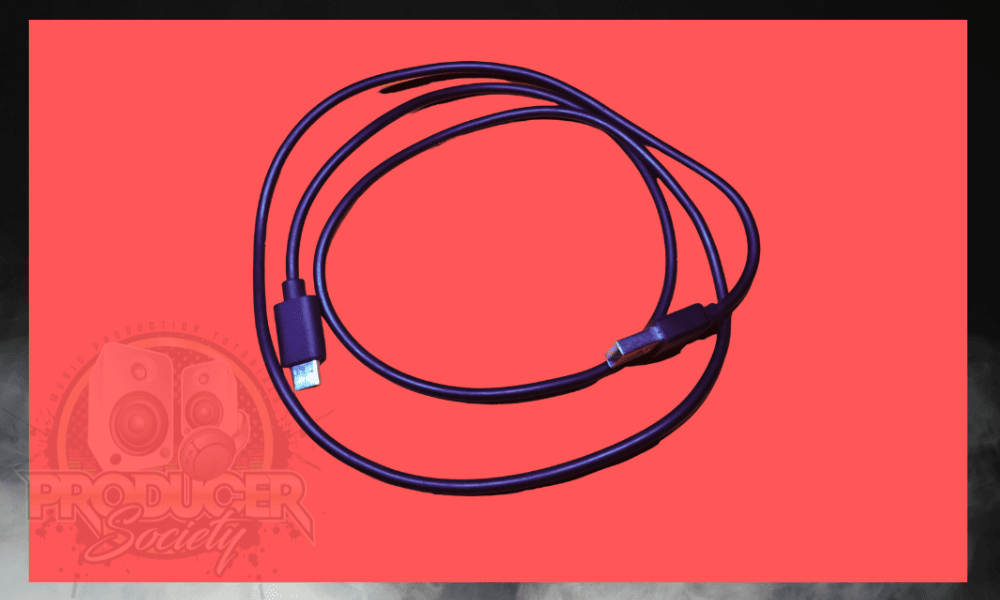
5) USB Type-C Adapter

6) USB Type-A Adapter

How to Set Up The Scarlett 2i2 With Your PC
Setting up the Scarlett 2i2 audio interface with your Windows PC involves two kinds of connection. Firstly you need to sort out the hardware connection, things like USB cables and the other pieces I mentioned earlier.
After the hardware has been properly sorted out according to what you’re connecting, you can begin the software connection by installing the appropriate driver for the interface and configuring the Windows PC.
1) Gather Your Scarlett, USB-C Cable, and USB to USB-C Adapter
The first step to connecting Scarlett 2i2 with your PC will require you to assemble all the needed equipment, ie, the Scarlett, USB-C cable, and USB-A to USB-C Adapter.
2) Install the Focusrite Driver
Before connecting the cables to the audio interface and the Windows PC, you should install the driver to enable the audio interface to work properly with the PC. Here’s how to do that.
A) Download Focusrite Control (Scarlett 2i2 Driver)
To install the driver, you will need to download the Focusrite driver from the official website. You can click on this link to access the driver’s download page.
The link above will lead you to the download page of the driver for the Scarlett 2i2 audio interface. You’ll be required to choose the version of the Windows operating system you’re using because the driver for Windows 10 and 11 is different from that of Windows 7 and 8.
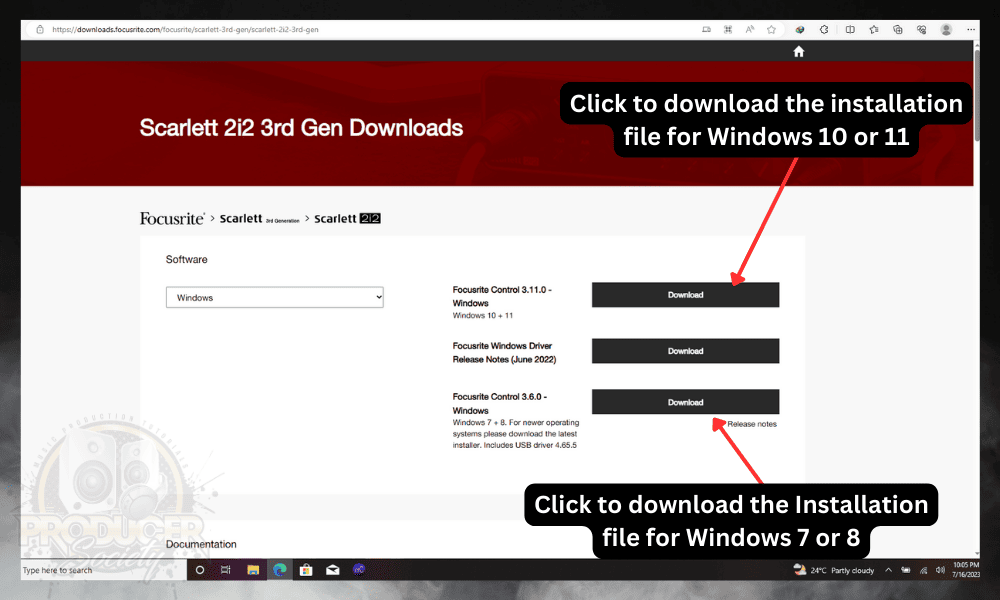
B) Install the Driver
After downloading the correct installation file for your Windows PC, you should go ahead to install the file. Make sure to select “Full Installation” to ensure the audio interface works properly in the end.

After selecting full installation, you can now continue with the installation process. It’s pretty straightforward like the installation of every other file on Windows.
Once you’re done with the successful installation of the driver on your PC, you’ll get a prompt requiring you to restart your computer to be able to use the driver. Grant this permission and restart your PC.
When the computer reboots, you should be able to locate the Focusrite control shortcut on your desktop. This indicates the successful installation of the driver. Now you can go ahead to connect your cables to both the Windows PC and the audio interface.

3) Connect The Cables
Once you’ve successfully installed the driver for the audio interface, the next step is to connect the audio interface to the PC using the USB type-C cable.
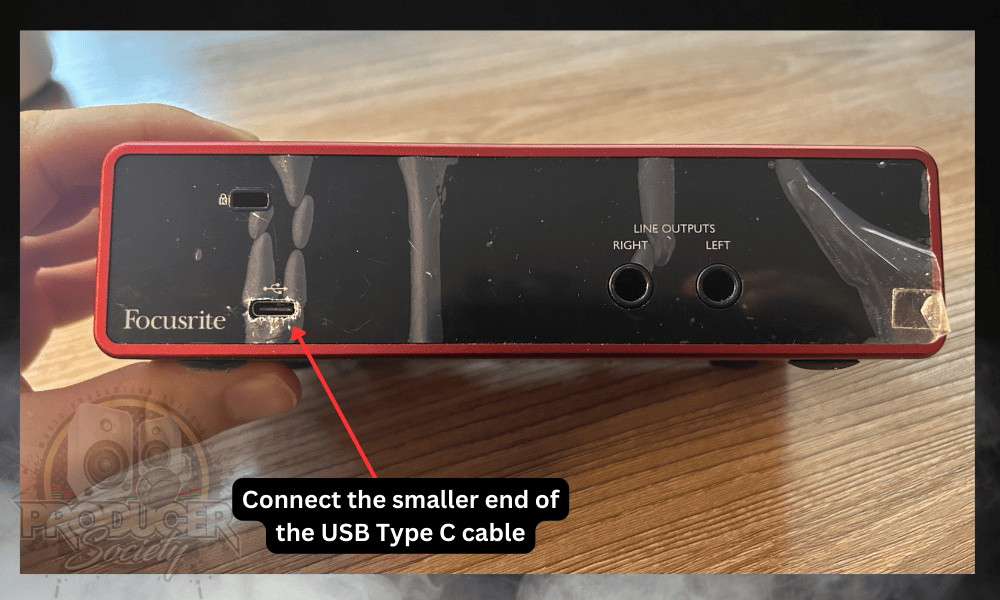
You will need to connect the smaller end of the cable to the Scarlett audio interface. The bigger end of the USB Type-C cable should be connected to the USB port of your Windows PC.
Newer Windows PCs come with Type C ports that can also be used for this connection, but you’ll need a Type C to Type C cable to use this port.

Once you’ve connected the audio interface to your PC properly, the USB indicator on the audio interface will light up a green light, This indicates that the device is switched on and ready to be used.
4) Configure Sound Settings
Here’s how:
A) Open Settings on Your PC
To correctly configure your Windows PC to use the Scarlett audio interface, you’ll need to go to the system settings by clicking on the Windows Icon and subsequently clicking on “Settings.”

B) Locate Sound Settings

On the sound settings page, under Output click on “Choose output device” to select Focusrite USB audio from the dropdown.
The same should be done for the Input, click on “Choose input device“, then select Focusrite USB audio from the drop-down.
C) Open Sound Control Panel
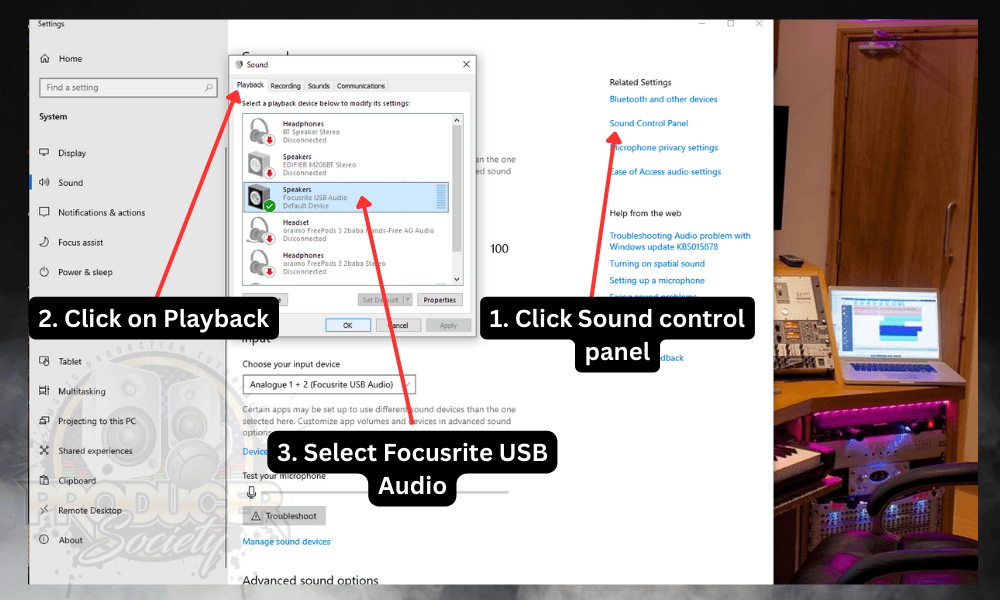
After selecting the Focusrite USB Audio as your input and output device, you will need to confirm your choice to make sure the audio interface is properly selected for playback and recording.
Left-click on “Sound Control Panel” under “Related Settings.” A floating window will pop up as shown below, Left-click on the “Playback” option, and you’ll find the list of audio devices currently or previously connected to the computer.
From the list, select Focusrite USB Audio then left-click apply.
After selecting the playback option, you will also need to left-click the “Recording” option, select the Focusrite USB Audio from the list of devices in the list then click Apply.

Once these instructions are followed, the Windows PC sound input and output will be controlled and channelled via the Scarlett 2i2 interface.
You can connect your headphones to the interface to listen to the output, You can also check the input by using the microphone connected to your interface.
5) Configure Interface in FL Studio (DAW)
After setting up your audio interface as described above, you will need to open FL Studio to select and properly configure the interface with the DAW.
A) Open FL Studio
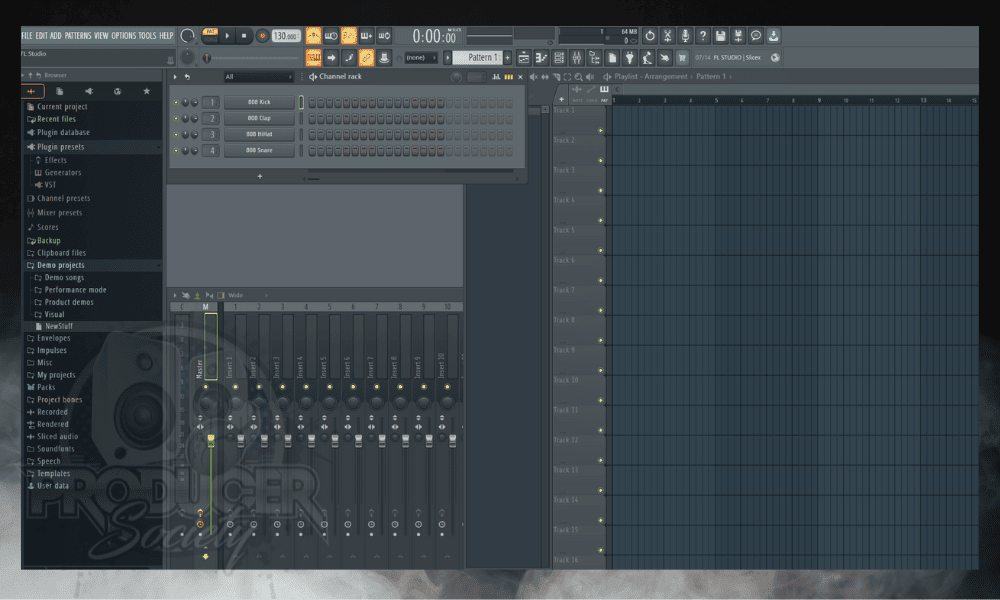
Locate the FL Studio software on your Windows PC, Once the software opens up, you’ll find a blank project page as shown below.
B) Go to Audio Settings
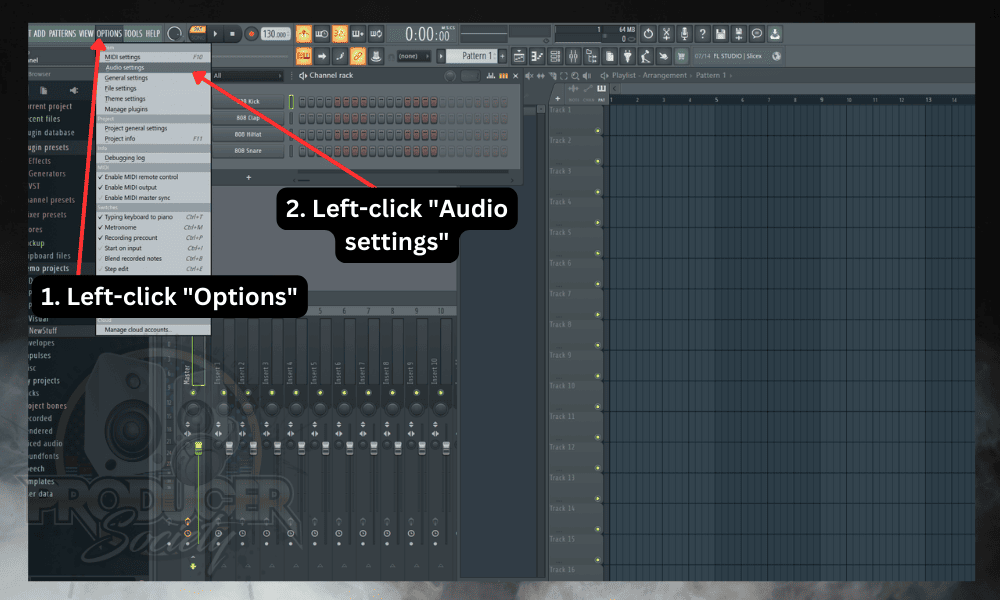
To access the audio settings, left-click on “Options” at the top left corner of the page. Once this is done, you’ll find a drop-down menu, In the menu left-click on “Audio Settings“.
These steps will open up the audio settings page where you can configure your audio interface with the FL studio. Alternatively, clicking on “F10” (fn + F10 for macOS) will open up audio settings directly.
C) Select Input/Output Device
In audio settings, under Input/device, left-click on the device menu, and a drop-down menu listing all currently and previously connected audio interfaces will appear.
From the list, you should select Focusrite USB Audio as your preferred device. This will allow the interface to control sound input and output from FL Studio. Alternatively, you can also select Focusrite USB ASIO. Either of these options works well.

D) Adjust Buffer Length
Latency is sometimes an issue when it comes to the recording process in most DAWs. This frustrating experience can be fixed by adjusting the buffer length to fit what you’re doing. Direct monitoring is another way to do it.

I) During the Recording
It might help to use a low buffer size by adjusting the buffer slider to the left. The lower the buffer size, the less likely it is for you to experience latency/delay during your recording processes.

II) During Playback
For playback, a low buffer size is less than ideal because the tracks won’t play smoothly. The playback stops and starts intermittently.
This is due to your Windows PC and the audio interface picking up the sound data of the recorded tracks in bits as it plays back.
Therefore it is best to increase the buffer size considerably during playback by moving the slider to the right. This will work better for mixing, mastering, editing, etc.
How to Set Up The Scarlett 2i2 With Your Android
1) Assemble the Needed Equipment
Before setting up your Scarlett 2i2 audio interface with your device, it’s important to assemble the needed cables to facilitate the connection. It is also important to make sure the pieces of equipment are in perfect condition to avoid connection failure.
These pieces of equipment are as follows:
- Android device (running Android 10 and above).
- Scarlett 2i2 audio interface.
- USB Type-C cable.
- USB Type-C Adapter cable.
- USB Type-A adapter cable.
It should be noted that Android devices do have 2 types of ports. The older devices have a USB type-A port, and the recent/new generation devices have a USB type-C port.
2) Connect the Android Device to the Interface
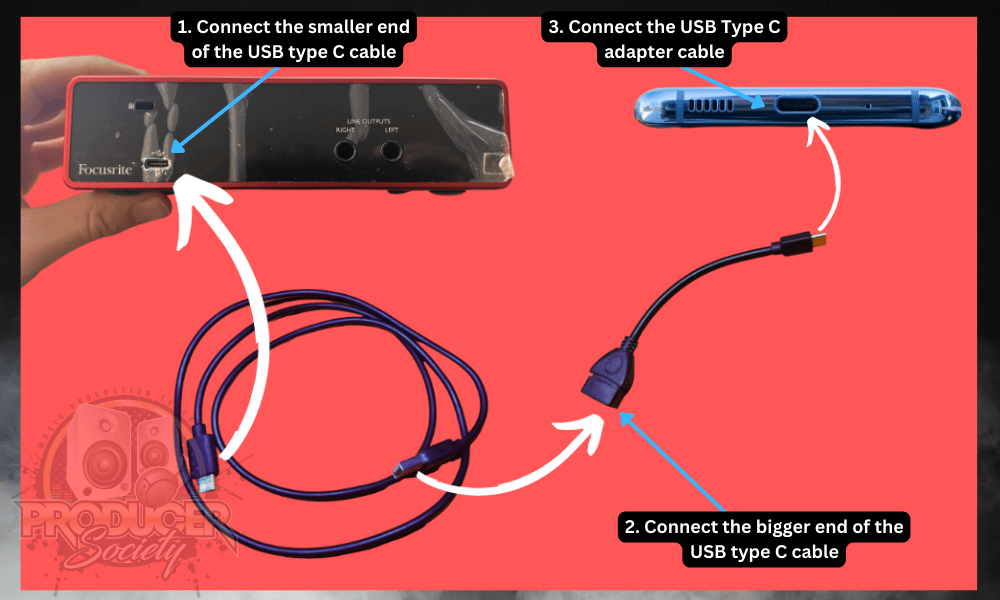
To do this, you’ll be using the USB type-C cable and the USB type-C adapter cable. Firstly, connect the smaller end of the USB type-C cable to the USB type-C port on the Scarlet 2i2 audio interface, and then connect the bigger end of the USB type-C cable to the USB type-C adapter.
Lastly, you will need to connect the smaller end of the USB type C adapter to the USB port/charging port of your Android device. For Andriod devices with USB type-A ports, the same step applies, the only difference is that a USB type-A adapter will be used instead of a USB type-C adapter.
Once the hardware connection has been completed, the Scarlett 2i2 audio interface will switch on a green light. This indicates that the interface connection to the Android device is successful.
It is important to note some other audio interfaces have separate ports for power and USB connection. The Scarlett 2i2 is buss-powered which means it relies on the device for power.
I’ve talked about this at length in my other tutorial on the Scarlett for iOS. You can get around this with a multiport adapter that allows for a power bank or block charger to be added. This will drive the Scarlett 2i2 with the power it needs in case your phone isn’t capable.
Certain Android devices, particularly older ones, won’t be able to drive the Scarlett 2i2 because they don’t have enough power for it. This shouldn’t be a problem if you’re using a newer phone though.
3) Configure the Interface
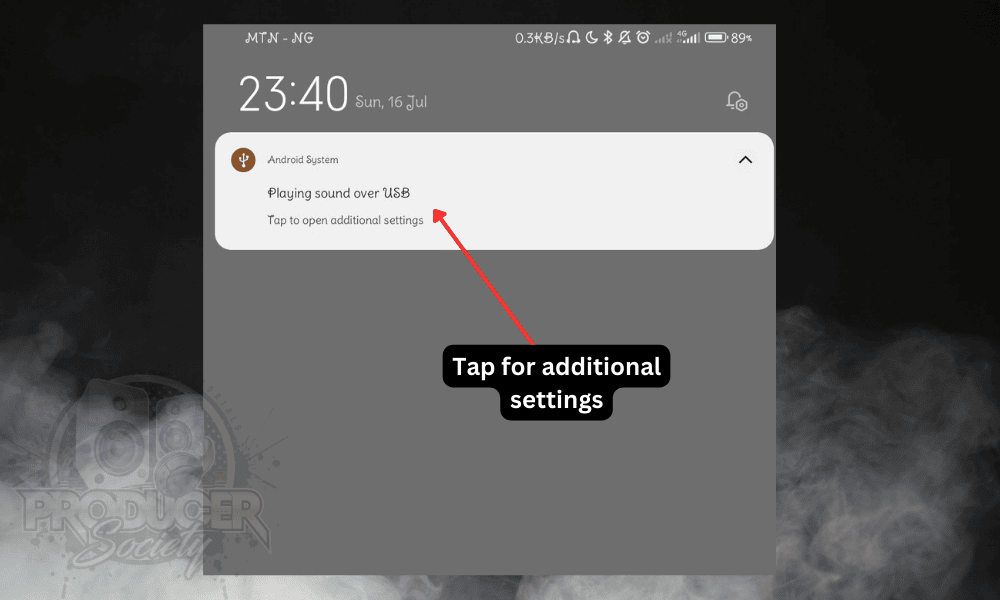
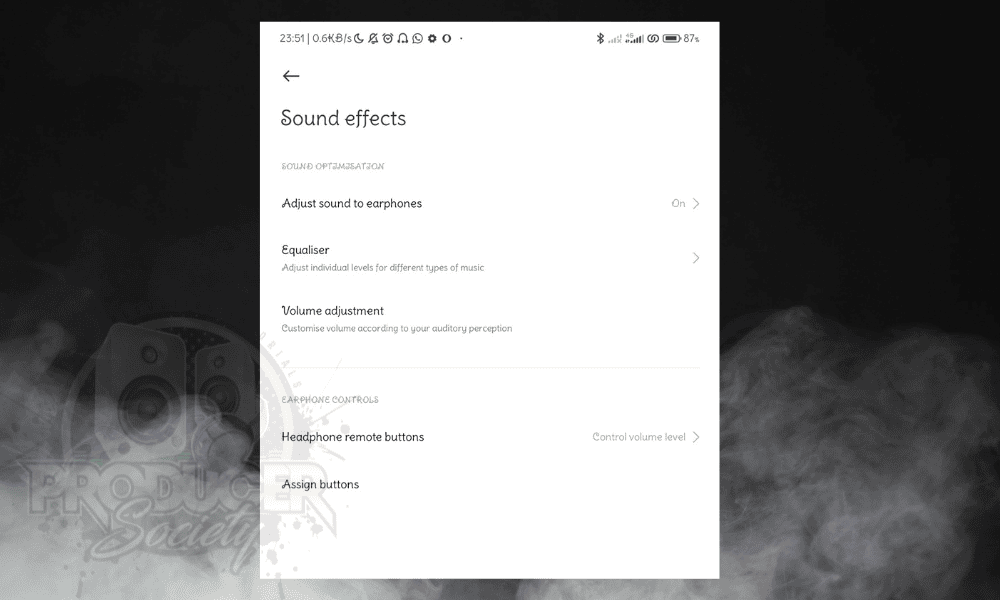
There are various additional settings such as Adjustment of the Equalizer, Volume adjustments etc. These can add very good effects to your sound.
4) Record with Sound Recorder Application

Now that both software and hardware connections are successful, you can open up the sound recorder on your Android device to record vocals or anything else you choose using the microphones connected to the Scarlett 2i2 audio interface.
You will also be able to listen to audio playback from your Android device with the headphones connected to the audio interface.
5) Open FL Studio Mobile
You can also use the Scarlett 2i2 audio interface with FL Studio Mobile. This possibility erases the limitation on recording with Android devices.
The quality of your recording or the mixing process will still be maintained due to the compatibility of some Android devices with the interface. To configure the Scarlet 2i2 audio interface with FL Studio Mobile, you can follow the below steps.
A) Click on the Fruity Icon
On the empty track page that is found when you open FL Studio mobile, tap on the fruity logo at the top left of the screen, This takes you to the settings menu where you can configure the software.

B) Configure the Software
- Firstly, tap on “Settings“.
- Then, tap on “Midi driver.”
- A drop-down menu will appear with two options; “Standard” & “Legacy.”
- Lastly, select Legacy.

After selecting “Legacy”, a pop-up will appear asking you to allow FL Studio Mobile to access Scarlett 2i2, Click OK.
You have successfully configured FL Studio mobile on your Android devices with Scarlett 2i2 audio interface. You can now record audio with the microphone connected to the interface and also listen to playback with headphones/monitors.

Troubleshooting Scarlett 2i2 Connection Problems
1) Why Can’t I Hear Myself Recording?
This can be due to many factors. In most cases, it just has to do with the input/output selection. And usually, this is easily fixed just by re-configuring your input/output device for the second time.
If that doesn’t work, here are some other things you can do:
A) Monitor Settings

B) Input/Output Settings
Incorrect selection of the input/output device is a common cause of not hearing oneself while recording. To solve this, go to the DAWs audio settings (as described in the article) and make sure you select Focusrite USB audio as both the input and output device.
C) Low Input Gain
Check the volume levels of the connected microphone or instrument on the audio interface. increasing the gain levels solves this problem
D) Outdated Driver
It is important to regularly check the Focusrite website for the updated sound drivers for Scarlett 2i2. Outdated drivers can cause malfunctioning and other problems.
2) Why Do I Have So Much Latency?
Latency can be very disturbing due to its ability to negatively affect the recording process. It can be due to several factors:
A) Bluetooth Speakers/Headset
Using Bluetooth speakers or headsets is a common cause of latency/delayed playback. To avoid this, I’d recommend using speakers with a wired connection.
B) Buffering Size
This is the most common cause of latency during the recording process. As earlier stated in the article, when recording the buffer size should be reduced.
This erases the latency experienced during recording. A high Buffer size is only suitable for playback or mixing.
C) Computer’s CPU
This is the reason why many music producers heavily invest in their computers. A computer with a very strong CPU, for example, a 32GB RAM, 10th gen computer will rarely experience latency issues.
Compare that PC to a 4GB RAM, 3rd gen computer and it’s like night and day. You should probably get a PC with a very strong CPU.
D) Low-Quality USB Cables
It is important to invest in top-quality USB cables. Low-quality USB cables can cause serious latency issues due to their slow rate of transmitting data. Changing the cables to high-quality ones will eliminate latency issues.
3) Why Won’t My DAW Recognize the Device?
Some of the causes of this can be:
A) Outdated, Missing or Incorrectly Installed Drivers
For macOS, drivers aren’t required to use the Scarlet 2i2 Interface. For Windows OS, however, you need to install the correct driver for your OS version.
It should be noted that the drivers for Windows 7 and 8 are different from those for Windows 10 and 11. Download the correct sound driver from the Focusrite website.
B) Multiple Connected Audio Devices
When multiple audio devices are connected, this could cause misconfiguration of the sound setting leading to the DAW not recognizing the audio device. To get around this, you should disconnect the other devices.
C) Conflicting Software
When there is another software on your computer using the audio interface, your DAW might not recognize the audio interface. A quick solution to this is to close all other applications or restart the PC.
4) Why Can’t My Android Device Power The Scarlett 2i2?
This can be due to:
A) Older Android Versions
Android devices running older Android versions will most likely not power the Scarlett 2i2 audio interface. This is usually because they don’t have the required firmware support to connect to the audio interface.
The solution to this is to get an Android device running the most recent Android versions.
B) Power Saving Mode
Android devices on power saving mode will not power the Scarlett 2i2 audio interface. Exiting power saving mode on such Android devices will solve the problem.
Other Articles You May Be Interested In
- How to Connect Scarlett 2i2 to MacBook Pro? (Full Tutorial)
- How to Use the Scarlett 2i2 With GarageBand [iOS/macOS]
- The Best Audio Interface For Beginners
- How to Connect An Audio Interface to a Mixer [A REAL Guide]
- How to Connect A Digital Piano to an Audio Interface [EASY]


 Written By :
Hi,
I ought the Scarlet 2i2 4th generation and I ran following setup:
Connected with USB-C cable to Samsung Galaxy a52s5g with Android 13 runs wothout problems, bit with my other phone (Xiamo Redmi 13 Pro with Android 13) it produces noisy and faulty sound. Why? Sample rate of the interface is set to 44.1 kHz without modifying ay other settings.
Please help, thanks!
Considering the audio interface works fine with your Samsung Galaxy, it must be your Xiamo Redmi 13 Pro that’s the problem then. I’ve never heard of that brand, so it’s a possibility that Focusrite won’t work with it. That’s one of the problems of using devices that aren’t well known. I could be wrong though. Wish I could help you more, but that’s all I’ve got.