Getting your project louder is one of the most frequently asked questions in music production. I wrote another article on the same idea for GarageBand the other day. The principles are the same, but the execution is different.
To get a louder project in Logic Pro for iPad, set the levels of the mix before exporting as an AIFF. Drag the file into a new project, and then add 2-4 limiters on the track and a volume meter at the end of the chain. Increase the gain from +2db to +3dB on each limiter & the output level to -0.5dB.
How To Get A LOUD Project in Logic Pro (iPad)
1) Put A Volume Meter on Your Stereo OUT Track
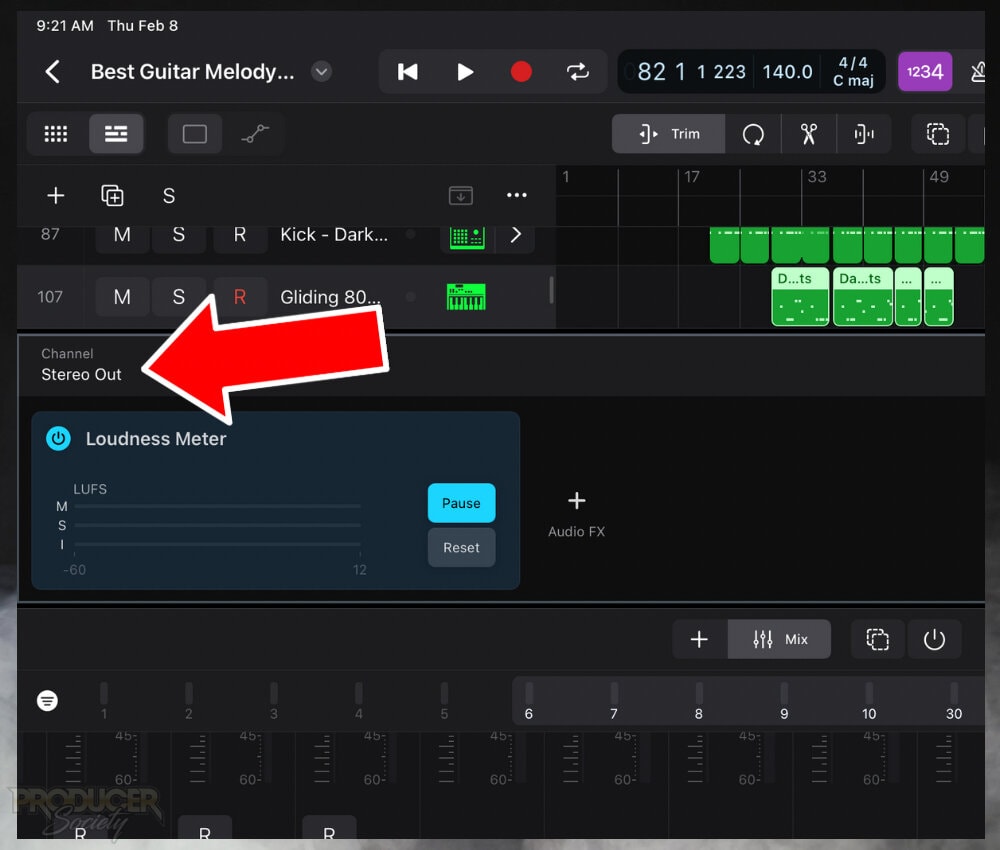
To do this, you first need to bring up the “Mix” panel by clicking on the icon shown in the image above. Click on your Stereo Out channel and then bring up plugins by clicking on the little dial in the bottom of the interface.
Click on the “Audio FX +” sign that appears and then you can bring up a Volume Meter. You’ll probably have to go into “Logic Pro,” and then the option that says, “Metering,” if you haven’t done any of this before.
2) Get Your Mix to -18dB to -23dB Approximately
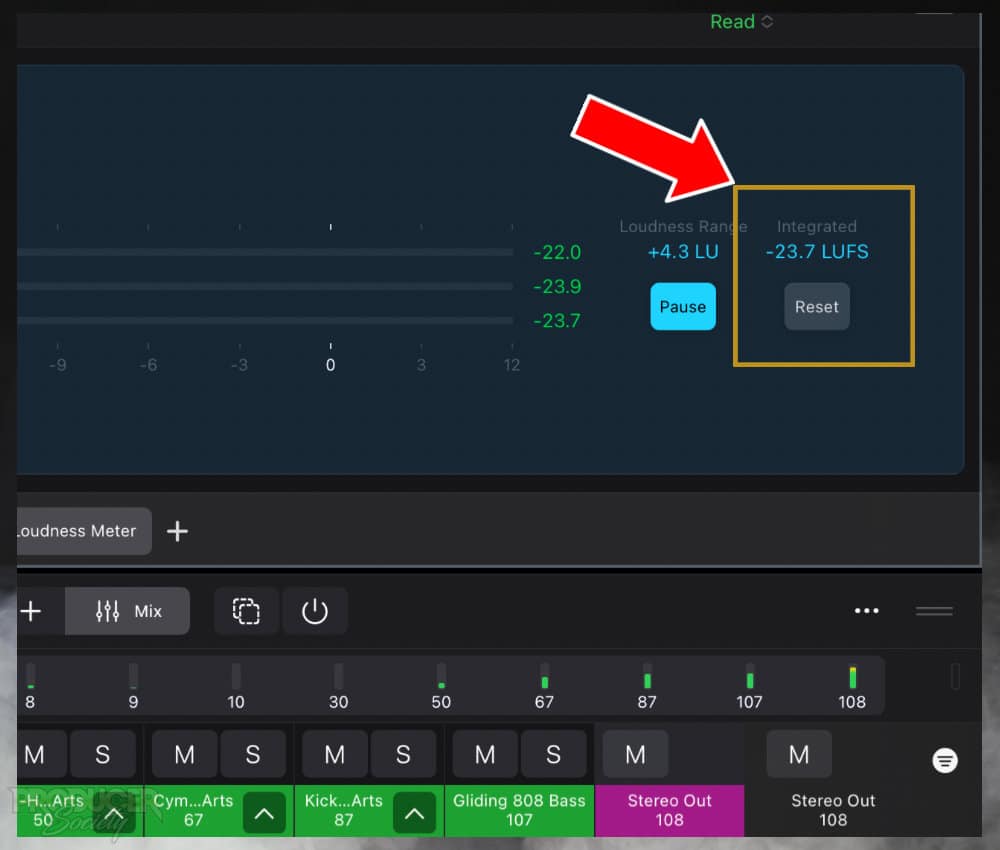
The most common recommendation is probably -18dB to -23dB, but I prefer around -23dB. You’ll need to listen to your whole project with the Volume Meter turned on.
One thing you can do if you don’t have the patience is drop the Playhead arrow to a bunch of different areas of your project to get a general reading of its volume.
Make sure to include the loudest part in this measurement.
3) Turn Off Any Superfluous Plugins Before Exporting As AIFF
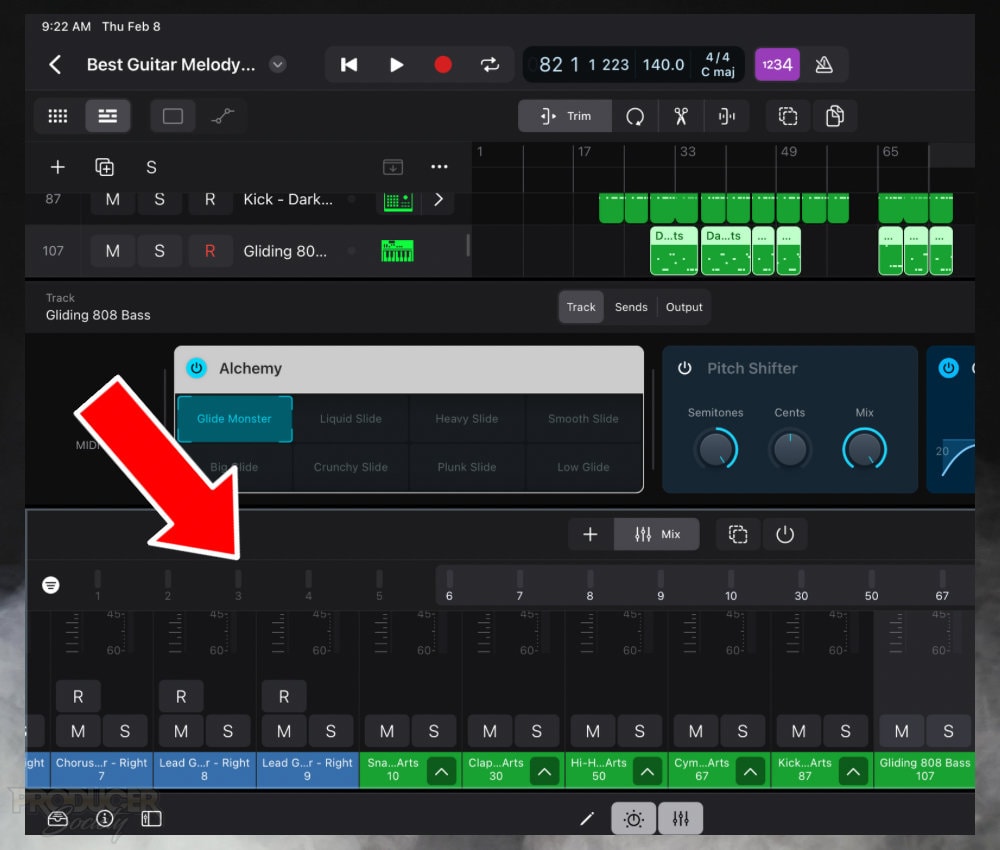
Sometimes, I’ll use a Gain plugin when I’m making the song just to increase the total volume while I’m working. Or, I may have a reference track loaded into the project. Make sure you remove things like this before you export.
4) Export As AIFF and Send it to An Accessible Location
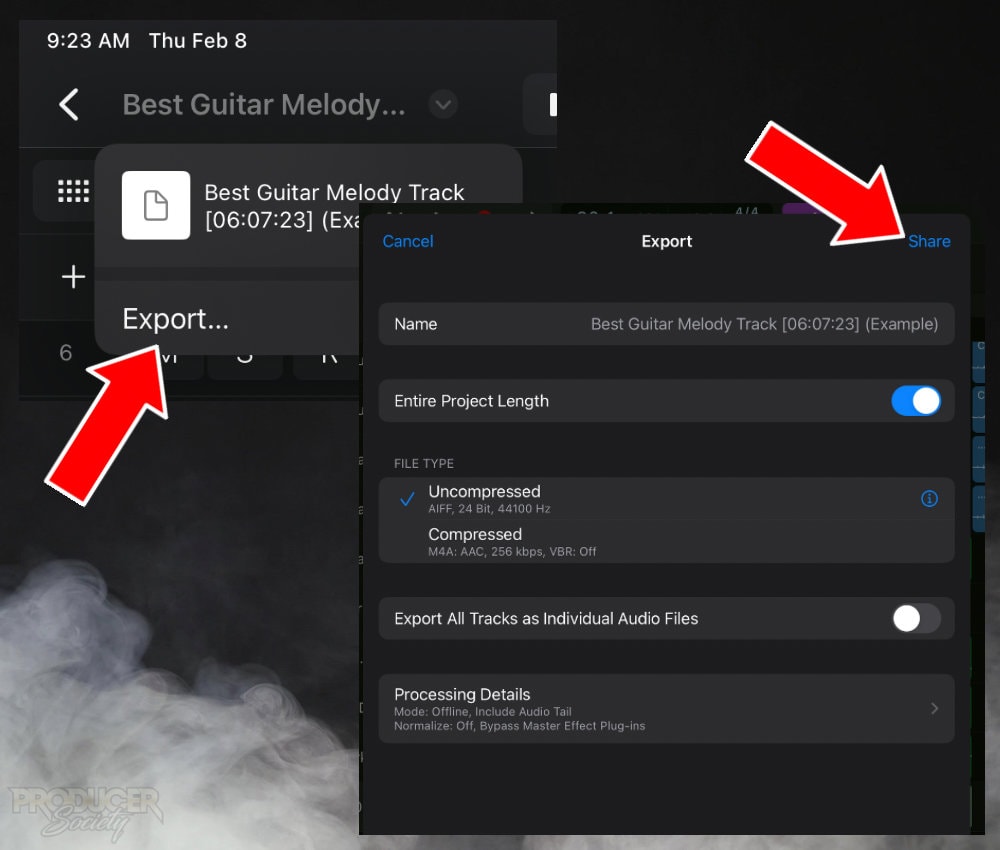
From there, you can give your project a proper title, select “Uncompressed,” and then choose “Share” to send your project to where you want it to go.
I recommend having a special folder on your iPad like “Logic Pro for iPad Projects,” that way you have an easy location to find everything.
Otherwise, there are too many places for it to go which makes it surprisingly difficult to find.
The problem is accentuated further by the existence of the iCloud Drive folder which the operating system tends to be biased toward.
Once you’ve completed this step, you can go ahead and close Logic.
5) Open A New Project and Drag Your File Back In
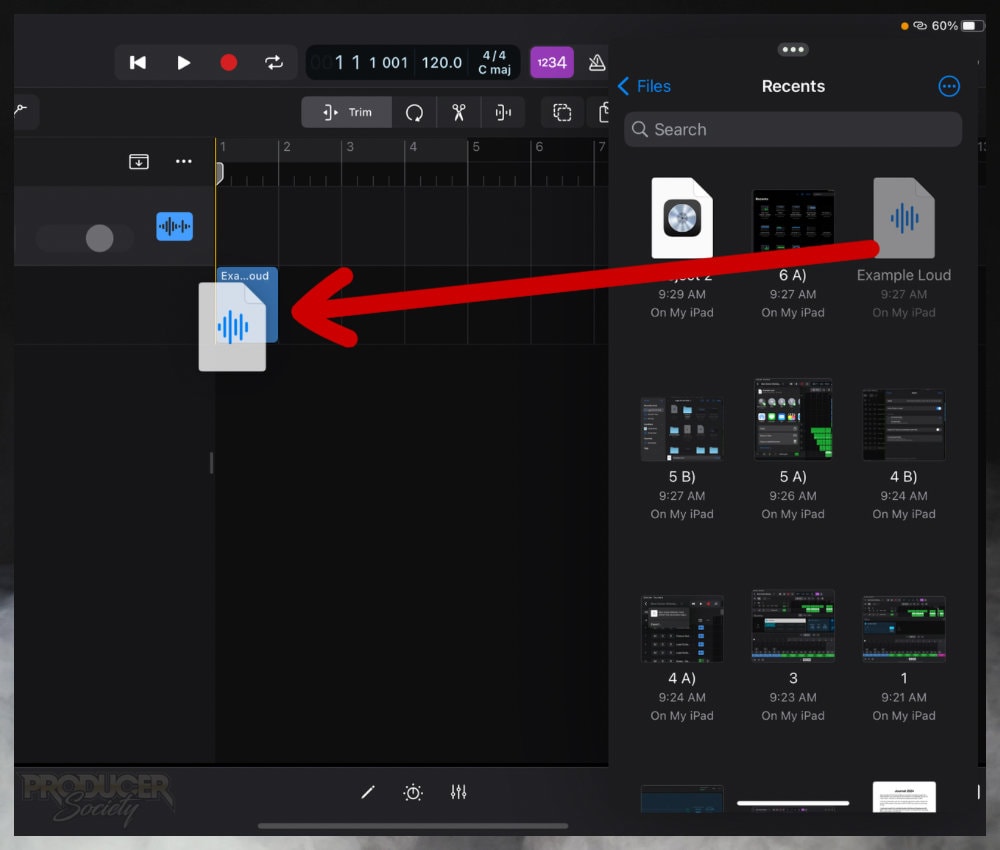
After you’ve opened Logic Pro again with the Files app tucked to the right side, you’ll have the ability to drag the project back into Logic.
While this importing process works great if you know how to use it, figuring out the first time was a challenge for me.
The video below shows you how to import files starting at 02:10. My other article also shows you how.
When you get your project into Logic, go ahead and delete the empty track region that’s created in the process.
6) Open 3-4 Limiters in the Plugins & A Loudness Meter
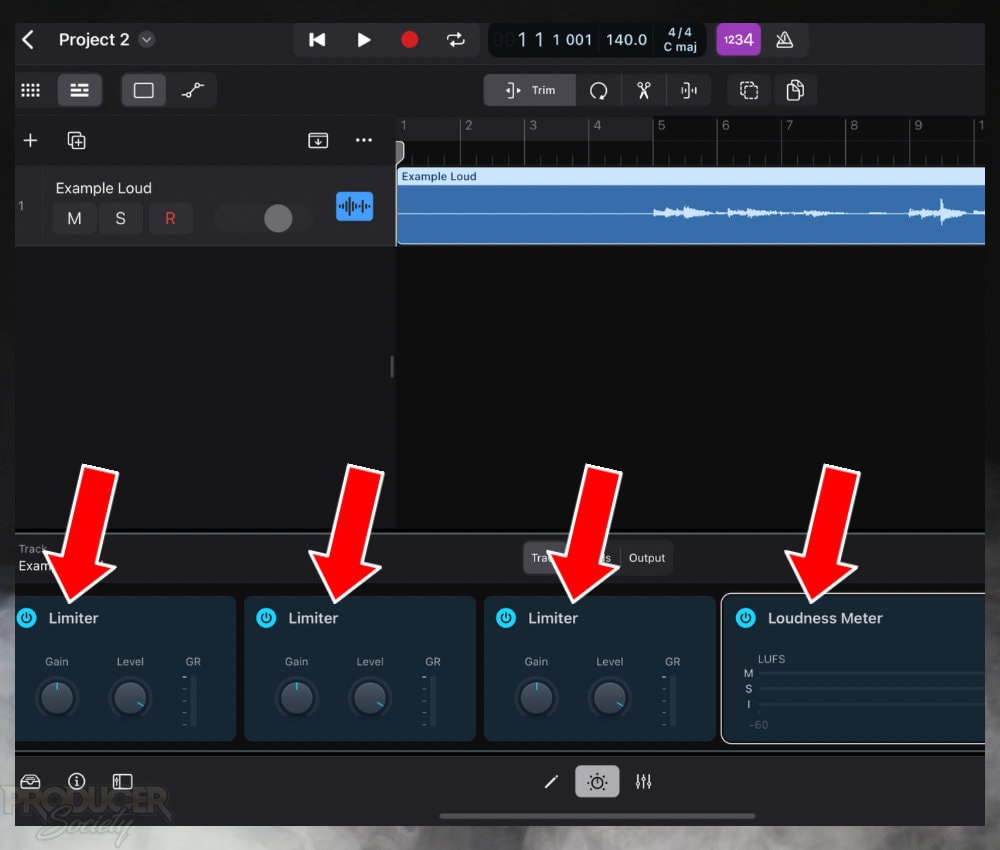
This makes the most sense because you want to measure the volume after you’ve increased the gain with the limiters.
Unlike GarageBand for which you need to use a plugin like the YouLean Loudness Meter, Logic Pro for iPad has a fully-featured loudness meter. It’s great.
7) Set the Gain to +2dB to +3dB and the Output to -0.5dB
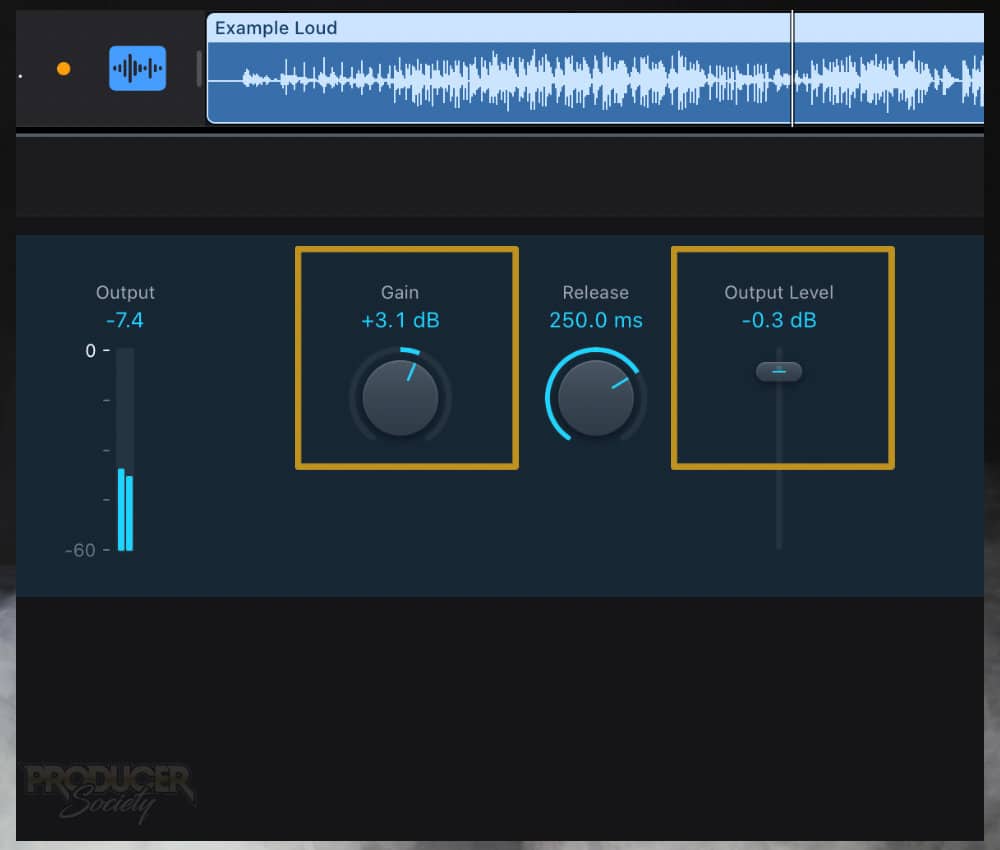
For this project, I was trying to get it as loud as possible without any problems, so I set the Output Level a bit higher than -0.5dB.
-0.2dB and -0.1dB is probably pushing it though, if you ask me.
8) Get the Integrated LUFS to -8dB to -10dB
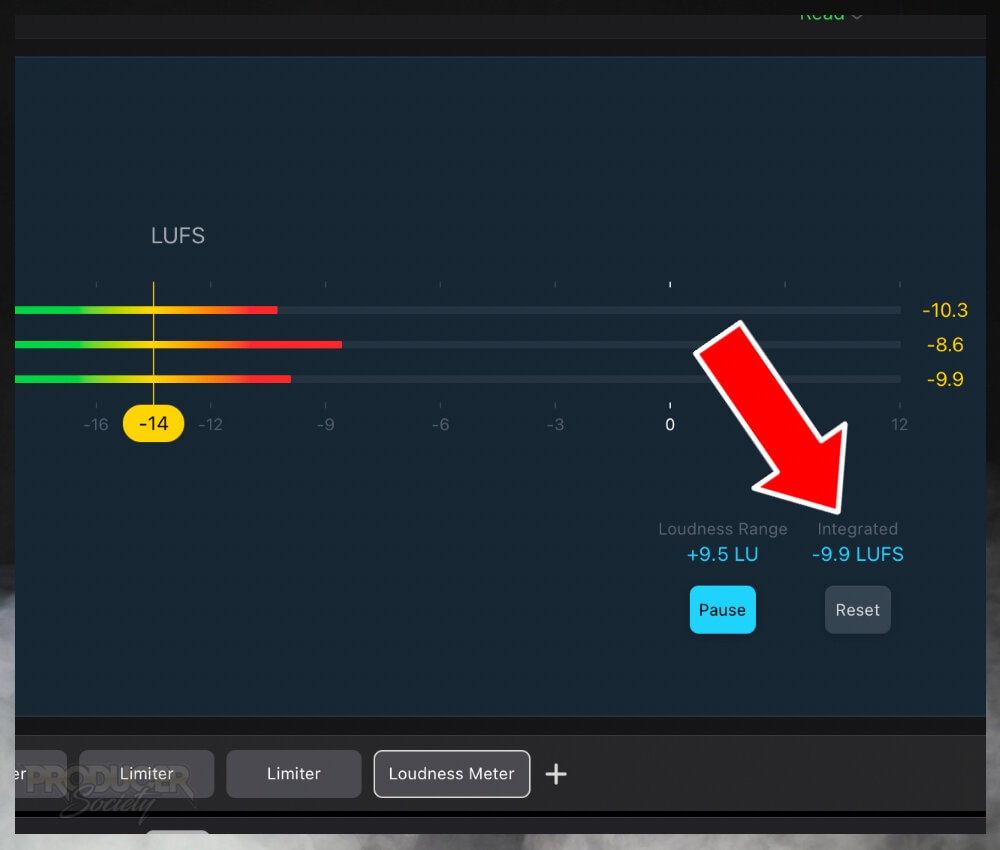
For whatever reason, I find the “Reset” button doesn’t work the way I’d like it to. I usually end up having to re-load the plugin if I truly want to reset it.
9) Listen with Good Monitors for Signs of Clipping/Pumping
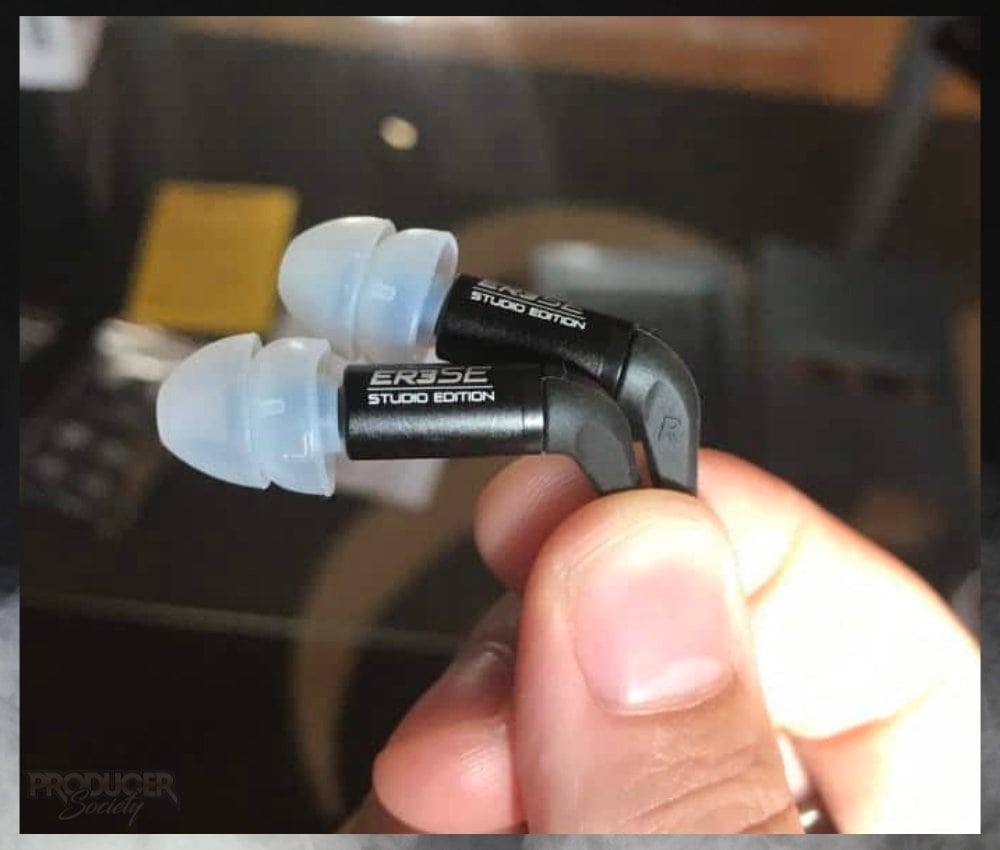
For this stage, I would recommend decent monitors so you can really listen closely for any problems in your mix.
The ER3SEs are good for music production, however their one downside is their filters need replacing every once in a while.
10) Export Your Project as AIFF & Listen Across Platforms & Sound Systems
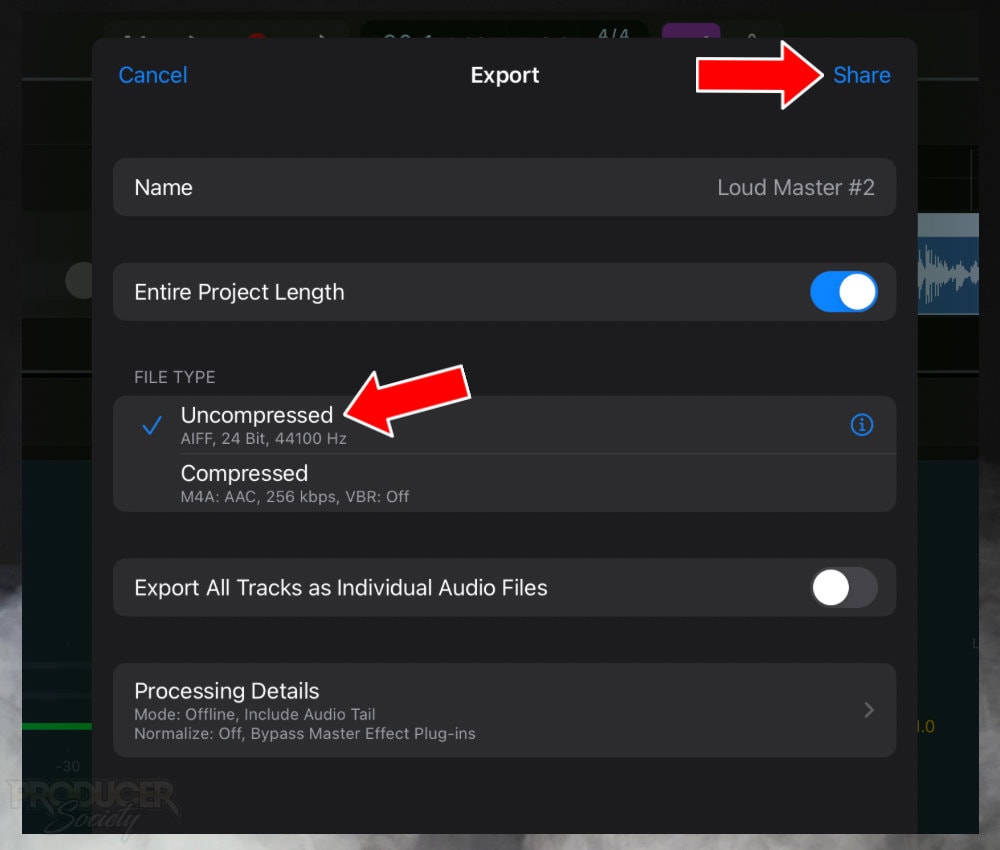
I choose uncompressed because I don’t want Logic to do anything to my project that I haven’t personally managed.
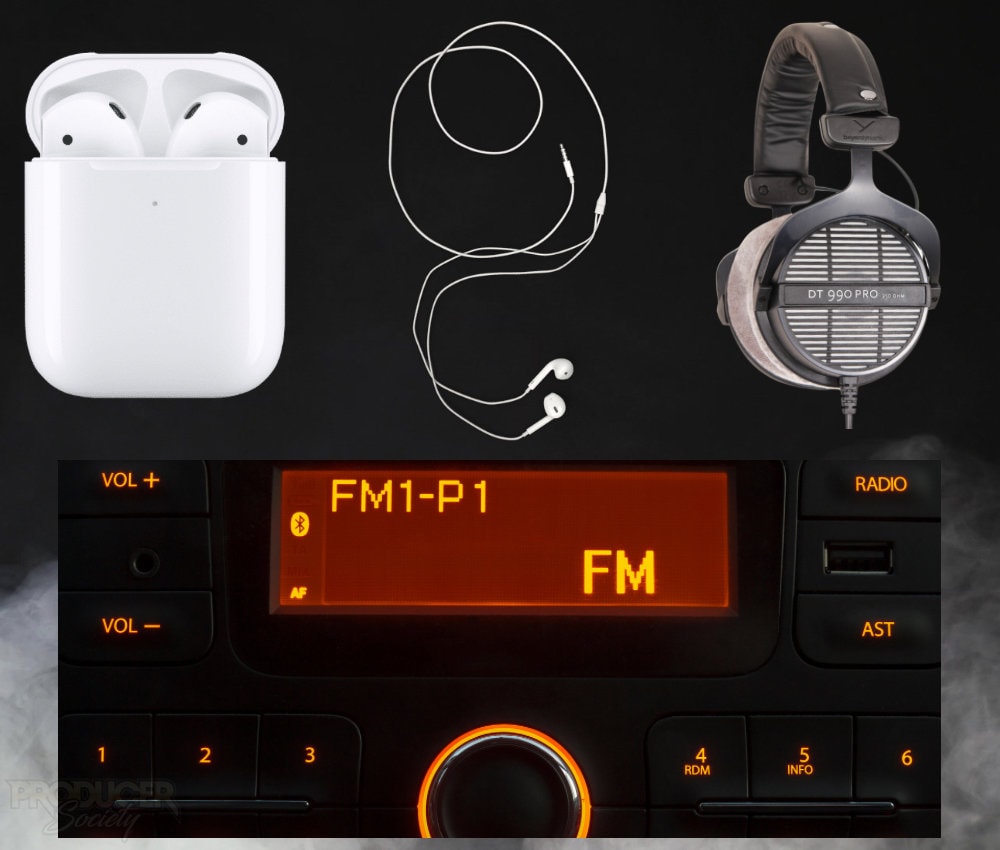
Probably the most common though is the car test. Most producers and beat-makers will test their track in their car’s stereo system to see how it sounds.
11) Compare and Contrast Your Mix to Professional Tracks

This will give you an idea of how your mix will sound relative to others. And you’ll have a better idea of what changes and improvements need to be made in the future.
3 Tips for A Louder Project in Logic Pro for iPad
1) Watch the Low-End of Your Mix
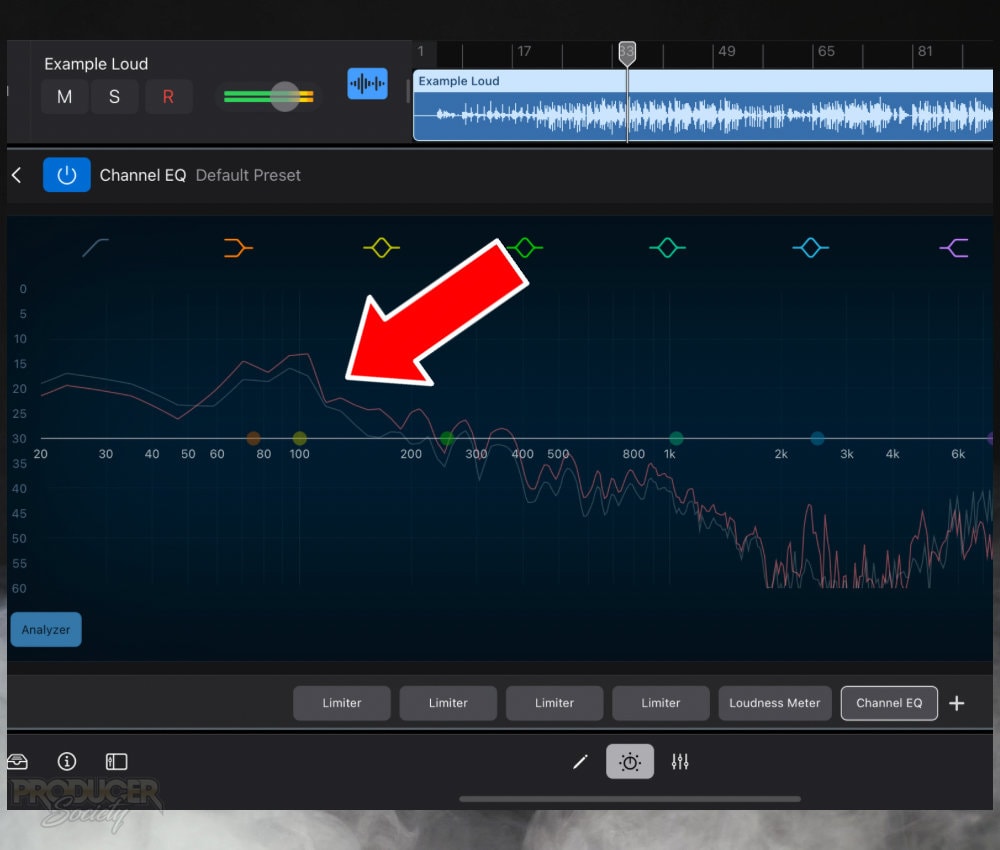
As I explained in my GarageBand counterpart to this article, the low-end tends to be the loudest.
One way of handling this is to reduce your bass instruments, or use the Channel EQ in your mix to ensure you’ve got plenty of space and headroom in the 20Hz to 200Hz range.
It’s common for me to increase the bass instruments – particularly the Initial Audio 808 Studio II – too much because I like to have a bass-heavy sound to my projects.
Sometimes I have to go back into my mix and turn the 808 plugin down a bit because it’s just too loud in the final project.
2) Don’t Use Too Much Compression
When I first started producing my own music, I would load a Platinum Analog Tape compressor onto pretty much every master track. It sounds great, but it tends reduce the amount of headroom significantly.
A lot of that has to do with the preset itself which applies +3dB of make-up gain.
Regardless, I prefer to put compression on individual tracks that need it in my mix, and then only use limiters in the mastering process. I find I can get my projects much louder this way.
3) The Limiters Don’t Need to Be the Same
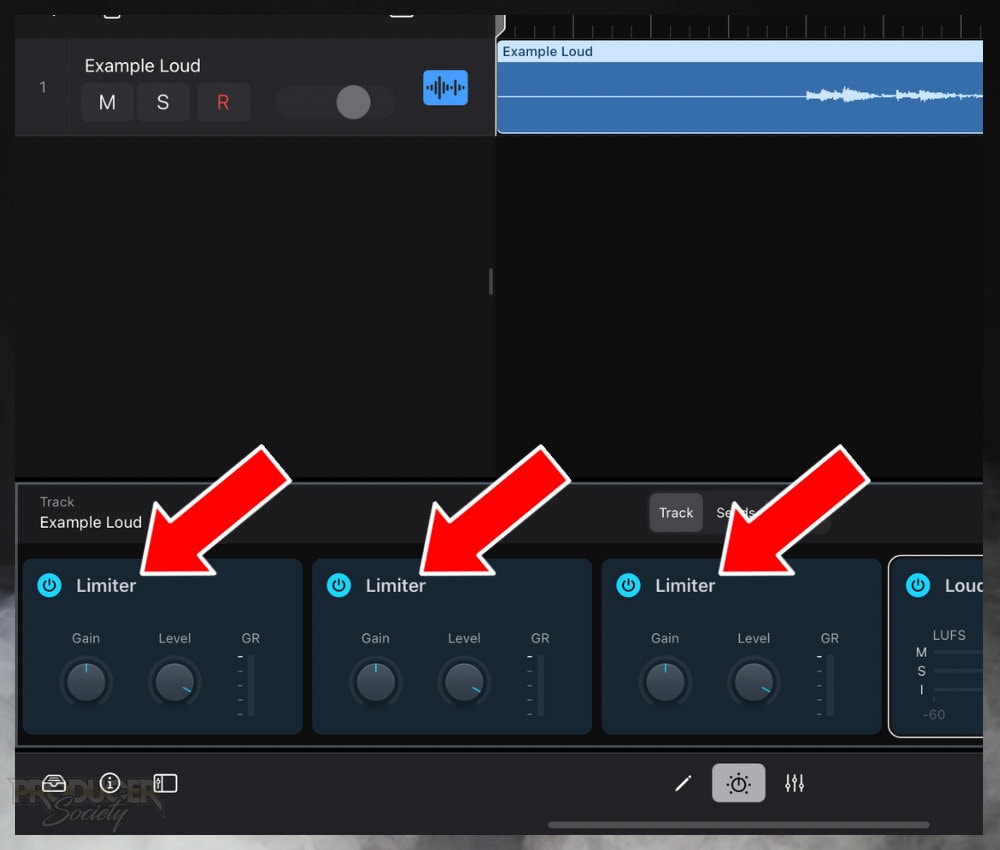
Other than the output level, you can set the limiters to different values. For instance, one can be +3dB, and another could just be +1dB.
I think it makes sense though to split the load evenly across the limiters. For instance, if your project needs to be increased by +8dB, I would split that across 4 – +2dB on each.
Other Articles You May Be Interested In
- Why Are Garageband Songs So Quiet?
- 24 Basic (And Actually Useful) Mixing Tips For Garageband
- How to Master A Song In Garageband
- Why You Can’t Hear While Recording in FL Studio (14 Tips)
- Why Are My Songs So Quiet in FL Studio? +7 REAL Solutions


 Written By :