Setting up a MIDI keyboard with FL Studio is pretty basic stuff.
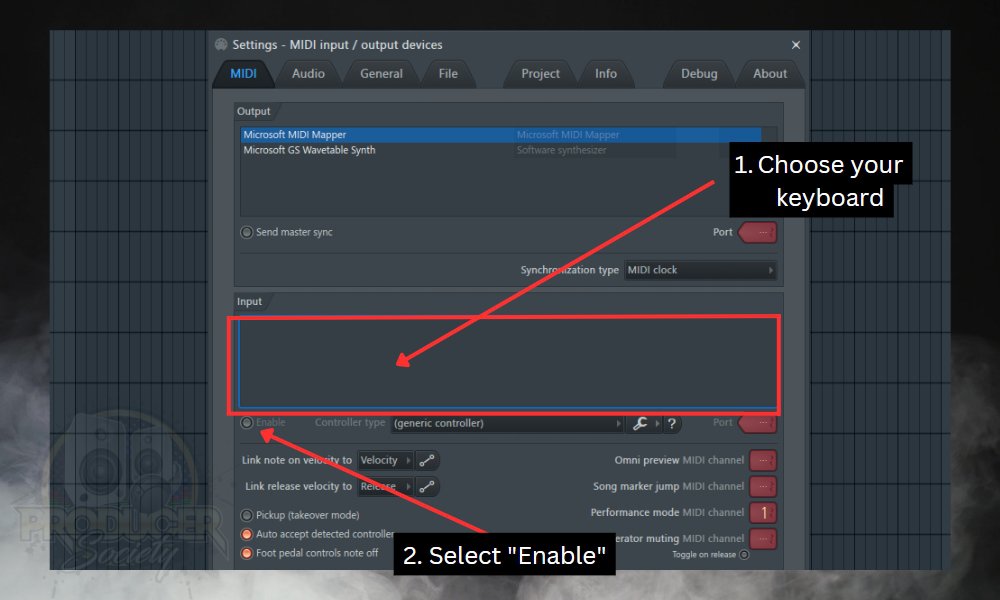
Other than the MIDI keyboard itself, the most important thing you’ll need is the standard USB-A to USB cable. Connect it from your keyboard to your PC, open FL Studio and enable the keyboard in the settings via FL Studio > Settings > MIDI and then click Enable in the “Input” section.
What You Need to Connect A Modern MIDI Device to FL Studio
1) USB-A to USB-B Cable

For most MIDI controllers, this is all you’ll need to connect it to your computer.
Most MIDI keyboard purchases will include a dedicated cable to be used to connect to your computer. Standard MIDI cables today come as a USB type B to type A cable, although, it’s possible we might see more USB-C in the future. I don’t have a crystal ball, so I can’t say for sure.
The type B connector goes into the keyboard, while the type A connector goes to the computer. It’s not uncommon for these to also go by the name of “printer cable” on retailers’ websites.
One quick tip I have for you is to get one that’s really long (9 feet or longer). It’s better to be too long than too short.
For computers with type C ports, you can get a MIDI type C cable (type C cable) and connect the keyboard to your computer.
In some cases, you’ll need to get your hands on a USB to USB-C adapter (my Page), which I’ve talked about a million times before, including in my guide on connecting keyboards to GarageBand.
2) The Keyboard

There are all kinds of keyboards you can get. I have a Yamaha PSR-640 electric piano that’s almost 25 years old, an AKAI MPK Mini MKIII, and an Acorn Masterkey-61. The AKAI is more for portability and the Yamaha keyboard is for at-home production.
If I had to do it all over again though, I would recommend the M-Audio Oxygen Pro Series.
You can get them in 25-key, 49-key, and 61-key formats. There is also an 88-key version called the Hammer Pro.
What You Need to Connect An Older MIDI Device to FL Studio
1) MIDI or Audio Interface
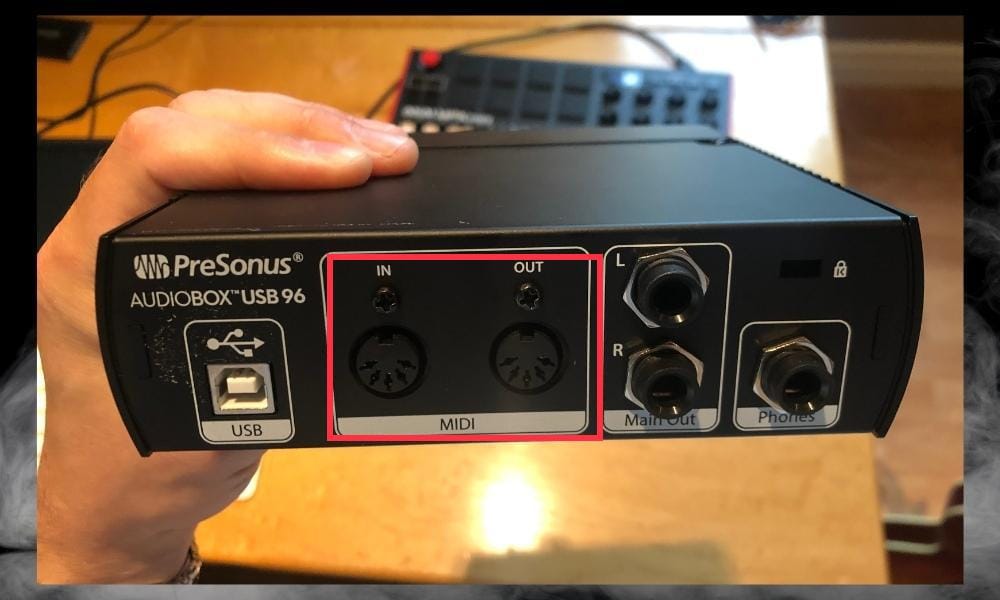
For older keyboards, like electric pianos and other devices that don’t have the same USB connection, you’ll need to use an audio interface.
For older keyboards and MIDI devices, they can have two (sometimes three) MIDI ports. We care only about the first two:
- MIDI IN
- MIDI OUT
- MIDI Thru (sometimes)
If your keyboard only has the classic MIDI ports, which probably means it’s quite old, you’ll need a MIDI interface or an audio interface. The PreSonus AudioBox USB96, Focusrite Saffire 6USB, and the Scarlett 4i4 all have these. The interface on my wishlist though is the SSL 12.
2) MIDI Cable
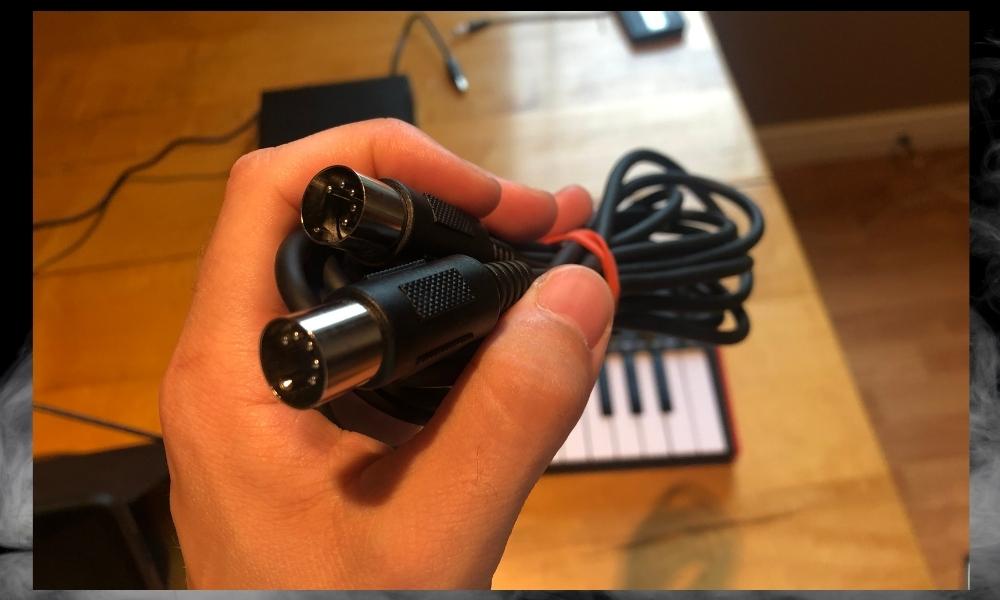
This will be used for connecting the MIDI In and Out ports. If you were to connect an old Yamaha keyboard via MIDI to your modern computer, you would connect a MIDI cable from the OUT port on the back of the keyboard to the MIDI IN on the back of the audio interface. This is how I do it.
Another Option for Connecting Older MIDI Devices
USB to MIDI Converter or Cable
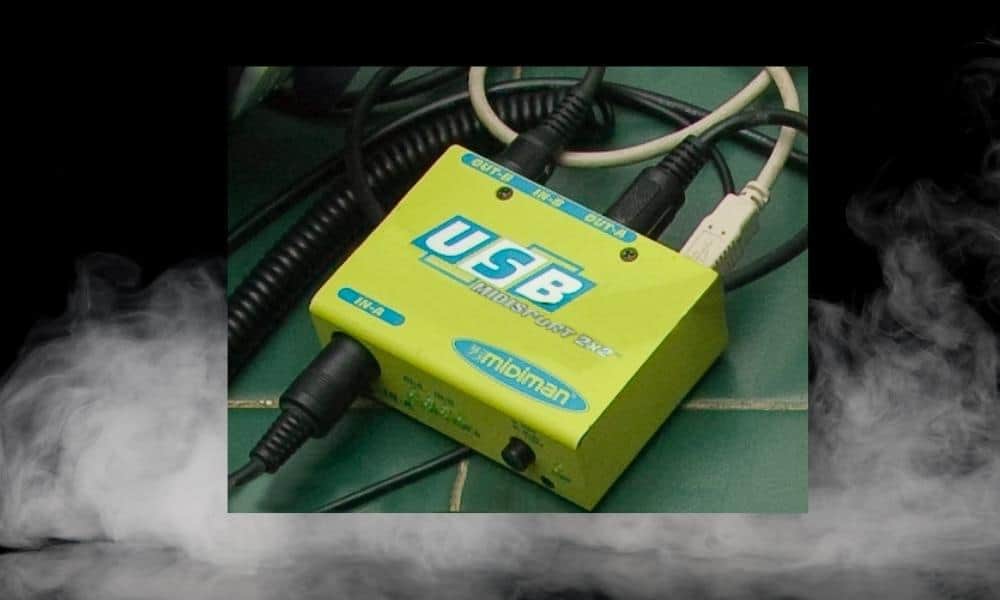
If you can’t get an interface for whatever reason, then a USB-to-MIDI converter or cable will work fine. However, I wouldn’t recommend using something like this.
How to Connect Your MIDI Keyboard to FL Studio
1) Connect Your PC To The MIDI Keyboard
The first step is to get the keyboard connected to your computer. Let’s start with the direct method (more common) and then the audio interface way (less common).
A) The Most Common Way – With USB-B to USB-A Cable

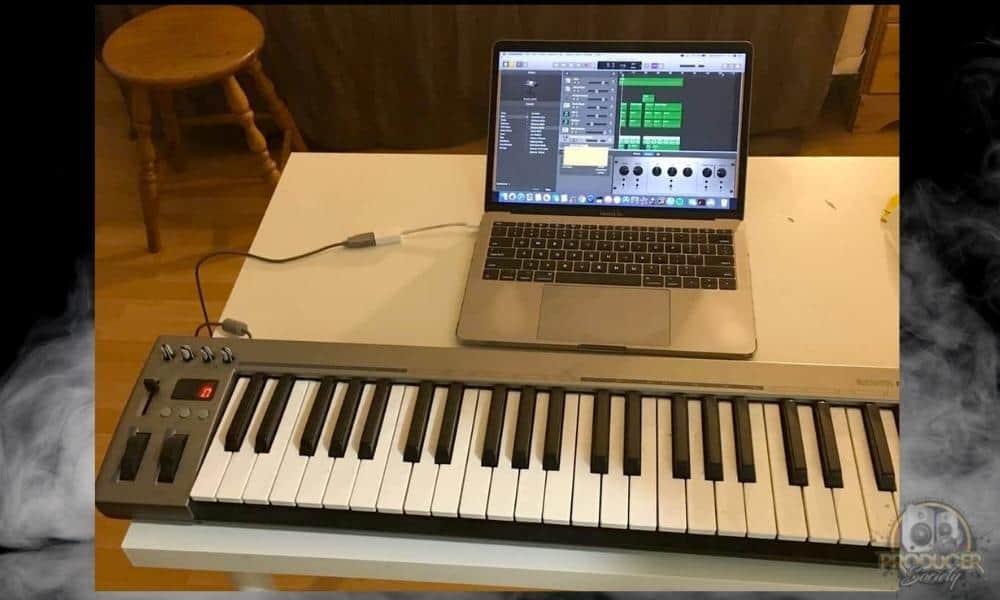
The advantage of this method is that you do not require an external audio or MIDI interface before you can use your keyboard.
B) The Less Common Way – With A MIDI/Audio Interface (For Older Devices)
![How to Connect an Old Keyboard to PC/Mobile (Any DAW) [Diagram]](https://producersociety.com/wp-content/uploads/2022/07/How-to-Connect-an-Old-Keyboard-to-PCMobile-Any-DAW-Diagram-1-2.jpg)
The second method is through a MIDI or Audio Interface. Connect the two ports on the MIDI keyboard to the corresponding ports on the interface.
i) Connect the MIDI OUT of the Keyboard
![MIDI OUT on Keyboard - How to Connect An Old Keyboard to Your PC/Mobile Device [Any DAW]](https://producersociety.com/wp-content/uploads/2022/07/MIDI-OUT-on-Keyboard-How-to-Connect-An-Old-Keyboard-to-Your-PCMobile-Device-Any-DAW-.jpg)
Connect the “MIDI OUT” of the keyboard (information coming out of the keyboard) to the “MIDI in” of the Interface being used (Information goes into the interface).
ii) Connect it to the MIDI IN of the Audio Interface
![MIDI IN Port - How to Connect An Old Keyboard to Your PC/Mobile [Any DAW]](https://producersociety.com/wp-content/uploads/2022/07/MIDI-IN-Port-How-to-Connect-An-Old-Keyboard-to-Your-PCMobile-Any-DAW-.jpg)
Then you connect the interface to your computer using a standard USB cable. I almost never have latency issues using this method, and I like it because it frees up ports on the multiport adapters on my computer.
For MIDI interfaces, you configure them in FL Studio the same way you configure the direct connection. Make sure you install any required drivers for your keyboard. You can check the keyboard manual or website for instructions on how to install the drivers.
I prefer to use devices that don’t need the installation of drivers.
Now that we’ve got the hardware set up out of the way, let’s walk through the setup in FL Studio. It’s important to wrap all of this up for it to work.
2) Open FL Studio
Open FL Studio to configure the keyboard and enable it as the input/output device.
3) Open MIDI Settings

Go to the menu panel (bar). From the menu panel, select “Options”. Under Options, select “MIDI settings” or press ‘F10’ (fn + F10 for macOS).
The MIDI settings view has two sections: Input and Output. When your keyboard is connected to your computer, it will be visible under both Input and Output.
4) Select And Enable Your Keyboard
5) Set Your Recording Options

Recording MIDI in FL Studio is not the same as recording audio. Sometimes when you click on the record button, the recording filter pops up. On the recording filter, you have the option to select what you want to record.
To record MIDI, select “Notes and automation”. You can also select “Everything”, as long as you don’t have any microphone input selected.

Of course, there are other tangentially related options we can explore another day like the metronome, the count-in, the wait-for-input-to-record, overdubbing, and loop recording as well.

How to Map Your MIDI Keyboard to Controls in FL Studio
There’s a lot more to FL Studio than just plugging it in. There are also ways to map MIDI keyboards and controllers. I’m going to show you precisely that now.
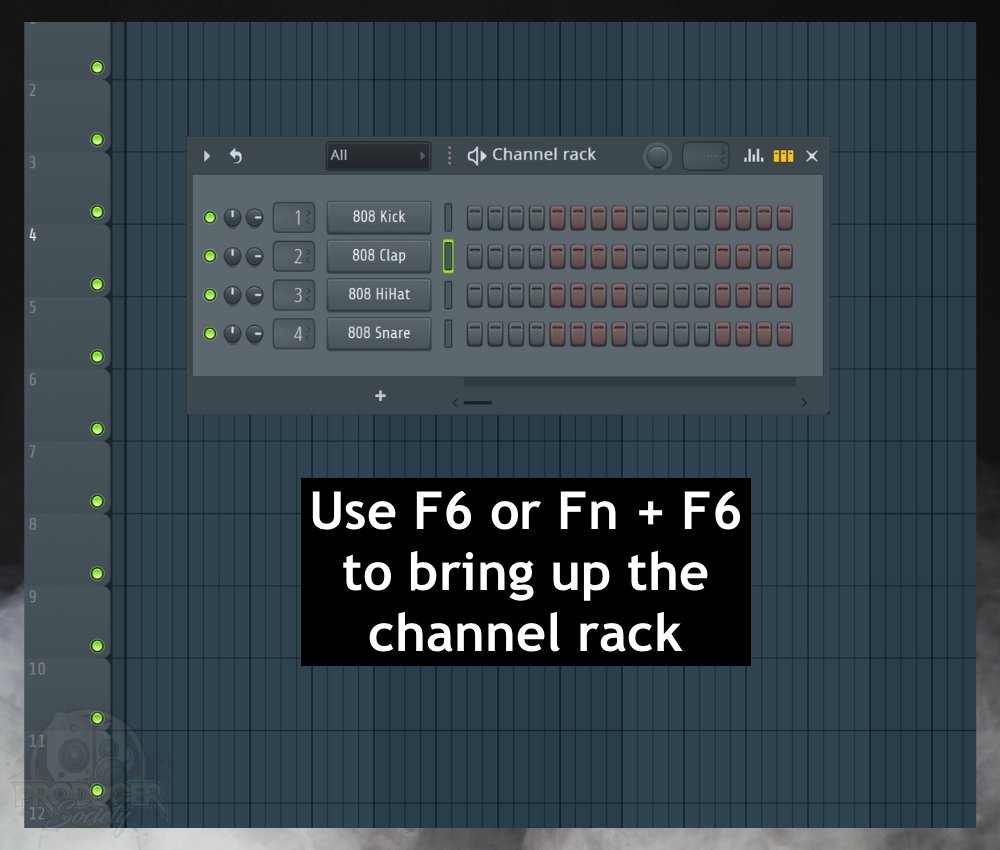
1) Open FL Studio and then the Channel Rack (F6 or Fn + F6)
2) Right-click the Plugin, Choose Replace, and Then Select the “FPC”

There are other ways of arriving at this menu, but this is my method.
3) Click the Dropdown Arrow and then “Map Notes for Entire Bank”

4) Press Each Pad From [Bottom Left to Right] to [Top Left to Right]

In other words, press the following pads in regular numerical order: 1-2-3-4-5-6-7-8. Wait for each pad to trigger a sample sound in the FPC drumkit, ie, the kick, hi-hat, snare, tom, etc.
Be careful to press them intentionally. Sometimes, you can trigger other pads together at the same time and you’ll have to start over. In that case, right-click again and choose “Cancel Mapping.” and start again.
5) Press the Bank A/B Button And Repeat the Process Once More

Repeat the process.
6) Choose “Save Preset”

This is the essence of setting up your MIDI Keyboard in FL Studio. Trigger your keys and drum pads in this way.
There’s more to this though. You can also have the keys work as a piano and the pads work as drums at the same time. Let me show you how to do that.
How to Link the Knobs on your MIDI Device with FL Studio
Thankfully, linking the knobs is way less involved. All you’ve got to do is right-click.
1) Choose Your Sound, Instrument, or Function to Control
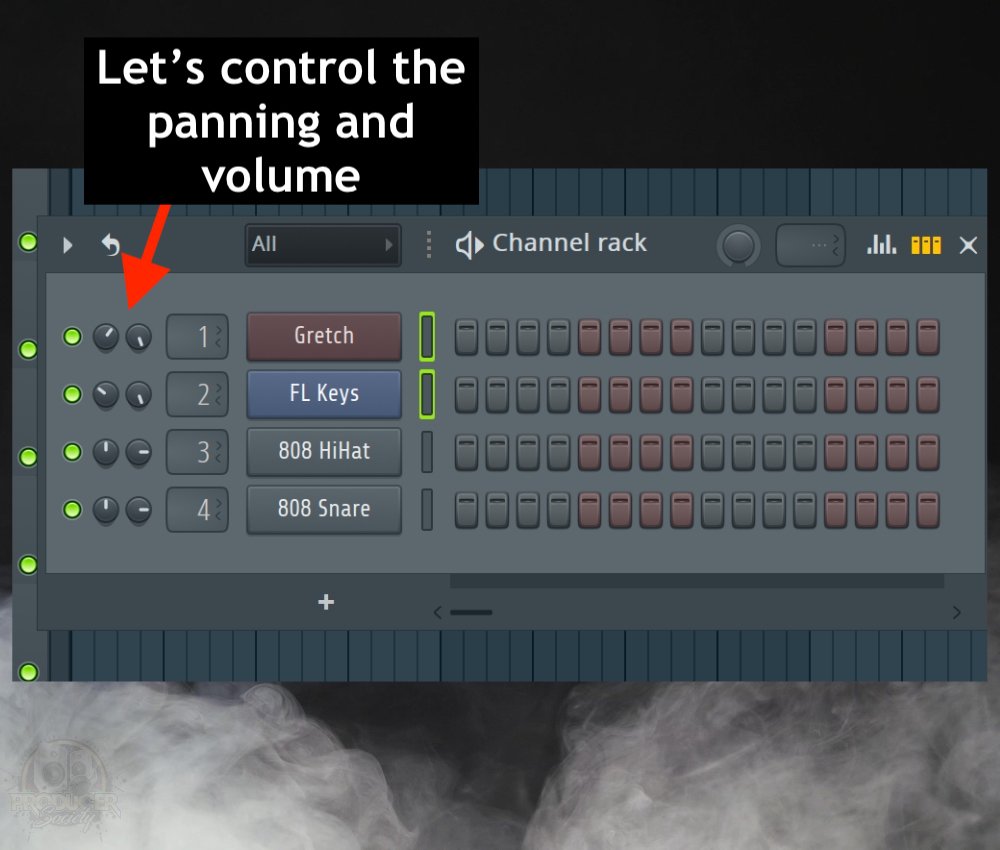
However, you can use the keyboard to control almost anything.
2) Right-click the Function and Choose “Link to Controller”

3) Turn the Knob on Your Device
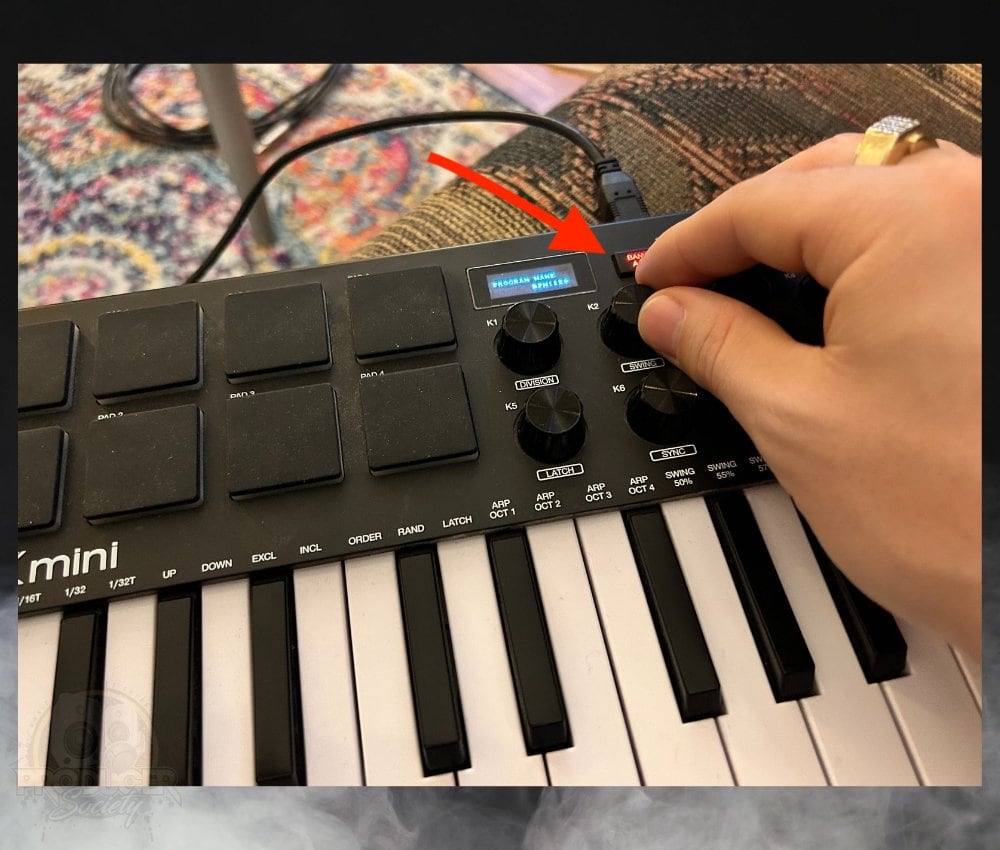
And that’s all you have to do. You can get way more creative with this feature.
For example, the guy in this video uses it to control an EQ sweep which sounds great.
How to Fix Latency and Other Problems
Latency is the delay you experience when you are recording. It is due to the time it takes FL Studio (any DAW) to process the signal sent to it and deliver output.

Latency can be solved by changing the buffer size of the audio device. It is advisable to use a low buffer size (256, 384) when recording so that you can have little to no latency.
However, you need to increase the buffer size (1024, 2048) when mixing or processing, especially when you have used high-performance plugins in the project.
At this point, you are no longer recording so latency will not be a problem. Then, using a low buffer size will not give FL Studio enough time to process the project, and you begin to have pops and clicks. This section of the FL Studio Online Manual describes how to change buffer size.
Other Articles You May Be Interested In
- How to Connect A MIDI Keyboard to FL Studio Mobile [EASY]
- How to Set Up The AKAI MPK Mini With FL Studio [macOS/iOS]
- How to Connect A Digital Piano to an Audio Interface [EASY]
- How To Connect MIDI Controller to Garageband iOS


 Written By :