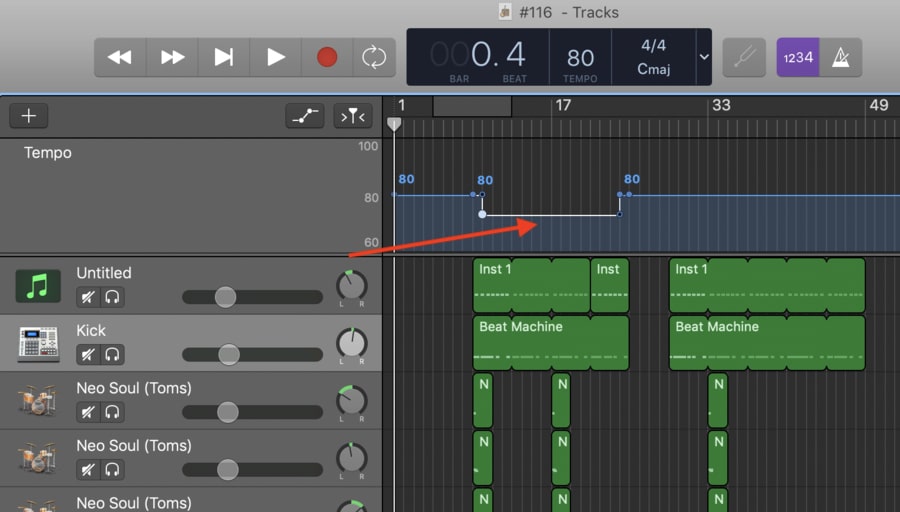
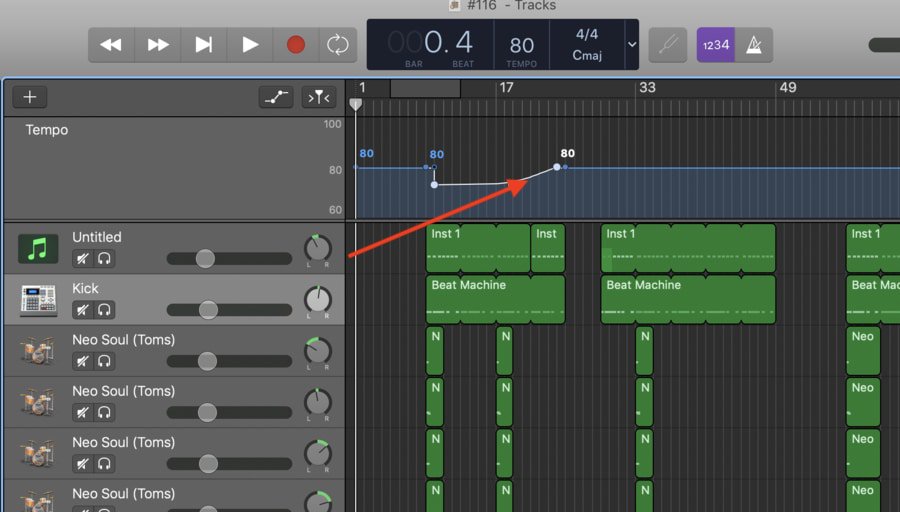
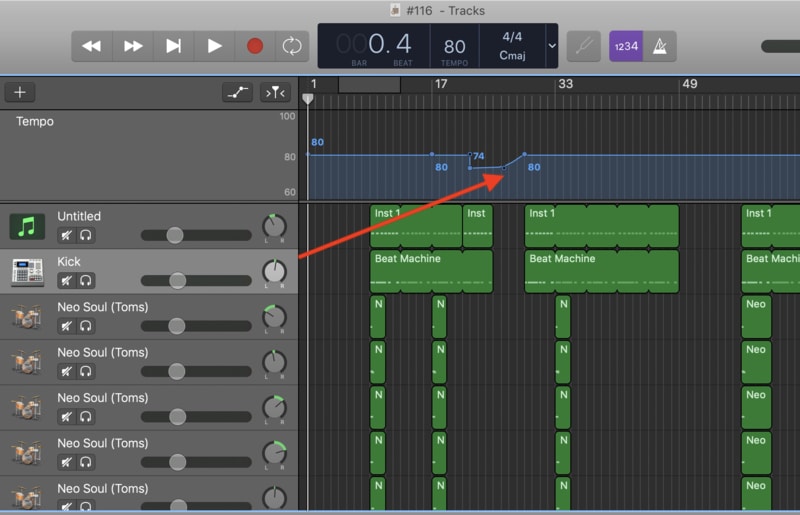
1) Go into Garageband’s toolbar and select “Track.” Bring up the “Show Tempo Track.”
2) From here, you’ll see the Tempo Track, and using the tempo automation points, select the points where you want to decrease or increase the tempo.
3) Drag the tempo track up or down relative to the BPM.

Changing the tempo of the middle of a song you’ve created in Garageband is quite easy, and it involves just a few different steps.
Another thing that you can do is try out the easy command, (Shift + Command + T), which will bring up the tempo track as well.
This is undoubtedly the easiest way to go about this, however, unfortunately, there are some limitations to Garageband’s ability to adjust tempo, notably, the fact that you can only apply it to every single instrument collectively rather than just one at a time.
In other words, you can’t apply the tempo changes to just one instrument. The change is consistent across the board.
However, as I discussed in my other article on tempo, if you add a track region as a Loop, you can make adjustments to it specifically without affecting others. For the sake of clarification, we’re going to explore the same tactic here albeit in short form.
How To Change The Tempo Of Just One Instrument
1) Choose which track that you want to isolate
2) Hit ‘File’ in Garageband’s tool-bar
3) Click on the button that says, “Add Region to Loop Library,” or use the command, (Control + Shift + o).
4) Once you have access to all of the options for adding loops to Garageband’s loop library, choose the box that says, “One-Shot.”
5) Make a new Audio track using either the Command, (Shift + Command + A) or by using the right-click option.
6) Select the loop that you want to use by choosing the rope icon in the top-right hand side of the DAW.
7) Drag and drop the appropriate file and drop it into your new track region.
8) At this stage, you have a sample that won’t change whenever you’ve adjusted the tempo of the song.
Additionally, users often ask whether it’s possible to change the time signature in the middle of the song, but unfortunately, a user can’t do this in Garageband. It’s just one of those limitations to the software.
To make more sophisticated changes to your music, you’d be better off to try out Logic Pro X. GarageBand is a beginner-level software, so it isn’t able to make such changes.
It’s worth noting that making tempo changes to a song is going to sound the best for Apple Loops (my guide), Drummer Tracks (also my guide), and MIDI recordings, rather than actual audio recordings that you’ve done with a guitar or another instrument.
With that said, you can adjust the tempo of an audio recording, but it may sound a bit weird and slightly off if you make the change. On the other hand, you can record actual instruments and then speed them up after the fact. I’ve done this at least once so far.
Features of the Tempo Track
The Tempo Track works very similarly to the other forms of automation in Garageband which I’ve discussed before, notably, the way in which we’re able to increase or decrease the amount of change with the automation track.
In other words, you just have to double-click on the blue line to separate the track into different pieces, although, it’s different in iOS (my guide).

You can also adjust the level of decline or incline, which will make the changes either more abrupt or much smoother, depending on what you want to do.
Additionally, it’s worth mentioning that if you want to delete all of the changes you’ve made to the tempo track, you can actually drag a box around each automation point and then delete everything that you’ve done, rather than go back through and delete each automation point individually.
Tempo Track Techniques For Better Songwriting
Adjusting Dynamics
By this, I mean that you can make tempo changes to your music for dramatic effect. In other words, let’s say that you’ve created a verse right before the chorus.
If you want it to build in intensity before a chorus drops, you would just have to increase the tempo of the song right up until the chorus.
It would look something like the image shown below:

You could use the same principle for the ending of the song as well. For example, if you wanted the song to fade out in speed as well as in dynamics, you could set up a gradual decrease in volume as well as speed for the sake of fading out the song.
The same principle can be used for different things.
It’s not uncommon for hip-hop producers, for example, to quickly slow down one part of the beat just to keep it interesting. I’ve heard this while listening to other producers on Soundcloud.
I’ve used this same technique for a song that I once did called “Cosmo Canyon,” where the introduction was a drummer track that leads into a beat that suddenly drops pretty hard.
You can check that out on my Soundcloud here:
https://soundcloud.com/atxk/cosmo-canyon
Moreover, while using this principle, you could also set up a flanger on the master track of the song during the slowed down part, which would introduce an additional effect on the track.
Think of everything that could be done this, it doesn’t just have to be a flanger. It could also be a flanger, additional reverb, a phaser, and other effects.
YouTube Video Tutorial
Conclusion
I hope this article and tutorial was helpful to you in some way. Unfortunately, there are some limitations to Garageband’s interface, but there are usually some ways to work around them.

 Written By :