I was using FL Studio the other day and I couldn’t bring the clip back to normal after having changed the speed with “Stretch Pro.” Google didn’t help either, but I did end up figuring it out.
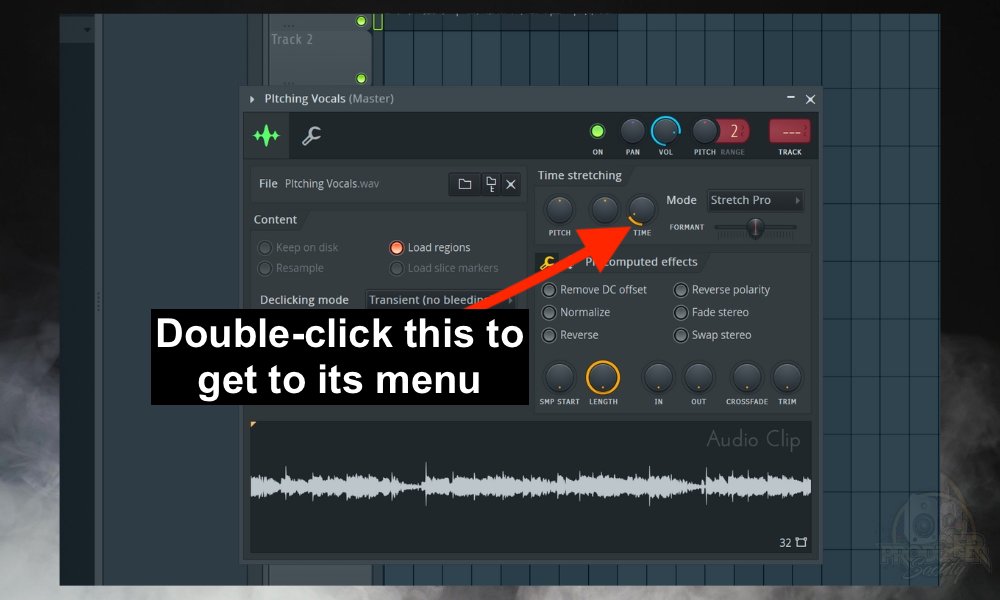
To reset a time-stretched audio clip in FL Studio after having altered it some way, double-click the audio clip to bring up the Channel Settings window. Right-click the “Time” button and then choose “Reset” on the right side of the menu.

The Easiest Way to Reset An Audio Sample in FL Studio
Here’s the same process but explained with images and a bit more detail.
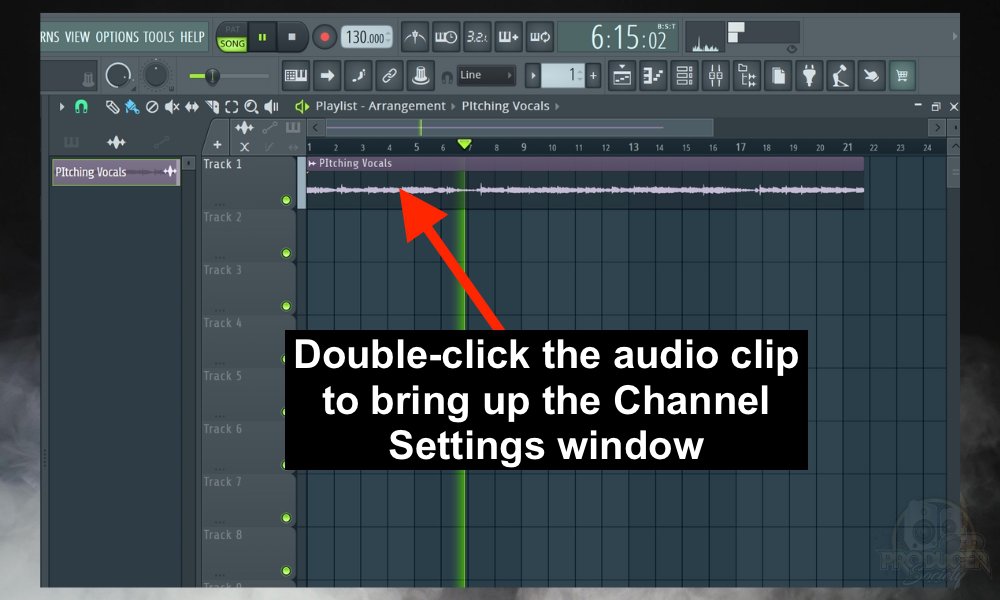
1) Double-Click the Audio Clip to Bring Up the Channel Settings Window

I tried finding a separate shortcut for bringing up the Channel Settings window, as it’s called, but I couldn’t find one. It looks like double-clicking on the track header or the clip is the only way to do it, although, I could certainly be wrong.
2) Right-Click the “Time Knob” and Choose “Reset”

This will bring up the menu.

And that’s it for restoring the clip back to the way that it was.
Of course, there are some other, less efficient and cumbersome ways of restoring the clip.
- For example, you could reload the clip into the Playlist, but this would be time-consuming and fairly annoying. It also pre-supposes you haven’t deleted the clip already and have to retrieve it from the trash. Or it’s possible the clip is stashed away on your hard drive somewhere.
- Another way would be to press “undo” a bunch of times. But this isn’t ideal either because the order of “undo” actions would have to be in perfect secession to successfully do it without undesirably altering your other actions.
For both of these reasons, I think using the “Reset” button on the pitch, MUL, and time parameters in the Channel Settings window is the best way of doing it.
Other Articles You May Be Interested In
- The EASIEST Way to Reduce Background Noise in FL Studio
- How to Slow Down Audio in FL Studio [3 Simple Ways]
- How to Snap to Grid in FL Studio + (7 QUICK Tips)
- How to Import/Export Audio To & From FL Studio (MP3s & More)
- How to Install Plugins in FL Studio Mobile [EASY]
Important Things to Note About Bringing A Clip Back to Default
1) The Same Principle Applies to Other Changes
In other words, if you alter the pitch, you can bring the clip back to its default state by clicking on the appropriate knob and then pressing “Reset” after. For example, you can bring a change in pitch back to its original condition by right-clicking the “Pitch” knob and choosing “Reset.”


 Written By :