Here are six steps for creating a sad trap beat in GarageBand.
How To Make A Sad Beat In Garageband
1) Create a chord progression using minor chords from a minor key
2) Take the same chord progression and copy and paste it into an arpeggiator, synth, pad, or soundscape instrument track.
3) Add Snare and Claps on every third or 4th beats using the Trap Drum Kit, such as the one from the Drum Pro Plug-in.
4) Add the Kick.
5) Use 16th-note hi-hat notes and snare and hi-hat rolls
6) Boutique 808 notes that match the kick. Make sure they’re on key.
Now let’s run through each one of these steps in detail
1) Using Minor Chords from a Minor Key Signature
For this tutorial, we’re going to explore some very basic music theory concepts but explained in a way that’s easy for everyone to understand, with minimal jargon, so just bear with me (however, if you are interested in learning more, PianoForAll is probably the best and cheapest way of learning these principles in a way that’s actually applicable to music production).
We’re going to explore two different concepts in this section, including the Plagal Cadence, as well as the importance of knowing how to use the minor scale and its accompanying chords. Understanding what these two concepts are will help you create not only sad beats but other kinds of sad songs as well.
Using Minor Chords
If you want to make a song sound sad or somber, a good thing to do is to just use minor-sounding chords. You don’t have to learn music theory really, you can just google “minor chords,” and you’ll find a list of minor chords to use.
Every chord out there has a parallel minor, for instance, if there is a G Major chord, there is also a G Minor chord.
In many cases, it’s just as simple as changing one note in the chord to make it minor, usually the third note of the triad.
For instance, a G Major Chord (G,B,D), can be changed to a G Minor chord by flatting the second note of the chord, B.
G Minor: (G, Bb, D)
The Minor Scale and Its Chords
This is arguably one of the more important aspects of building a sad progression.
The minor scale looks like the following:
i, iiø, III+, iv, v, VI, VII(7)
The order of major and minor chords look like this:
Minor, Half-Diminished, Major (or Augmented), Minor, Minor, Major, Major (Dominant 7).
In the Key Of A Minor, these are the following chords:
A Minor, Bm7b5, C Major (or Augmented), D Minor, E Minor, F Major, G Major (or Dominant 7th).
To make a sad sounding chord progression, you could pick three of the aforementioned chords and jam on them a little bit, until you have something that sounds good to your ears.
For example, JuiceWRLD’s song, “Empty,” uses the simplest chord progression of them all.
The track starts out on a variant of the A Minor Chord and then goes up to a variant of the C Major Chord, and then comes back to the A Minor again. The entire song revolves around this chord progression: i-III-i
The beginning of the song uses these two chords as the foundation, and then there are extra notes added in there with the piano in the beginning, and then, of course, you have JuiceWRLD’s singing on top of the track and then the 808s performing another function (Initial Audio’s 808 Studio II from Plugin Boutique is my favorite).
Truthfully, a song doesn’t have to be any more complicated than that. You could easily just use two chords of a song, and then construct the rest of the music around those two chords, which is going to be what we’re doing with the rest of this tutorial.
However, before we go on to the next part of the tutorial, I’m going to show you how to use a Minor Plagal Cadence, which is another technique for making a sad sounding song.
The Plagal Cadence
When it comes to making a sad sounding chord progression, the main thing is to use Minor chords and minor-sounding progressions.
In popular music, arguably the most common chord progression is the Plagal Cadence, which is a IV-I chord progression, or, in other words, the fourth chord of the key signature as well as the first chord.
Let’s say you start out with an A Major chord. The A Major chord consists of the following notes: A, C#, and E.
It looks like this on Garageband’s Musical Typing:

Those are the main notes of that chord. From there, you want to travel up by four notes and use that chord, which in this case, is D.
The D Major chord in the Key of A Major is the following notes: D, F#,A.
It looks like this on Garageband’s Musical Typing feature:

Now you know what a Plagal Cadence looks like. From here, what you want to do is actually turn the second chord in the progression into a Minor Chord, and then it becomes a minor Plagal Cadence.
In roman numerals, it looks like this:
I-iv
I = A Major = A, C#, E
iv = D Minor = D, F, A
Turning the D Major into a D Minor is quite simple, all you have to do is turn the F# into an F-natural, which means there aren’t any sharps or flats on the note.
A D Minor looks like this on Garageband’s Musical Typing Feature:

This Minor-sounding chord progression is perhaps the most popular one out there and can be heard in all kinds of songs, including “I Believe I Can Fly,” from R. Kelly, Radiohead’s “Creep,” and so on. It’s incredibly popular and used all over.
The purpose of the Plagal Cadence, in this context, is not to be the foundation of the song, but rather, it’s used to end the musical phrase in a particular way.
You could use a bunch of different chords in your progression, but if you throw in the Minor Plagal Cadence into the mix and end the musical phrase that way, you’re automatically going to make a particular type of sound, notably, the sad sound.
Going from the minor iv chord and down to the Major-I chord will create tension and a particular expectation from the listener.
To summarize the purpose of this technique, just understand that using the iv-I progression is a way of ending a particular musical phrase in a way that builds tension and creates a sad sound.
2) Copy and paste the chord progression into a new software instrument of choice.
For this section, all you have to do is copy the previous chord progression that you created using the (Command + C) function, and then paste it into a new software instrument track using the (Command + V) function.
The idea behind this is to add extra melodies and layers on to the track to make the original melody a little less bland.
This doesn’t have to be the final melody or the final layer of the song, I just find that it fills out the track a little bit and helps me get in the groove of the track so I feel inspired enough to continue creating the song.
If you check out my article on The Best Garageband Instruments for Hip-Hop, you’ll see I created an entire list of the types of instruments and sounds one can use.
The number of instruments you can use, find on the internet and download as a plug-in is mind-blowing and definitely worth looking into, additionally, if you’re willing to pay, the quality will increase substantially.
However, for the sake of this tutorial, I’ll mention just a few that I like to use:
String Movements
Sun Glitter Pads
Breathing Vox
Boarding Area
Dripping Cycles
Erratic Motion
3) Use a Trap Drum Kit from the Drum-Pro Plug-in to add Snares and Claps
This is a drum-kit that I’ve mentioned on other occasions several times now, including in my article on how to make a trap beat in GarageBand. My article on installing plugins will guide you through the process as well, however, for this section, the main thing is to add snares and claps on every third beat or fourth beat.
This is the most commonly used snare/clap in trap music. There is pretty much always a snare or a clap on every third or fourth beat. That much you can count on, for sure. In “Maze,” for instance, from Juice WRLD, there is a clap on every 3rd beat, and on “Empty,” there is a clap on every 4th beat.
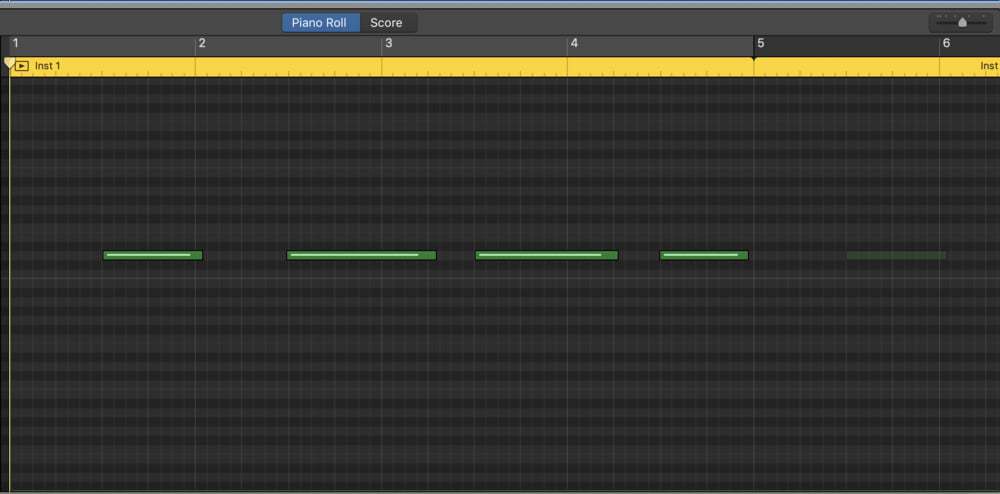
Here’s what a clap on every third beat looks like:

Here’s what a clap on every fourth beat looks like:

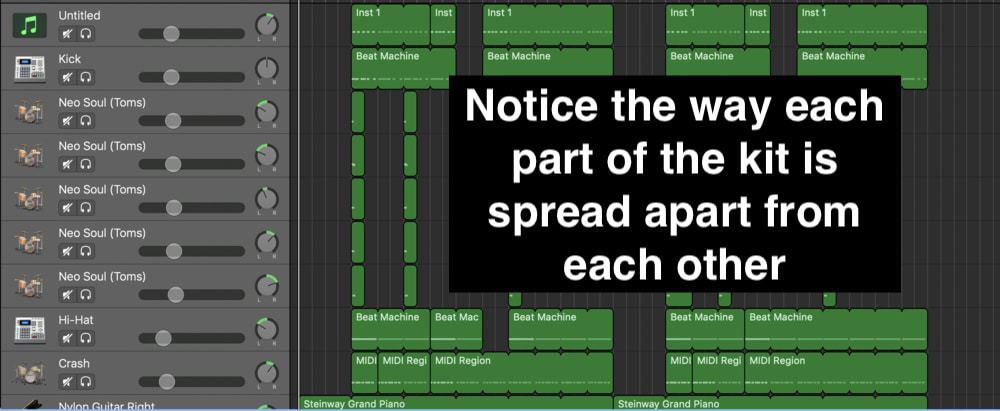
It’s important to note that you should probably separate each part of them into a different software instrument track.
This allows for more customization for each part of the kit, including with EQ, Compression, and other dynamic processing plug-ins and effects (FabFilter has the best limiter, EQ, and compressor ).

For instance, if you want to a flanger on the hi-hats, or perhaps a bit of delay or reverb on the snare, just to fatten things up a bit, this allows you to customize the individual sound of the kit, without affecting the others.
I would also mention that setting the BPM between 120 and 160 is a good move. The reason why setting it higher is better is that it makes it easier to create beats because there are more clicks to keep everything on time.
As a general rule, the more clicks there are, the easier it is to keep time, and the fewer clicks, the harder it is to keep time.
4) Add the Kick
The points at which you add the kick is going to be up to you, depending on your individual taste. The kick and snare/claps are probably the 2nd most important aspect of creating a sad beat, or any kind of beat for that matter because it’s going to establish the groove.
Many people have different ways of going about it. For instance, some people like to draw them individually, whereas others like to do it in a slightly different way. In my case, I like just hitting the record button and winging it and seeing what I can come up with.

Once the foundation of the kick has been created, I’ll go back through and time quantize it to around 1/16 notes, that way all of the slightly off-timed notes are snapped back to the gridline.
After you’ve laid down the majority of the kicks, I would keep them panned to the center of the mix, because that’s typically where the kick sits in the mix in most hip-hop songs.
In Jazz, and other genres, it can vary quite a lot, but for the most part, in rap music, the kick is always front and center, or perhaps very slightly to the left or right.
5) Use 16th-note hi-hat notes and snare and hi-hat rolls
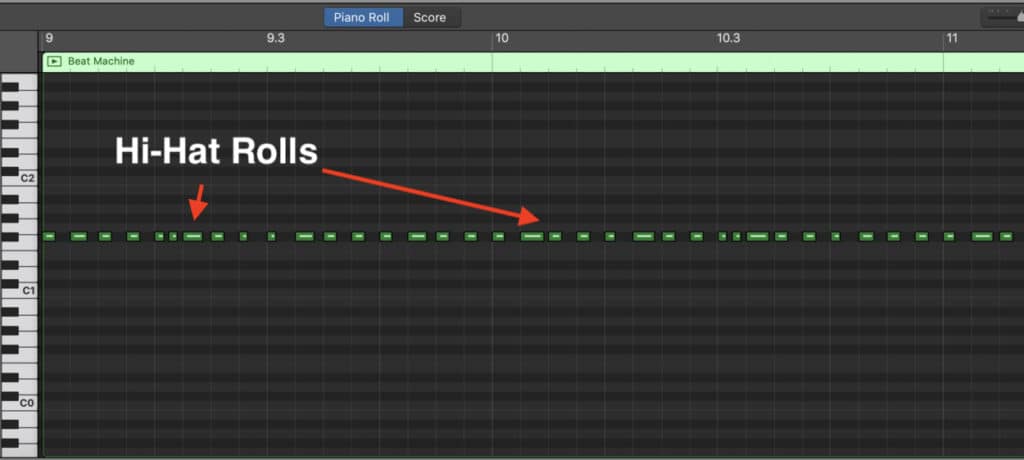
This is arguably the easiest part of creating a beat because the vast majority of the notes will be the same. For instance, the song will have four hi-hats per beat, which means that it’s a 1/16 note.
What you do, is you just create a hi-hat note on every other grid-line, and then copy and paste them all the way until the end of the workspace until you have an entire hi-hat section.

To create hi-hat rolls, the process is quite simple, you just have to create around 2-3 additional hi-hat notes in the space where they would usually be one. You can get really creative with this. For instance, you could have a long line of them, around 6 notes if you wanted, or occasionally just three.
It’s really up to you.
For Snare rolls, the same principle applies, however, the Drum Pro plug-in doesn’t offer different kinds of snares, there is only one really. You might have to find a different drum kit if you want to make these types of rolls.
Additionally, what you want to do is adjust the velocity of each note by however much you choose. This will make some parts of the hi-hats hit harder than others.
The same principle applies to snare rolls.
6) Boutique 808 notes that match the kick. Make sure they’re on key.
The same principle applies to build a bassline for making the melody, albeit slightly different.
What I do, Is I just figure out the key signature of the song and the accompanying scale, and then I map out how that looks on the keyboard and then I just jam and see what sounds good.
For this section, what I like to do is start out with a bass guitar set at about C3 or C4, that way I ensure the notes are actually on key, and then once the bassline has been created, I make sure that almost every note falls on the kick, that way the bass and the kick slam together and you get that hard-hitting bassline that so many people love.
After that, you can either change it to a Deep Sub Bass synthesizer and drop the octave down to C2.
Perhaps the most important of creating the bassline is the mixing of the instrument. For instance, adding compression and distortion to the boutique 808 is the difference between having slammin’ 808s or ones that aren’t-so slamming.
Additionally, you want to let the notes ring out on the boutique 808s that way they actually have time to boom properly.

Moreover, as I mentioned above and in my other article, you want your 808s to hit on the same notes on the Kick, perhaps not in all cases, but in many cases. To hear the final product of what I created, go ahead and check out the YouTube video tutorial below:
YouTube Video Tutorial
Conclusion
I hope this article (and my best tips for 808s article) was helpful to you. Make sure to share it on your social media with your friends, I’d appreciate that a lot.

 Written By :