 Written By :
 1) Get the Zoom H6 and choose “Medium” as the gain option on the recorder
2) Hit “Record” on the device after having connected it to Shure SM58 microphones
3) After recording the podcast, connect the H6 to your computer and then drag the file into Garageband
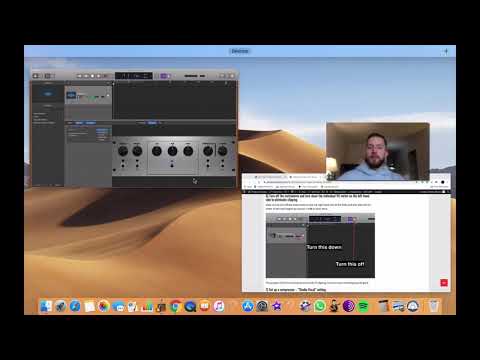
4) Turn off the metronome and lower the VU meter volume to eliminate clipping
5) Turn on the “Studio Vocal” compressor preset, and then the Channel EQ preset “Speaking Voice Improve”
6) Set a noise gate between (-55dB) and (-70dB)
7) Keep the Master Volume at +0.0dB and then put an AUPeakLimiter on the Master Channel with the “Pre-Gain” setting turned up to +12dB to increase the total volume.
8) Export the file to your desktop as a .wav file and upload it to Spotify, Apple Music, iTunes, and Soundcloud
A Step-By-Step Guide For Making A Podcast
1) Get your hands on a portable recorder like the Zoom H6
Creating a podcast the easy way involves one piece of gear, maybe two, assuming your laptop needs the USB-C adaptor. I would recommend picking up a Zoom H6 recorder bundle and using that, rather than going out and purchasing a ton of other gear.
At some point, you’ll want to get your hands on a more sophisticated and filled-out set-up, with all kinds of microphones, maybe a mixing board, etc. However, for the first 50 episodes or so, you just want solid quality audio, and this can be done with a nice microphone from Zoom.
I have the Zoom H2 recorder that came out around 11-12 years ago, and I still use it today for recording audio for my YouTube videos that are almost always at the bottom of the article.
However, there’s no sense in buying an extremely old device when there are better and more modern options available. I would recommend getting the accessory pack that I listed above, that way you have multiple microphones and other gear. Here’s the Zoom H2 that I still use to this day every once in a while:

2) Choose the proper gain option on the recorder, usually Medium is enough for a regular speaking voice.
On the Zoom H2, for instance, you have three options, Low, Medium, and High, however, on the latest model of the recorder, those options have been eliminated and replaced with numbers.
Obviously, the higher the number, the more gain.
Typically speaking, if you’re going to record speaking voices, the gain of the microphone should be around the low-to-medium range, assuming you’ve placed the device close (around 2 feet/0.50 metre) to everyone speaking.

If your gain is too high, you risk picking up on too much noise, for instance, breathing, doors opening and closing in the background (my tutorial on eliminating background noise), the noise outside your home, the air conditioner, and so on and so forth.
I would argue that it’s best to choose the low-gain option and just have the microphone close to the hosts.
Additionally, it’s definitely worth mentioning that you need to turn off noisy appliances and other noise-disturbances in the area, for instance, a fan or an air conditioner.
This is also one of the reasons I mentioned the accessory pack that comes with the recorder.
It includes the foam guard which stops the wind from ruining the recording, in case you want to do one outside, but it also stops you from bumping the recorder up against something and causing a massive noise disturbance in the audio.

Truthfully, you can eliminate this in the mixing process, but it’s best to avoid these problems from the source. An ounce of prevention is worth a pound of cure.
3) Record the podcast
For this stage, everything is quite self-explanatory, however, there are a few things you can do to avoid annoying problems, and the following is just one of them.
Moreover, I have the PDF manual at this link here in case you want to read more about the Zoom recorder and its functions.
Hit record on the recorder and start talking. Make sure you have enough space on the card.
Furthermore, it’s best to buy a file-card that has a lot of space, for instance, 32GB or even more, upwards to 64GB. This is going to thwart a lot of potential problems.
If you cheap out and only purchase a 3GB card or something like that, you’re going to end up spending a lot of time deleting files, dragging them to your desktop, or corrupting other files because you didn’t have enough space to record the entire podcast, to begin with.
4) Connect the recorder to your computer and drag and drop the file on to your desktop
Once everything has been recorded and you’re good to go, connect the recorder to your computer (this is the MacBook Pro I recommend the most for GarageBand users). Select the file folder on the computer.
Once it’s been opened up, you can see all of the files within it. Select the one you want and then drag and drop it on to your desktop. It should start copying almost right away. Make sure you have enough storage space on your computer to copy files.
For the future, it’s best to keep the recorder’s files either properly labeled, or the older ones deleted altogether.

Obviously, the former is a better option, but the reason for this is you want your files to be easy to identify. You don’t want to click through all of them, pressing play on each one to find out which one is the newest recording.

Moreover, it’s just going to make your life a lot easier if everything is labeled well.
The Mixing Phase
5) Open up Garageband and drag the file into the workspace
Now that you’ve got Garageband open, you can drag and drop the file into the workspace, after choosing the “Software Instrument” track template.
Delete the additional software instrument track that’s taking up space, and label the new track region if you want to.
6) Turn off the metronome and turn down the individual VU meter on the left-hand side to eliminate clipping
Make sure to turn off the metronome on the top-right hand side of the DAW, and also drop the VU meter on the track region by around -3.0dB or even more.

The purpose of this is to eliminate all sounds of clipping, to ensure your recording sounds great.
7) Set up a compressor – “Studio Vocal” setting
In the Smart Controls of the track region for your audio recording, go down into the plug-ins and start using some of these dynamics processors. This is the part of the process where you’re going to start seeing significant improvements in the quality of the audio.

The compressor is going to do a number of things. It’s going to increase the quiet parts of the recording, and it’s going to drop the volume of the loudest parts by just a bit.
Select the “Studio Vocal” pre-set as if you were mixing vocals (my guide), and you’ll notice right away that the recording has gone way up in volume and in quality. The volume of hard-to-hear words and the pronunciation of words will be way more audible and easy for people to listen to.
8) Set up a Channel EQ – “Speaking Voice Improve”
For this part, it depends on the gender/sex of the podcaster.
If it’s a woman with a relatively high voice, it’s not a good idea to scoop out all of the low-mid and low frequencies. In fact, you might want to increase those frequencies by a little bit.
If the podcaster has a much lower voice, you’ll want to attenuate the low frequencies and increase the high frequencies. It’s going to look something like the image below.
The following image is the EQ setting that I like to use for my voice:

For a woman’s voice, you might want to set up an EQ that looks like a lot like this, instead:

9) Set a noise gate at (-55dB) to (-70dB)
For the noise gate, I would be more cautious.
The reason being that using a noise gate with the threshold turned up too much will cause choppy and annoying audio. If you are going to use a noise gate, it has to be set up properly, otherwise, you risk creating really low-quality audio.
If you’ve ever listened to an audio recording with too much of a noise gate, it’s audible right away.
For instance, on YouTube, if there is a video with a noise gate with the settings too high, 90% of the comments on the platform will be about the use of the gate.
There’s just something extremely annoying about choppy audio as a consequence of an excessive noise gate. I’m guilty of this sometimes as well.
10) Turn up the Master Volume on the top-right hand side to the desired level, usually +0.0dB or less
Once you’ve set up the Compressor, the Channel EQ, and possibly even the limiter, what you can do now is go up to the Master Volume fader and increase the total volume to around +0.0dB

That way the track is quite loud and users have the option to either turn the volume way down or way up. When it comes to volume, it needs to be quite loud, because all of the professional podcasts out there – for instance, think the JRE podcast – has the ability to go quite loud.
As I explained in my guide on why you can’t hear while recording in Garageband, there’s nothing more annoying than having a recording where nobody can hear what’s being said.
However, the better way to go about increasing the volume is by using the AUPeakLimiter and the “Pre-Gain” parameter. This is a great way to get the volume up.
11) Export the file to your desktop as a .WAV
Now that all of the plug-ins are set up, you can go ahead and export the track as a .WAV. It’s up to you really, but I would export it as a .WAV, because from what I understand, most streaming platforms are cool with this format.
Optional – Mastering
You can DAW-master it afterward, which brings me to the next part of this tutorial. This is more optional, but it’s something that can be done as well to increase the quality of the recording even more.
12) DAW-“Master” the Recording
Once you’ve exported the audio file as a .aif file, what you can do is create a new project, and then drag and drop the .aif file of the recording back into Garageband.
From here, select the “Master” track option, either by clicking on it in the Smart Controls, in the top toolbar, or using the (Shift + Command + M) function.

What you do from here is kind of like what you did in the previous section. We’re going to set up another compressor on the master channel, EQ, and a limiter.
Compressor
Use the “Platinum Analog Tape” pre-set on the recording and you’ll notice another significant boost in volume.

Channel EQ
For the Channel EQ, you can just listen to the recording and see if there are any unpleasant frequencies in the background, for instance, hissing, or perhaps there are too many “ess” sounds. In this case, you would attenuate the higher frequencies. Check out the image below to see what I would set the Master Channel EQ to be:

Limiter
For the limiter, I almost always increase the gain to +2.0dB, and then I set the output level to -0.1dB. What this does is increases the total gain of the recording.
But also sets a ceiling or a “limit” on the file, that way there won’t be any annoying clipping or distortion, additionally, you can use the AUPeakLimiter and the “Pre-Gain” setting like I mentioned earlier.

Once you’ve set up the following three plug-ins, what you can do from here is increase the Master Volume of the recording once again if it’s not loud enough. I would err on this, however, because we’ve already jacked up the volume a few times. Just be mindful of what you’re doing.
YouTube Video Tutorial
Conclusion
Alright, that’s all for this tutorial. I hope this was helpful to you. While it seems like a very complicated process, it really isn’t. If you use a convenient hand-held record like the Zoom H6 or the Zoom H2n, it’s honestly quite simple.
After you’ve mixed a couple of audio recordings like this, and you’ve recorded a few podcasts, you’ll be able to do it much faster and without even thinking about it.
Additionally, you could actually save a template in Garageband, including the volume changes, compressor, limiter, and channel EQ settings, already programmed into it, and then it’s just as simple as dragging the file into the template and then exporting it.