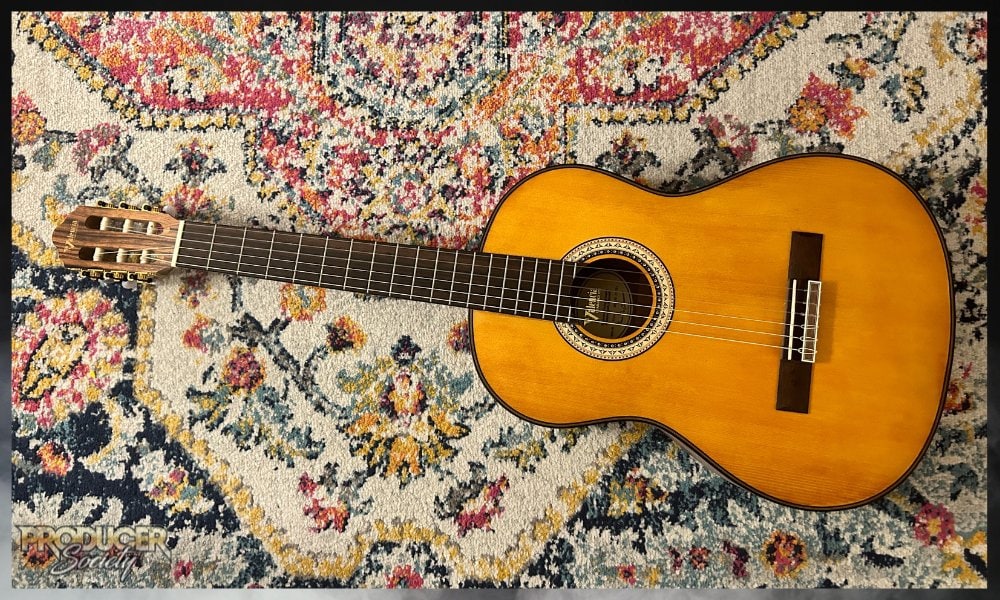
I think there are definitely some useful guidelines one can follow or use as a jumping-off point for mixing, and this is certainly the case when EQing a nylon string guitar. Just to name one example. Here’s how I do it.
To EQ a nylon string guitar, set up a high-pass filter to cut out any unwanted boominess, eliminate some of the low mids, drop out the range between 400Hz and 600Hz, and boost the higher-range frequencies from 1000Hz onward. However, keep in mind that your EQ will depend on many factors.
Setting Up An EQ for a Nylon String Guitar (A Step-By-Step Guide)
Truthfully, guitars are all very similar to each other whether it’s a nylon string guitar, a traditional steel-string acoustic guitar, or an electric guitar, which I’ve already explored before in my guide on how to EQ guitars. But while there are definitely similarities between them, there are also some differences.
Nylon string guitars are different from steel-string acoustic and electric guitars, enough to the point that it’s worth exploring on its own.
To put it simply, a guitar’s primary frequencies lie between the areas 70Hz and 500Hz, although, of course, there are more sounds in the upper range 1000kHz and up.
But between 70Hz and 500Hz is where there is going to be the most noticeable difference. Nevertheless, I’m going to explore what I mentioned at the start of the article but in a more in-depth fashion for the sake of illustration, clarity, and detail.
1) Set Up A High-Pass Filter
In case you don’t know, a High-Pass Filter is an EQ setting in which you literally let the higher frequencies pass through uninterrupted but you block out some of the lower frequencies.
In the context of a nylon string guitar recording, a high-pass filter would look something like what you can see in the image below:
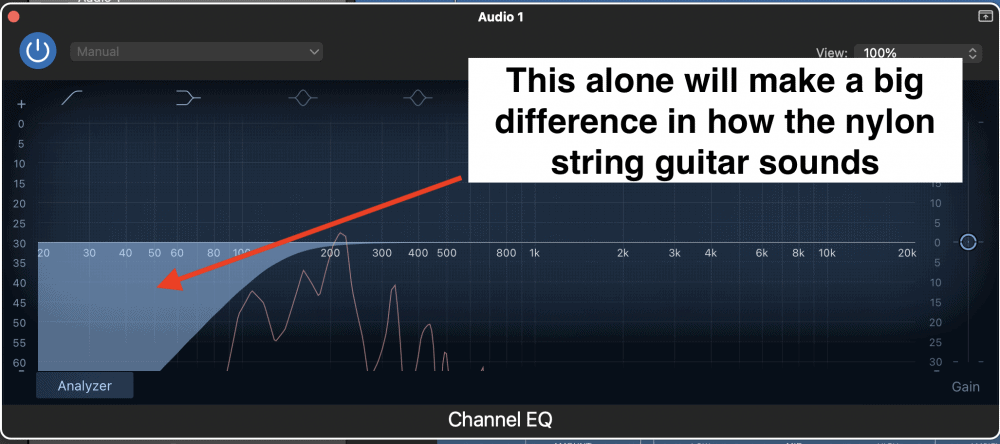
Because most of the guitar’s frequencies are above 50Hz, it’s best to just block out the lowest frequencies on account of the fact there aren’t that many there, to begin with.
However, there do exist some sounds in this range, and it’s worth your time to drop out the lowest bass sounds of the guitar because I find they don’t contribute much to the sound of the guitar anyway.
Additionally, I find that setting up a high-pass filter on a guitar is usually a great idea, regardless of the type of guitar. It always seems to make the guitar sound a little better because it frees up more room for the other, more important, and more audible frequencies to shine through.
To put it simply, a high-pass filter is going to emphasize some of the more desirable frequencies that you want to hear in your mix.
2) Cut Out Some of the Low Mids to Eliminate Muddiness
Muddiness is a big problem for most recordings, from what I understand, and this seems to be the case with guitar recordings, especially. Muddiness is the range that typically falls between 100Hz and 300Hz, and the same thing could be said about other sounds like vocals, especially a man’s singing voice.
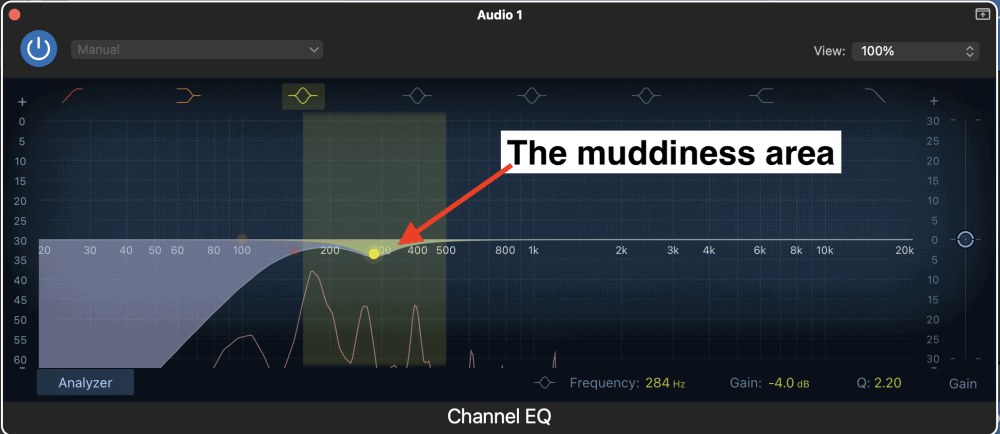
Go ahead and attenuate (decrease) some of the frequencies between 100Hz and 300Hz and see how it sounds. You may find that it has the effect – similar to the first step – of making everything sound a lot more clear, emphasized, or pronounced.
In other words, it has the effect of really cleaning things up in a big way, to the point where you almost sigh in relief the moment you’ve eliminated the muddiness.
3) Cut the Range Between 400Hz and 600Hz
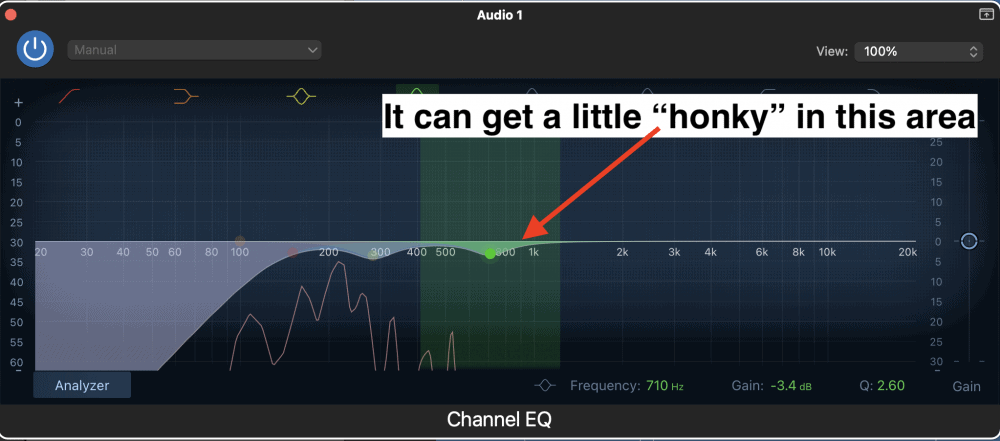
This range tends to produce what people like to cause “honkiness,” which may be lost on you if you’re not a native English speaker.
To someone who doesn’t speak the language, the term doesn’t mean much, but if you go ahead and boost the frequencies between 400Hz and 600Hz by a lot, you’ll notice that it does have somewhat of a “honky” sound to it.
Other people like to call it “boxy,” because it almost sounds a bit hollow as if the sound coming out of a box. This is a useful range to pay attention to and attenuate if you find there are some problems here.
Moreover, I’ve explored some other terms in my article on EQing pianos which may help you make more informed decisions in the mixing process, or, if not at least helping you identify problem areas or even more desirable effects.
4) Boost Frequencies Between 1000kHz and 20,000kHz
This is my favorite part of adding EQ to any sound. Boosting the frequencies between 1000kHz and 20,000kHz tends to bring a lot more air, sparkliness, clarity, and “breathiness” to the sound, which is why I like to use it a lot.
I also like it as a guitar player because I love to play in the higher end of the instrument, so this is the part of the frequency range where those notes actually are.
In combination with the first three steps on the list, adding more higher-end frequencies to the guitar is going to make a big difference in terms of the clarity of the sound.
Adding higher frequencies is almost like the finishing touch, so to speak because I find that at this stage, that’s where everything is really starting to come together.
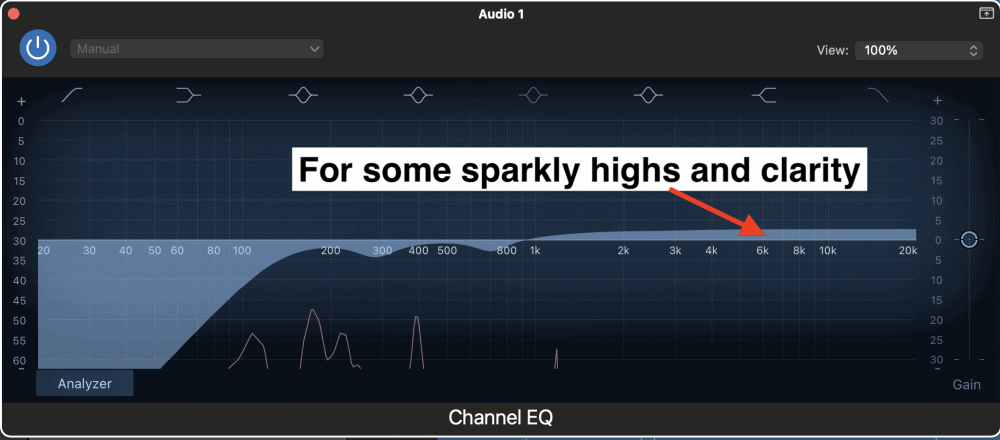
Boosting higher frequencies is also going to bring some of the harmonics and other sounds that make everything sound really nice, however, you have to be careful with this.
As I’ve mentioned before in my article on EQ, it’s best to be sparing with boosts and cuts regardless of where on the frequency range you’re playing with (with the exception of setting up high and low-pass filters where they’re needed).
Explained in another way, be careful when boosting higher frequencies because you may find that you bring too much “hissing” sounds into the mix, moreover, be wary of how you boost frequencies that may end up emphasizing your pick attack, which is something you may or may not want.
5) Pay Attention to the Pick Attack Frequency (If You’ve Used A Pick)
The attack is something that’s worth paying attention to, especially if you’ve used a guitar pick to strum your chords, play your leads, or perhaps both. The attack is less important to pay attention to, I find, when using your fingers because finger attack tends to be much smoother and gentler.
In general, I find that the pick attack tends to lie somewhere between 500Hz and 800Hz, although, it’s hard to say exactly where it is considering it seems to contain a little bit of all of the frequencies.
I think a better way of thinking about it, is just to consider the pick attack when EQing, and if it’s too intrusive, do an EQ sweep to find out where the harshest pick attack sounds are coming from.
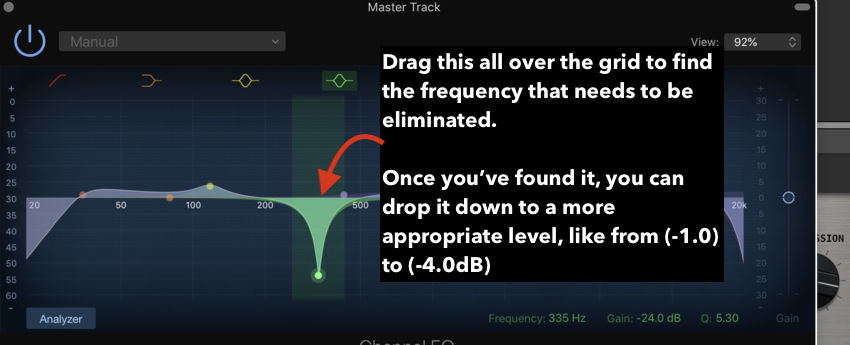
It’s not always easy to find where certain sounds are coming from in the frequency range, but certain plugins like the FabFilter Pro-Q 3 EQ – which comes as part of their mastering bundle – actually allow you to solo certain bands so you can isolate the pick attack if you wanted too.
And that’s pretty much it for EQing nylon string guitars, but there are a few more things I want to explore in the sub-section below.
Important Things To Note
1) Some Recordings Emphasize The Strumming and Minimize The Notes
Interestingly, one thing that I’ve learned from JamPlay’s website – my favorite guitar teaching platform – is that it’s not uncommon for guitars to be compressed and EQ’d in a way where all that can be heard is the strumming of the strings, rather than the notes themselves.
Assuming you’re reading this article, this probably isn’t something that you’re actually interested in though, but I just thought it was worth mentioning
I can’t think of where this has been the case in a nylon string guitar recording, but I imagine that if professional engineers have done so with an acoustic, they’ve probably done the same with a nylon string guitar as well. It’s possible that some just want the strumming pattern to be heard because it creates an entirely different vibe.
2) This Is Just A Guideline
I already said this at the start of the article, but it’s worth repeating. The following tips are just guidelines, and I’m not saying this is THE way of EQing a nylon string guitar. How you go about it depends on many different variables, but if you do choose to follow it, I think that you’ll wind up learning something valuable anyway.
3) EQ Will Be Different Depending On What Notes You’ve Played
By this, I mean that playing notes on the higher register of the guitar is much different in terms of the frequency range than playing an open A Minor chord in the first position. Put simply, how the EQ is set up will ultimately depend on what notes you’ve played.
This goes the same for your set-up, as well. This is one reason why I also recommend picking up PianoForAll (from their site). It’s the best way of learning piano for music production because it gives you a basis on which to make melodies that way you’re not just taking a shot in the dark.
4) Your Microphone Matters – A Lot
I would recommend a small diaphragm condenser microphone for recording any kind of acoustic guitar, simply because they’re much better suited for it.
Condenser microphones tend to pick up on more subtleties than a dynamic or a ribbon microphone, so they’re great for picking up on those hard-to-hear, but ultimately important harmonics that a guitar tends to produce.
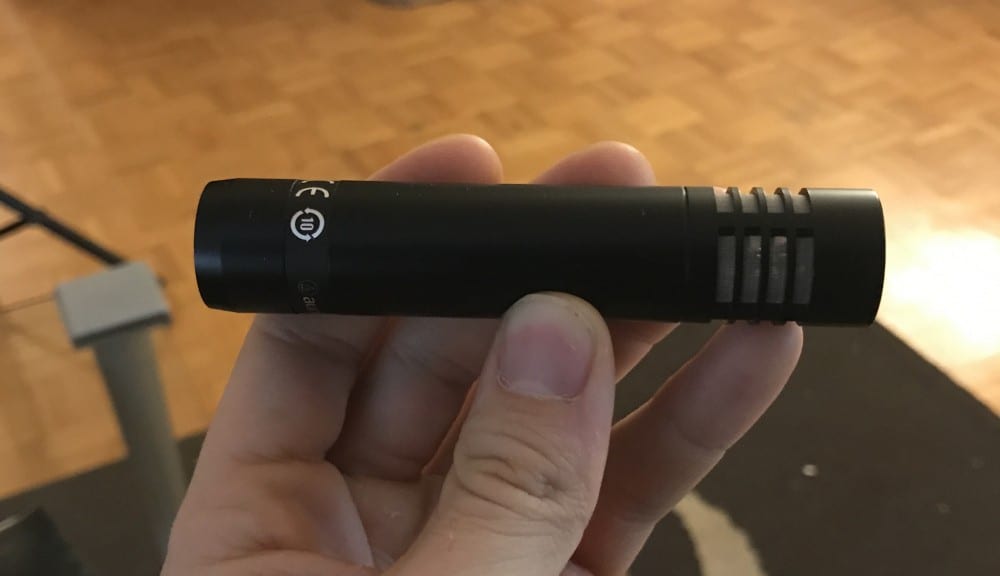
I don’t think you can go wrong with Audio Technica’s AT2021 small-diaphragm condenser mic which I linked at the start of the article. Not only does your actual microphone make a big difference, but the positioning of the microphone also will have a large effect as well.
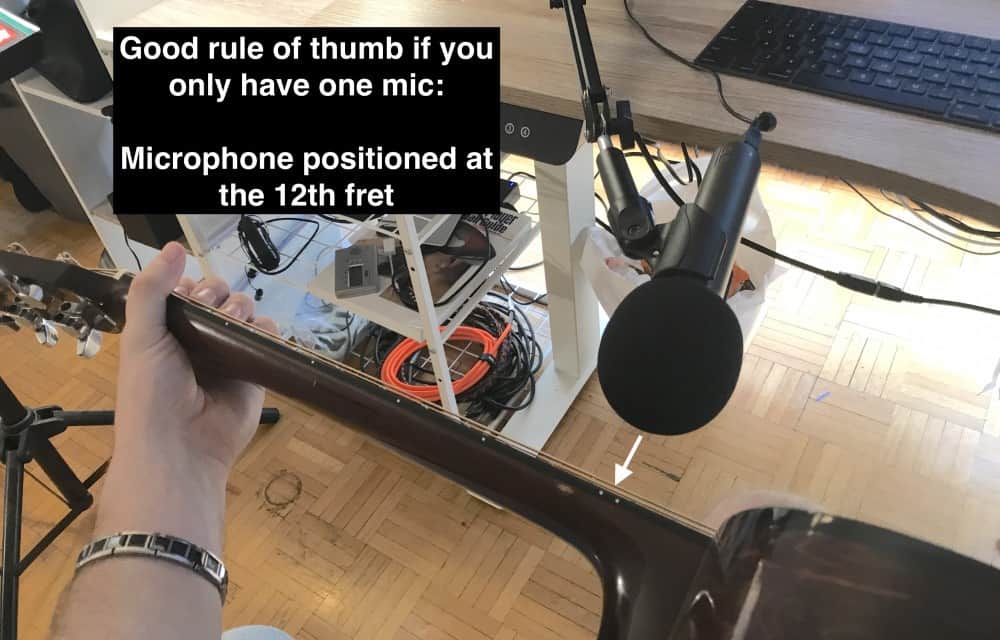
Typically, it’s a common practice to hold the microphone head around 6″ away from the 12th fret of the guitar neck like I showed in my acoustic guitar recording guide, moreover, you can see the way this looks like in the image below as well:
YouTube Video Tutorial
Conclusion
There are a lot of things to say about EQing guitars, however, a lot of it is going to come down to individual circumstances and desired outcomes which depends a lot on the recording itself, the genre, or the producer’s own taste.
Nevertheless, I find there are certain guidelines that are great to follow in the beginning stages of your learning curve.

 Written By :