While the software does include drum machines like the Modern 808 which imitates the classic TR-808, it only comes with one bass sound.
In order to make 808s in Garageband iOS
1) Choose an 808 file from Cymatics.FM, Soundcloud, or Plugin Boutique
2) Download the sound into your device’s files
3) Open the Sampler in Garageband iOS
4) Hit “Import” in the Sampler to open the 808 file
5) Add EQ, Compression, and Distortion.
The second, but admittedly inferior, way to create 808s in Garageband iOS is to open up a new project, and then select the “Drums” category. Select the Beat Sequencer, and then from the top-left of the Garageband interface, you want to select the drop-down menu to choose the Modern 808, the Roland TR-808, or the 808 Flex.
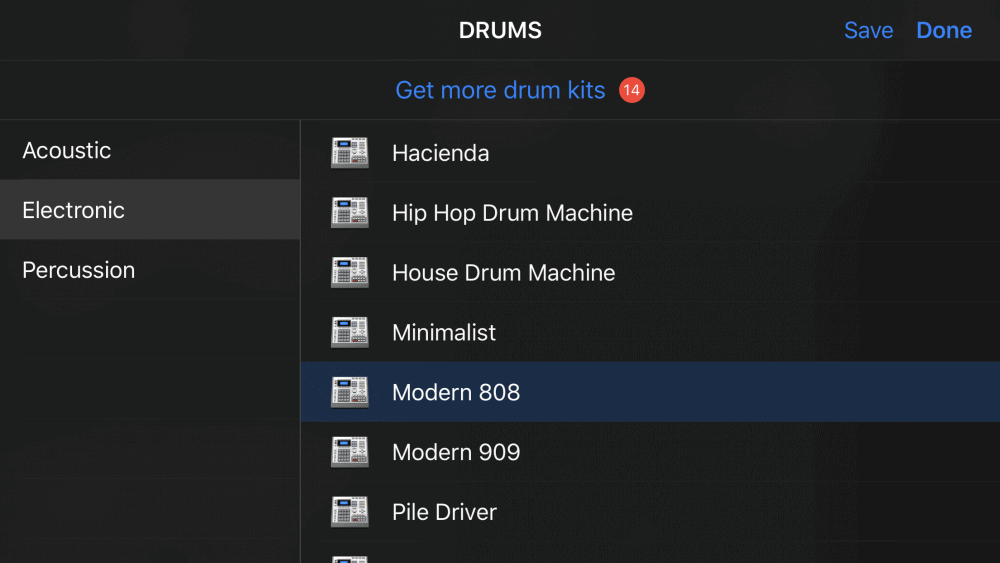
For the sake of simplicity, this tutorial is going to explore how to get the 808 sound using the sampler, because this is the best way.
It’s going to give you the tools you need to create a hip-hop song that has that coveted 808 sound like what you can get with Initial Audio’s 808 Studio II synth for Garageband macOS.
How to Create 808s in Garageband iOS Using the Sampler
For this tutorial, you need to know how to use the Sampler in Garageband iOS, which is really quite simple, in fact, I already have a guide on how to use it.
However, we’re going to run through how to add an 808 sound using the sampler in Garageband iOS anyway. The first step is to find the 808 bass that you want.
1) Find An 808 Sound
There are a number of ways you can get your hands on an 808 sound for hip-hop beats, including from YouTubers who offer free drum kits and sounds, however, I’ve included an 808 sound that I got from a Soundcloud user named Ty.
It’s a nice-sounding 808 that will certainly do the trick. To download the 808 sound, you just have to click the link above. It’ll take you to a page where you can demo the sound.
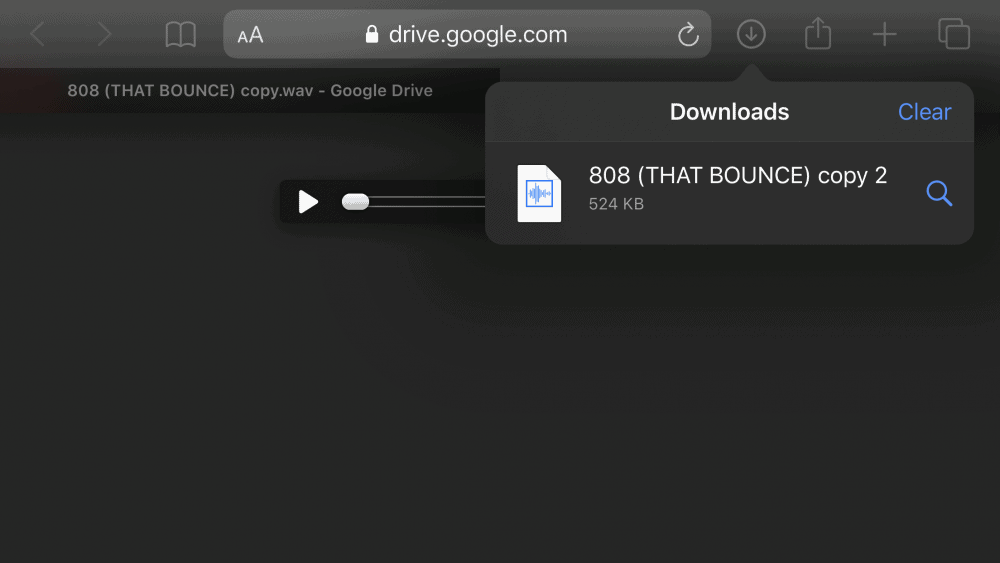
But you want to click on the little download icon that looks like a box with an arrow on it.

Once you’ve downloaded the 808 sound, you want to get it into your Garageband iOS project. If you want to find other 808 sounds, I recommend checking out the blog, Cymatics.fm, which includes a lot of great sounds for music production for free.
Once you’ve downloaded that free 808 sound, you want to open up your Garageband project and then load up the sampler.
2) Open the Sampler
With your Garageband iOS project open, you want to scroll over to the keyboard page. And the third icon from the left, or the second from the right, will say, “Sampler,” and you want to open that one up.
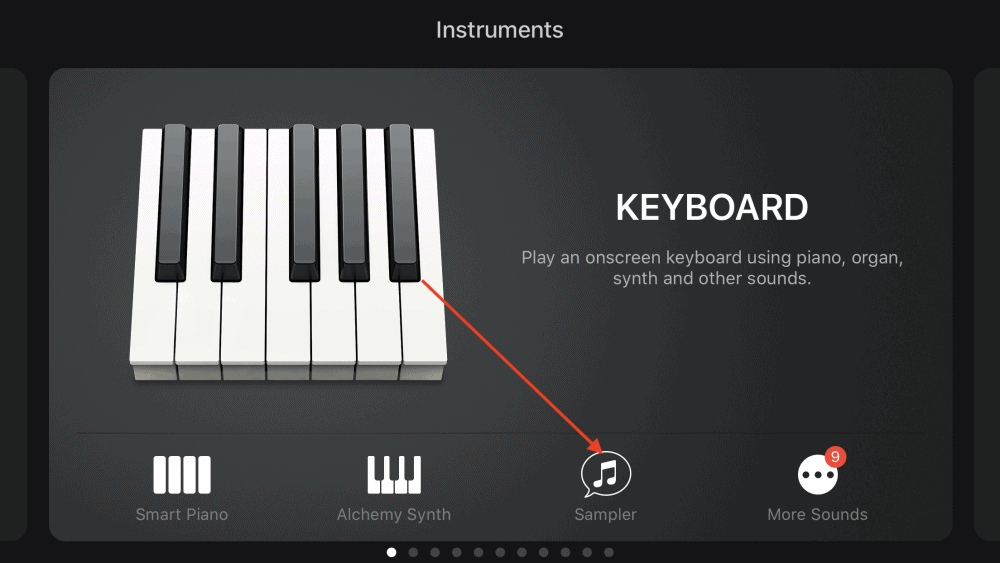
With your Sampler open, click on the option that says, “Import,” to import the sound that you want to use.

Because you’ve downloaded the 808 sound into your iPhone’s files, you want to select the option that says, “Files” at the top center of your interface (use an iPhone like this one because you want to make sure you actually have enough space).
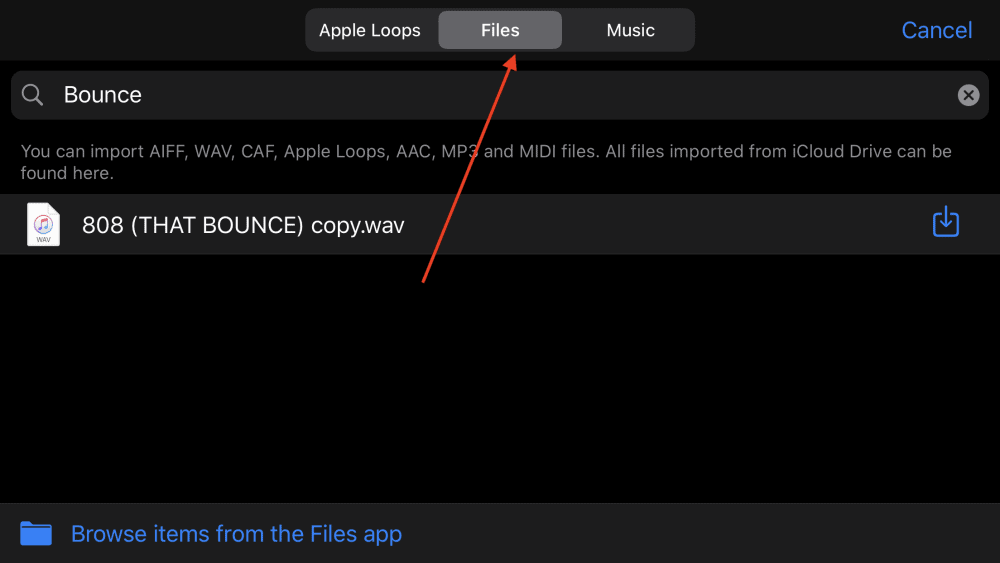
Type the name of the .wav file into the search bar, and you should be able to find it locally. When you do, you just want to select it, and then hit the little square with an arrow pointed downwards to download it. And that will load up the sound into your Sampler.

At this stage, the Sample should be loaded into the Sampler and you’ll know because it will say so in the Sampler’s interface, including the name of the file and how it looks in audio wave format. It’ll say, “808 (That Bounce).” You can check out the short video below to see how it’s done in real-time:
3) Find the Right Pitch
Now that it’s loaded into the sampler, you’ll notice that it doesn’t make a sound when you hit the “Play” button. That’s because you have to hit the notes of the keyboard in order for it to make a sound.
However, it will usually load the octaves, “-3” or “-4” on the Sampler, which is going to be too low and it’ll sound bad.
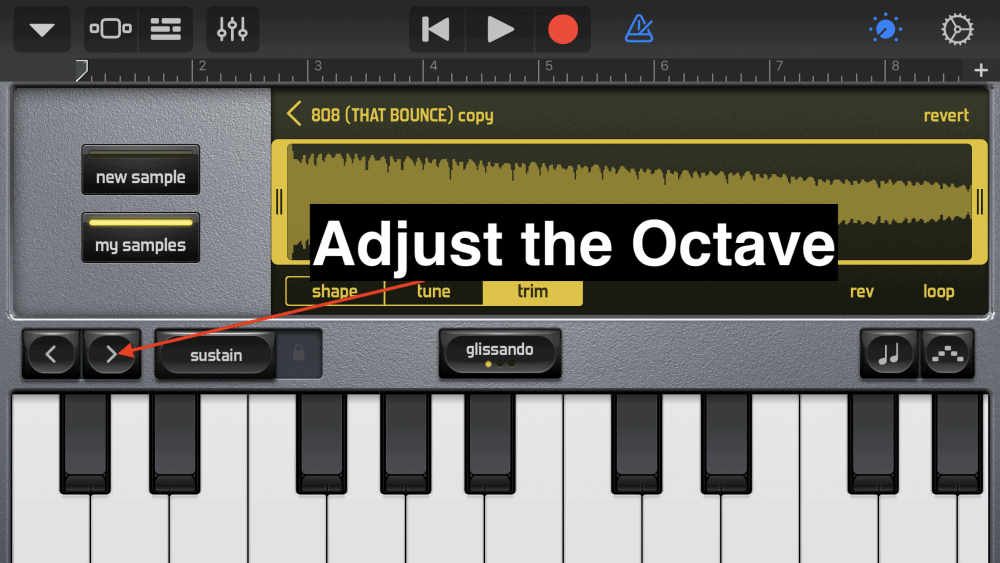
You want to hit on the little arrows on the bottom left-hand side of the interface in order to switch the octaves that way the Sample plays at a more reasonable pitch.
Hit the keys on the Sampler and it’ll start making the coveted 808 sound that we all know and love (you may also need to tune your 808s which I also have a guide on).
4) Hit The Record Button
The sample is loaded into the DAW, and you now have an 808 sound to play around with. Hit the record button and then quickly de-select it again that way you’re given the option to start editing the MIDI file in the workspace. Don’t forget to hit the notes on the keyboard to actually load the notes into the workspace.

Once you’ve done that, you’ll notice that you’ve been brought into the Garageband iOS workspace and you now have a Green audio region that’s ready for editing.
5) Draw in the 808 Sounds
How you add the 808 sounds is up to you. In some cases, I think it’s useful to add the 808 sounds into the piano roll manually, and in other cases, I would just connect a MIDI keyboard (my guide on how to do this here) and do it that way.
For the sake of simplicity, we’re just going to draw the notes in manually so you can see what can be done. Right-click or double-click on the MIDI region to bring up the “Edit” option, that way you can draw in your notes how you want.
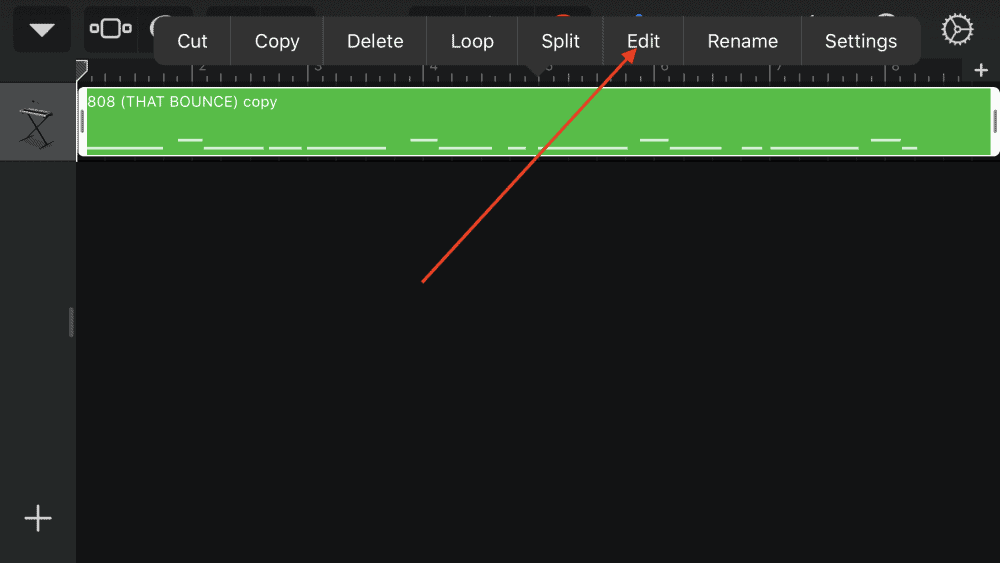
Slide the “Lock” button over to the right-hand side, that way you can start drawing in the notes with no limitations.

Typically, you’ll want to add notes in the C0 to C1 range, because that it is going to create the bass sound that you want. If you add the notes in any higher, it’s not going to sound like an 808 bass, it’ll sound more like an annoying bell or a synth sound rather than an 808 bass.
Get PianoForAll if you want to learn how to use the piano for creating melodies. Once you’ve drawn in the notes by tapping on the screen of your device, you’ll now have notes at your disposal, and you can extend them as long as you want or change the velocity if you want to.
And that’s pretty much it for adding a Boutique 808 to your project in Garageband iOS. It’s really quite simple to get the 808 sounds that you want, however, we are going to explore some additional tactics for spicing them up a little bit.
Adding Effects, Processors, and EQ to Improve the 808 Sound
Hit “Done” on the project, and then go into your Track Settings to add Effects, Processors, and other sounds to get your 808 to sound even better.

For the most part, I find that it’s best to add the following plug-ins, effects, and processors, to an 808 to get it to sound better in Garageband iOS:
1) Visual EQ
The Visual EQ and the Compressor should be loaded onto the track region by default, so no worries there, just go ahead and hit the “On” button to turn it on.
Admittedly, the Visual EQ is quite limited in Garageband iOS, because it only has three bands. They are useful enough for making basic adjustments but that’s about it.
Put simply, it does the job, but if you want a better EQ with more bands, you have to download the LRC5 Parametric EQ from the App Store (I’ve talked about it before elsewhere on the site), which has more bands and more capabilities for adjusting the EQ on your tracks, whether it’s your vocals or your Boutique 808 sound.
How you want to EQ, compress, and distort your 808 sound is up to you, but I’ll include some diagrams for you to follow as a guideline. For the EQ setting, try something out like this:

Notice the way that I took out some of those highs, increased the sub-bass frequencies ever-so-gently, and also boosted the 210Hz range by just a bit. This is going to fatten up the 808 sound A LOT.
2) Compressor
One of the drawbacks to using the Processors and Effects in Garageband iOS is the lack of presets, however, Garageband Mac, on the other hand, has plenty of presets, so you can just use Garageband Mac’s presets and then use them for Garageband iOS.
However, not everyone has Garageband Mac, so I’ve included a nice Compressor pre-set here which will fatten up your 808 sound. Try out this preset to see how it makes your 808 sound. I like this one because it makes it much louder and more aggressive.

Type-U Aggressive:
Compressor Threshold: -28.5
Ratio: 2:1:1
Attack: 8.0ms
Gain: 13.0dB
3) Distortion (Optional)
I would say that the distortion is optional because it really depends on what style of hip-hop or pop music you’re producing.
If you’re making something in the style of Ghost Mane or another artist like that, you would want to add a lot of distortion to the 808s to make it as gritty as possible.

However, if you’re just trying to throw in some low-end into your hip-hop beat like what can be heard in a song from someone like Post Malone, you won’t want any distortion in your project at all.
Important Things To Note
Changing Velocity and the Length of Notes
Adjusting the length of the MIDI notes when creating your 808s makes a pretty significant difference in how your 808s will actually sound.
For instance, if you take a look at the difference between the two notes below, know that the much longer one will typically sound a lot better and a lot fatter.
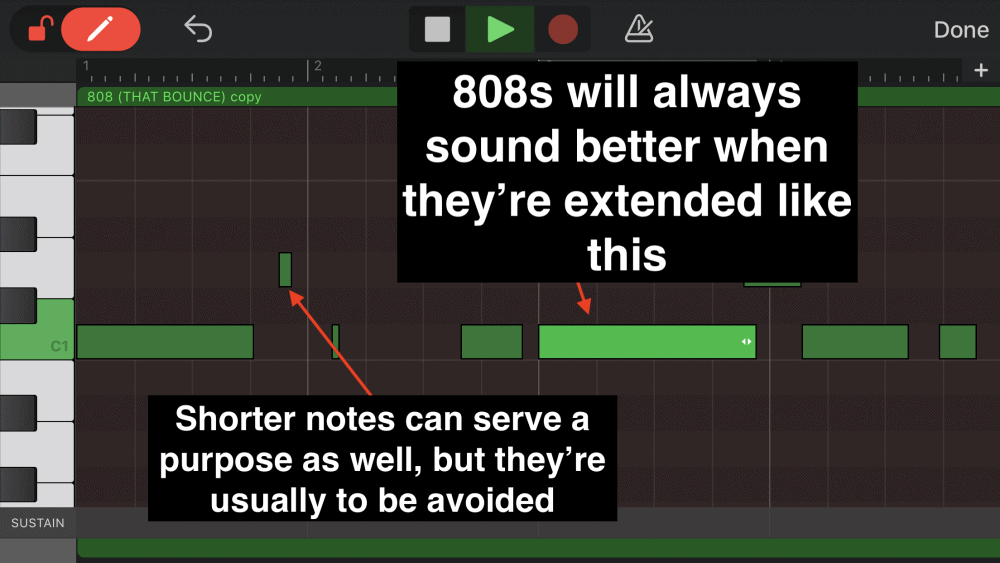
However, that doesn’t mean you can’t use short 808 sounds, especially if you want a triplet or aggressive type sound, in which you would maybe throw in 1-2 short ones before a much longer 808 note.
Using The Octaves to Your Advantage
I, and probably many others, would recommend creating your 808 sounds using the higher octaves first, and then once you’ve created your bass sounds using, say, the C4 or C5 range, you can drag and drop them down to the desired range where they actually sound like 808s now.
The idea behind doing this is to make sure they’re actually on key because the human ear is a lot more capable of detecting higher pitch sounds than they are lower pitch sounds.
If you use this trick, I can guarantee that you’ll never run into the problem where your 808s aren’t on key, which is a common problem among music producers and beatmakers.
To do this, you just want to tap on your screen and get the “Select All” prompt to come up.
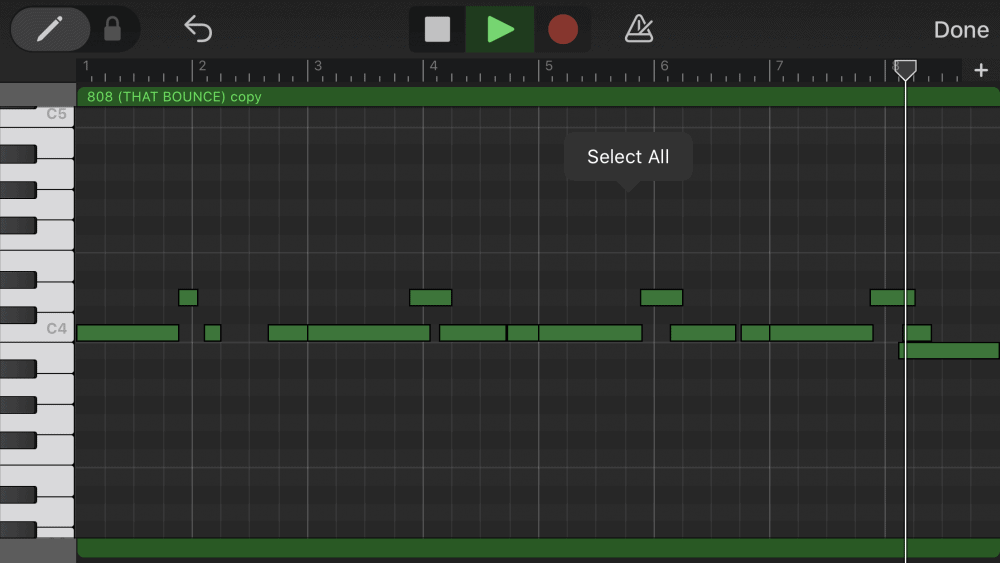
After you’ve selected all them, pick the note on the far left side and drag it all the way up to the 3rd or 4th octave, that way all of them go with it.

Using the Sound Library to Get More Sounds
In the case that these aren’t enough for you, you can actually go into Garageband’s Sound Library to download additional drum kits in case the stock ones aren’t good enough, or perhaps you want something that’s a little different or specialized to your needs.
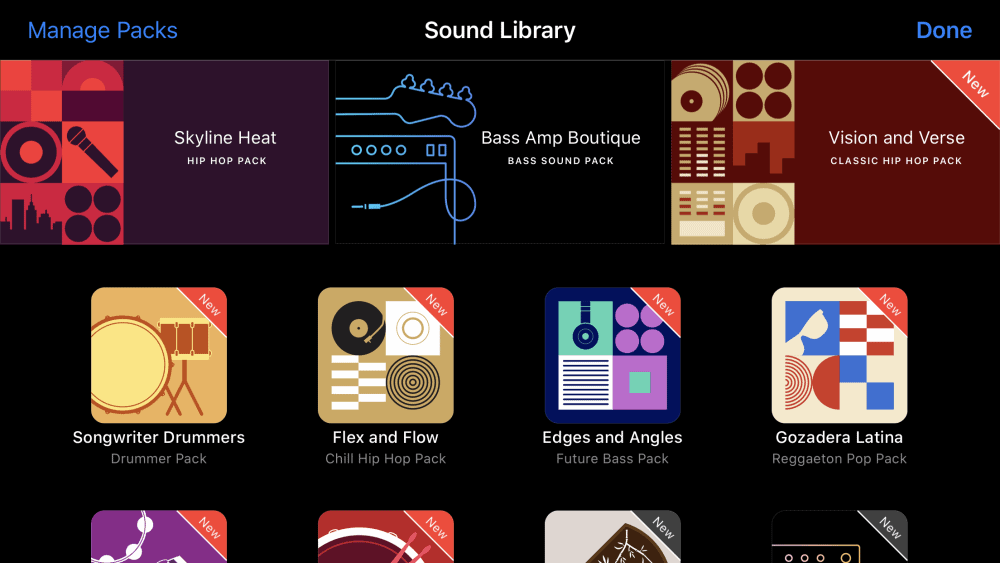
Admittedly, the 808 patterns that come with the Beat Sequencer won’t be enough for those of us who want to make custom drum patterns for our beats while using Garageband iOS.
What we want, is an actual 808 drum machine in which we can get that coveted bass sound that lies underneath the kick drum in modern hip-hop music.
The Term “808” Refers to the Bass Nowadays
Boutique 808s are a bit confusing, just because the term is used interchangeably with different meanings. For instance, the 808 is based on the Roland TR-808 which was a drum machine in the 1980s that almost no one owns anymore.
The term has evolved to where it is today, with most people referring to 808s as the bass sound that lies underneath the kick.
Nowadays, when a hip-hop producer says “808,” they almost always mean the bass sound, rather than the other instruments and sounds that the 808 Drum Machine comes with, such as the shaker, snare, or claps.
Using Other Synth Sounds
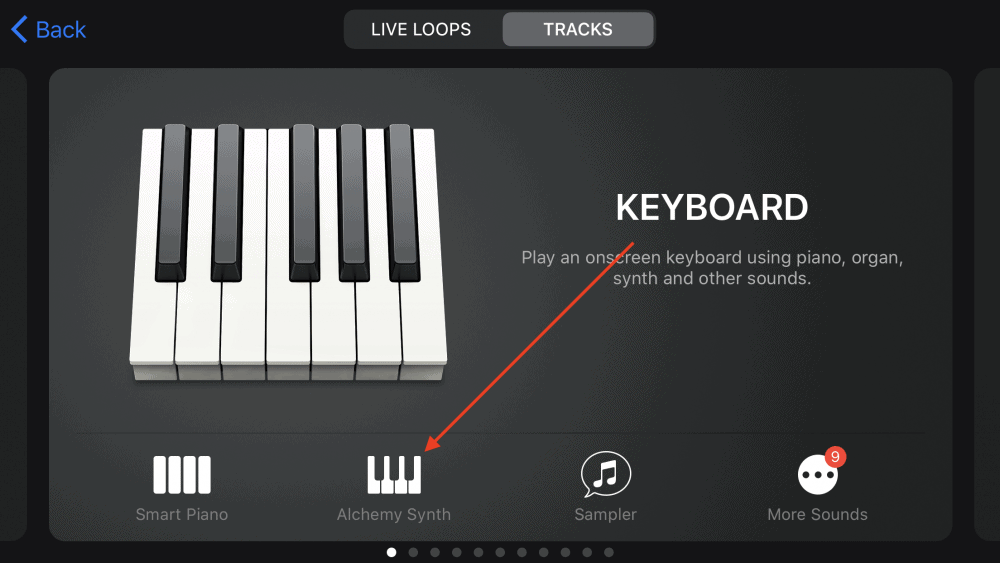
Through the use of some of the other synth sounds, particularly the Alchemy synth, it’s possible to create your own bass synthesizer that meets your needs specifically. We’ll explore this in a separate tutorial in the future.

YouTube Video Tutorial
Conclusion
I hope this tutorial was helpful to you. I would recommend scouring the internet, including other websites, YouTubers, and more, to find additional 808 sounds that you may want to use in your projects. However, the one I’ve included above will likely serve you just fine for now.

 Written By :